|
|


 09-15-2009, 09:47 PM
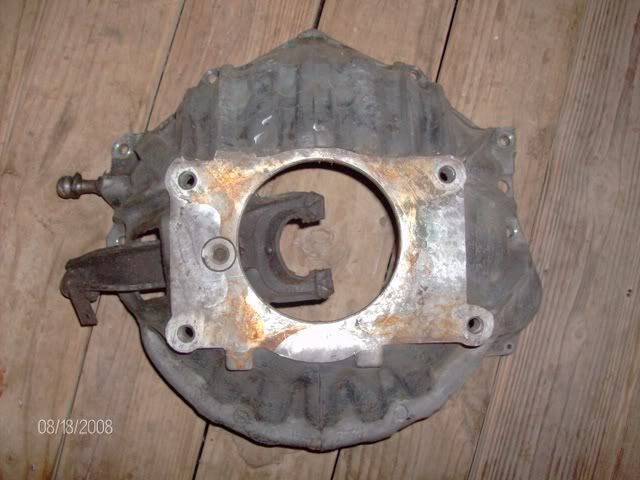
Talk with Evan about that spacer Cam. He machined one for his swap. FYI...bellhousings from SM465's and NV4500's both used the 5 1/8" bearing retainer flange. All the literature indicated that only the 465 did, until I mistakingly bought one for an NV4500 for my truck. The bolt pattern at the transmission is much different between the two. I dunno which one would work better for the 435. It's been awhile since I read through Novak's website. I know you have to oblong a hole or two IIRC. I've got a hydraulic bellhousing off of an SM465 with a driver's side slave, if yours doesn't work out.Originally Posted by ATL ZJ

Here are a couple of pics to show the difference...
Last edited by S-10 Seanzy; 09-15-2009 at 10:00 PM.


 09-15-2009, 10:18 PM
Yep, Kirby gave me Evan's number a couple days ago and I still need to call him. Looks like I may need him to do a little machine work... The OD of my bearing retainer is 4.842", which I think was designed to be a metric size because it's exactly 123mm. So if Evan can't make a custom ring, I'll still need to have it machined down to 4 11/16" and then add the spacing ring to get me out to 5 1/8" to fit the bellhousing.
My bellhousing looks more like the one in the bottom pic, so assuming its pattern is close enough to use with the np435's, I can go ahead and get this machine work done.
Last edited by ATL ZJ; 09-15-2009 at 10:20 PM.
 09-18-2009, 10:20 AM
Cam, why did you go with PSC instead of POS or Howe for your full hydro? I'm just starting my full hydro research, so I'd like your input.
09-18-2009, 11:03 AM
Mostly cost. The POS kit is better than PSC's but it's more expensive, and Howe has some nice stuff too but I didn't look at them as much. Actually my system is really about 50% PSC, 25% POS, and 25% custom. I knew I wanted to have a balanced cylinder, especially for the little bit of go-fast that we do. I didn't want unequal numbers of turns right/left that you get with a "single ended" cylinder and the likelihood of overcorrection. Plus I also liked the idea of having a little return to center.
I priced out the DE cylinder from surplus center that some of my friends run, that has the feet welded on, but I kept coming back to the PSC cylinder for its ease of mounting. And I've since come across cheaper sources for quality orbitals, but at the time, the PSC orbital was the most cost-effective, guaranteed quality valve I found. Then I was shopping field-servicable fittings and I couldn't find any for a better deal than PSC's kit. So I bought the kit.
That said, PSC's kit lacks in a few areas. They really short you on the hose they provide, so I bought a ton extra from discount hydraulic hose to have as spare hose... because why have field-serviceable fittings if you don't have hose to make a trail repair with? And it's common knowledge that their pumps are horrible. So I passed on their pump and res and called POS for that. I run a POS TC pump that's been awesome. IMO it's the best balance of reliablity and performance you can get in a TC pump. I also run the appleton cooler/filter/reservoir, which I got from POS and is bling but worth it. It's unvented and doesn't puke like all the PSC reservoirs I see spewing their fluid all over the trail. The last area I wanted to improve over PSC's kit was the suction line from the res to the pump. The pump and res use -10an fittings but I upsized to massive suction hose that I sourced from discount hydraulic hose and found some oddball adapter fittings from a place called clearwater hydraulics in Idaho. I upsized that hose because I didn't want to have fluid cavitating if the pump was not able to get fluid fast enough. Lastly, I run a p/s cooler that was actually a transmission cooler out of the radiator of an FJ80 that seems to work great.
My steering goals for this upcoming rebuild are to inboard my frame-side lower link mounts to let the tires clear the links and finally get my full range of steering, and to finally dial in the alignment. Right now it pulls to the right slightly and you have to keep turning the wheel to the left just barely, to go straight on the highway. I'm also going to try the stock LQ4 pump for ease of mounting on the new setup, so my tc pumps (POS pump and spare) are up for grabs if anyone's interested.
Last edited by ATL ZJ; 09-18-2009 at 11:12 AM.
09-22-2009, 12:54 AM
Well I've made a little progress... here are some of the highlights.
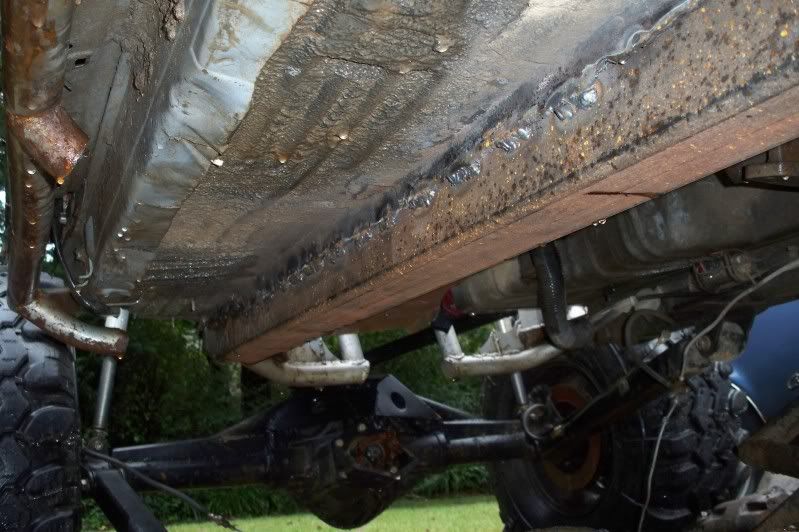
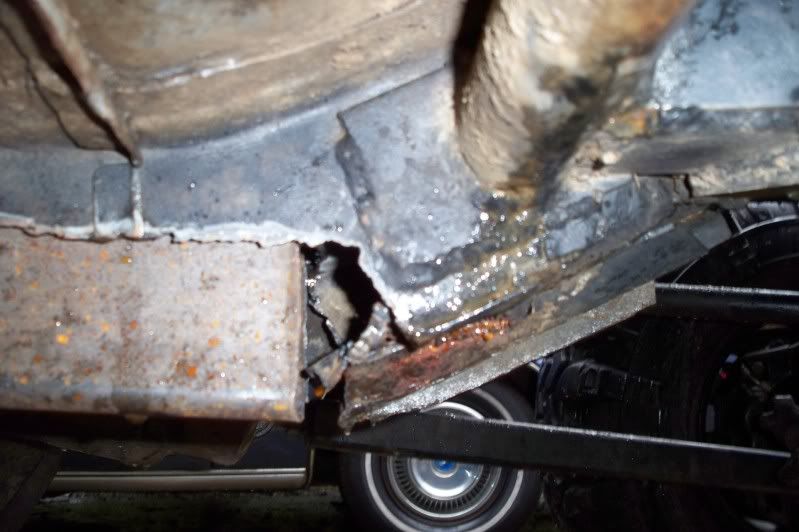
My framerails have been a weak point for quite some time. I decided I wanted to start over and build off something a little stronger. So I borrowed a plasma and went to town.
The replacement is 3x3 box tube stitch welded to the factory floorboard/upper half of old unirails.
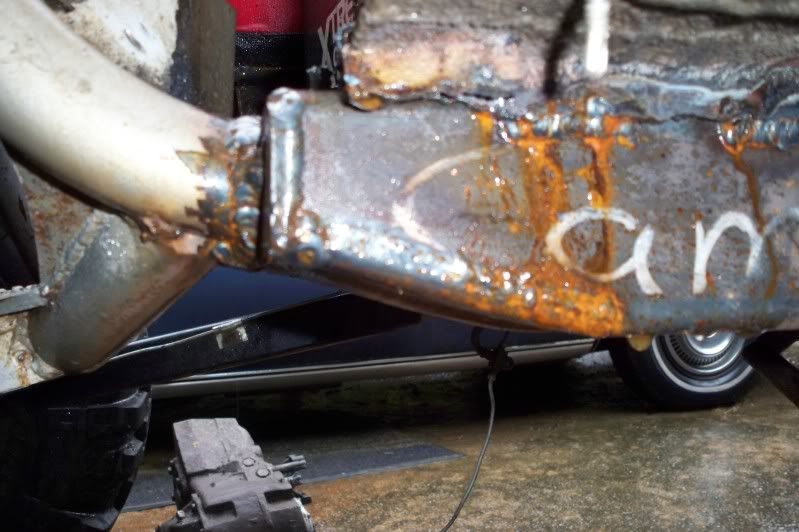
Here is how I capped and joined it to the existing tubework. Ignore the rust, I will be priming and painting everything once it's dry. And no, I'm not that vain... the steel supplier marked the tube that way haha
This is how far I've gotten. If you look carefully, you may be able to see the second "layer" of the framerail that starts and runs parallel to the bottom of the framerail that makes the cutting a little tricky. The plan is to splice into this with about 2 more feet of box and then transition to 1.75" DOM for the front frame rails.
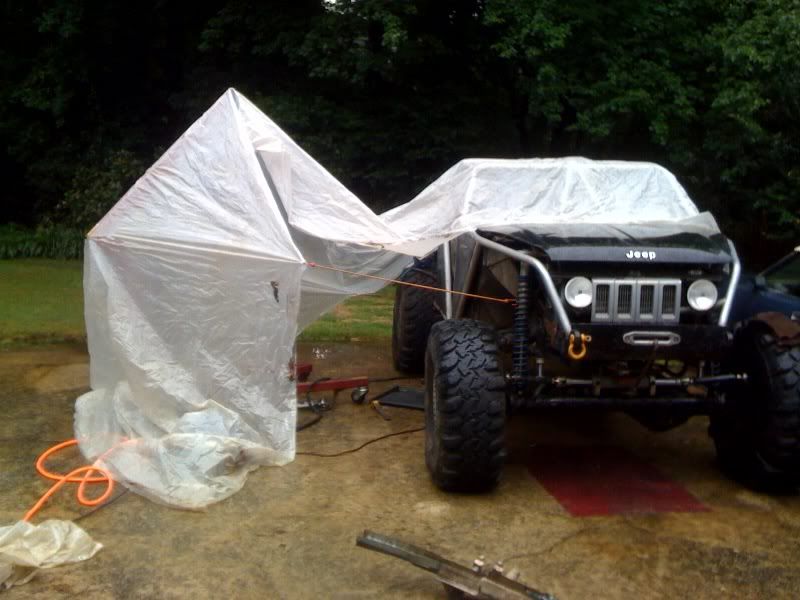
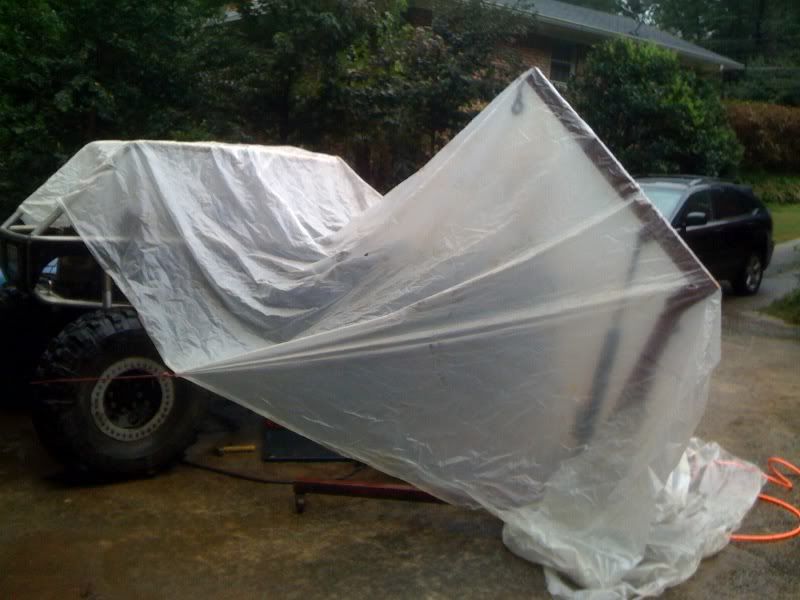
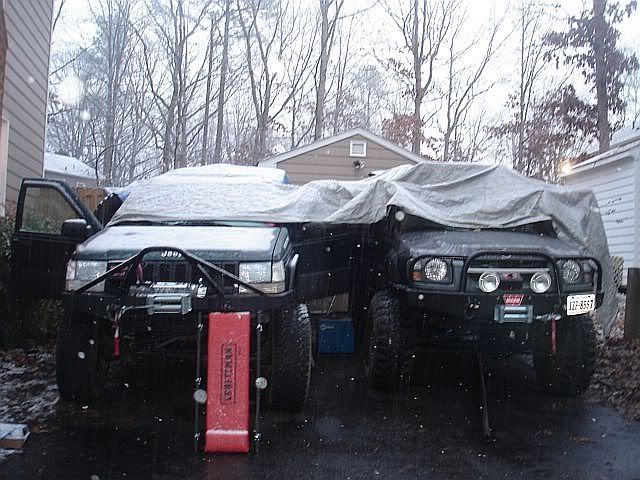
All my long projects fall into the driveway build category, so here's what I came up with to work in all this rain we've been having:
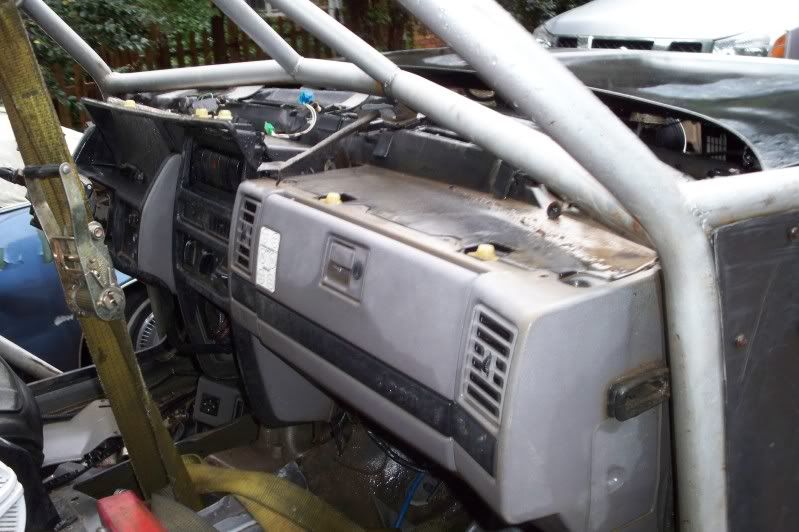
Dash gutting started
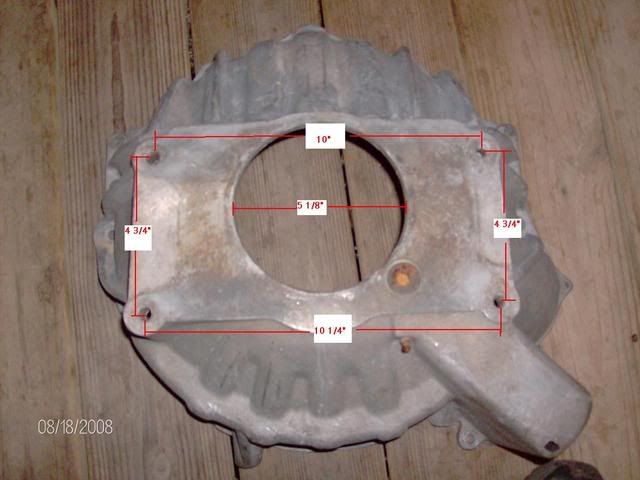
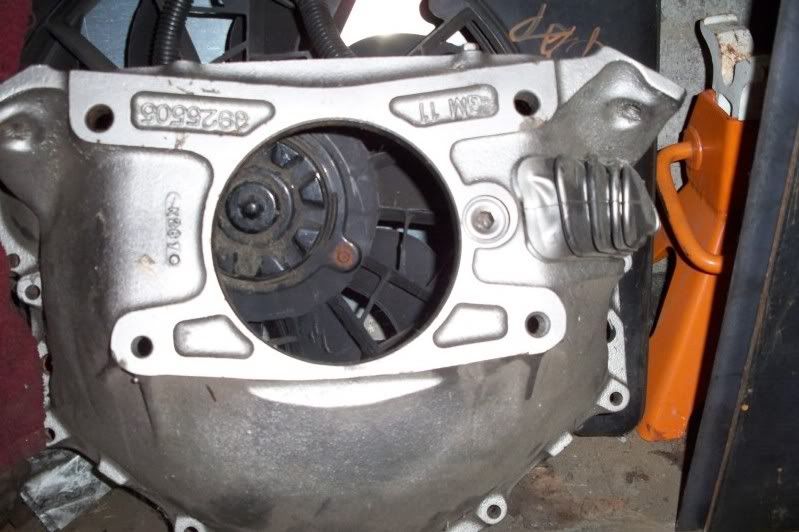
For reference of the bellhousing discussion above, here is the bellhousing I'll be using...
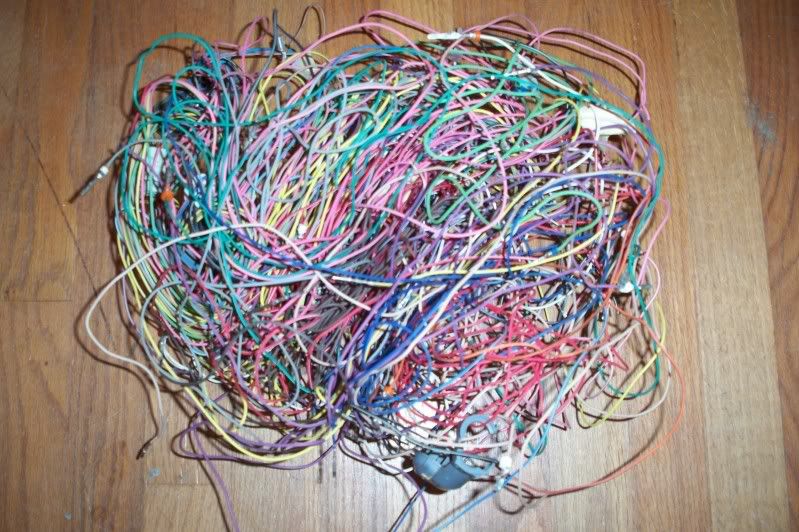
And here is the 6.0 harness work that I started yesterday using the awesome tech info at lt1swap.com as a guide. Stripped the harness down, went through each pinout at the PCM individually and thinned out the wires I won't be using.
The extra wire
The modified harness so far. Still need to wire in a fuse block, OBD2 diagnostic port, and add a few pinouts for cable TB.

09-22-2009, 01:02 AM
What amazes me is that you come up with a built bad ass ZJ buggy, in a fucking driveway under a tarp in the rain, I have a smooth concrete floor with nice 10' cieliengs and overhead lighting, and a 30'x30' shop to do my work, yet you can still crank out awesome work that makes me envy you!
Props for the real frame on the buggy now. I hope it all works to your liking.
09-22-2009, 09:08 AM
Looks... good man.
Got any plans for strenghtening the shit out of that new "frame rail"?
Are you doing the other side as well?
That shit reminds me of cage work..
Why I didn't wait till it was sunny... I do not know...
 09-22-2009, 09:33 AM
looks good man, different and better than what I had pictured from our conversations. Im interested to see how it comes together with the new rails up front.
cherry picker/clear plastic set up is a huge improvement over the spartanburg ghetto work in the rain with homeless people watching gig...
bellhousing application? any mods required to bolt the 435 up?
Last edited by zjeepin; 09-22-2009 at 09:35 AM.
 09-22-2009, 10:21 AM
Shoulda started with a "frame" in the first place!
Nah I'm kiddin, it looks awesome. Hope the rain clears out so it makes working a little easier.
09-22-2009, 01:56 PM
NICE. bet the fun starts when you get ready to burn on some new suspension mounts and you can crank the ish out of the welder and not have a worry in the world.
09-22-2009, 02:49 PM
It's probably plenty strong enough as it is, even though it's only 1/8" wall. The MOI (moment of inertia) number on this size and thickness tubing is 1.9+... which is greater than 2.5" .500 wall DOM! Hopefully MOI is a valid measurement to use to gauge resistance to bending in this application. It will be fully tied into the rockers and I plan to laminate it with 1/8" plate in critical areas like link mounts. I know a lot of people would have opted for thicker tube but I'm trying to keep it light on the theory that less weight breaks fewer parts.
Bellhousing is from a 1968-1972 Chevy truck and it's iron... that's about all I know. Still trying to figure out my options on mating the 435, but it shouldn't be too hard.
YepEven though though it's only .125 wall, it should be way more fun than welding to tinfoil.
09-22-2009, 02:56 PM
so what is the MOI rating for the 16ga unicrap? Im interested to see the % of improvement.
09-22-2009, 04:20 PM
Well it's hard to say because the lower part of the framerail tapers in so much. I'm sure an engineer could figure it out, but the calculators I've been using for square tubing can't. But just for comparison, I put in 3.5" OD with a 3.375 ID (.0625 wall thickness), which should come out to be a little stronger than the unirails actually are, but the best we can do. The MOI on that came out to be 1.69, which is only 17% weaker than my new framerails.
I also ran the numbers on my lower link material, which is 2.5" .250 wall square, and that came out to be 1.92, which is 3% weaker than the 3x3 box I'm using for the framerails. It doesn't seem right that the stock unibody rails are only slightly less strong than that massive link material. So while MOI may be good for measuring rigidity over a long span, maybe it's not the best measurement for frame rails.
All of the problems I've had with the OEM frame rails had to do with buckling and folding of the sheetmetal around plated areas like air bump mounts and link mounts. Hopefully the 1/8" wall is thick enough to prevent that same buckling, but just in case I'll laminate as needed. I really doubt I can tear 1/8" wall around the 12-24" of weld bead that each bracket will have, but this thing is going to take a serious beating, so better safe than sorry.
09-22-2009, 05:18 PM
I think you'll be fine as long as you plate/laminate generously.. I think with past designs you may have stopped short with the plating which allowed for buckling in the long term that being said, you didnt really start building the rig with the buggy evolution in mind... You've done enough destructive testing at this point to know what will work for you.
nice work man, now get it done so we can go wheelin!!!
09-22-2009, 07:45 PM
Yeah hopefully I've had enough material failures to have a decent idea what works. the lazy way would have been to use 1/4" wall box and call it good, but I'm really trying to go stronger and lighter where possible.
I might even be fine without any plating as long as the link tabs were placed in a way to spread the stresses out over a large area. But it's also not hard to plas out some plating and I have a pretty cool plan cooked up in my brain.
Don't tempt me to rush just yet, I want to do it right this time!
09-22-2009, 10:32 PM
Yeah, its all about stress concentration. The key is the way in which load is dumped from one part of the structure to the next. Your old design, it went from plated and braced to thin unibody sheet at once, obviously causes a stress riser and will fatigue or bend the metal at that point. Run some lamination out a good ways and taper the end of it linearly into the remainder of the structure, the load is transitioned out of it smoothly, no stress riser, less chance for fatigue damage or flat out bending.
MOI will give you a good idea of the level of bending resistance over a span, but like i said in this case i think it has more to do with how the load travels through it, not so much what i can straight up handle in bending.
meh. late night ramblings.
Paul
 09-22-2009, 10:57 PM
You pulling your hair out wiring or did you get a good diagram? Sometimes I HATE wiring, other times it can be a nice break from welding and grinding.
My hats off to ya' for doing all that work in your driveway.
what he said..
09-24-2009, 11:57 PM
That looks like a mechanical 465 bellhousing(though I've never seen one with that type dust cover). What are you gonna do for a slave cylinder setup...the Novak kit possibly? Willwood makes a pull style slave that I have seen a few guys use. It's not too bad on the wallet either. http://www.summitracing.com/parts/WIL-260-1333/
I was gonna go this route before I found my hydraulic bellhousing. I can certainly relate to the cherry picker garage. I've pulled that shit more times than I can count. And I see that we are now autographing our work. But wait...shouldn't it say Kirby Simonds?
 09-25-2009, 12:24 AM
I bet Cam still misses his boyfriend at Pizza Inn. Those were quality mustache rides.
09-25-2009, 10:47 AM
Very interesting. One of my old lower link brackets was tapered that way and the area in front of it never bent. The other side bracket, the edge of which was perpendicular to the framerail, buckled the framerail badly. I will definitely build this concept into my new designs.
lt1swap.com is awesome for the wiring. It's basically paint by number for the PCM wiring using his instructions. He also reprogrammed my PCM to delete unneeded emissions equipment and a bunch of unneeded sensors, so there's very little guesswork to do on that part.
The novak kit is overpriced for what you get I think. The wilwood one is better, but I already have an 1980s c30 slave cylinder and I'll just have to fab a bracket to attach it. Cheap and functional.
No one has been adopted just yet
Yeah he was special wasn't he?
09-25-2009, 01:32 PM
I emailed the guy at lt1swap a couple of times and he ended up getting back to me like a month later by which time I had gone with Jess at Wait4Me Performance for $10 more. While he was in there he enabled the tow\haul mode using just the PCM which I thought was a pretty neat trick and put a performance tune on it.
09-25-2009, 04:03 PM
I'm surprised Brendan didn't get back to you sooner. He usually responds to all my emails within 12 hours (and I've sent him a lot)... But then again I usually don't write a novel. It's pretty ironic that a company called WAIT4ME got back to you faster!
Does the tow/haul function do anything other than change the shift points for the trans? I am running a manual so that's sort of pointless for my rig. Oh and also I'd be a fool to actually tow something with it, haha.
I may play around with tunes on mine later down the road. Brendan from lt1swap says that the majority of the performance gains comes from removing a lot of the emissions restrictions. But I know wayne hartwig on pirate will do tunes for a super reasonable price, so I may look into using him in the future.
09-25-2009, 06:13 PM
I had him setup the tow haul mode to change the shift points and change the fuel map. Normally it will produce a little more HP and run a little leaner but when it's in tow haul mode it will retard the spark and richen it up for towing or wheeling when it's warmer and it might be pinging.
Once I get everythig running I'll drive around a bit with my wideband o2 and see if it needs adjustment and go from there.
10-05-2009, 12:58 PM
Where did you get all that damn plastic to cover your rig when it was raining...
| « Previous Thread | Next Thread » |
| Thread Information |
Users Browsing this ThreadThere are currently 1 users browsing this thread. (0 members and 1 guests) |