|
|


 12-12-2006, 07:23 AM
93' Grand cherokee Laredo
4.0, 42RE, NP242
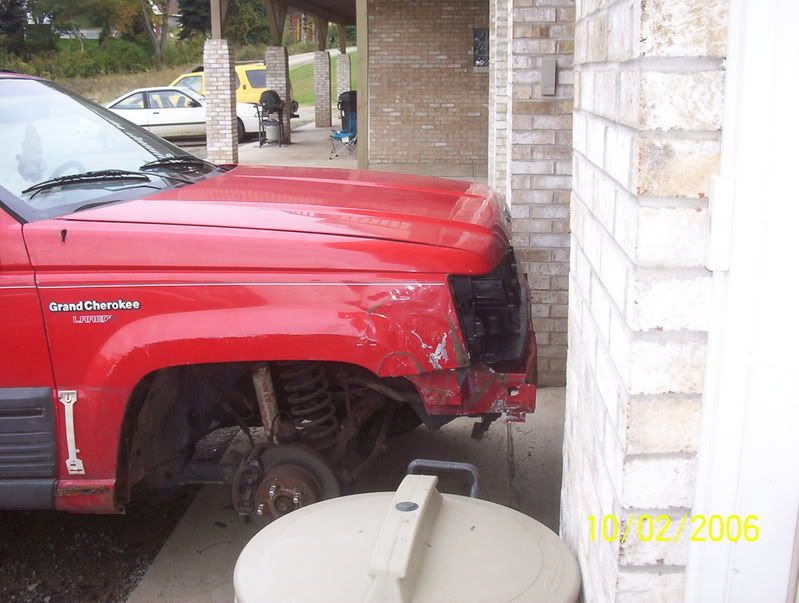
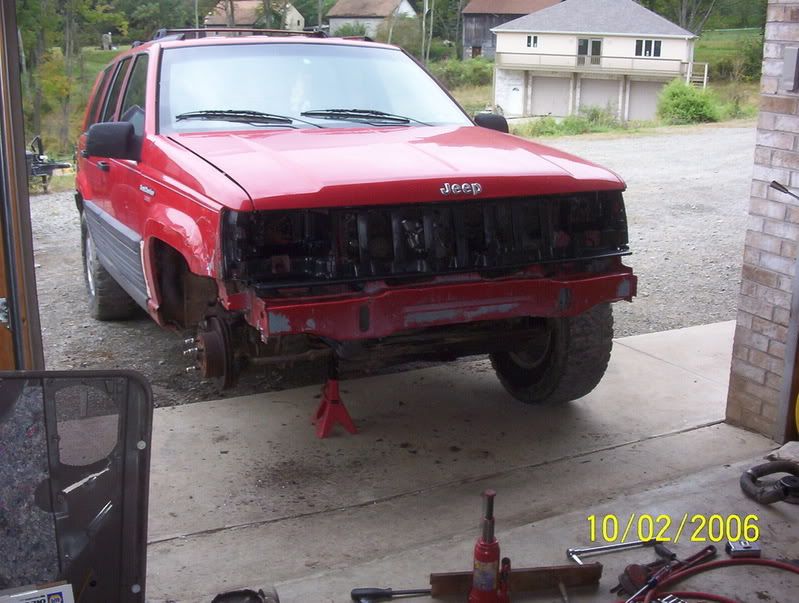
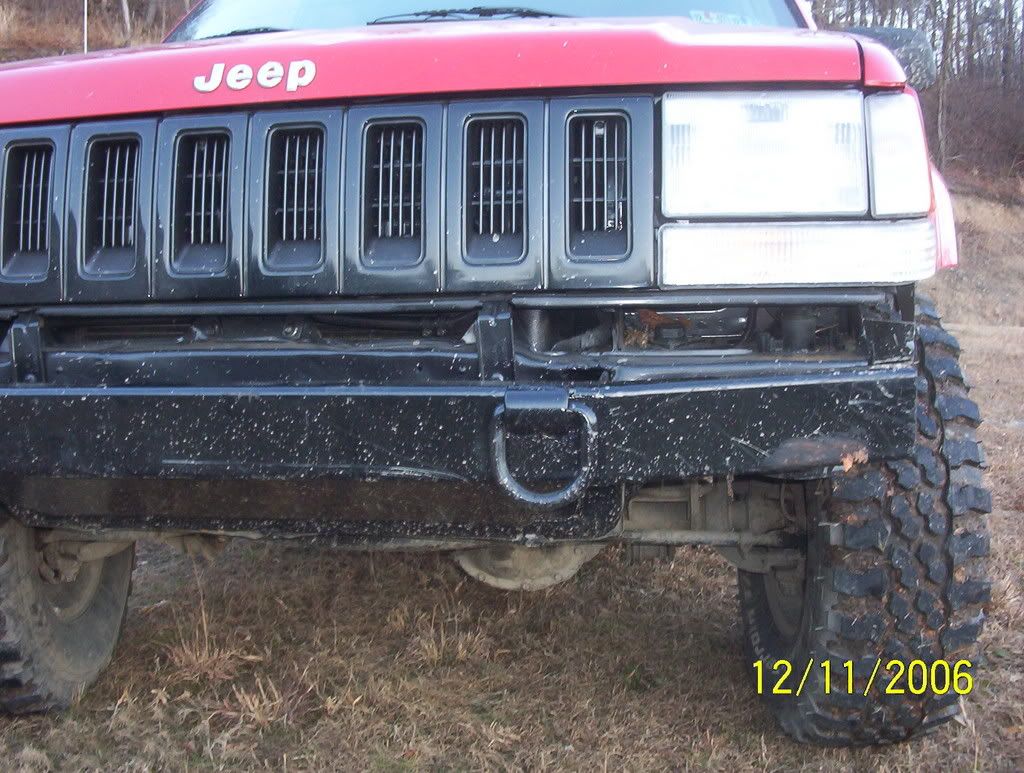
Police seized abandoned vehicle, bought it in rough condition with a bad fuel pump & wrecked front end
Ultimate plans are;
-4.5" pc'd together lift setup with RE 4.5" front coils, Up country front coils installed in rear with 1" spacers, and all adjustable control arms except rear uppers (In all the years I've been doing this, I've never bought a "kit")
-Parts store shocks specified for max travel
-Used Super 35 30 spline rear with 4.56's, Detriot, Trussed & tubes welded to center section
-Skid plated XJ HP30 front with 4.56's, used lunch box locker, used Warn "Ranger style" hub kit, 371 Precision steering joints with full circle clips, and 4340 Warn shafts
-Yj steering linkage flipped to top of knuckles
-NP231 conversion
-Skid plates for under body (possibly including the uni-body frame rails)
-3/16 plate boatsides with tube steps/nerfs
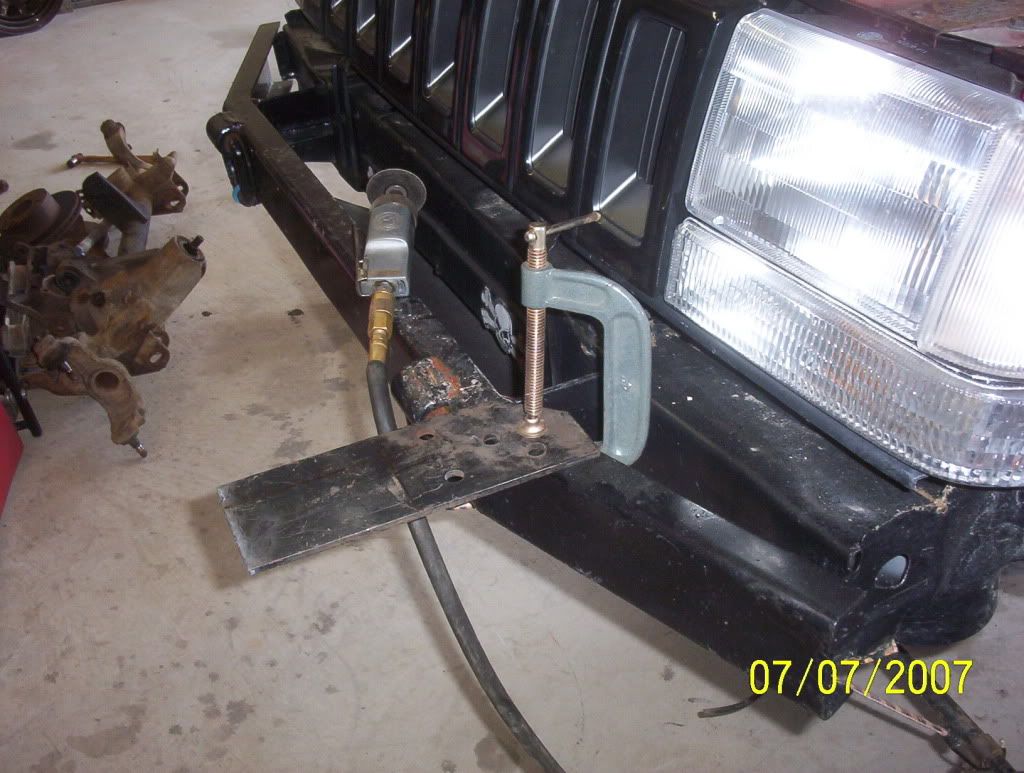
-Custom steel bumpers designed for max approach/departure angle, exhaust tunnel/guard, and winch/highlift mounts
All modifications will be done in a way that will make it as easy as possible for the upgraded parts to be removed from this rig & attached to the next if/when this vehicle is destroyed, without much/any major fab work needing to be done to the new vehicle chassis itself
I got some work done on it this weekend;
Saturday I got some more parts rounded up, the new fuel pump & filter installed and rear Gearlube checked
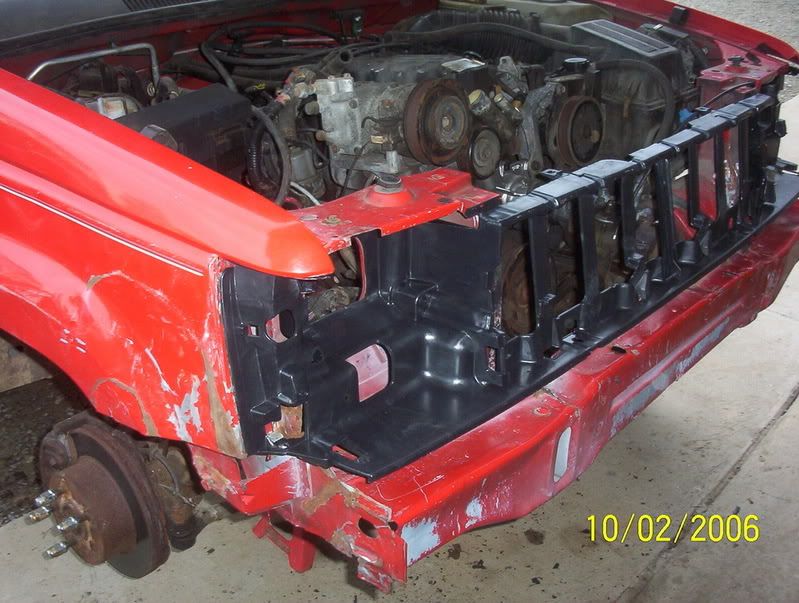
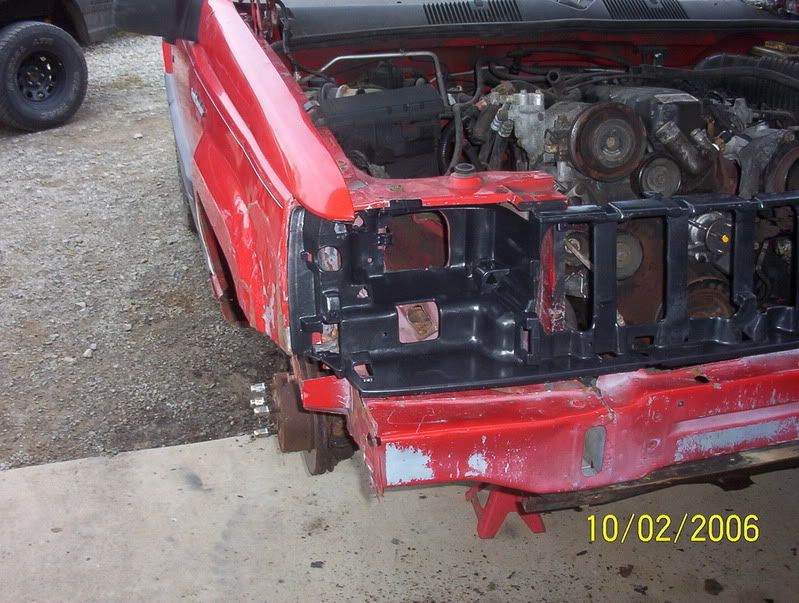
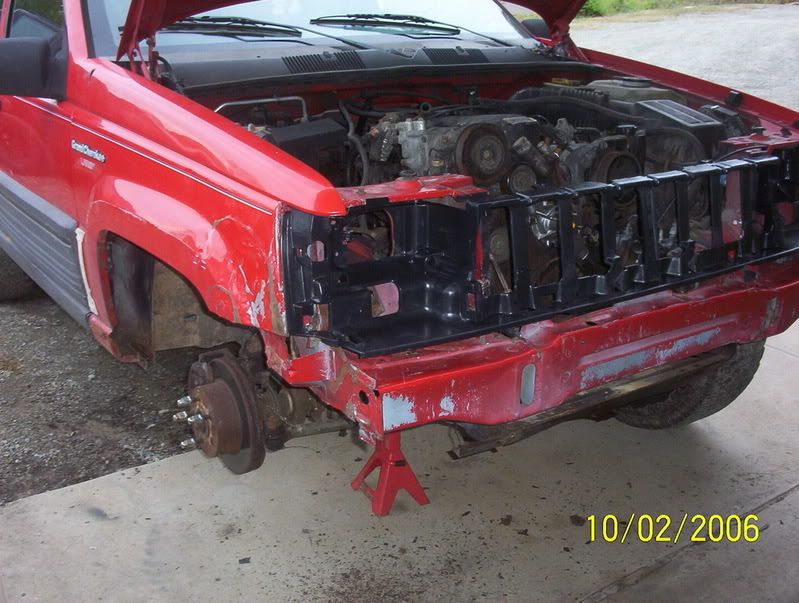
then today i got most of the damaged front end parts trimmed away, the new water pump installed, thermostat/gasket installed, and reconstructed the front end sheet metal & fender back to a functional shape (actually turned out really good too for the 6 hours worth of redneck bodywork that was involved :lol: )
Hopefully tomorrow I'm gonna get my MIG hooked up so i can get all the torn sheet metal reattached to itself on the front end and with that I should be real close to finishing up the engine compartment & front end to make it inspectable/driveable 8)
I'm also ordering the 4.5" front springs & shocks sometime this week (maybe even 2 lower control arms too), but i'm not actually lifting it until i get the truck back from the shop later this month so i have the time to work the bugs out of the Grands new suspension & axle combos without relying on it for DD duty (Trucks going in the shop cause of vibrations from the clutch and I'm also getting the new High performance injectors, gauges, and chip installed in the Powerstroke finally :twisted: )
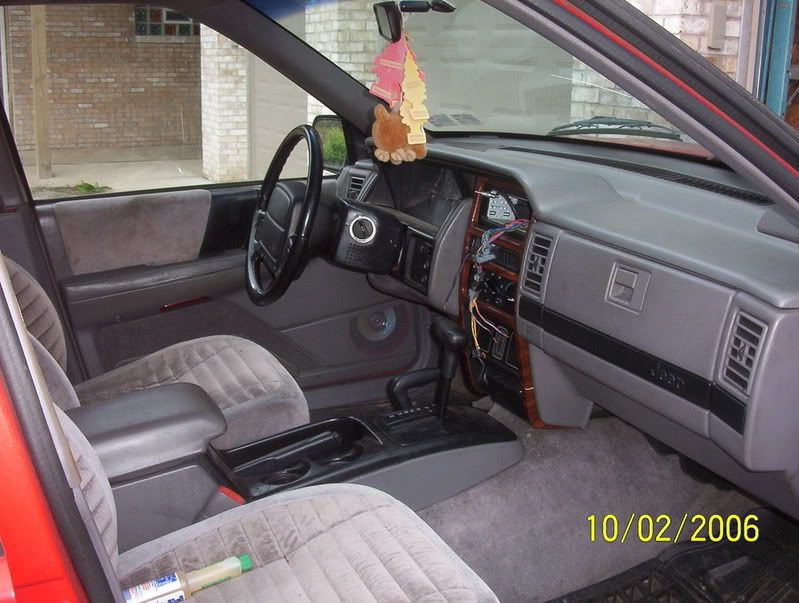
The interior (needs detailed real bad, thing was NASTY inside when we bought it )
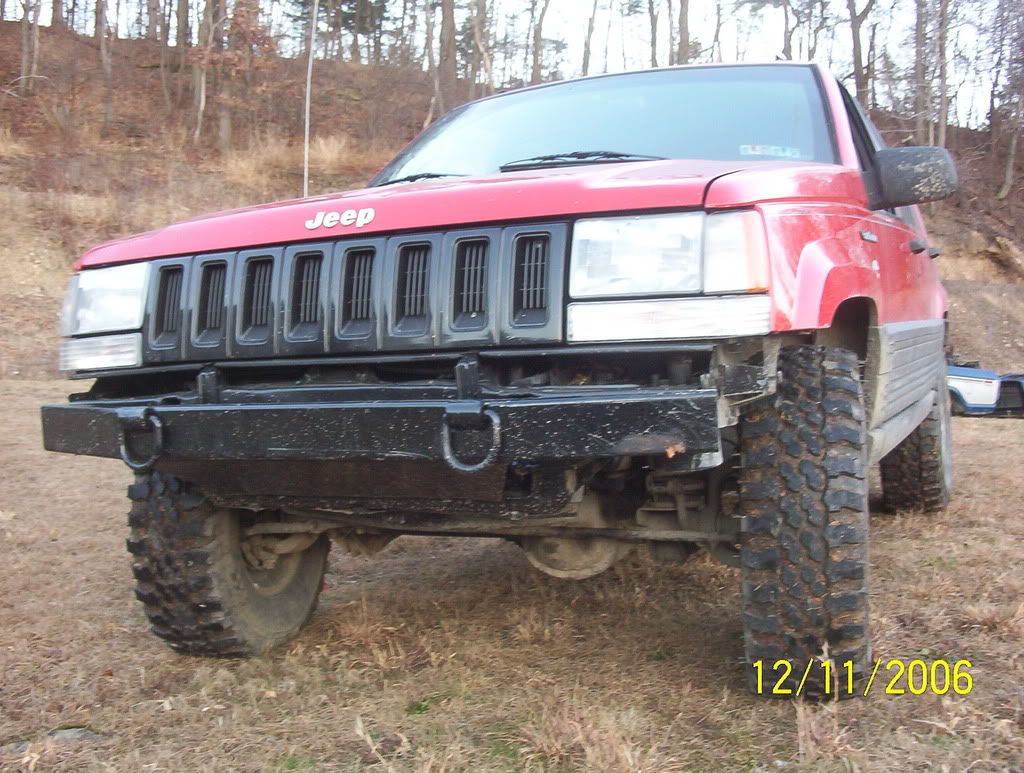
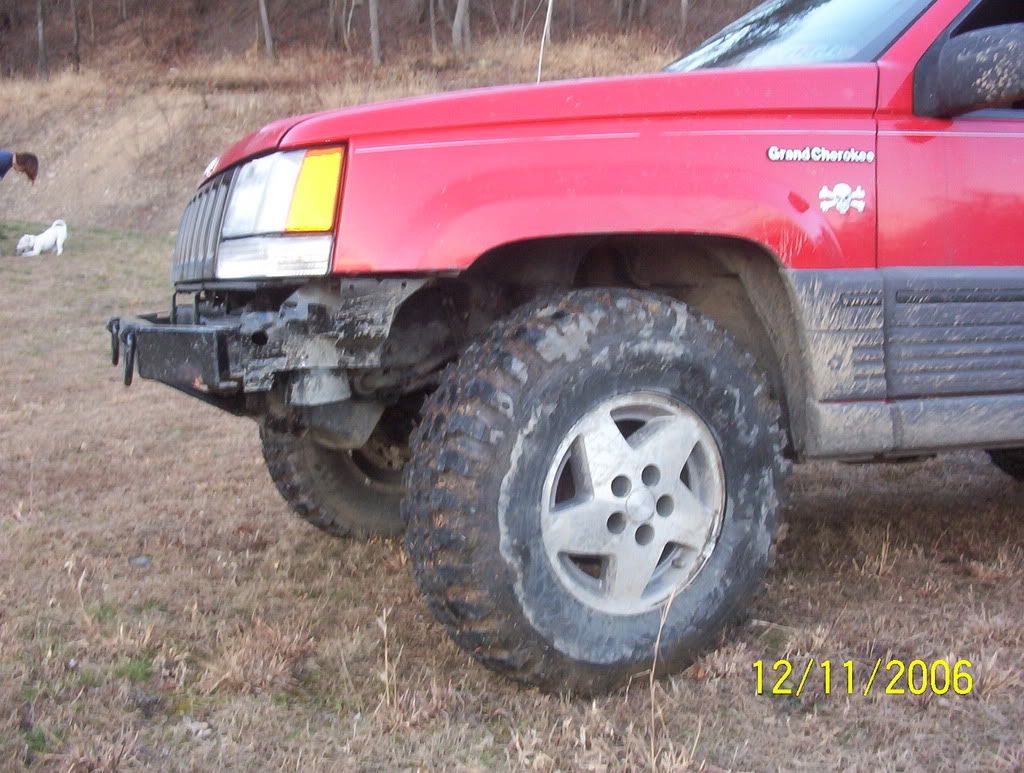
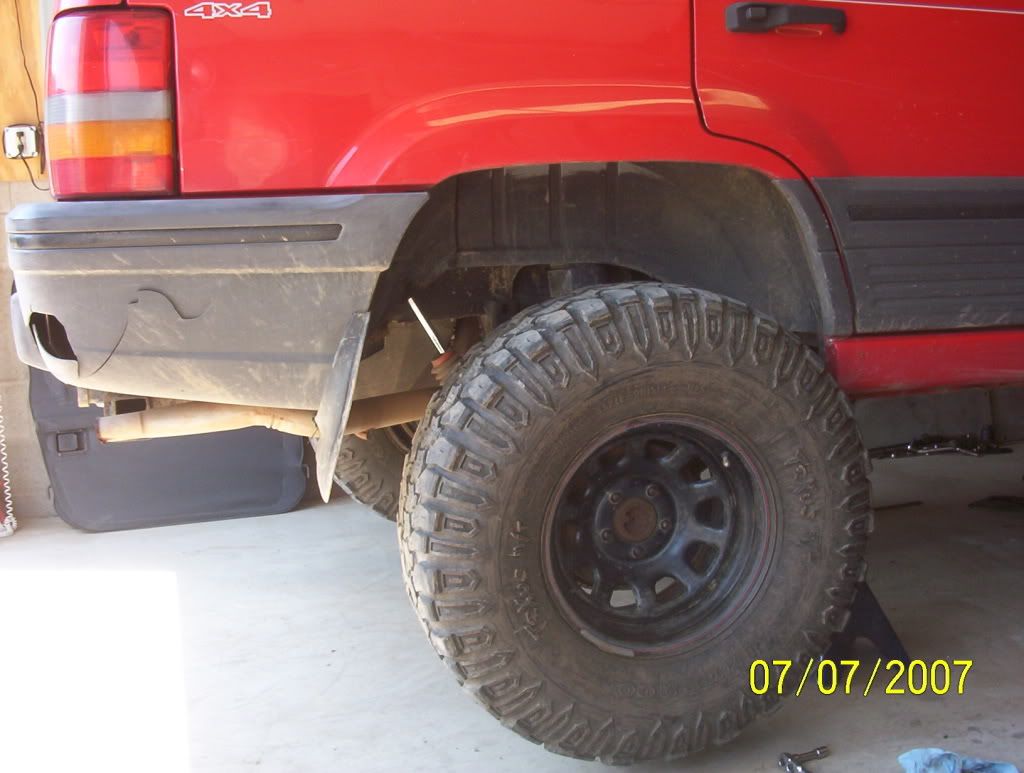
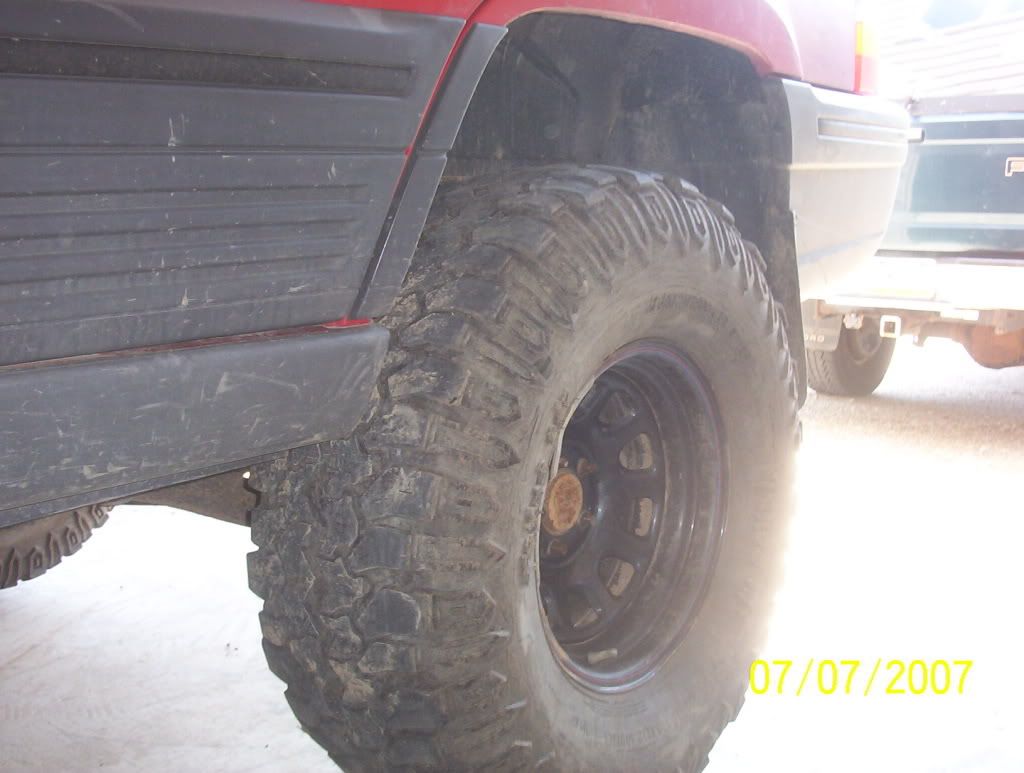
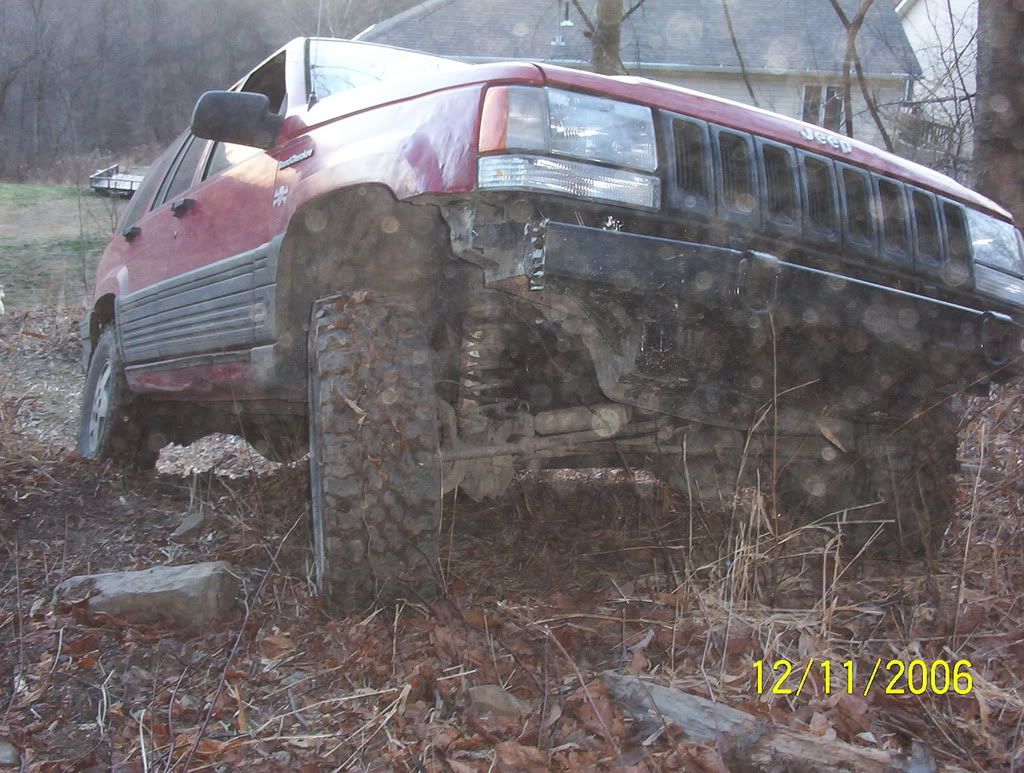
Proof a bone stock ZJ will fit 31's no problamo'
Back together & ready to drive
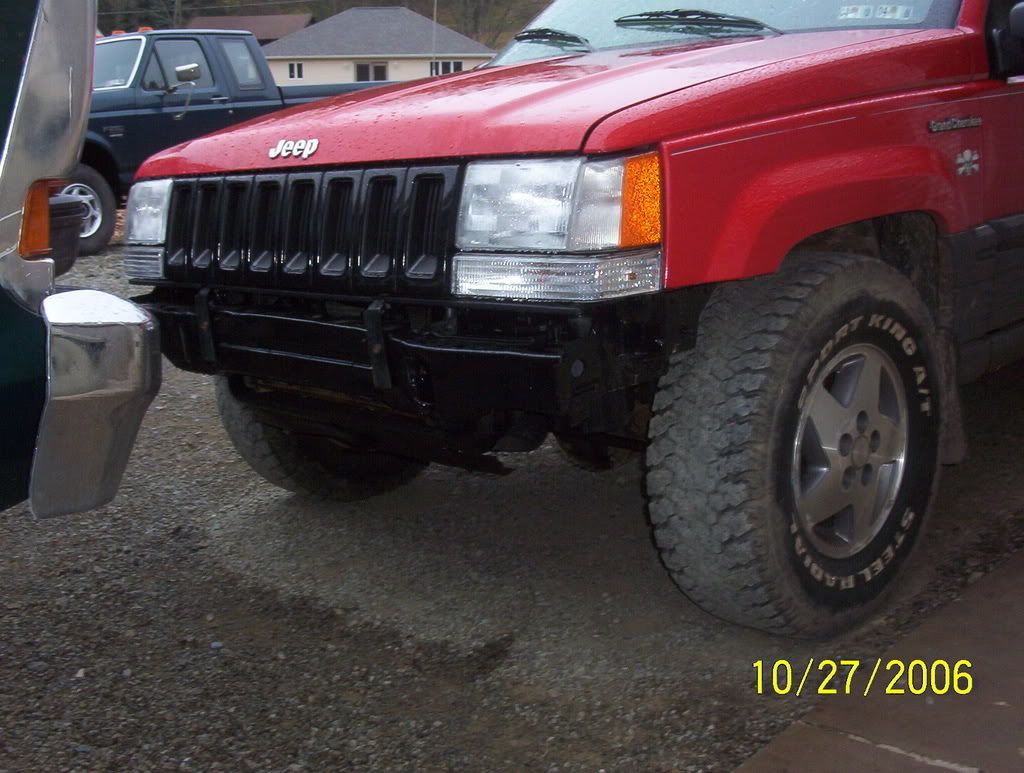
Recently Updated pics with the new "Jay built" bumper, 2" lift, and 31" recapped Mud's 8) 8) 8)
Planning on adding a 2" winch/reciever mount & a Highlift mount to the top of the bumper in the near future
Last edited by gonecheenin; 08-13-2007 at 12:09 AM.

 12-13-2006, 12:13 AM
hey Jay where are the befor pics of the front end all crunched?

 12-13-2006, 12:49 AM
BLING BLING!
 12-13-2006, 01:12 AM
screw the jeep, I wanna see the truck.
12-13-2006, 11:19 PM
I don't think its bad for a bumper I finished at about 5am the morning of the trail ride - LOL
I only have one pic of it from when the front end was all smashed & you can barely make out the damage
What truck Trojan the F-250?
looks the same as it did when you saw it, it is about $4000 dollars faster now but ain't no pic gonna show that (could get pics of a good smoke show though!)
04-07-2007, 10:27 PM
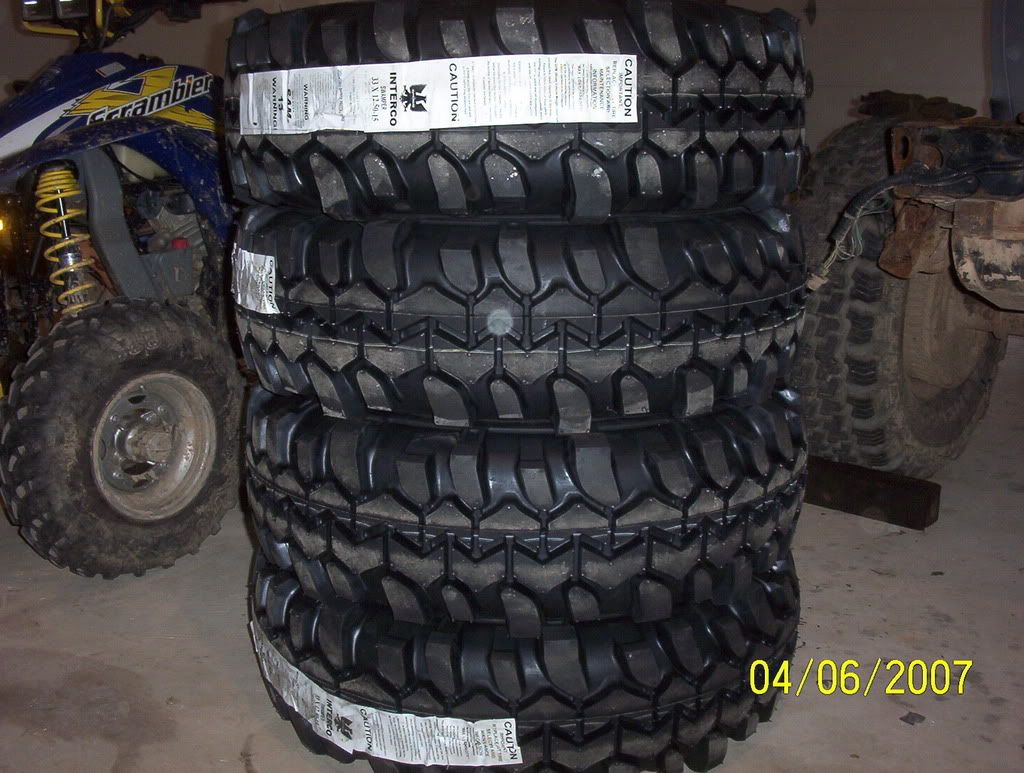
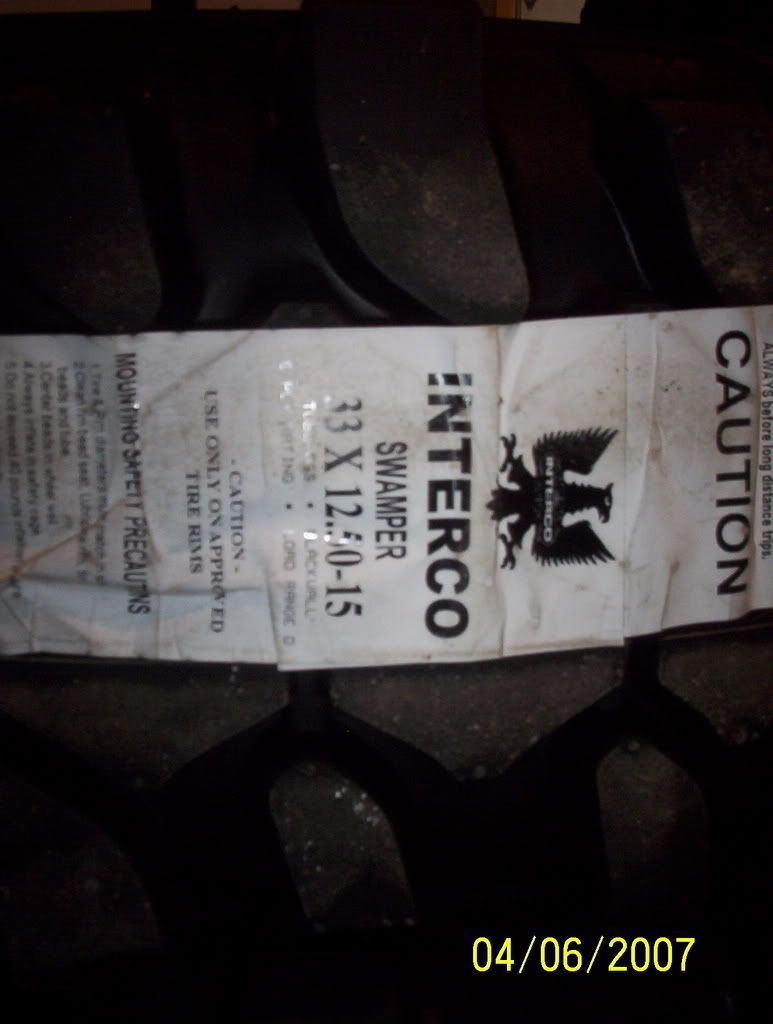
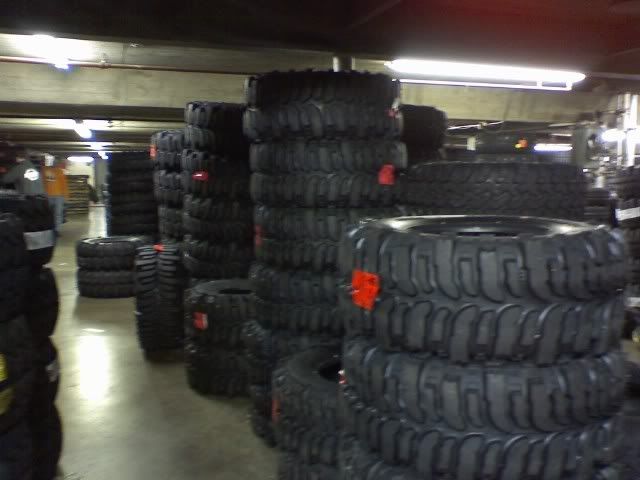
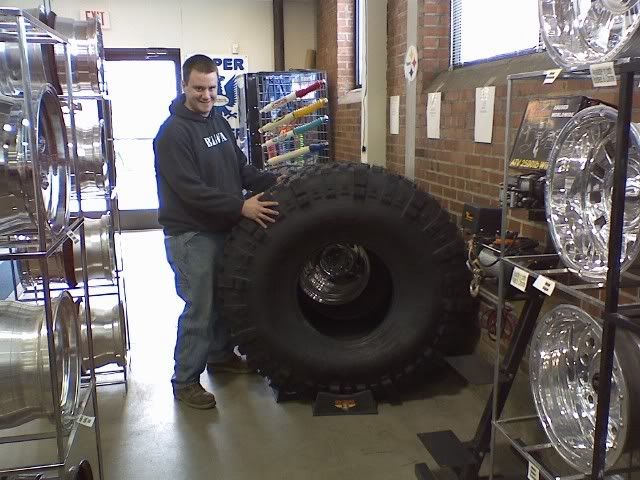
Decided on 33 x 12.50 R15 TSL's for her so we headed down to National Tire & Wheel in Wheeling, WV on "Good" friday
While we were there we had to browse the Bogger aisle of course
Mmmmm, 54"s of bad arse tire right there
 04-09-2007, 03:08 PM
where in PA you located?
04-10-2007, 04:12 PM
Fixed my profile, I'm in New Kensington, PA (we get our CAT parts at work from out of the YORK depot, bit of stupid trivia since I see you live there)Originally Posted by hkszx2

04-10-2007, 05:05 PM
I got those same tires from a local place here, mind if i asked how much they were? cause if they are a good bit cheaper there I may have to start going there
04-10-2007, 06:30 PM
Thats cool... just always lookin for locals to wheel with
04-11-2007, 02:50 PM
We drove down & beat them up a bit to get all 4 of them for $591 (before tax)
04-11-2007, 03:19 PM
damn mine was 660 after tax, but i guess with the way fuel prices are now its about the same once you add in the cost it took you to get there and back
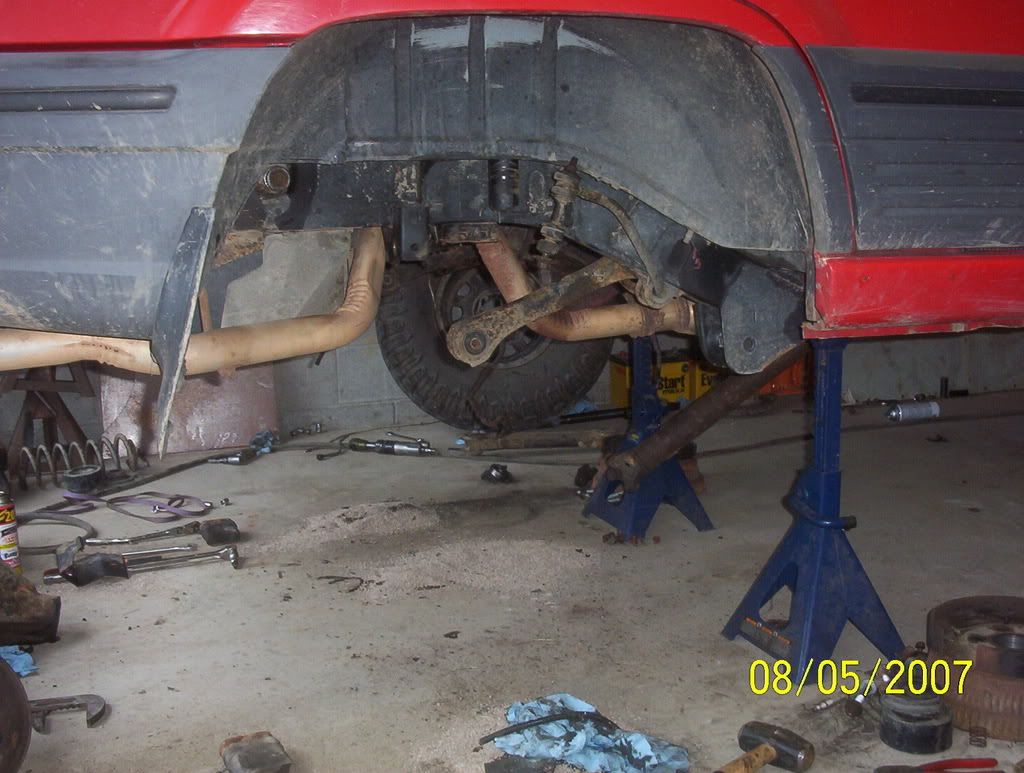
08-12-2007, 11:16 PM
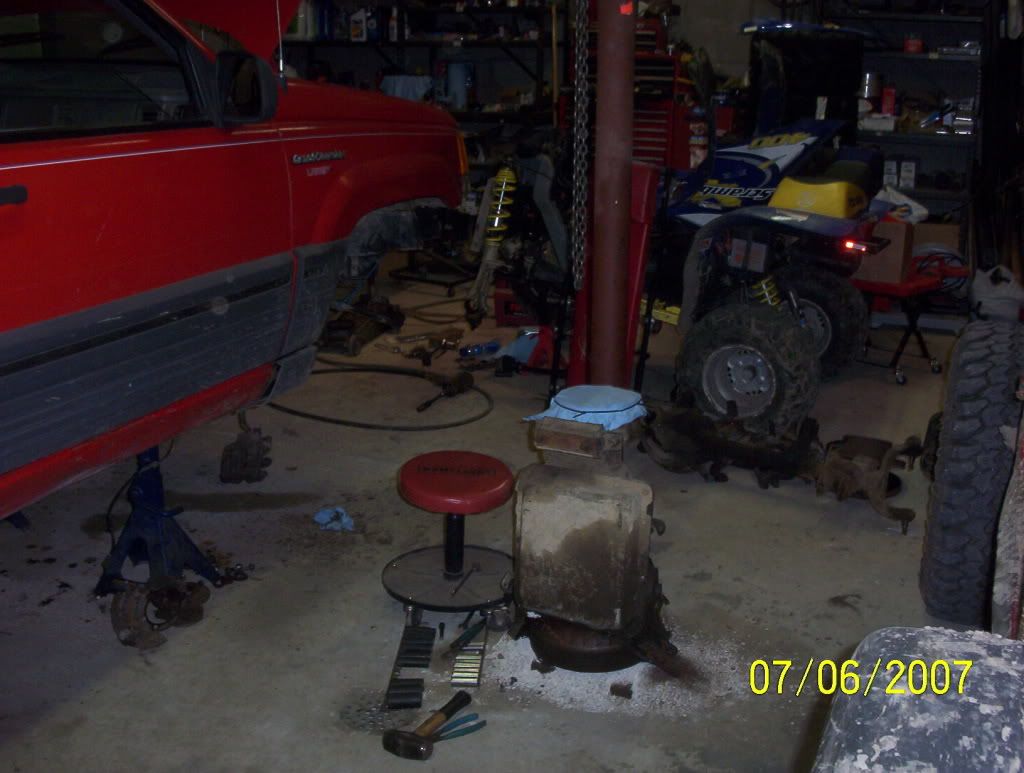
Some progress pics :twisted:
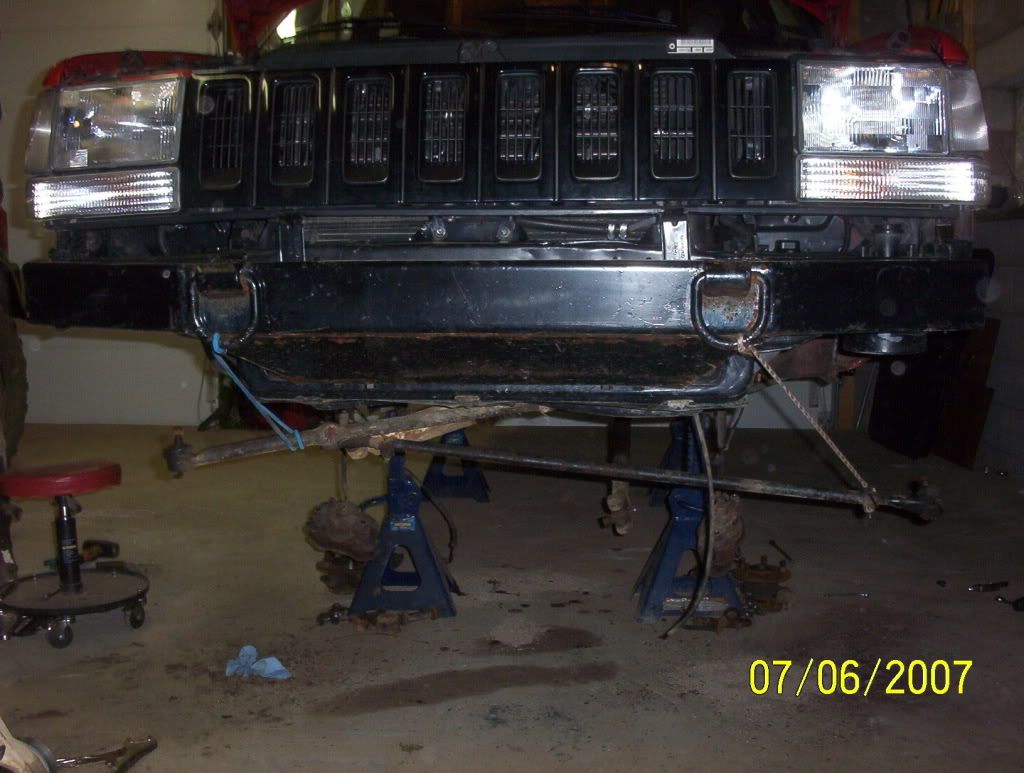
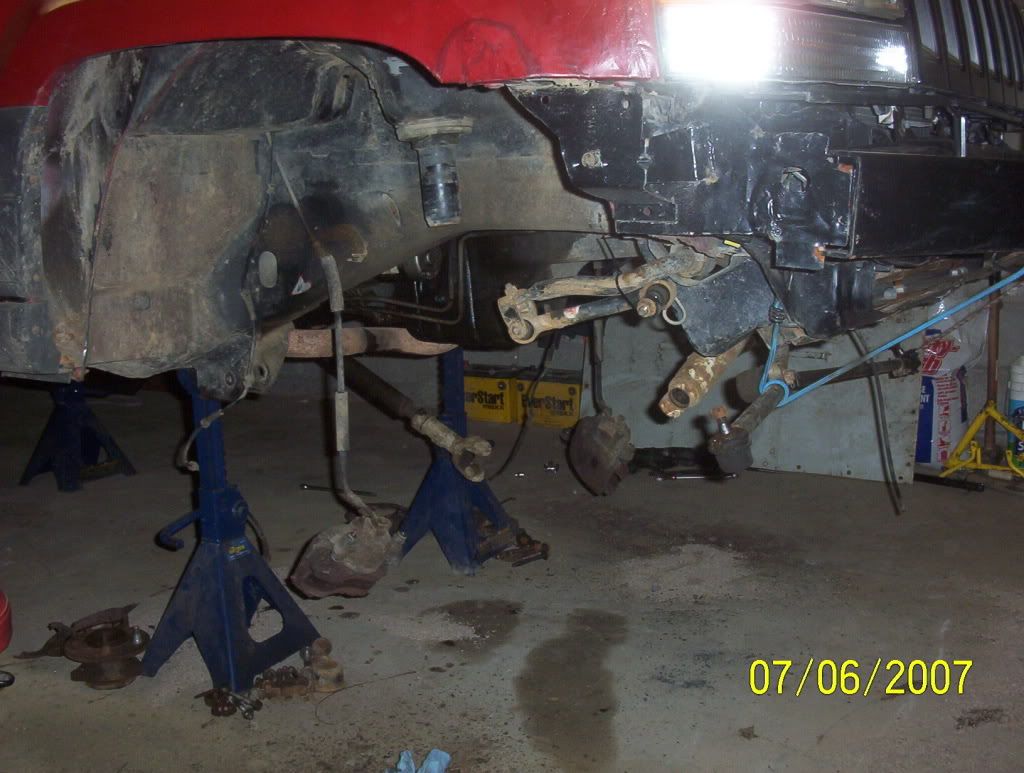
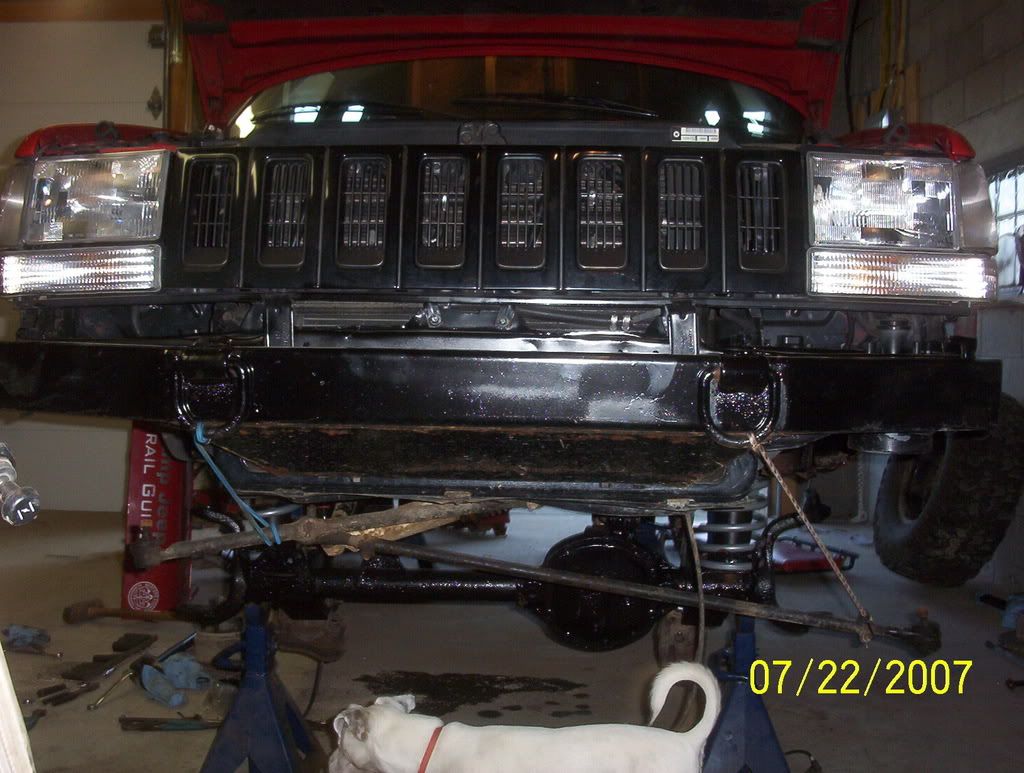
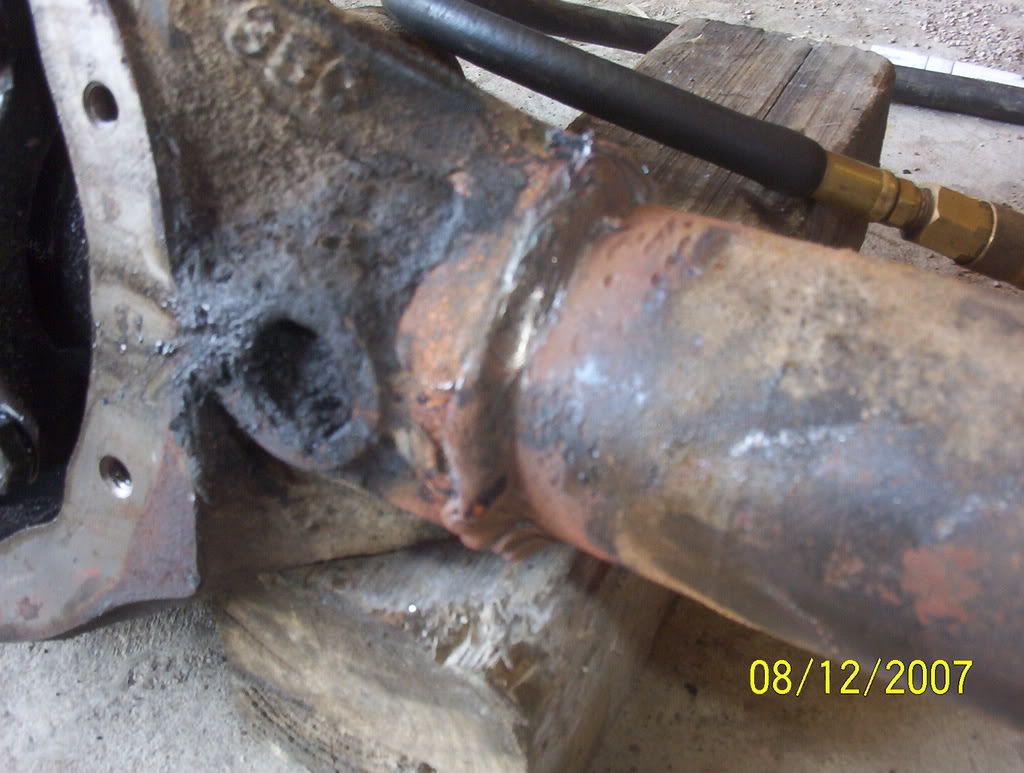
Got the old frontend out;
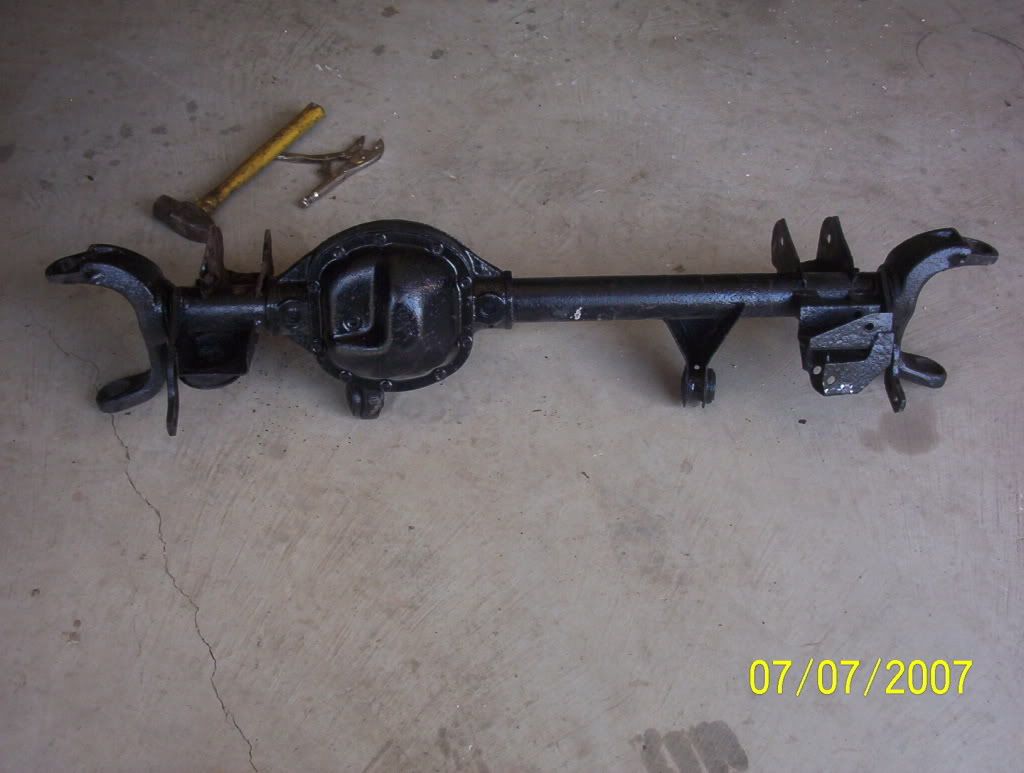
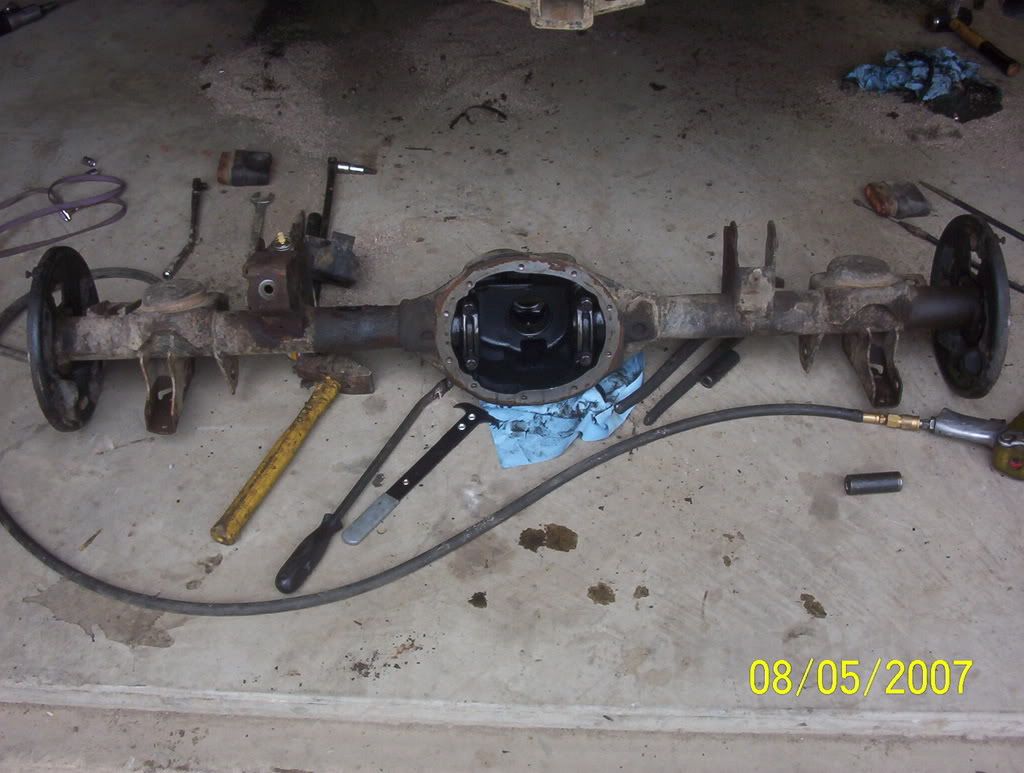
Drugg the new locked & geared HP30 over to start installing it;
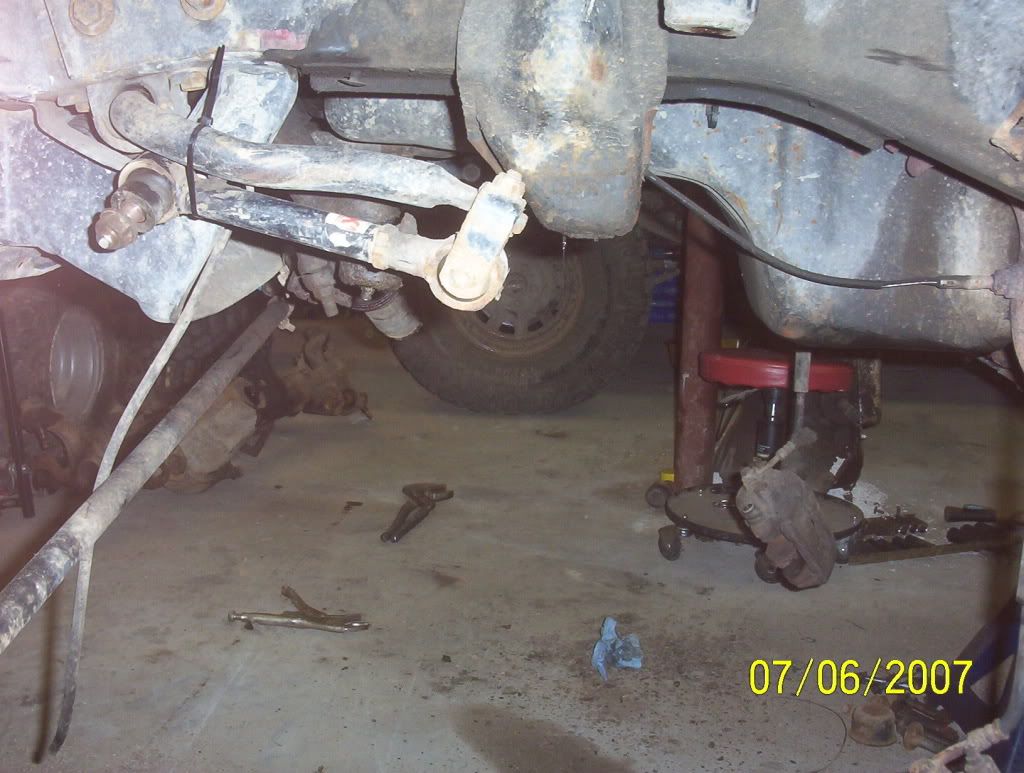
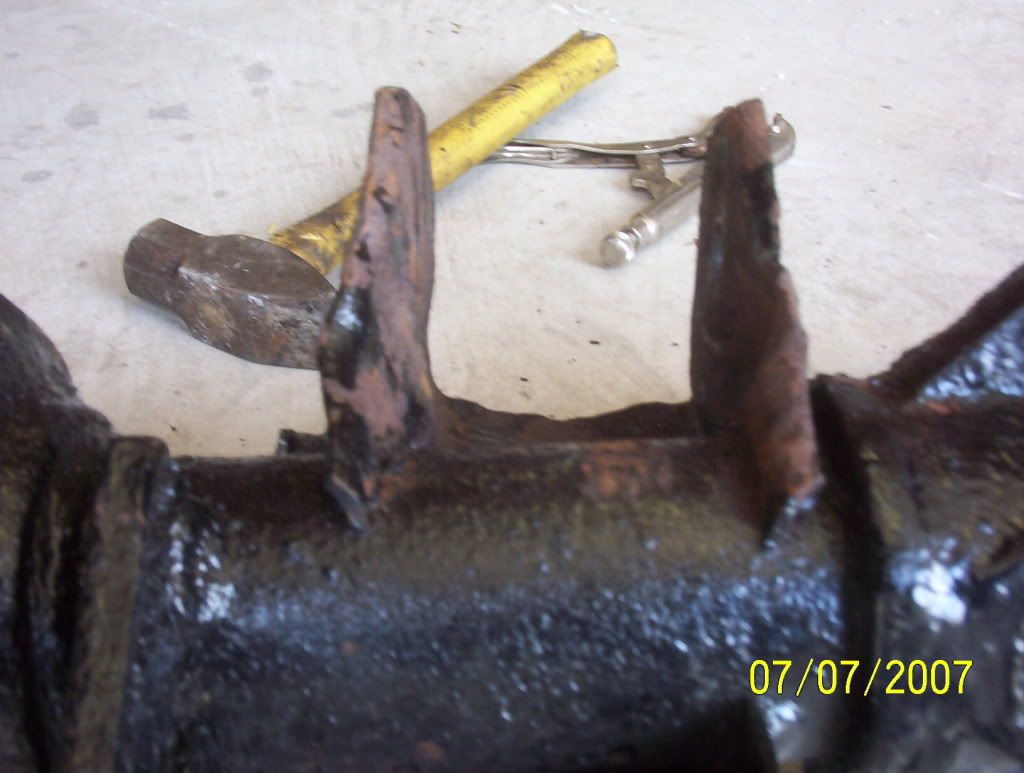
And found that it wasn't as nice of a housing as I was told it was;
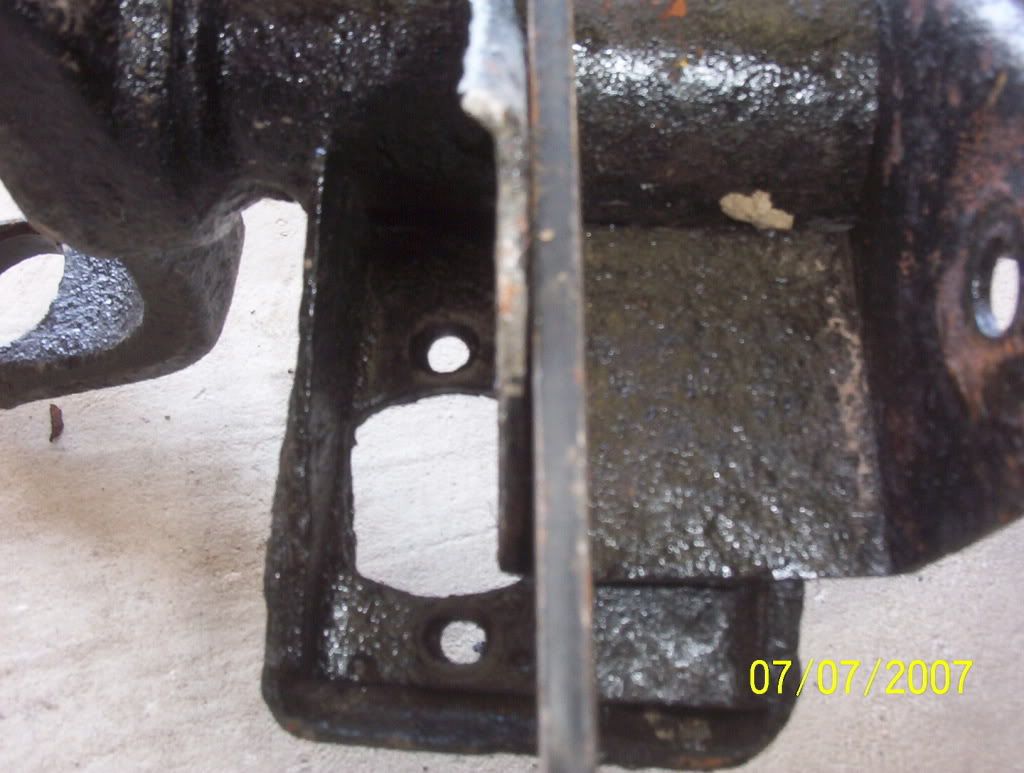
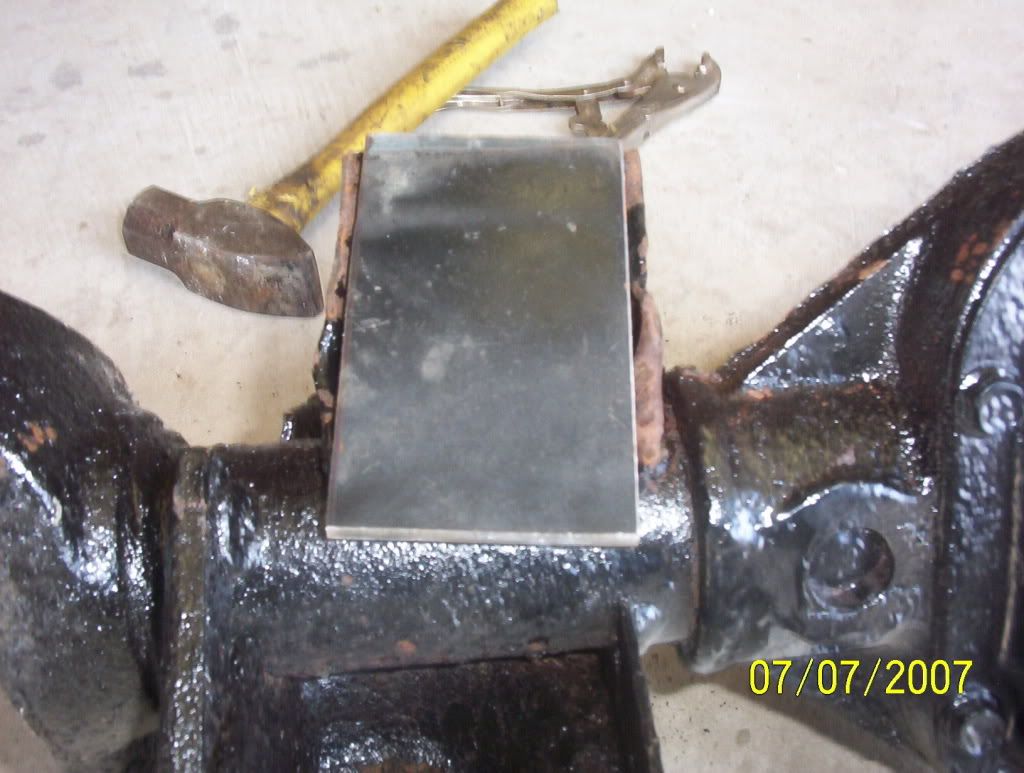
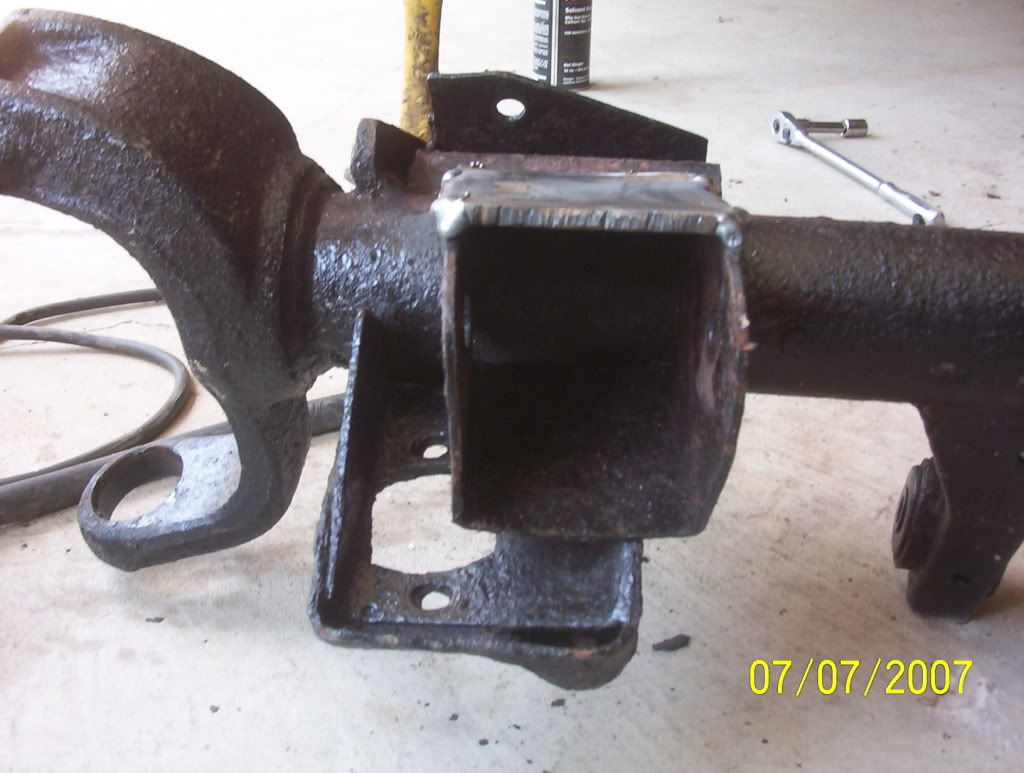
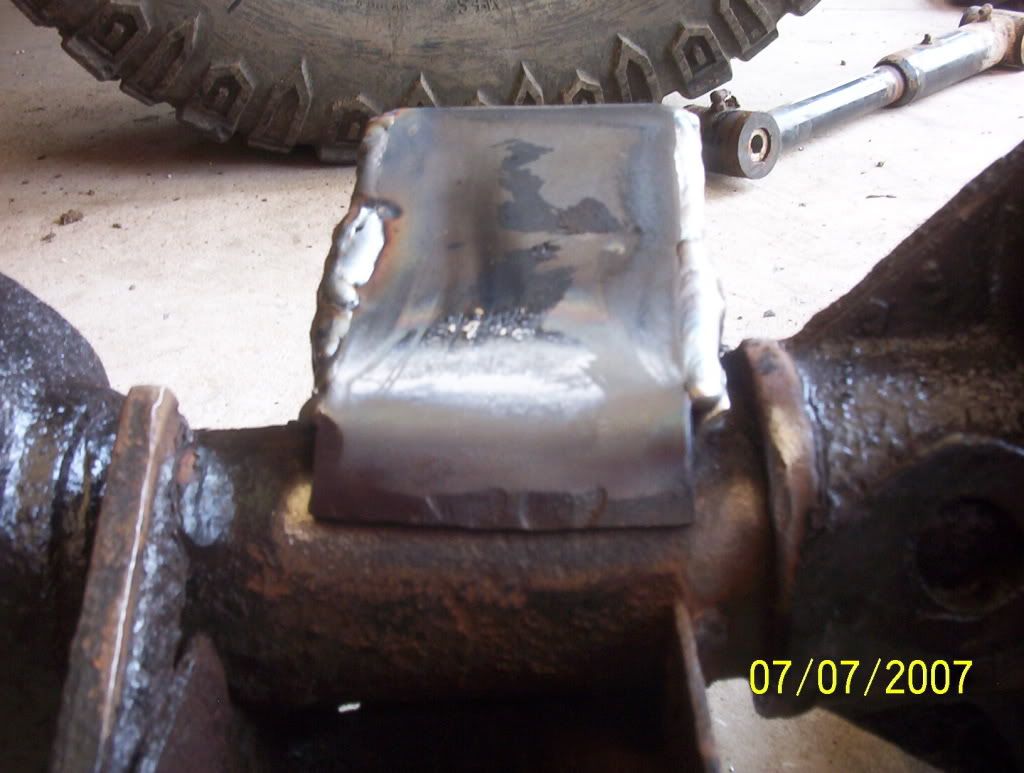
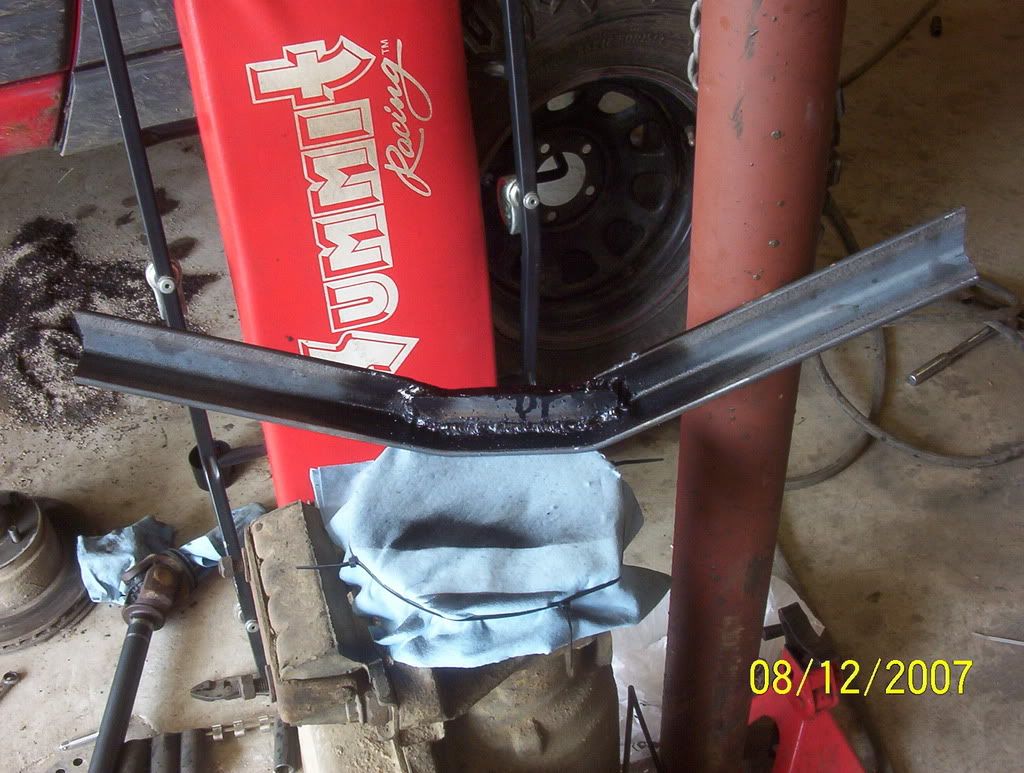
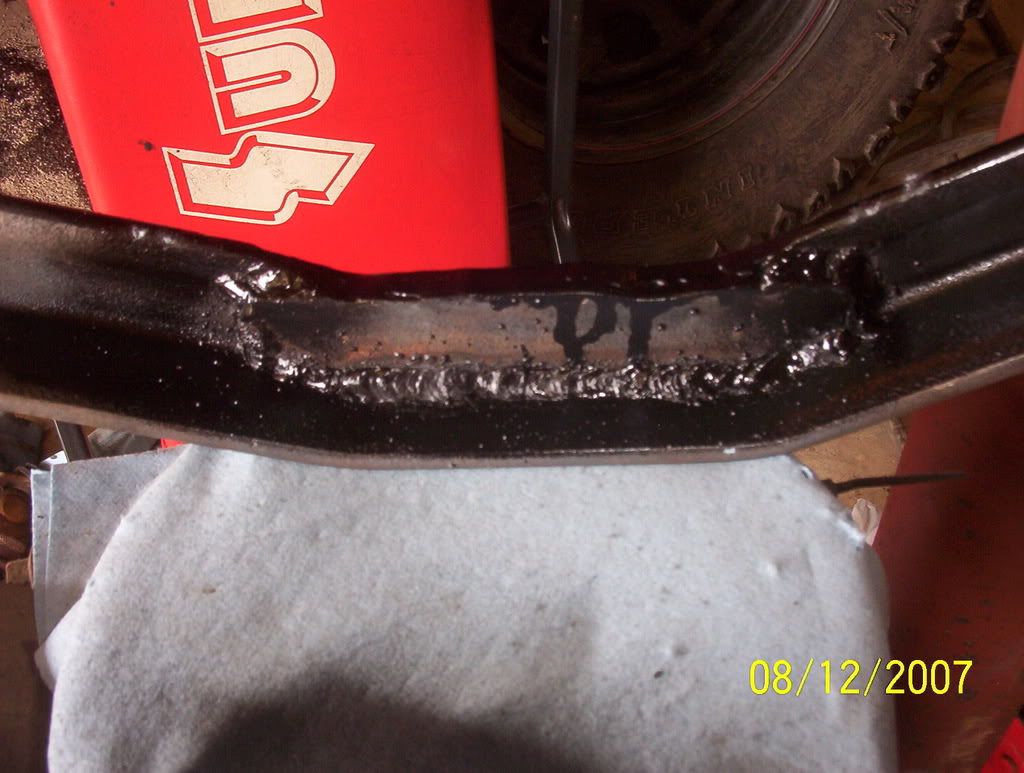
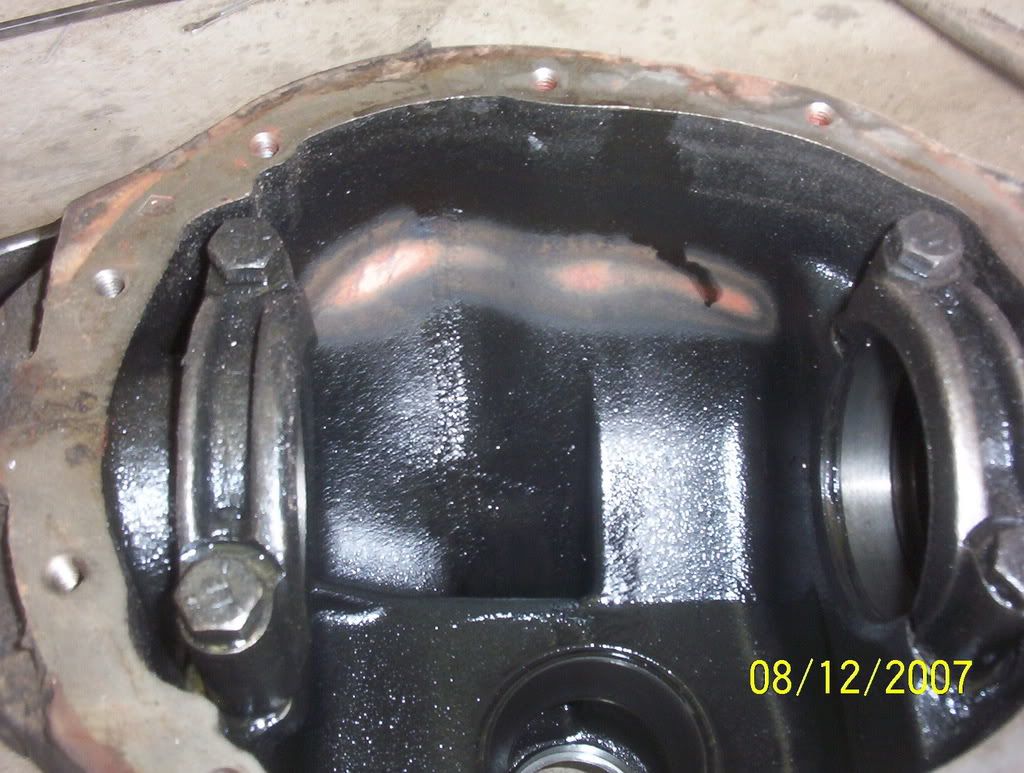
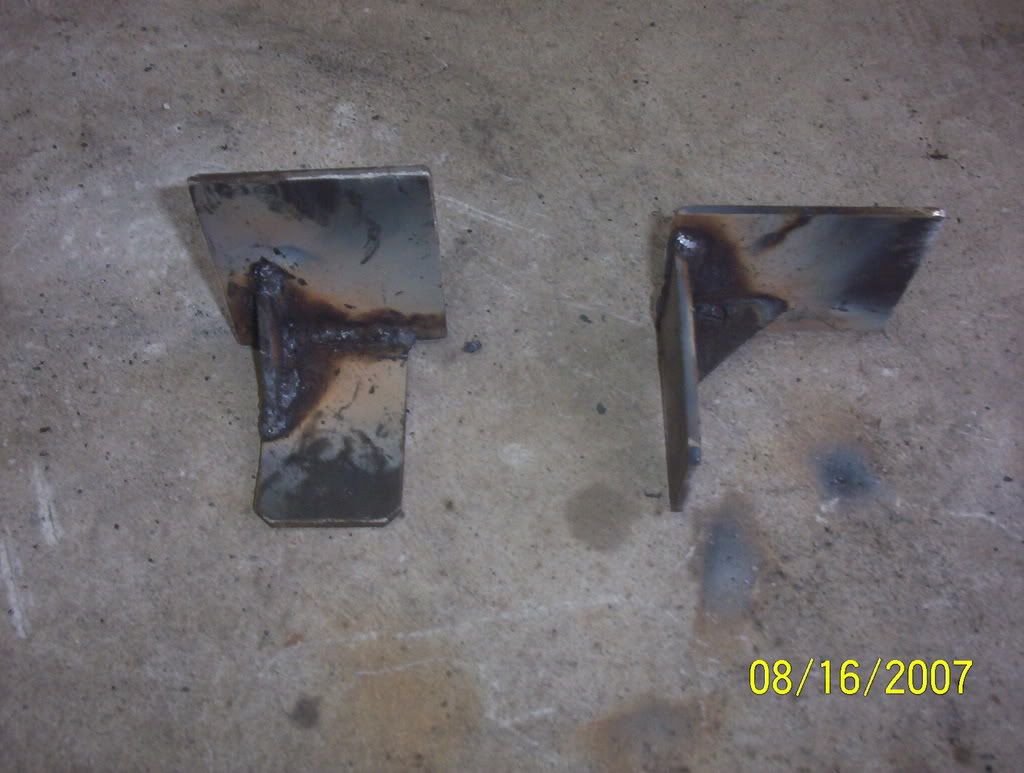
So after some thought about how much I didn't want to start over with another housing, I decided to fix those dilapidated lower control arm mounts with some much thicker material heavy duty re-enforcment plates/control arm mount skids;
Offroad bumpers make great work benchs :lol:
All finished, painted pretty, and ready to install
Then of course I had to mount up the Tuxus's on the rear to see how they fit/looked 8)
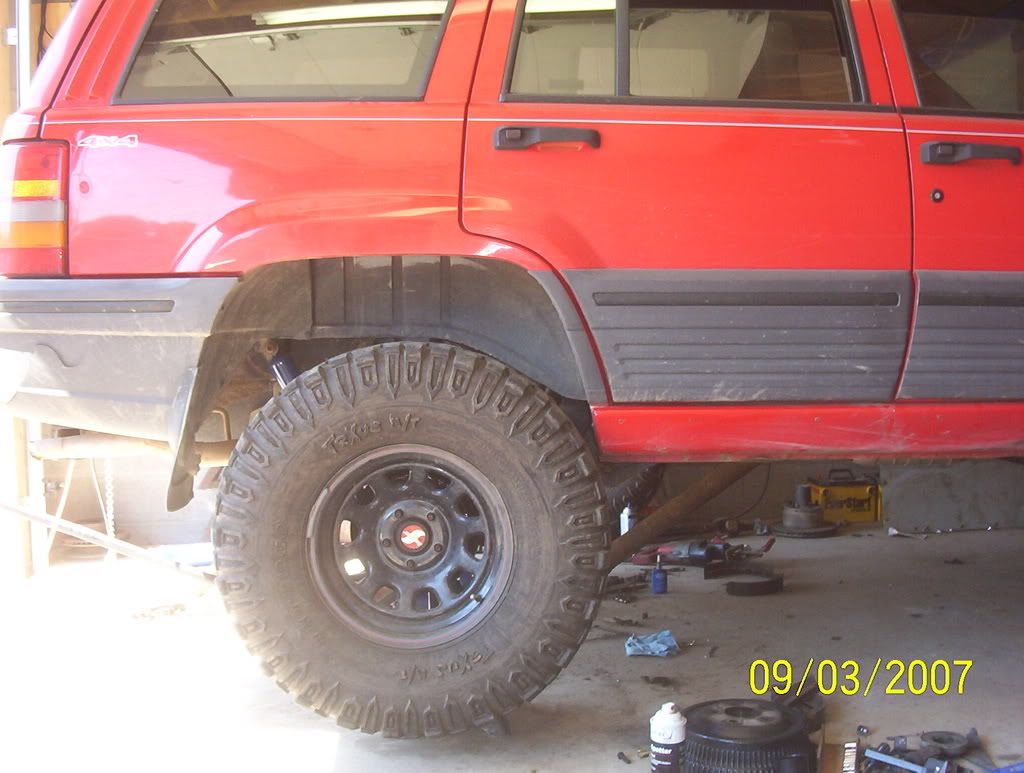
Got the TSL's mounted up & balanced their rims this week too :twisted:
Heh, Heh, Heh
I love this shit
08-12-2007, 11:35 PM
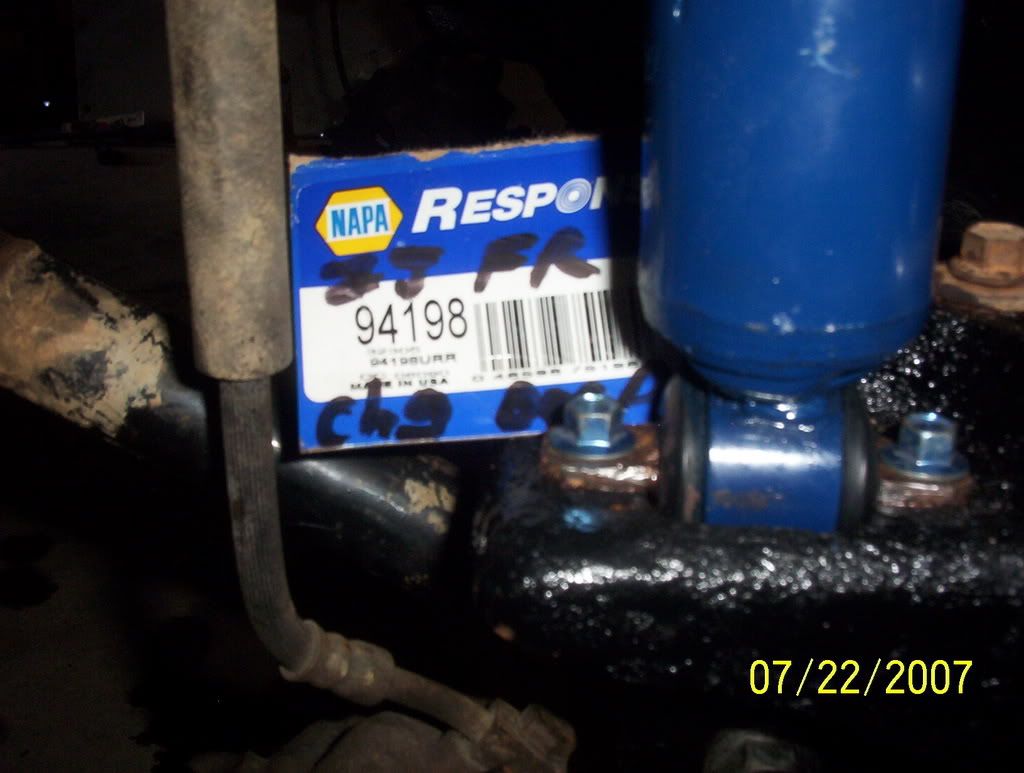
Decided there was no way in hell i was spending $160 on freaking shocks
So after digging through the Napa Catalog here at work i found a longer exact fit rear replacement, but for the front there is no good longer shock option with that stupid front bar pin thing on the bottom, so i went to the same type of lower mounting the rear has and I figure I'll fab a new bolt in lower bracket to convert the stupid original front lower mount to accept the new rear shock lower mount style.
That decided, I found 4 shocks that will work great with my 4.5" lift along with my front 3" bumpstop extensions & rear 2" bump stop extensions plus give me an extra 7"s of overall travel for a grand total of $60 8)
front 4.5" lifted Napa part# 94198
(94198 spec's are C-15.6", E-27.3", T-11.6"
Front Stock were C-13.0", E-21.1", T-8.1")
Rear Napa part# 94252
(94252 specs are C-16.6", E-28.3", T-11.6"
Rear stock were C-13.4", E-21.5", T-8.1")
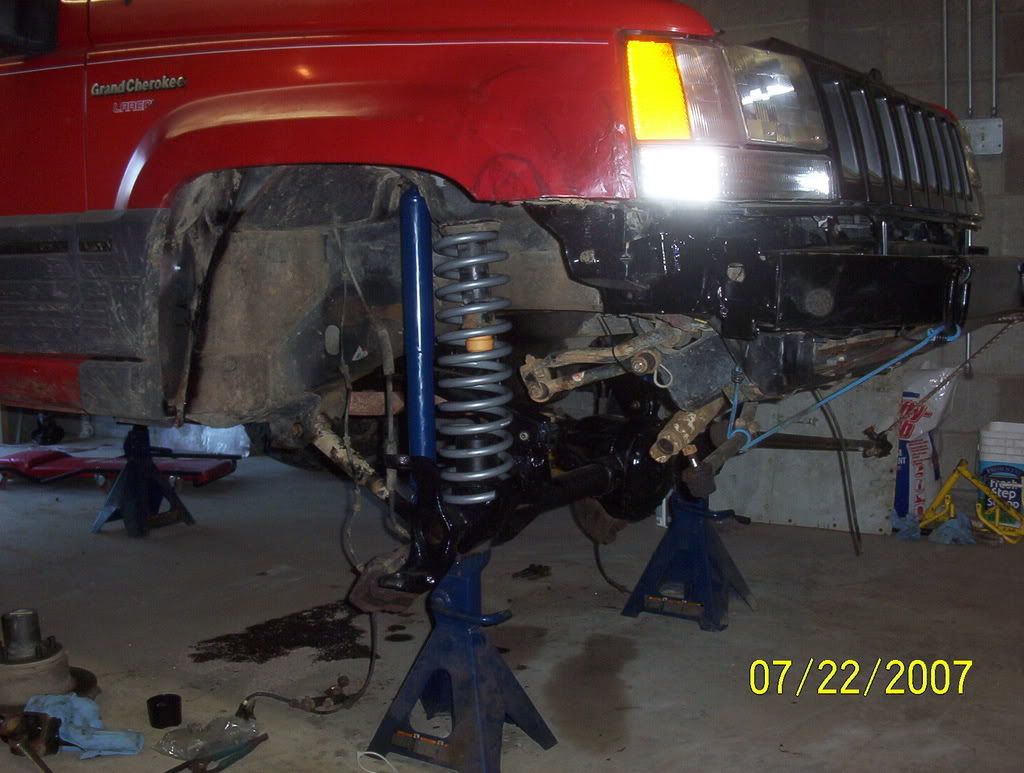
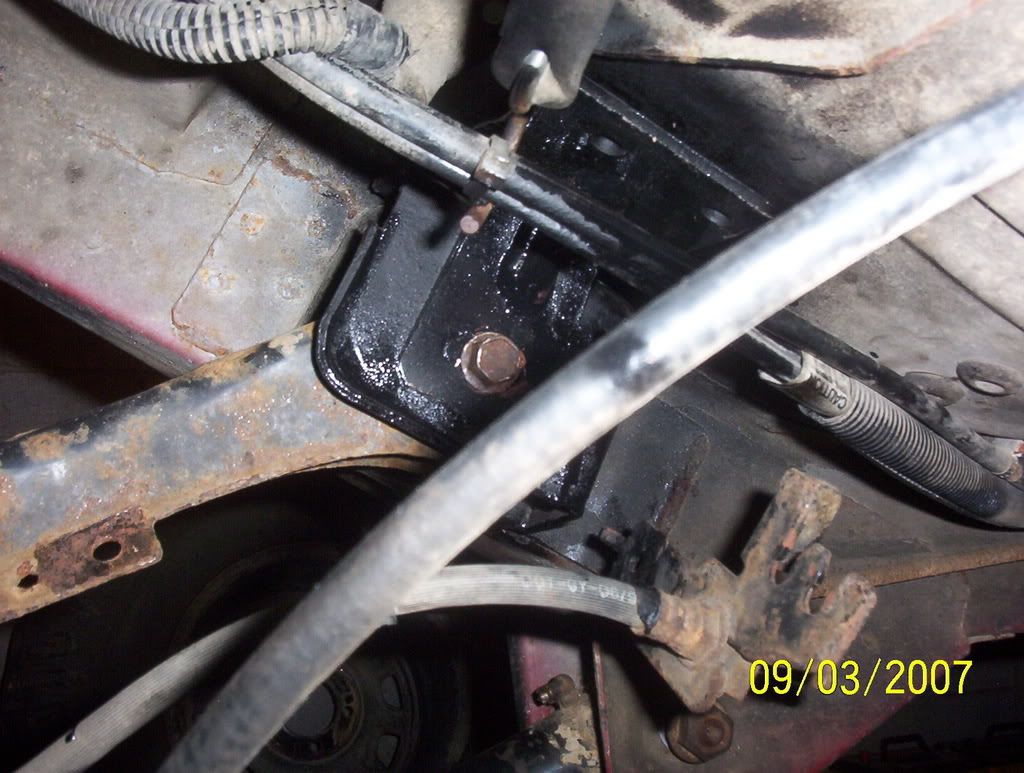
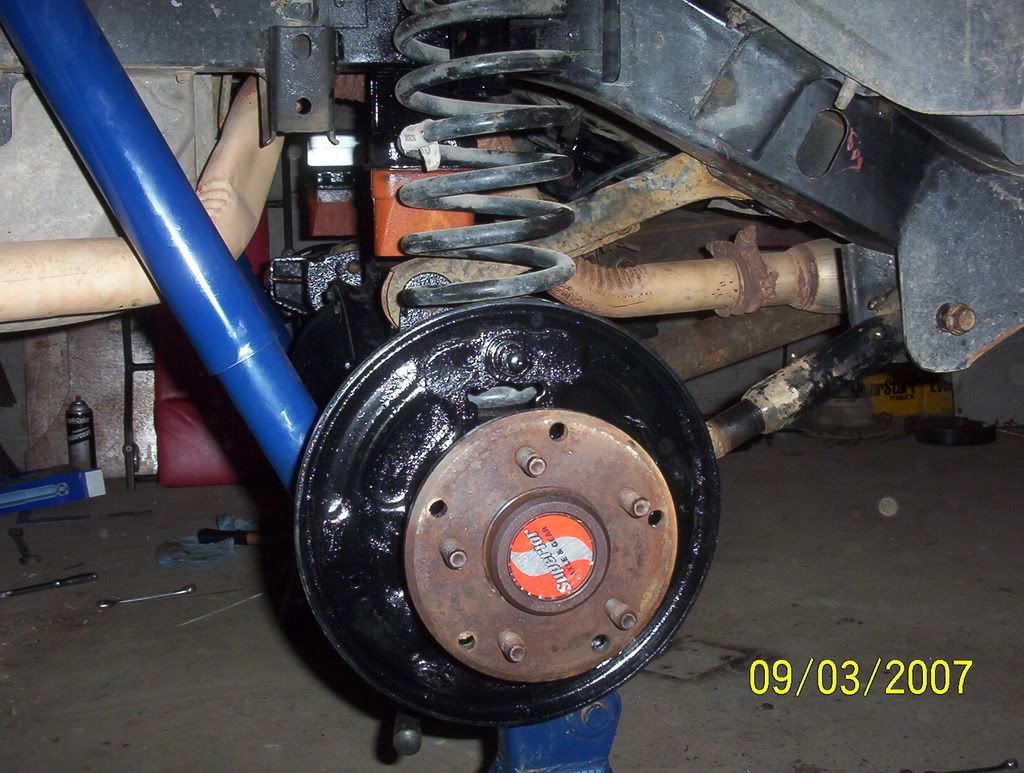
got the front HP30 installed & tightened down today with the rigs weight sitting on her RE 4.5" springs
(Theres a Brian in the pic for scale :lol: )
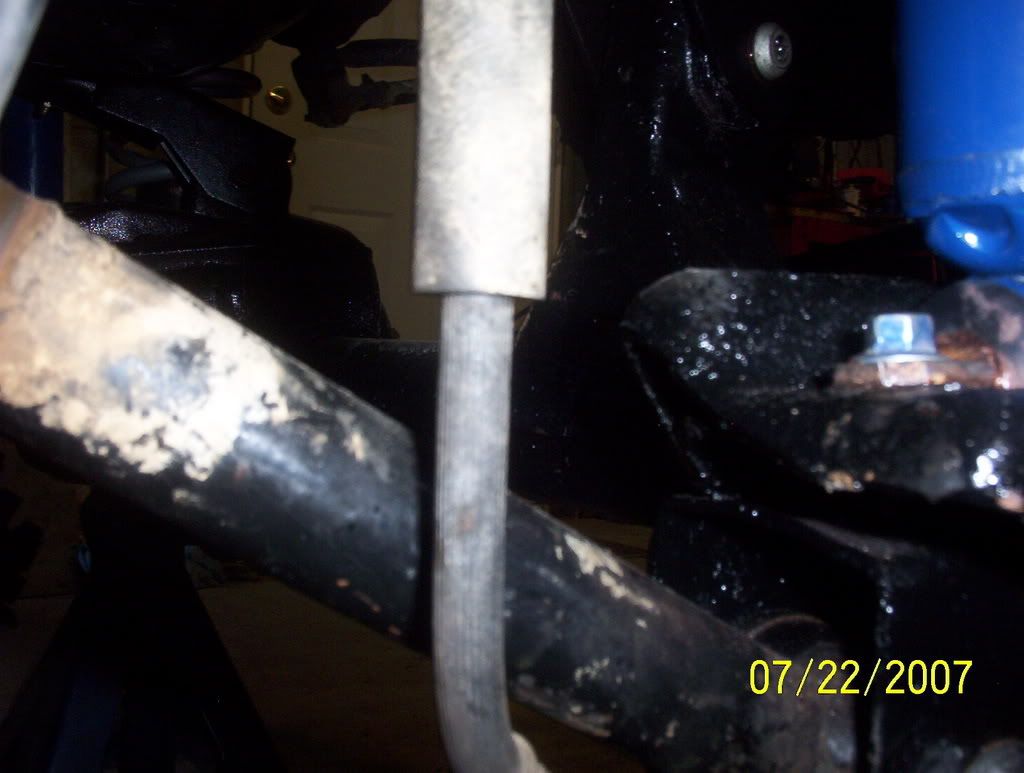
Was gonna build those brackets to allow me to install the NAPA 94198 shocks on the Grand, but after some thought I decided it would take more work to reinvent the wheel AND with a top mount style bracket my shocks wouldn't hit the end of their travel till right AFTER the lower control arms bound
So I simply pushed the bar pins outta the old shocks with my balljoint press & pressed them into the 94198 to replace the steel sleeves & everything mounted up great with the shocks maxing out travel right when (or just a little before) the control arms bound against my custom clearanced lower control arm mounts 8)
still gotta install BJ's, steering, Trac-bar (old school JKS rebuilt with all new stuff), & Etc.... but I'm still pleased with the progress[/
Last edited by gonecheenin; 08-13-2007 at 08:33 AM.
08-12-2007, 11:36 PM
Got some more progress made recently
(Once again I know I'm not a great welder so I don't wanna hear it (specially since nothing I've welded/over welded has fallen off/broken yet :wink: ))
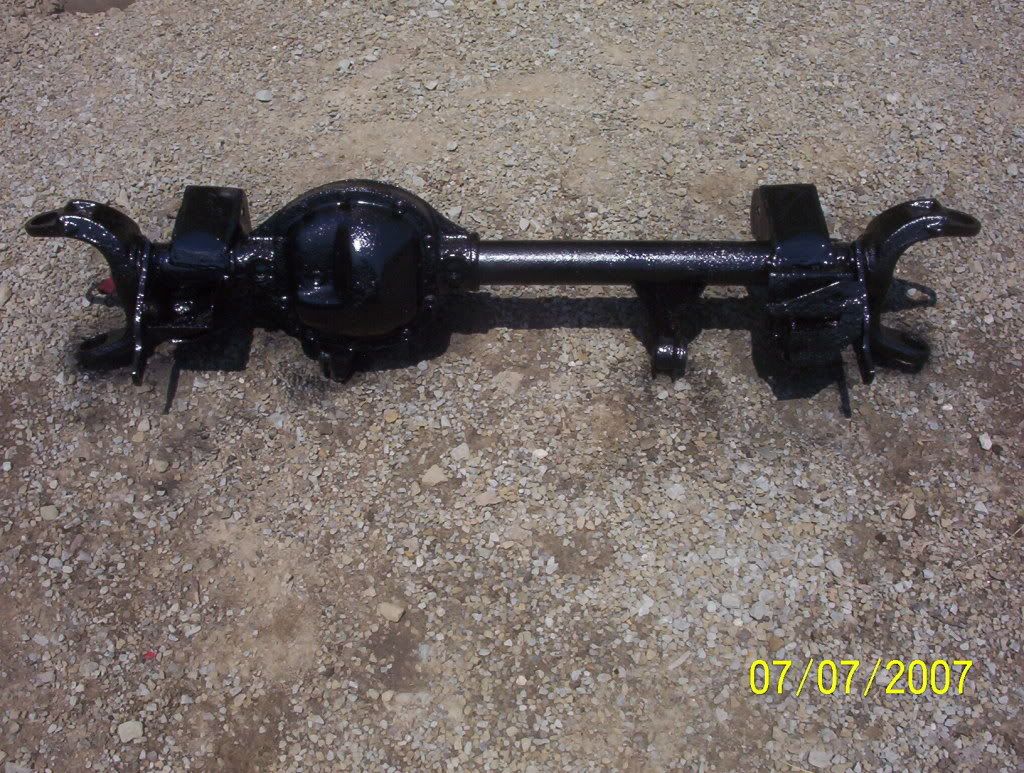
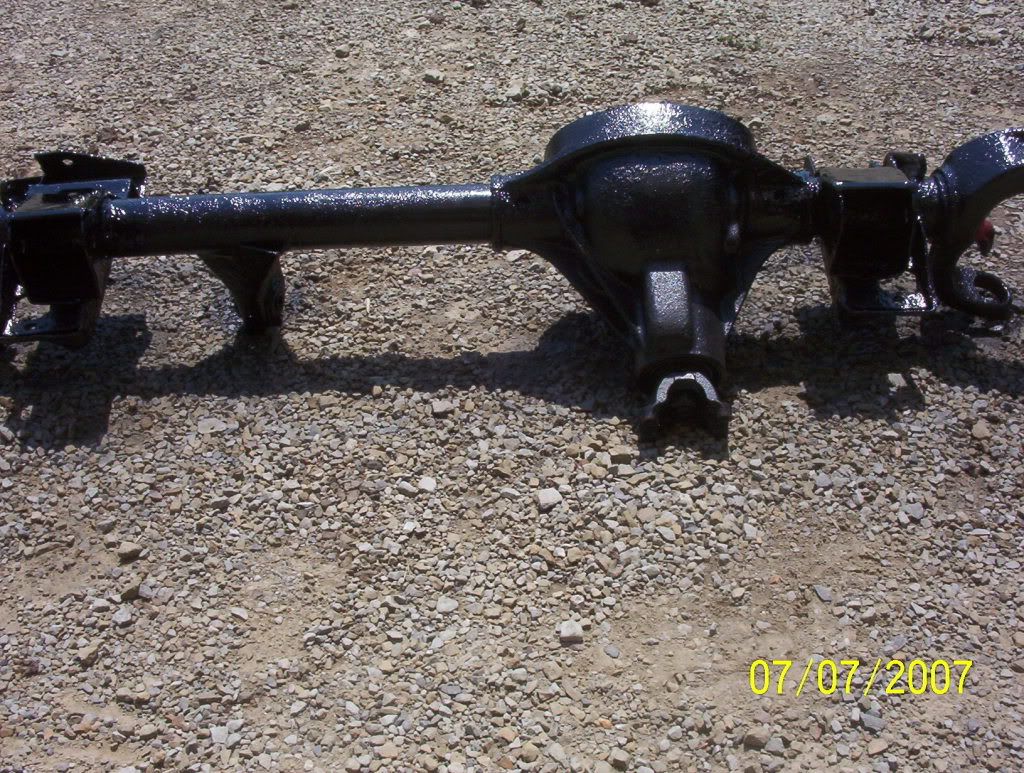
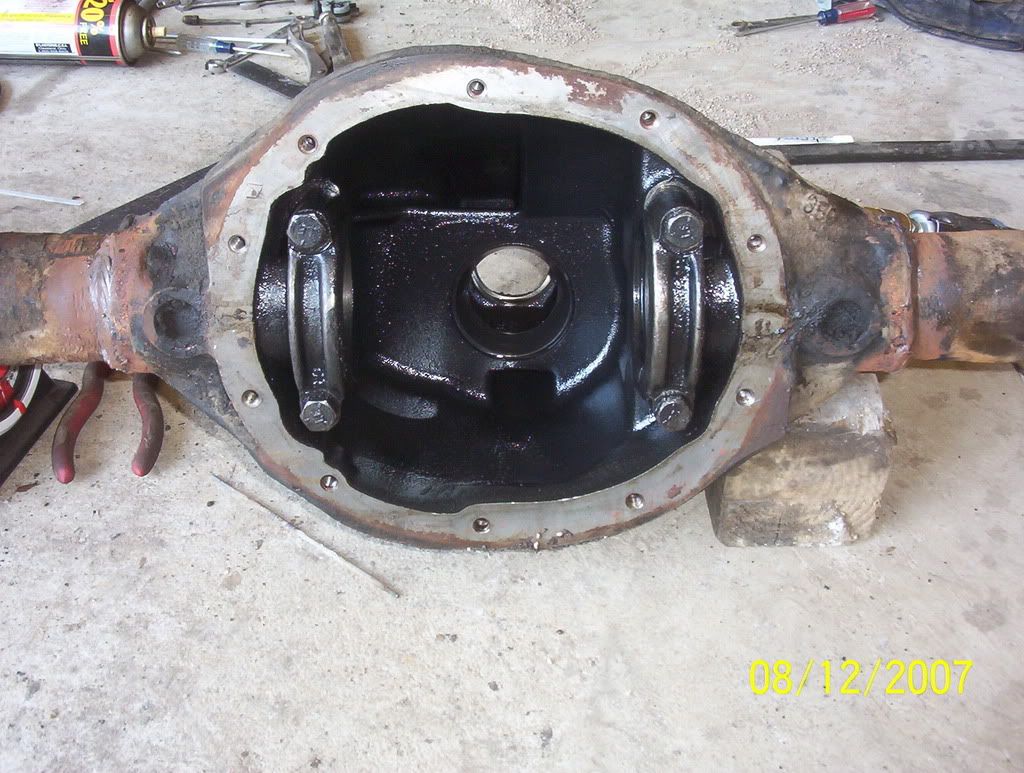
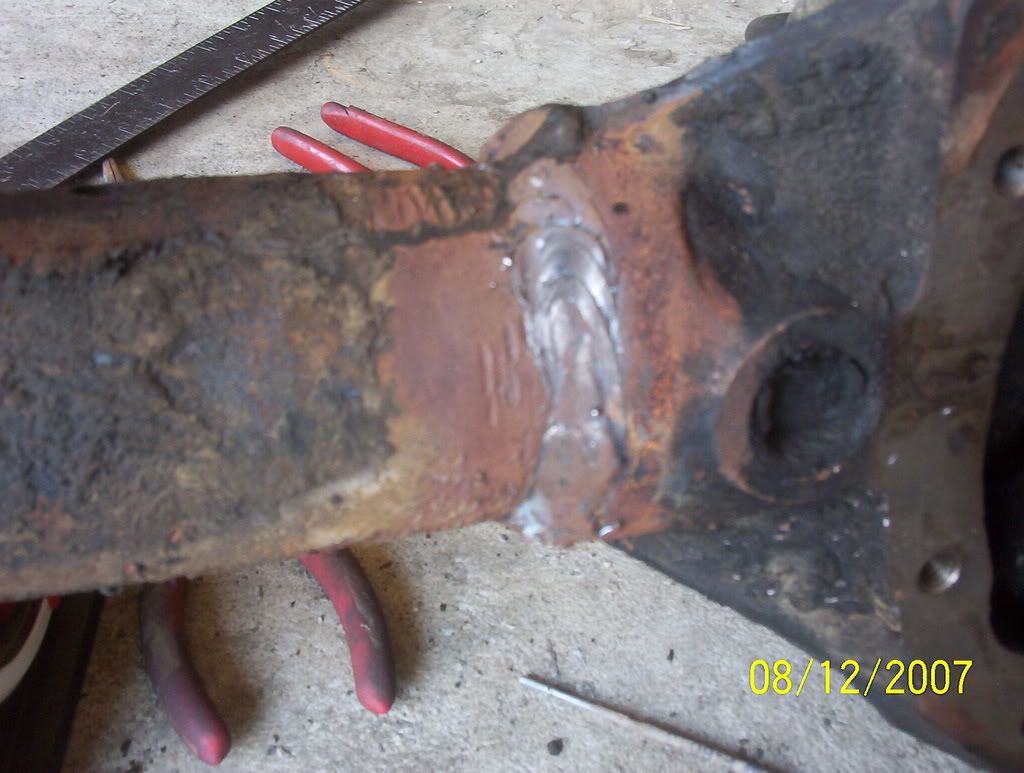
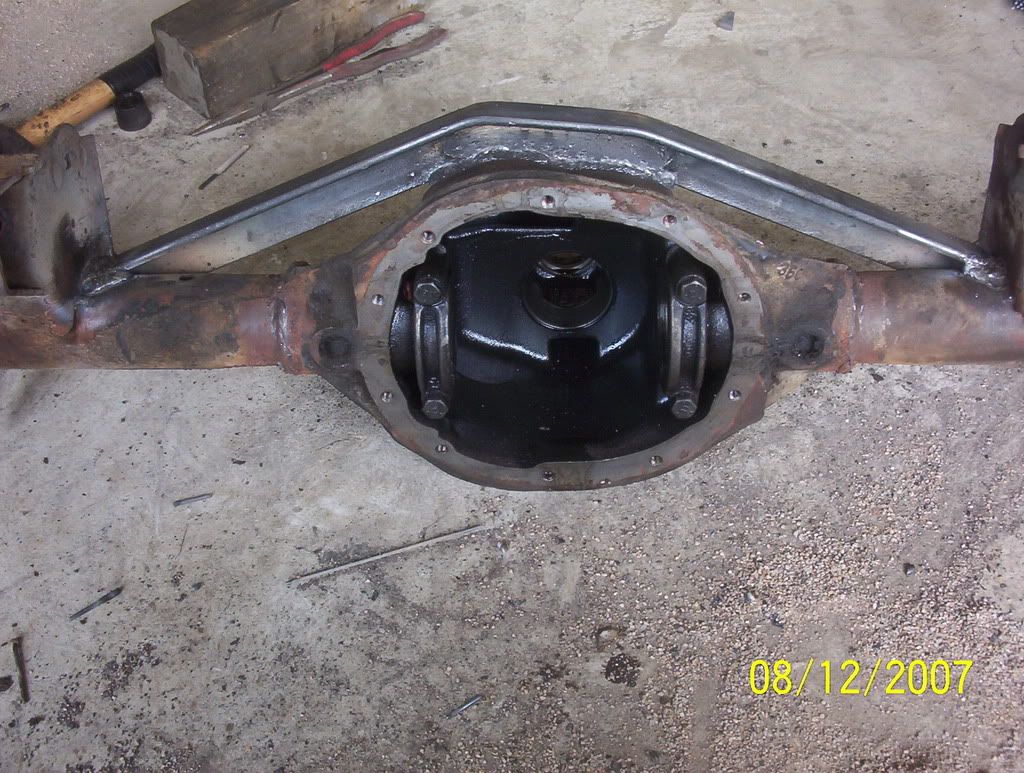
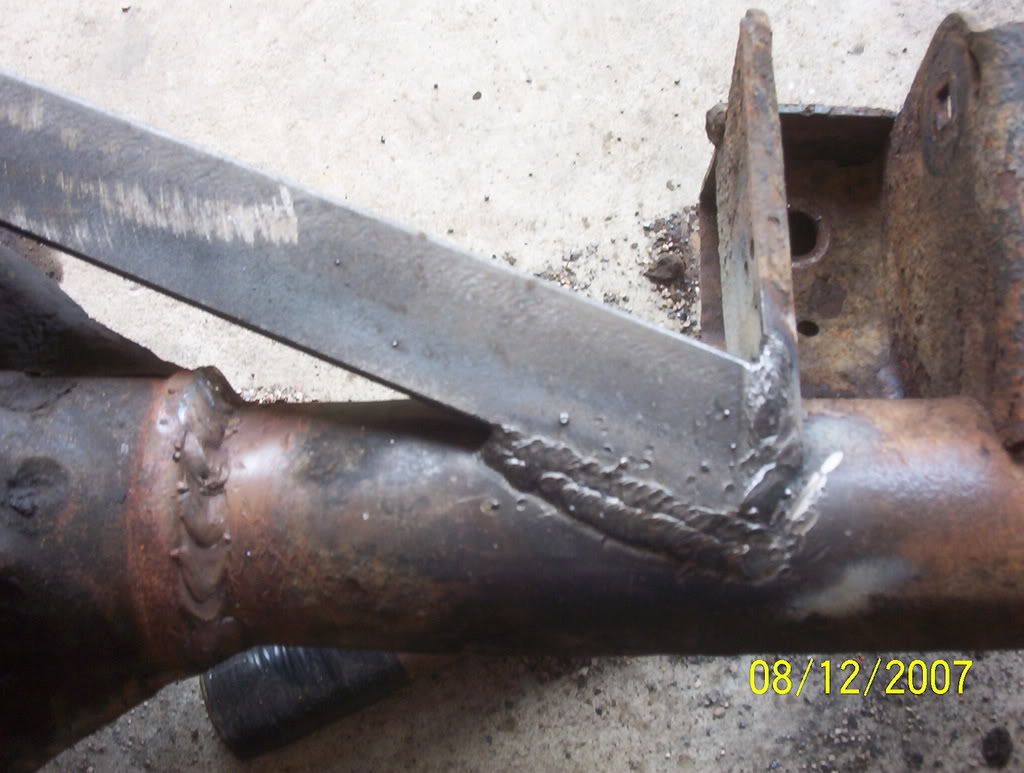
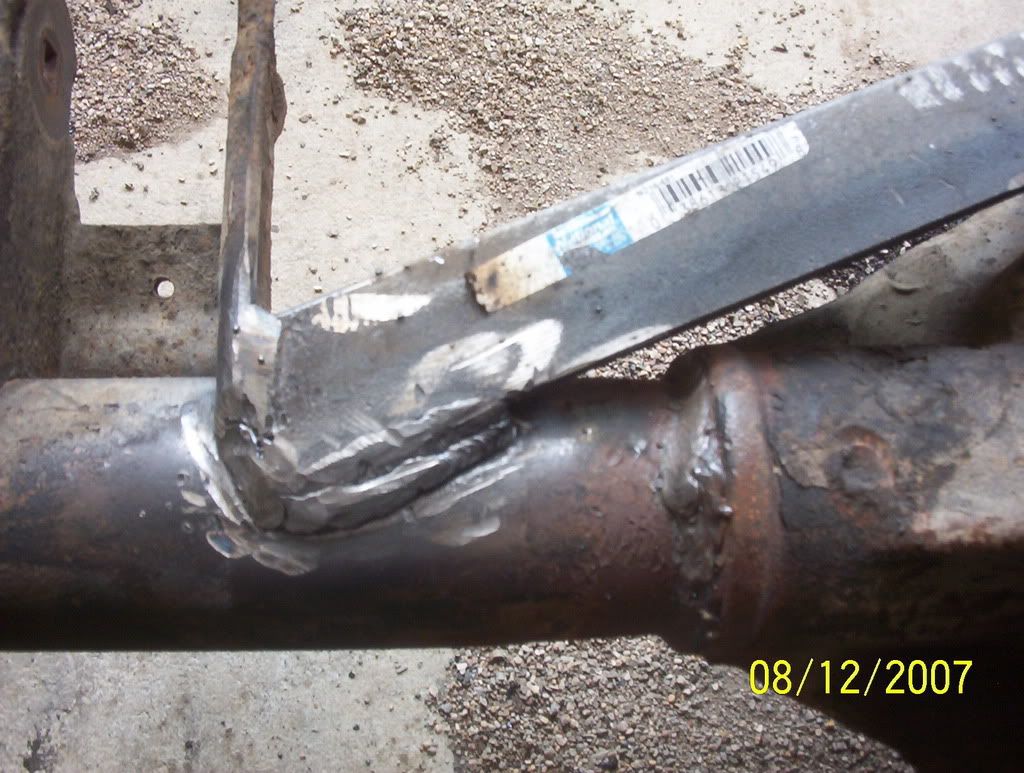
I pulled the rear housing out, stripped it almost bare, welded the tubes to the housing, and trussed the center section for strength (Now its a REAL SUPER 35 :twisted: )
Its now ready for cleaning, painting, and reassembly
Got penetration? :lol:
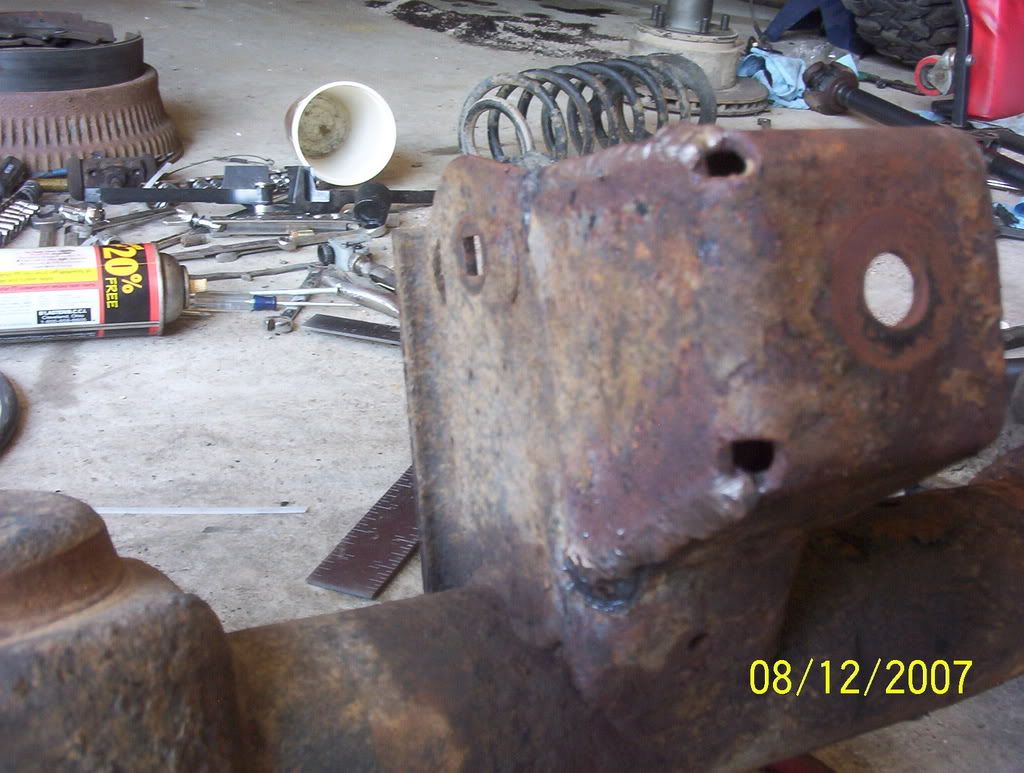
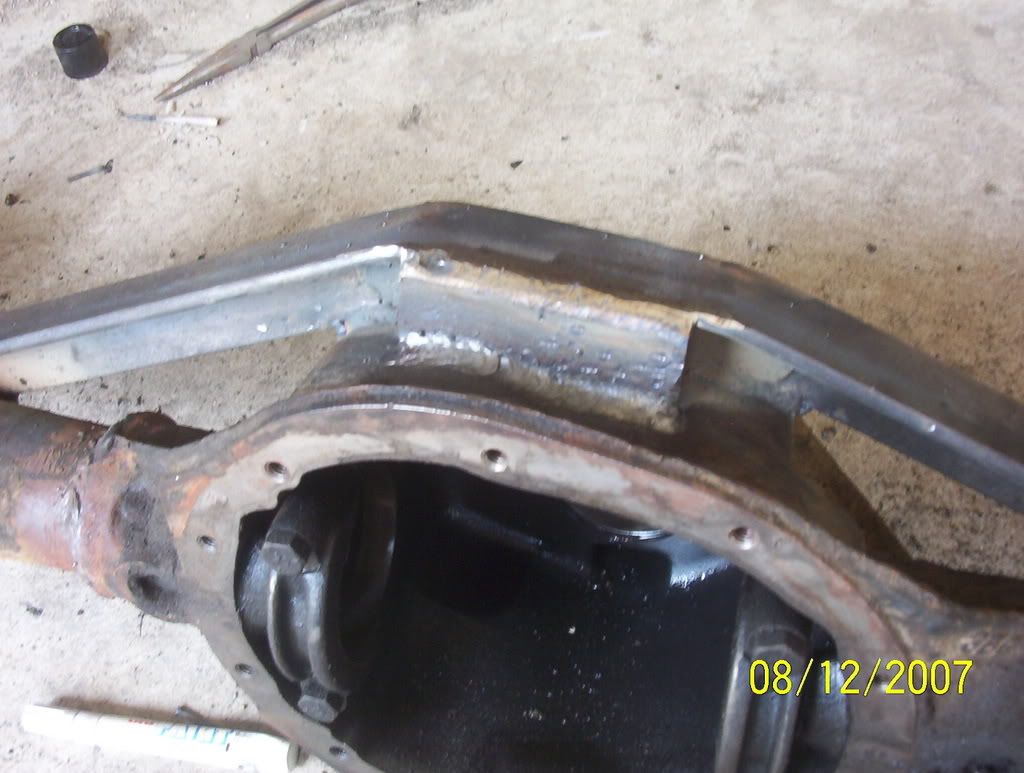
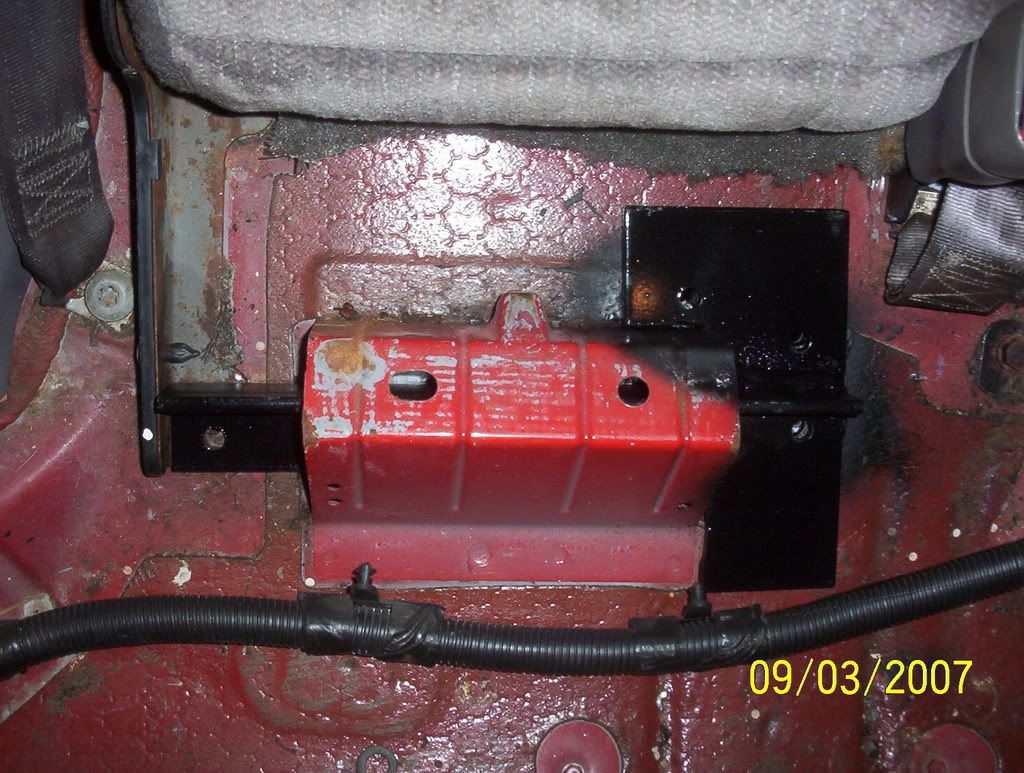
Next step on the fabrication list is reinforcing the notoriously weak (In a lifted short arm application) ZJ unibody upper control arm mounts.
As you can see in the pic they are totally unsupported on the outer top of the bracket which is EXACTLY where the stress is transfered once the vehicle is lifted (the control arms drop down to an angle where they quit pulling back & start pulling down)
I plan on doing a plate & ear design that will bolt through the floor to a larger plate tied into the structural areas under the rear seat.
Also disassembled the spare YJ HP30 housing I picked up for the steering knuckles to replace the severely worn ones the Grand had on it stock
Slowly but surely I'm making headway 8)
08-12-2007, 11:50 PM
I added them in the first post
 08-13-2007, 02:39 AM
holy ugly welds bat man, What were you using on that truss?

 08-13-2007, 03:06 AM
why are you putting any time/money into a d35?
 08-13-2007, 08:36 AM
1/8" 7018 rod running 200-210 amps-ish AC on the diff
3/32-1/8" 6011 rod running 120-160 amps-ish on everything else
The picture makes the welds look worse then they are
They actually came out better then I expected to be honest, but even my ugly welds have held up great over the years because I over weld the hell outta everything to comensate for not knowing how to weld properly
08-13-2007, 08:45 AM
Just to PISS you off
I got an entire Detrioted & 4.56'd TJ Super 35 for $400 with low use on it
I picked up spare 30 spline shafts & a Super 35 ARB backup locker for another $100
I'm putting approx. another $100 into the housing in material & new parts (bearings, brakes, etc...)
So you swing by & drop me off a bolt in axle assembly built up that well for $600 & I'll gladly throw this one in the hopper or make it into a flower planter as is the common census
Besides, I love proving people wrong & I'm betting with my setup (6cyl, auto, single stock t-case, 33's) in my western PA street wheeler, that trussed & welded tube Super 35 will be sweet & trouble free for me
Plus it'll be a great conversation pc for everyone else on the trail
If it proves to be total garbage as is legend & breaks while turning around in my driveway to get the mail
I'll change it out for a D44/8.8 combo then
But until that happens, I'll be ah pimping the Turdy-fiver
Last edited by gonecheenin; 08-13-2007 at 08:53 AM.
 08-13-2007, 09:08 AM
lookin good man. sounds like you're gettin a pretty sweet hook up on the parts. i'd be doin the same thing with that turdy five if i got those kind of deals.
where do you wheel at around there? I lived in monroeville about 7 years ago and will probably moving back east in a year or 2 to the lower somerset county area. I know of places down there to do a little wheelin, but never really saw anywere around da burgh to wheel.
08-13-2007, 10:22 AM
MANY years worth of collecting good deals when they showed themselves
You'd have to be totally crazy to spend retail on a Super 35 kit, but I'm willing to give it a shot for the small investment I've got in it so far
I wheel all over, no place really close to the Burgh though, the closest place to the burgh I know of is out by Harmerville & its a don't ask don't tell kinda area
Up in Somerset though you'll have access to a bunch of places within 45min-1 hour away
Shoot me a PM when you get back into town & we'll see if we can set something up
08-14-2007, 08:33 AM
that's good to know. I'll probably be coming back that way for a month or 2 during my sabbatical in march, so maybe i'll steal..... i mean borrow... one of the old man's WJ's and "break it in".
08-19-2007, 06:32 PM
Got the rear all painted up pretty & ready to be reinstalled
Got the 3/16" upper control arm brackets braces built, drilled, & mocked onto the jeep to use for a template to drill the holes up through the rear floor (Yes I know my welds suck)
I spoke with a friend of mine who used to build roll cages in unibody race cars & he said that a 6"x6" 1/8" plate sandwiching the floor top & bottom meets NHRA standards for mouting the roll cage & saving a life at 100+ MPH.
Soooooo, I figure that a 6"x3" 3/16th plate welded into a T to a pc of 1.5"x1.5" 1/4" angle that will be threaded under that seat bracket & bolted down through the floor on the inner side to the lower brace plates with 4) grade 8 bolts & locknuts (a single G8 bolt & heavy washer will go in the hole on the upper side of that seat bracket with a small plate) and at the other end the angle iron will be tied into the outside lower seat bracket bolt which will brace the whole assembly across the frame rail (I'm figuring with all the leverage advantage from length, that single bolt should be plenty strong).
I'm thinking this setup should provide all the added strength I'll ever need to structurally reinforce the upper control arm brackets on this and any future grand cherokee's short arms 8)
Here's where those holes came up through the rear floor (one hole is hiddin' by the seat bracket) you can also see the lower bolt of the seat back on the far lower right that I'm gonna be utilizing to tie in the upper plate "leg"

Last edited by gonecheenin; 08-19-2007 at 06:35 PM.
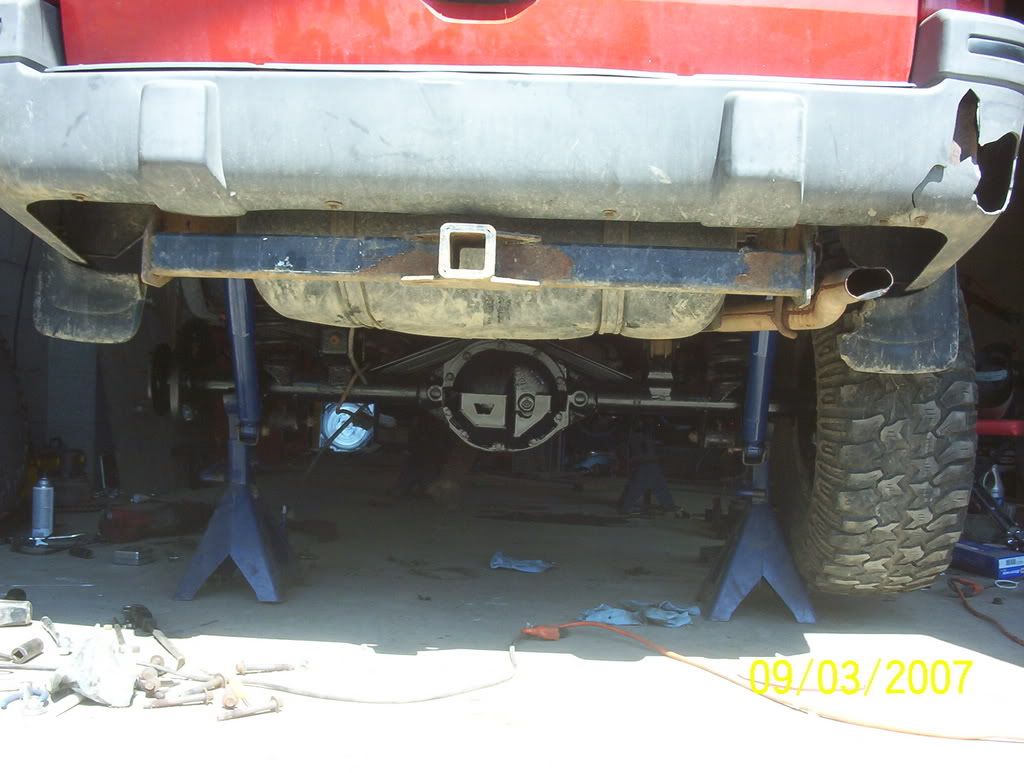
09-03-2007, 09:43 PM
Whelp I spent almost this entire weekend wrenching on the Grand, I'm pretty beat down but with all the prgress I made it was worth it %100
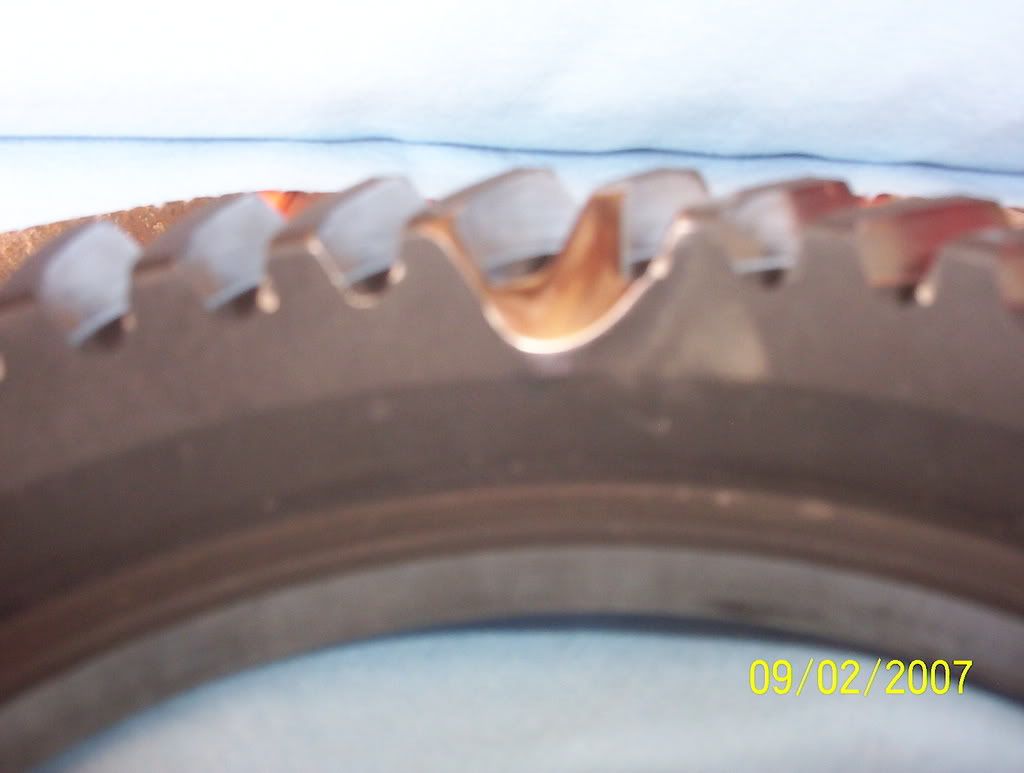
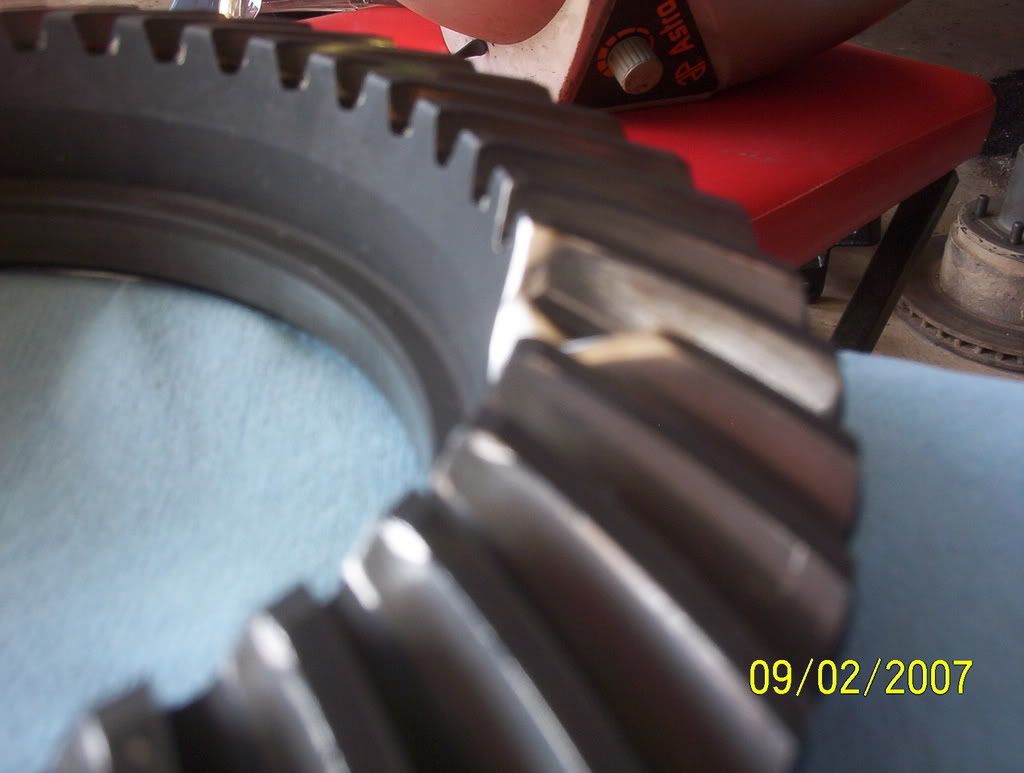
Swapped the Super 35 stuff over into the strengthend ZJ housing & found a chipped gear tooth, after reading in Randy's differential book that a ring gear can usually survive a chipped tooth in the toe area I smoothed & blended the tooth to remove any stress risers or sharp edges as best I could to get this
(even though I'm still worried as hell about it I figure I'll run it for now & just plan on ordering some Yukon 4.56's soon as a preventive action)
The pattern wasn't perfect, but with the spray white lithium I used to check the pattern (all I could find) it seemed to be fairly centered between the face & the flank so I went with it
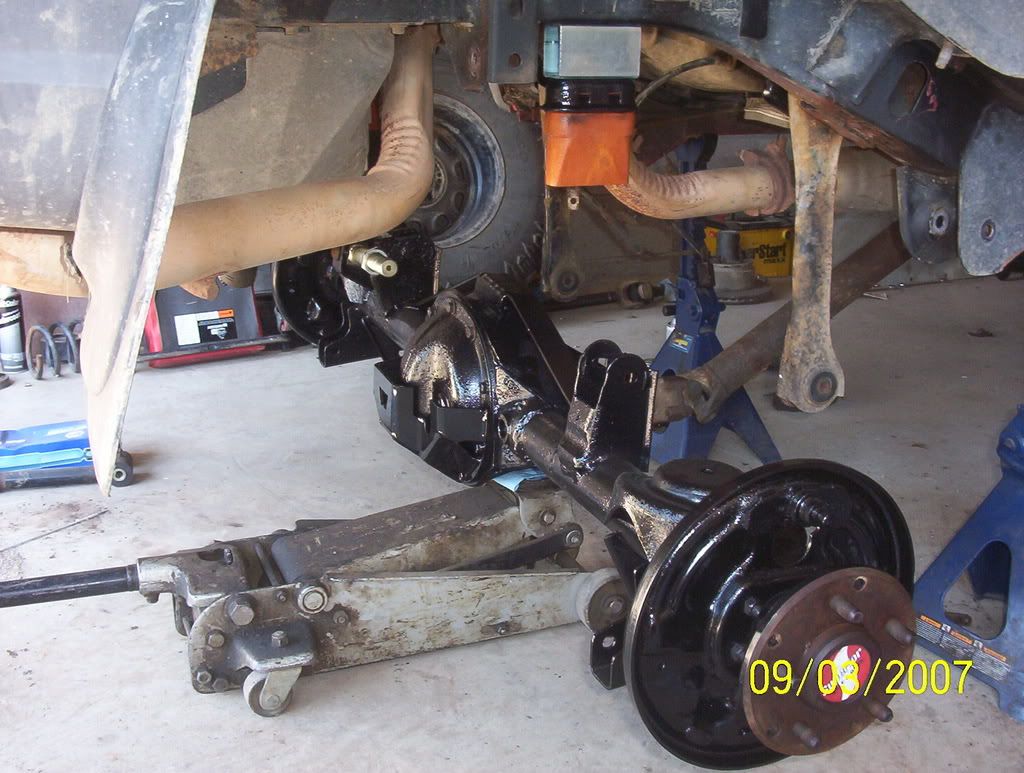
Axle all buttoned up & ready to install
Got the vehicle side upper control arm brace bracketry finished, painted, and in place for boltup
Installed all the hardware finger tight, welded 2" extensions onto the rear coil posts to gaurd against coil drop out & tested the shocks for proper travel, everything worked out real nice showing max travel with minimum trimming on the axle side LCA brackets but I can see I'm gonna have to order real rear lift springs cause at max flex the spring/spacer combo drops & when it reseats its all discombobulated
Sitting at ride height everything looks great, got the pinion set perfect with the t-case output at 4 degrees but after looking at the tire to rocker clearance I'm thinking I'll push the pinion down to 2 degrees and do some minor trimming to help fight against pinion climb & rocker contact during high traction induced bushing flex in the rear
| « Previous Thread | Next Thread » |
| Thread Information |
Users Browsing this ThreadThere are currently 1 users browsing this thread. (0 members and 1 guests) |