|
|


 10-11-2006, 07:48 PM
damn...lookin awesome man!

 10-11-2006, 07:55 PM
What he said.Originally Posted by AgitatedPancake
 10-12-2006, 10:12 AM
Thanks for the thanks! just helping out a fellow JeeperKeep up the good work!

 10-24-2006, 06:12 PM
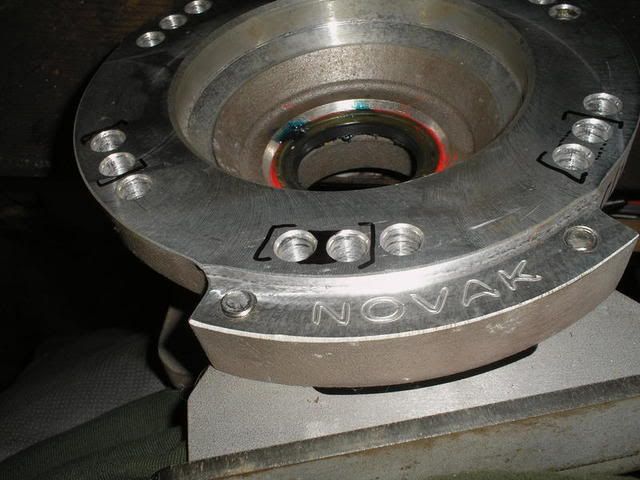
I did not have much time to work on the rig the past weekend. Since I had to flip my 249 reduction box, I had to re-drill my transmission adapter. (or get a clocking ring and mess around with seal engagement) This method was faster and easier to do.
I cleaned off the previously messy basement work bench and went to work. It turned out fine and was not nearly as painful as I originally thought.
I kinda had to mentally prepare before I took a blade and grinder to such a pretty adapter... but it just had to be done, I'm sure you understand!
-Tim
Last edited by EMTimZJ; 10-24-2006 at 08:53 PM.
 10-30-2006, 04:36 PM
Nothing like chopping up something purdy
So I must ask Tim, aren't Toyota axles 6 lug? Are you still using a d30 front? How are you getting around the different bolt patterns.
11-02-2006, 12:29 PM
Yeah, I think I measured about 15 times before I marked it, then about 15 times after I marked it
See post #31, second picture from the bottom. My toy-8 came from a 4wd version, which means 6x5.5 lug pattern. The V6/turbo 2wd versions have a 5x4.5 lug pattern, however they are a harder to find. The non V6/turbo 2wd axles are the Toy 7.5" diff with 27 spline axles and weaker housing.
-Tim
 11-05-2006, 02:20 AM
Love the pretty steering box
11-05-2006, 04:08 PM
Hey Daryl, nice to see you made it over here!
12-19-2006, 03:20 PM
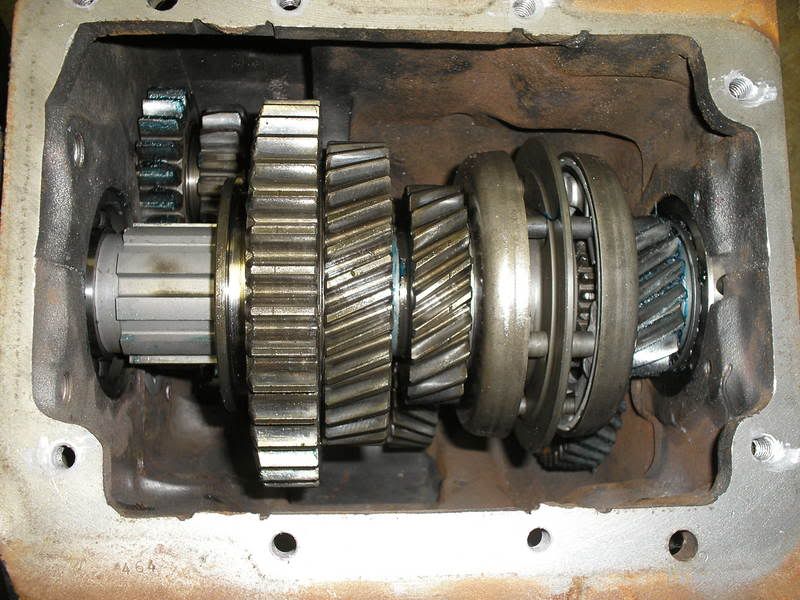
NP435 internals:
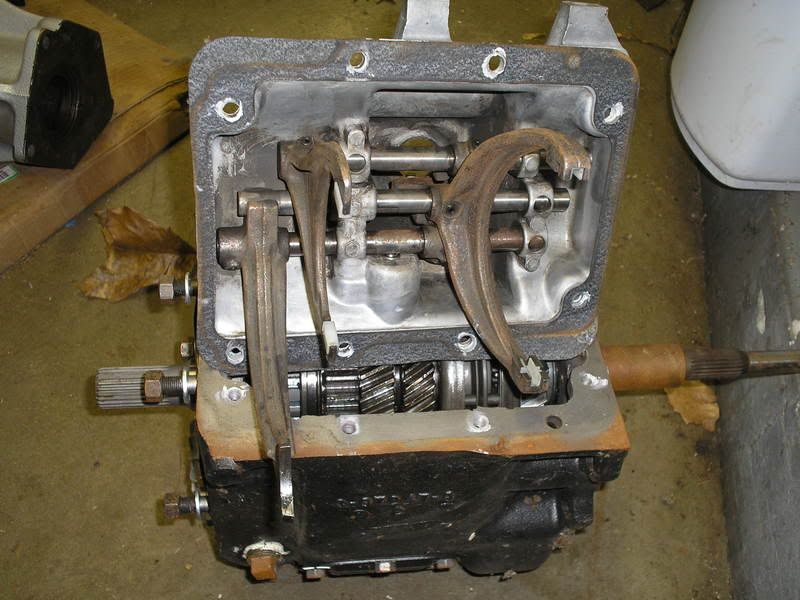
Shift assembly:
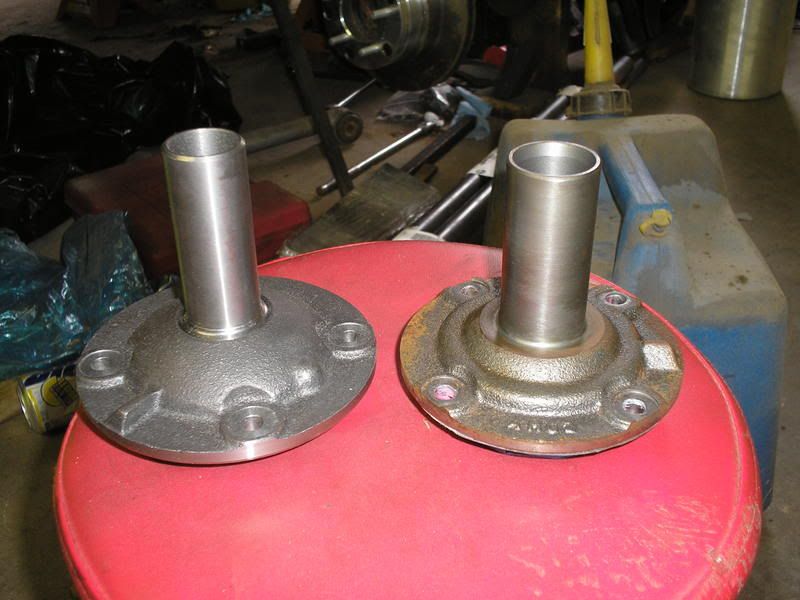
Installed the correct bearing retainer, Dodge style on the left, Ford style on the right.
OD of the Dodge = 1.236"
OD of the Ford = 1.430"
The two throwout bearings have different ID's and there attaching methods to the clutch release arm are different, just get your hands on the right retainer and life is good!
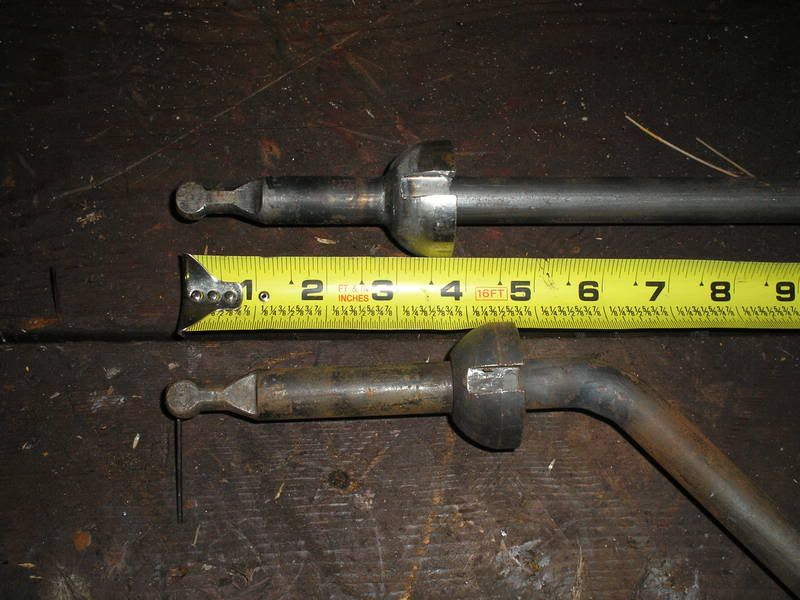
Also, there are two different finger lengths for the NP435 shifters; the one I am using is on top:
Big thanks to my buddy Aron for loaning me the kerosene heater!
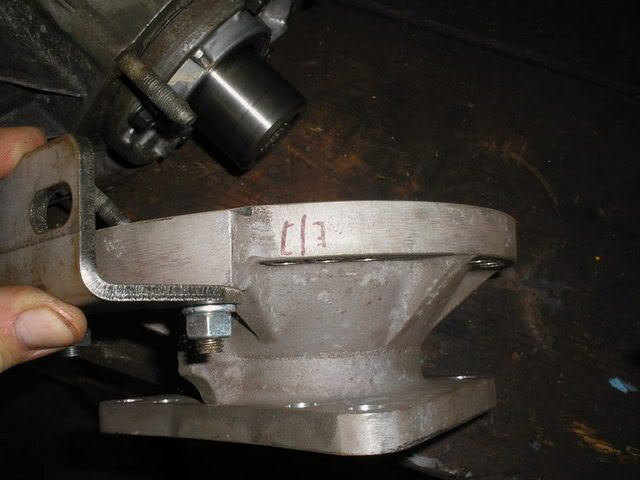
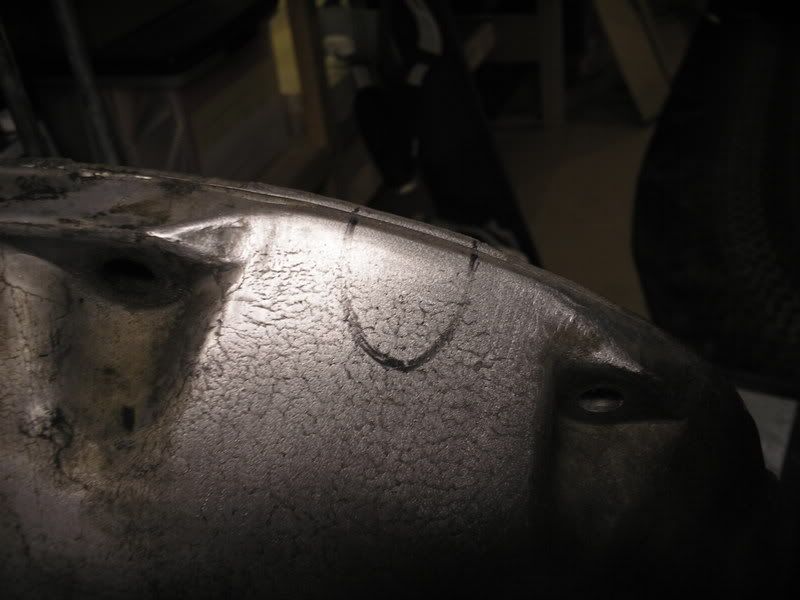
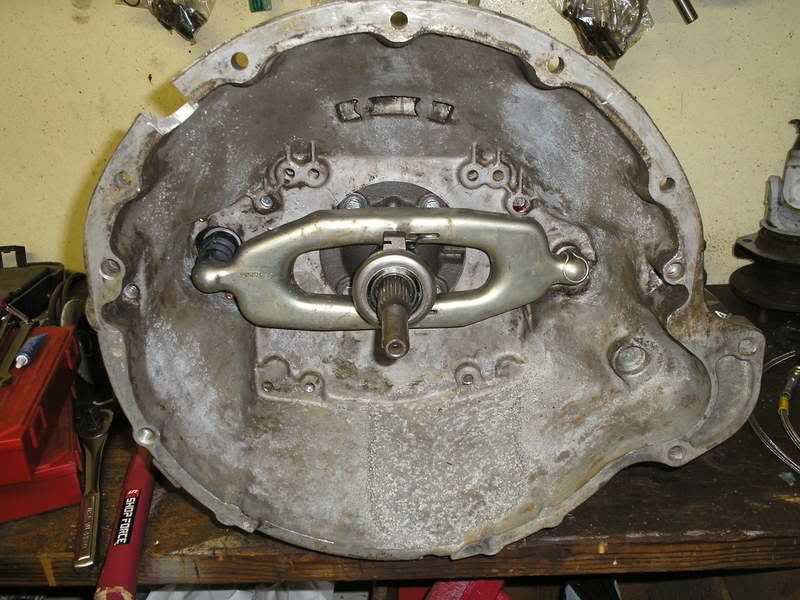
Notice the notch for the CPS (crankshaft position sensor) on the stock 46RH bellhousing, there is no notch on the 435 bellhousing...yet...
marked:
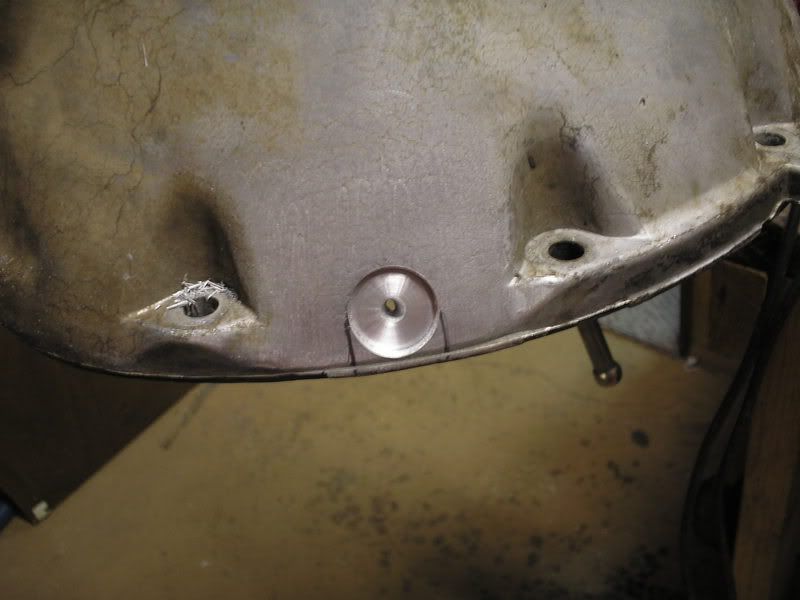
1/4 way through...
CPS notch cut, bearing retainer on, throwout bearing, release arm, and slave cylinder installed:
Last edited by EMTimZJ; 12-19-2006 at 03:32 PM.
 12-19-2006, 03:22 PM
Looking good man.
Keep up the good work.
Dirk
12-19-2006, 03:25 PM
Looks good Tim.
12-19-2006, 03:31 PM
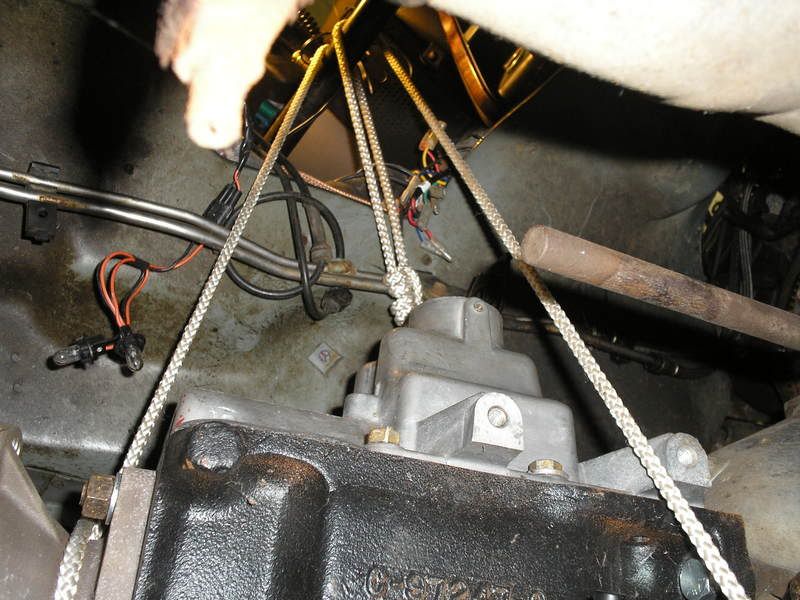
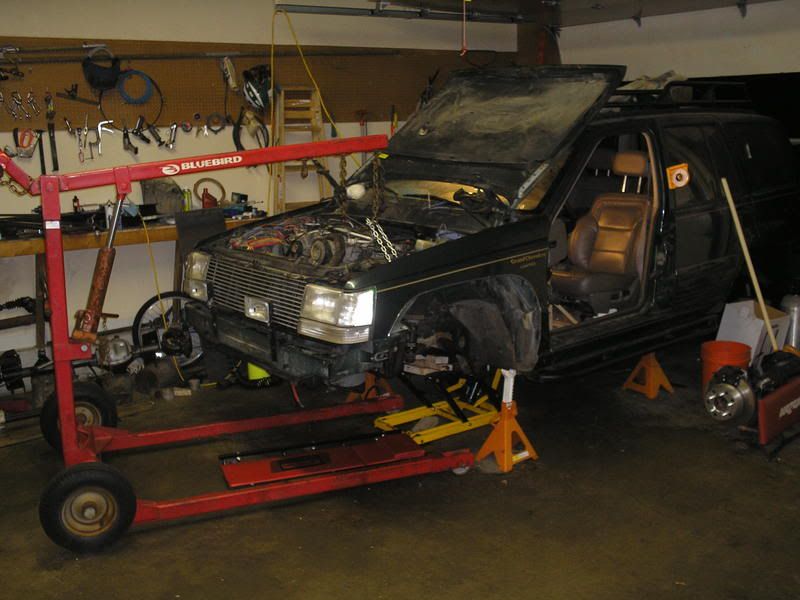
The trans was too tall to set on the ATV jack and then be slid under the ZJ, so I put it on the creeper to get it under the ZJ and then hoisted it onto the ATV jack.
Keep in mind I am trying to do this by myself, lifting that 435 around under the vehicle is a pain!
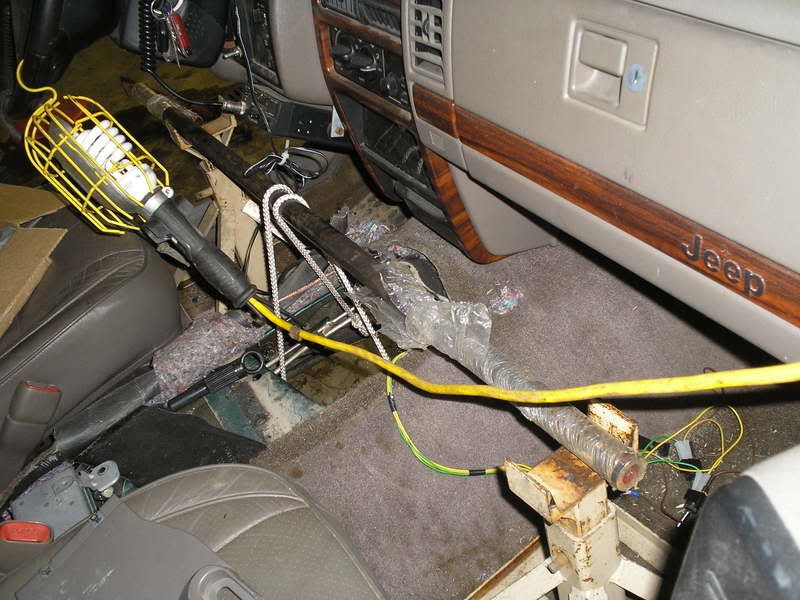
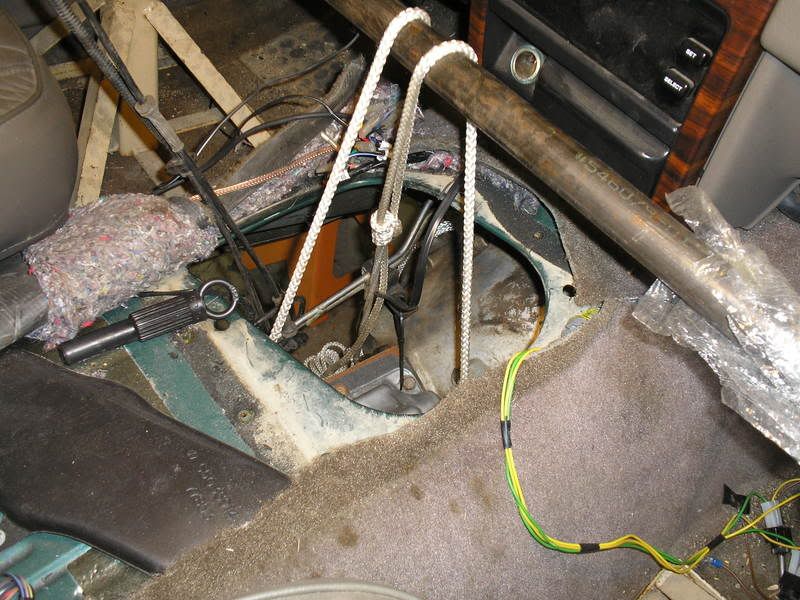
I rigged some rope to the trans from inside the ZJ down through the hole:
On the inside were two jack stands with a piece of DOM running between:
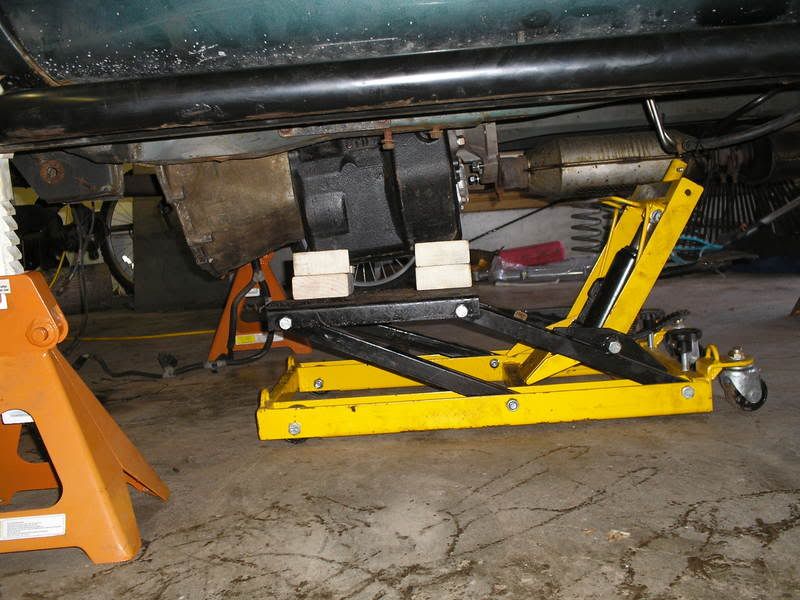
This way I was able to go back and forth raising it one notch at a time until I could slide the ATV jack underneath:
Much easier to manuver this thing now!
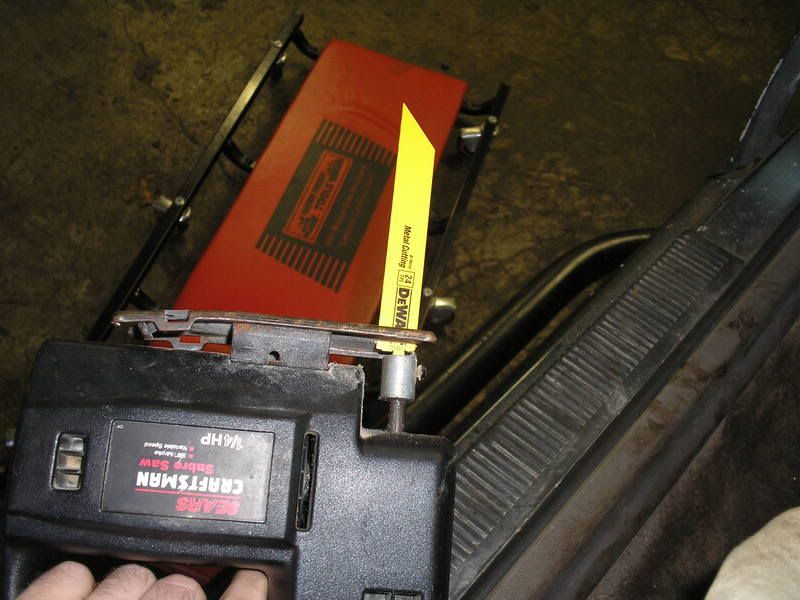
Had to cut a bit to get enough room for the top cover to clear:
Last edited by EMTimZJ; 12-19-2006 at 03:34 PM.
12-20-2006, 12:41 AM
absolutely amazing..

 12-20-2006, 03:01 PM
Tim,
This is a project and a half!!! Can't wait to hear it's up and running!
Hope to see ya soon!
If I lived about 500 miles closer, I'd be your gofer.
Phil
12-21-2006, 11:52 PM
Thanks for the encouragement! Phil, well get out on the trail soon!
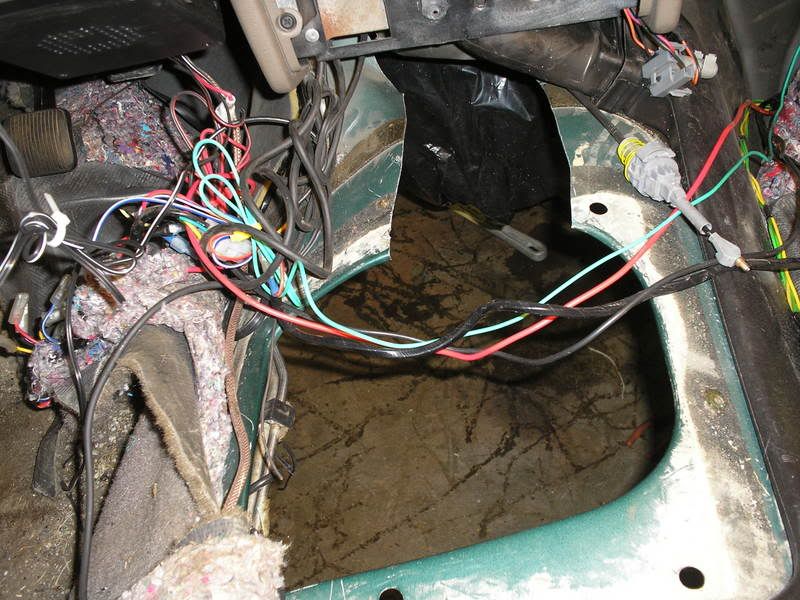
Tunnel cut shot from the top:
So this was a little red-neck, but I could not find the reciprocating saw (sawzall) ANYWHERE. I have not seen it around in years, but I had a brand new package of blades from who knows where so go figure. I rigged a recip blade to fit the jig saw and it actually worked great. The proper jig saw blades were too short for these cuts:
The result:
Getting the trans to mate to the engine was pretty tough. Im by no means master mechanic so for some I am sure this is a breeze. Anyway, laugh at me if you must, but they are now mounted together! I got an engine hoist (Aron, thanks again!) and pulled the engine forward and dropped it down a little. This allowed more room to get at the bellhousing bolts (five of them) across the top, and actually get the angles right for the input shaft to slide in. Huge thanks to my buddy John for helping me get this accomplished, what a night and day difference it makes with two people! Oh yeah, and Johns wrenching skills >>> my wrenching skills
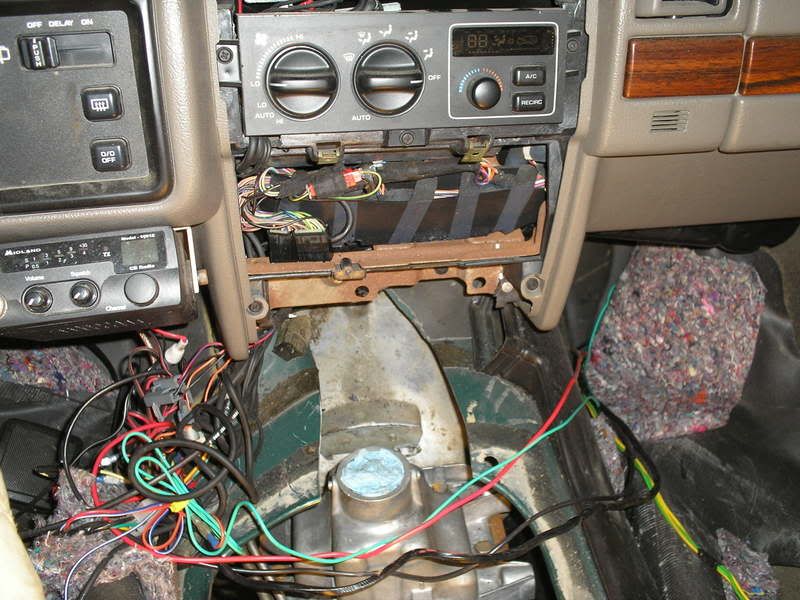
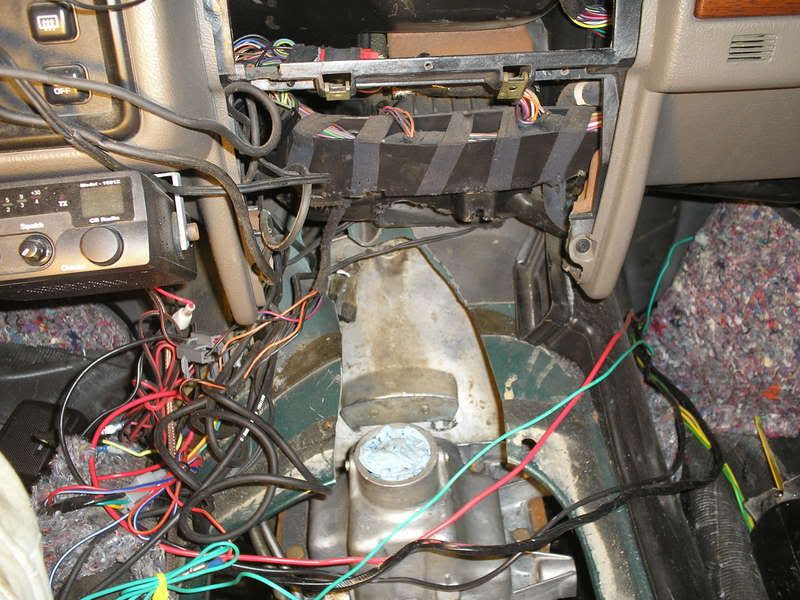
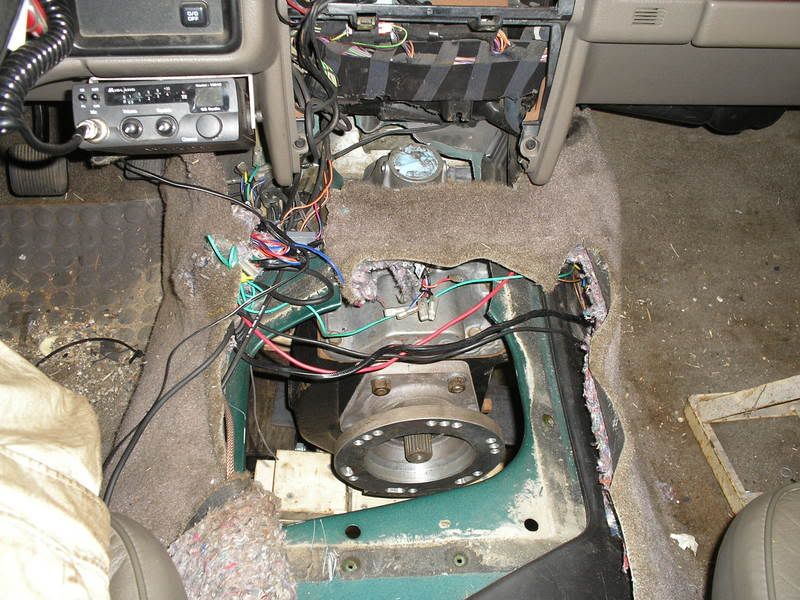
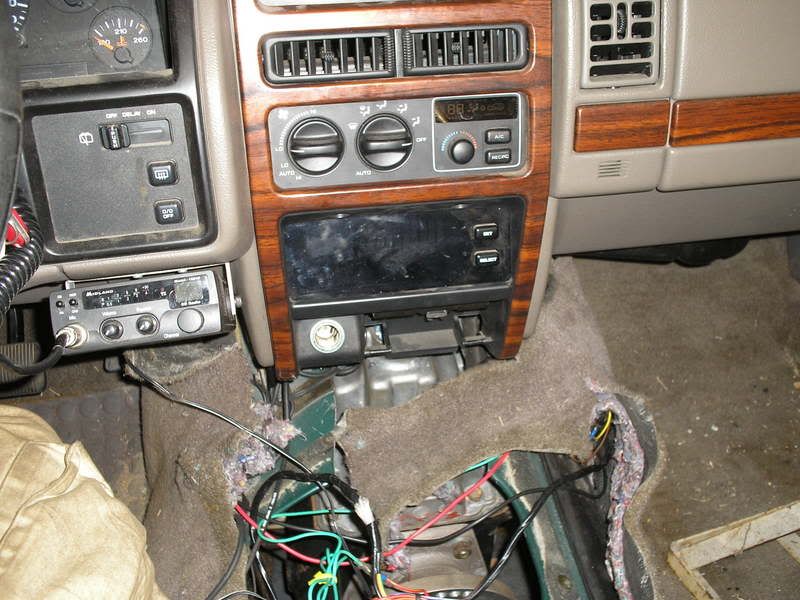
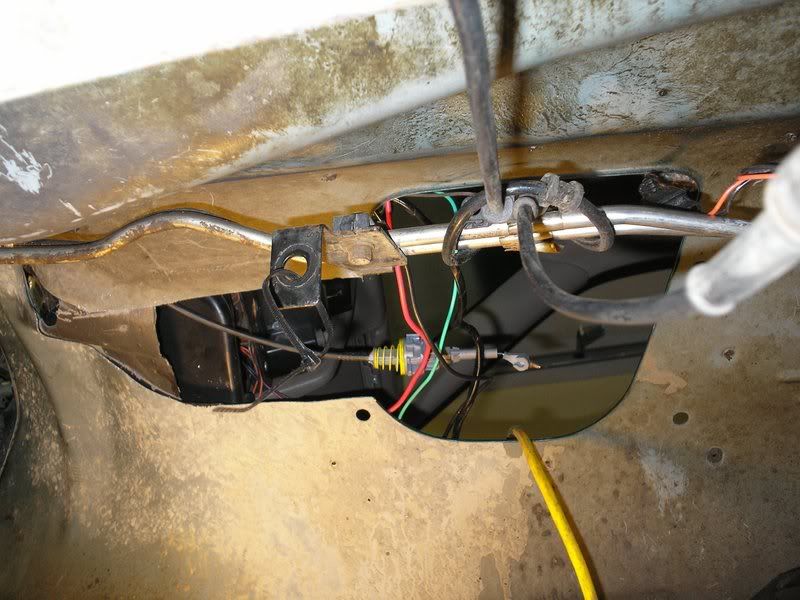
With the engine mounted back in place, this is where the shifter column comes up through the floor.
Center console pieces back in place just like stock right?
Im pretty sure I will lose the VIC, but Im not too concerned.
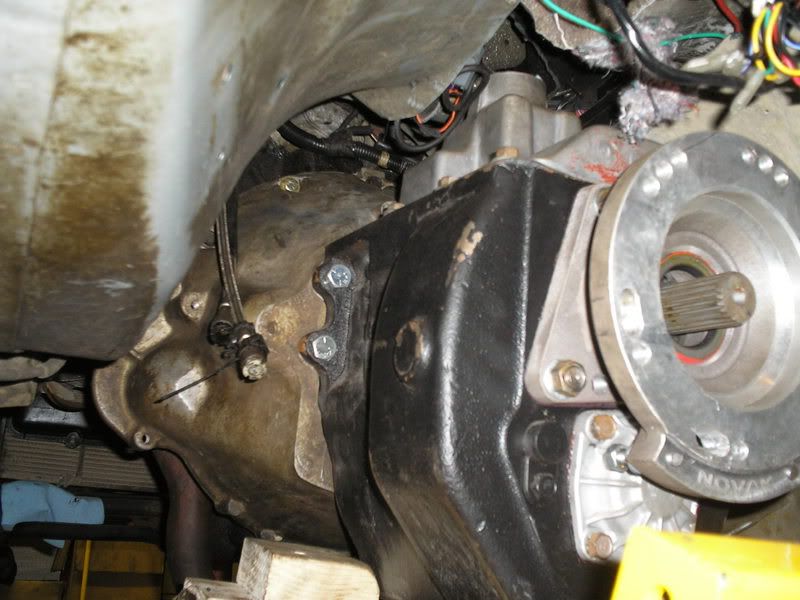
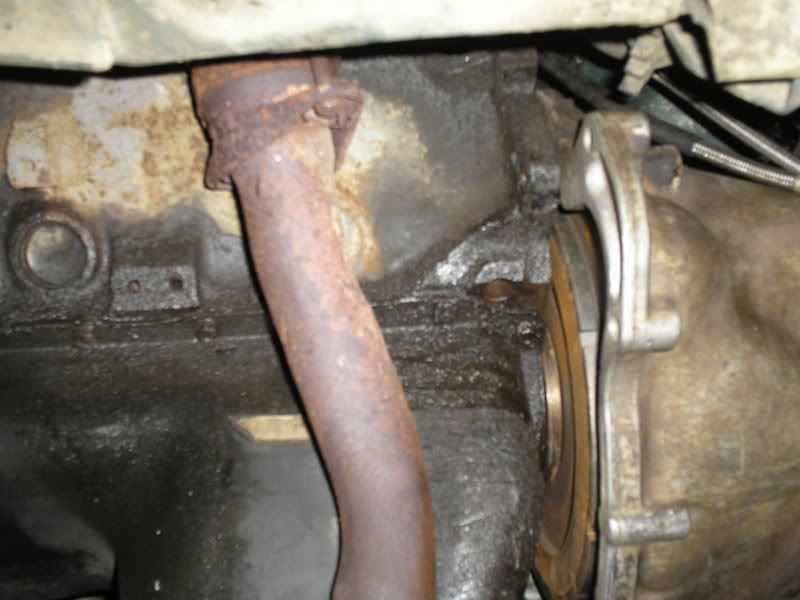
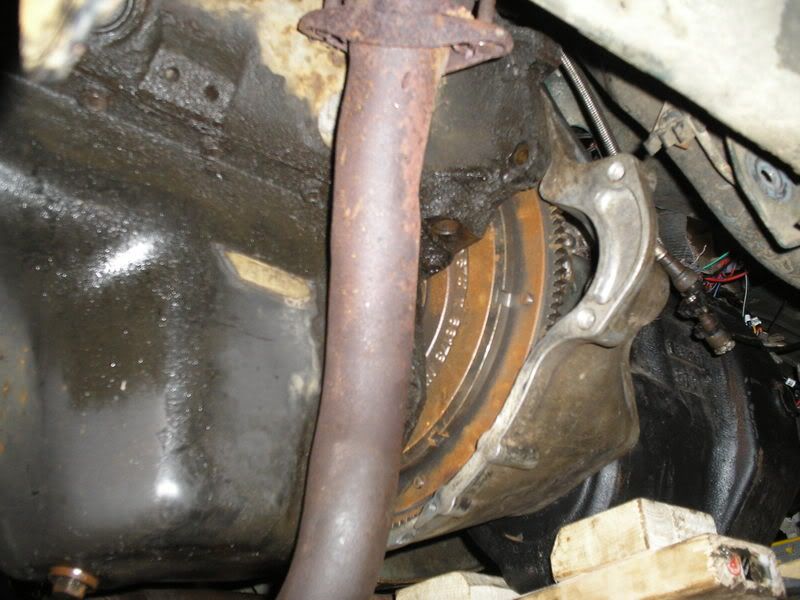
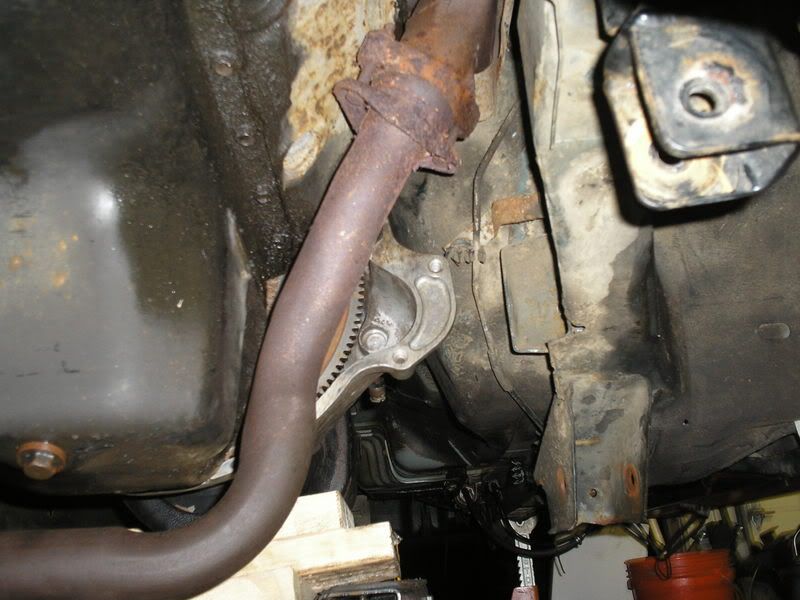
Shot from underneath:
Here are some good pictures showing where the starter will end up, the drivers side down pipe will have to get modified. It is after the flange for the manifold and I should have enough room for re-routing.
-Tim
 12-22-2006, 02:29 AM
Wow Tim.
You sure the shifter will work in that location? I think you have an issue there. Even with a severe bend, I think it will be a challenge.
I'm starting to think a NV3500, 3550, or 4500 would've been easier.
I don't know how much you've got into this install, but a local guy up here got a brand new NV4500 with all required components to install in his YJ for around $1750, shipping was a bear up here, but it was only a few bucks more than getting the necessary adapters, bellhousing and stuff and buying a used 4500 from a junkyard.
Glad to see parts going in the Jeep. I'm sure she's complaining about how long it's been since it's been rolling on it's own wheels.
Keep up the good work.
12-24-2006, 04:24 PM
sweet build.
great to see someone finally swap in a Toy rear.
 12-24-2006, 05:08 PM
Definately an "outside the box" type build.
 12-24-2006, 09:29 PM
Tim I am glad you FINALY got the tranny bolted up. Good thing we have ONE friend (john) who knows what he is doing... becuase aron and I were not much help the night before.
Give me a call on tuesday and let me know how things are going!
12-24-2006, 09:58 PM
NICE WORK! reminds me of some of the work I did on my 4wd swap, I think I really enjoy the build/fabrication the most on our Jeep addiction projects
12-24-2006, 10:25 PM
Anything since getting it bolted?
 12-24-2006, 11:23 PM
I like the old school way of installing the tranny, I have the same device for model T
AW
12-31-2006, 02:33 AM
Thanks for the comments guys, she should be rolling soon!
Woody, yeah the shifter is pretty far forward, but Ill make it work somehow.
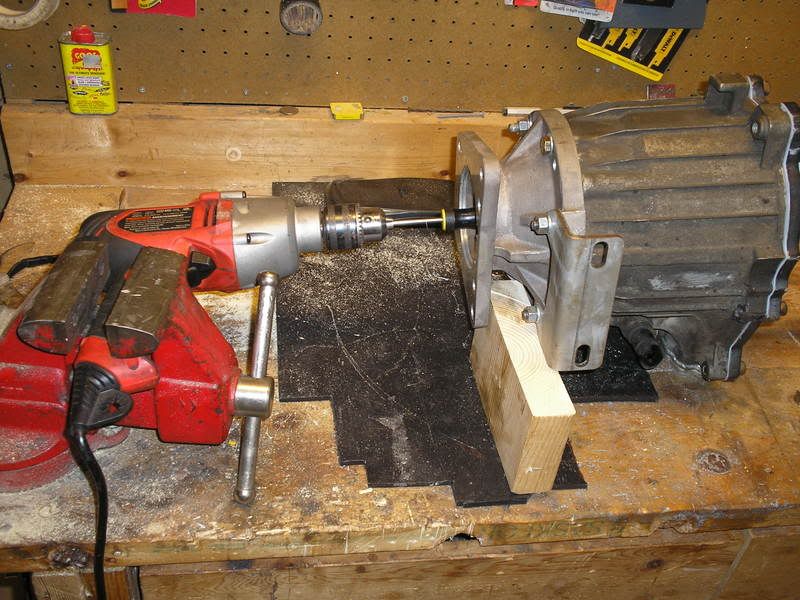
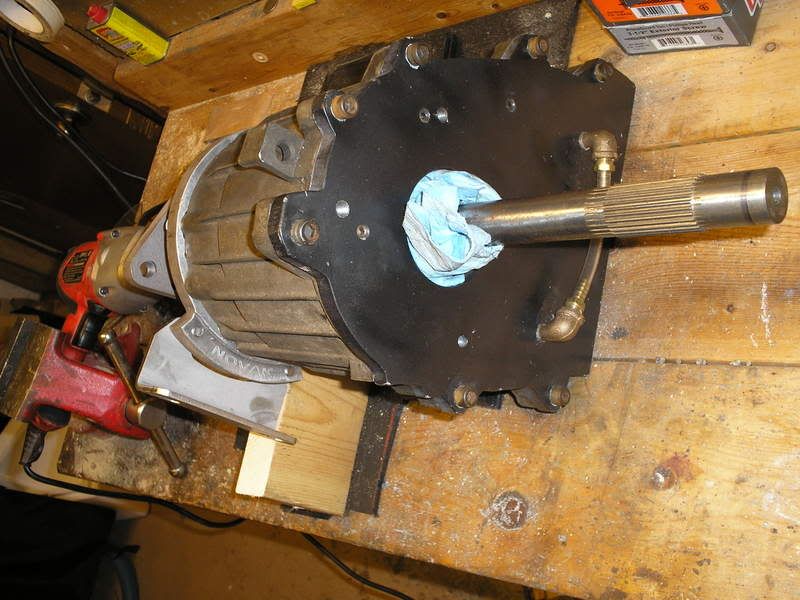
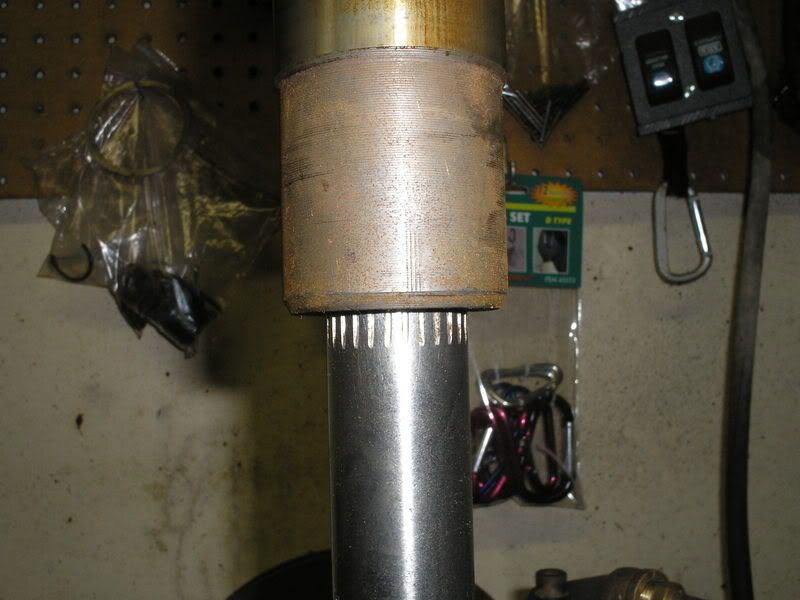
So the mid-shaft joining the D20 and 249 was 3/8 of an inch too long. Yes, I need a real lathe, but this worked just fine! Powered by the drill, I was able to get a square cut while it was spinning.
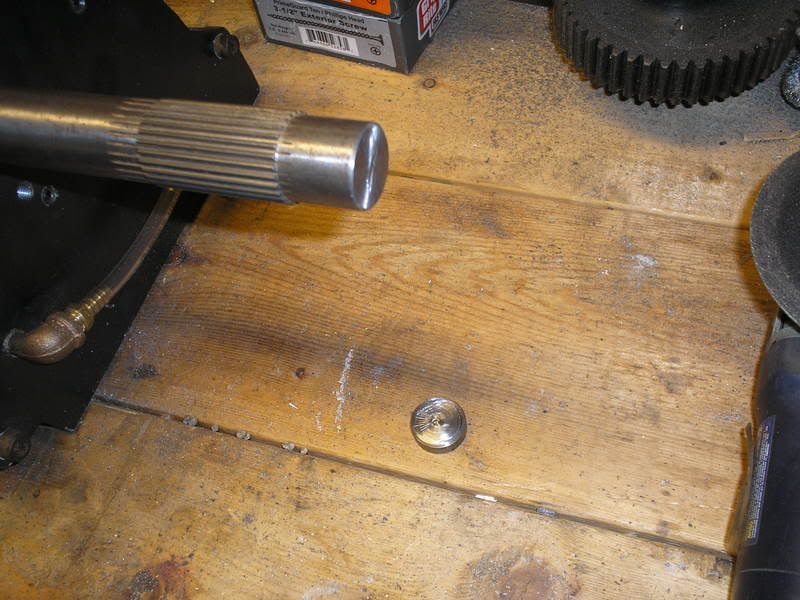
All finished!
Yes, I went pretty slow and Im sure it did not get above 900 degF to alter the heat treatment.
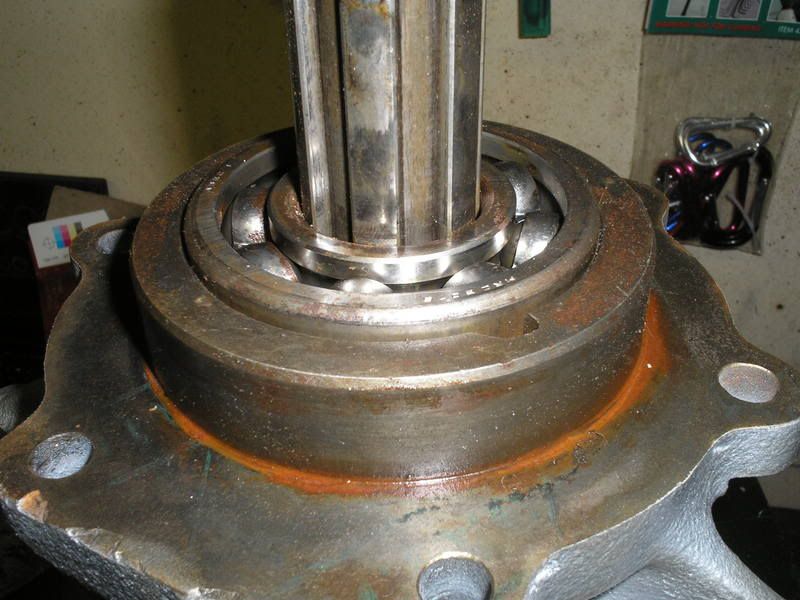
Before, the D20 input bottomed out on the mid shaft and could not seat fully in the intermediate housing.
After the cut, it seats perfectly!
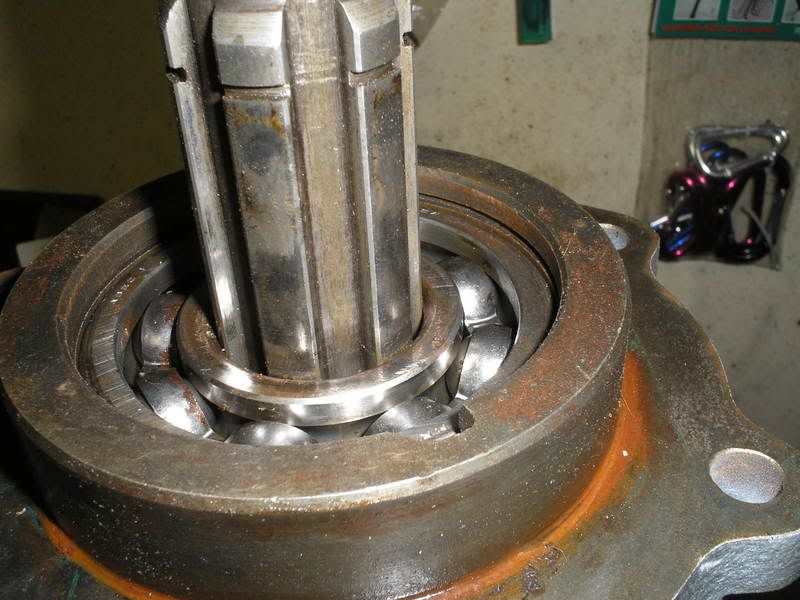
Spline engagement just perfect after the cut:
12-31-2006, 02:41 AM
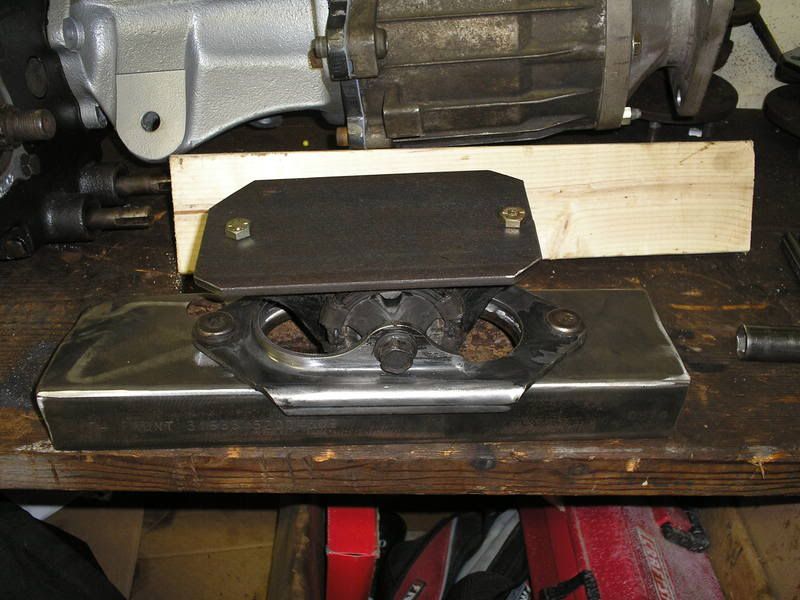
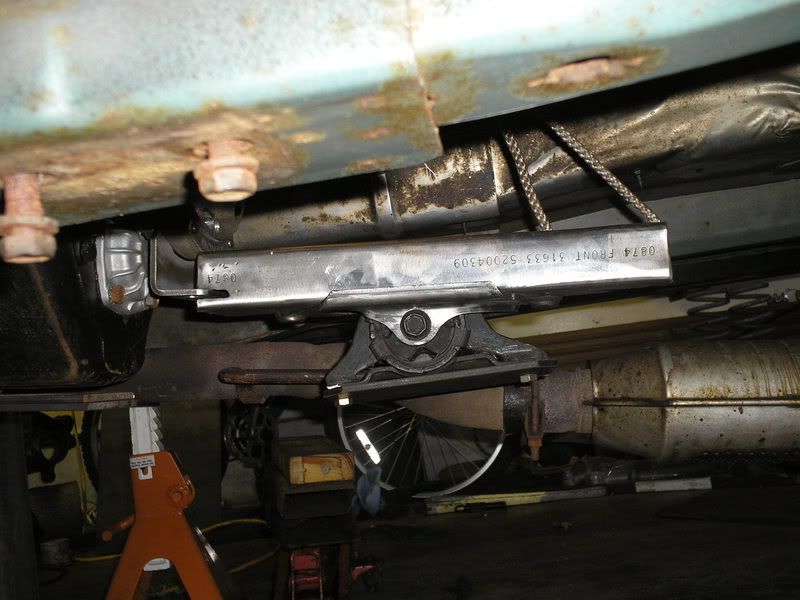
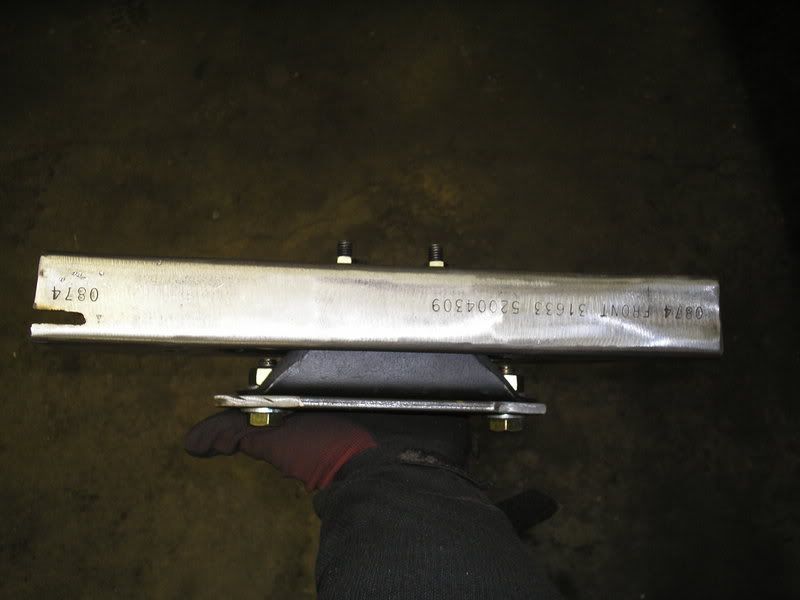
I started on the new cross member and transmission support. At first I tried to use the old ZJ rubber mount and bracket just because it was sitting there, but it ended up being too tall.
It would just hang down too low:
I ran to Napa and purchased a different mount (PN 620-1091) and this will work much better:
This will make more sense when I have the finished support and cross member, but basically it is hard mounting to the rear of the transmission (on the Novak adapter) and the intermediate housing of the D20. This way that long combo will be supported nicely instead of just at one end.

 12-31-2006, 05:30 AM
Very nice progress
| « Previous Thread | Next Thread » |
| Thread Information |
Users Browsing this ThreadThere are currently 1 users browsing this thread. (0 members and 1 guests) |