|
|


 04-17-2006, 01:38 PM
This write up covers the necessary internal modifications that can be done to an Early Bronco (EB) Dana 20 (D20) T-Shift transfer case.
Some Quick Facts:
Driver side drop
Cast Iron, all gear driven
2.46:1 low range (T-shift 1966-1972) 2.34:1 low range (J-shift 1973-1977)
Fixed yokes
Can be used in any mode in any gear range after modifications are complete
Rear wheel only high / low. 4x4 high / low. Front wheel only high / low.
NOTE: this is not the same Dana 20 found in CJ’s!
The J-shift case requires no internal modifications.
I had very few instructions so I ended up disassembling a little more than what was needed. So if you see some parts missing or removed that do not need to be, just keep that in mind.
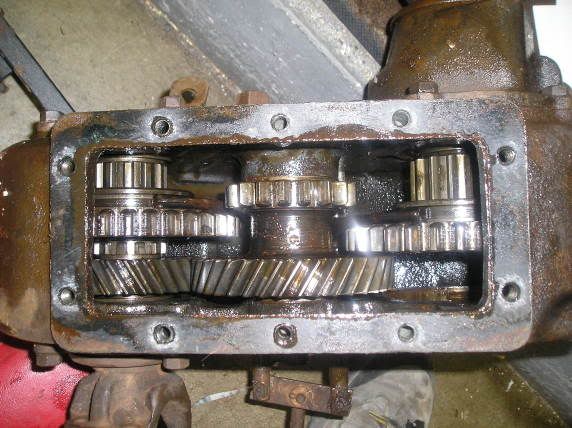
Start by removing input gear, inspection plate, and tail cone. Drive the tail cone out from the inside out. Collect the 13 needle bearings!
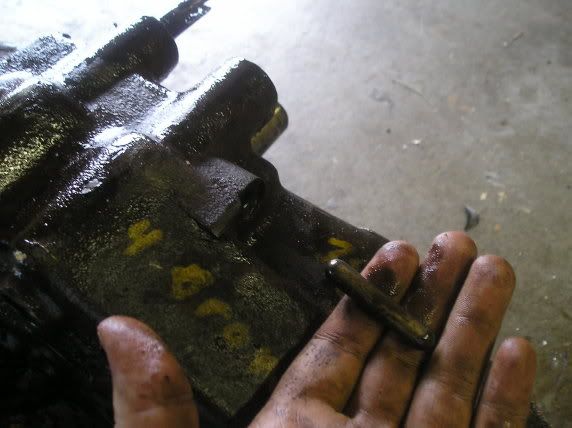
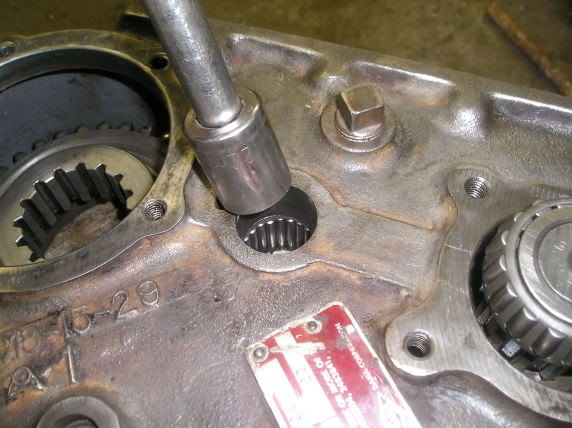
There is a retaining tab that holds the idler gear shaft in place (center of transfer case). Remove tab, apply as much penetrating oil as possible and start driving out the pin. I used a 22mm socket on a 10” extension and a 4lbs hammer. After the first inch or so you will see the first set of needle bearings. When you can, start pulling them out with a magnet. There are two sets of 24 each (total of 48) so do not lose them!
Once the idler shaft is driven out enough you can remove the idler drive gear.
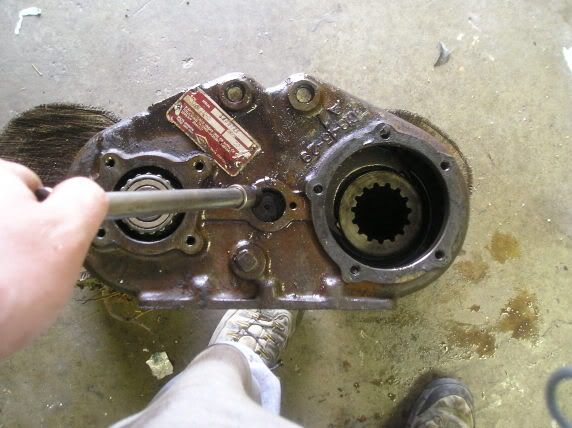
Now there is enough room to get at the set screws that connect the shift forks to the shift rails. The set screws are 3/16 hex.
The shift rail/fork for the rear is easy and very accessible.
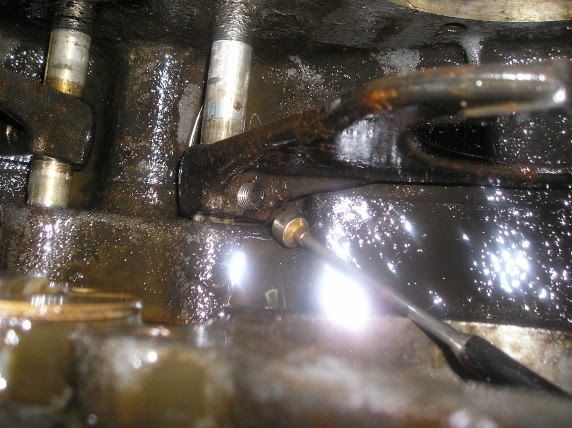
Remove set screw (inside of case) and detent ball and spring (outside of case on either side of the shift rails) and you can slide the rear shift rail out the front.
Tip the case; knock on it with the hammer and one of the interlock pins will slide out the same hole as the detent ball and spring.
Illustration of the interlock pins and their location (labeled “rods” in the diagram).
Photo from classicbroncos.com
Same procedure for the front shift rail/fork. This set screw is a little tougher to get to but it is possible. Slide out shift rail and remove the second interlock pin.
Reinstall shift rails / set screws / and detent ball and springs.
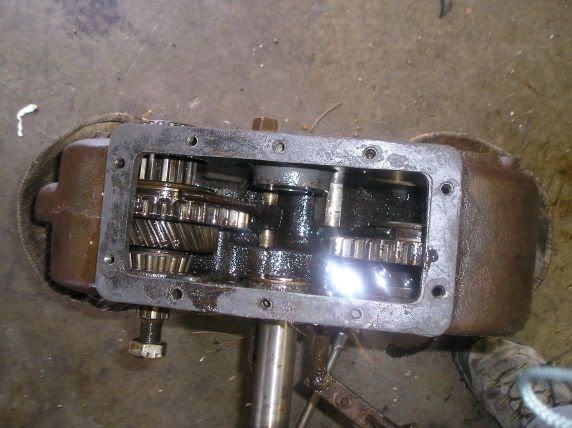
Place intermediate thrust washers (brass looking), idler drive gear, and drive the idler shaft part way back in. Now you need to reinstall the 48 needle bearings.
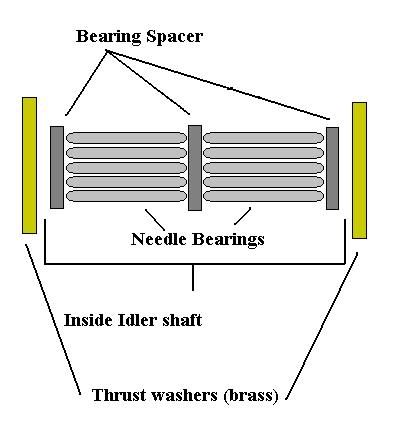
**Before you put the idler drive gear in place, you must install the 3 needle bearing spacers inside the idler gear before driving the idler shaft in place.**
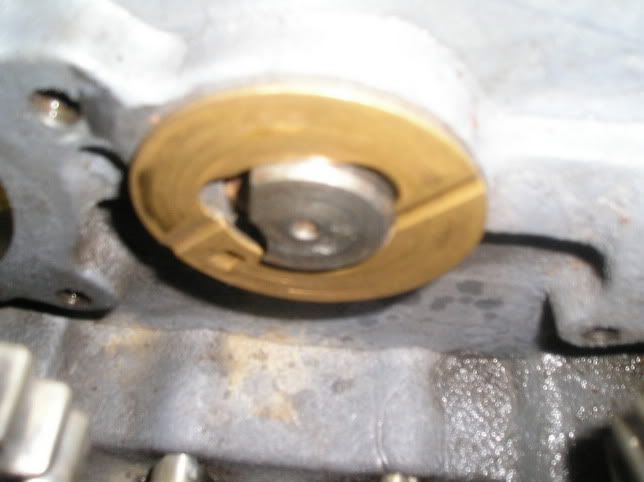
Brass Thrust washer in place. There is a notch in the case that matches up to a raised portion on the washer, it will only install correctly in one way.
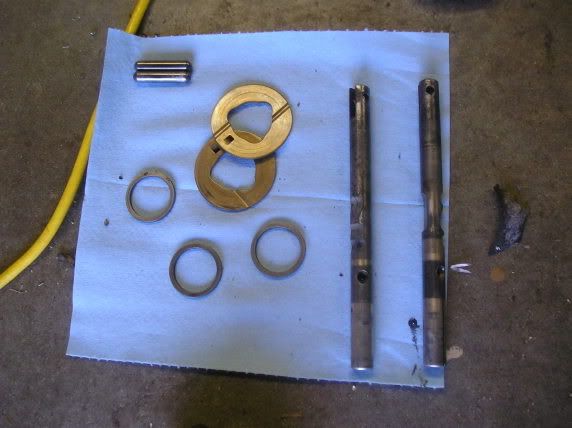
2 removed interlock pin in top left, 2 brass thrust washers in center, three bearing spacers, 2 shift rails.
Picture I made to illustrate how the bearing spacers and needle bearings install inside the idler gear.
I used the same 22mm socket and extension to help the needle bearings from collapsing while I hammered the idler shaft back into position.
A diagram of all the T-shift parts and locations.
Photo from broncograveyard.com
Hope this helps anyone as they attempt to twin stick their EB Dana 20 T-shifts. I searched and searched and could not find any real write ups, so mallcrawlin has the only one so far!
-Tim
Last edited by EMTimZJ; 04-17-2006 at 08:18 PM.

 04-17-2006, 02:15 PM
How is the strength of this case compared to a flipped D300??
04-17-2006, 03:34 PM
In stock form, a stock V8 and 35's is just fine. Once you go further, upgrade the stock 10 spline output to the 32 spline output. The weak point is the same as a stock Dana 300. Both are upgradeable to the 32 spline output that the Atlas uses. Just like the D300, the D20 is stronger than the 231.
-Tim
04-17-2006, 03:35 PM
Is there 4:1 gears avaliable for the D20? Are they easier and cheaper to find than a D300?
04-17-2006, 04:49 PM
3.15:1 can be found here:
http://www.wildhorses4x4.com/41.asp
and 4:86:1 can be found here:
http://www.bcbroncos.com/drivetrain1.html
Mine was easy. I ordered it from a junkyard for $75 when I scoured all the local yards and found nothing. I used www.car-part.com
-Tim
 04-18-2006, 12:21 AM
I think you just gave dirk another thing the wrap his mind in good job.

 04-18-2006, 11:55 PM
Nice job...
Finished pics????

 04-19-2006, 12:46 AM
nice!!!!
the d20 is a very underrated t-case with the jeep guy's.
04-19-2006, 10:46 AM
Thanks for the replies.
I have the first coat of paint on it, and when I have the painted portions assembled I'll post up some pictures. It will probably be Saturday or Sunday.
I will also put up what I will use for the twin-sticks and linkage. Which I have not decided 100% on.
-Tim
04-23-2006, 12:30 PM
Ok, it's sunday...where are these pics?!
04-23-2006, 10:43 PM
Charlie, good thinking. Here ya go.
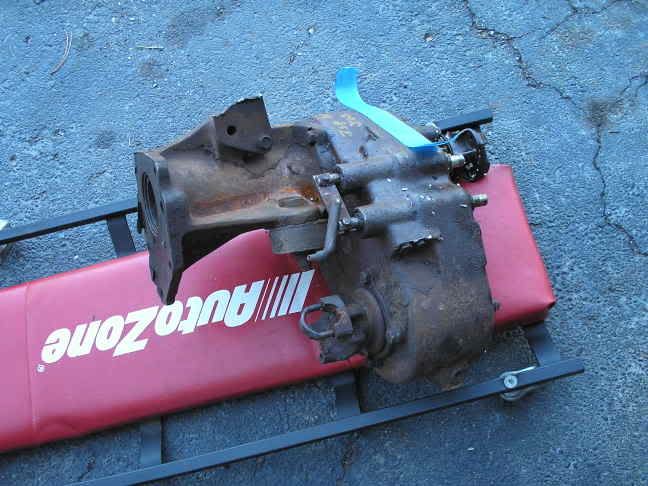
Before:
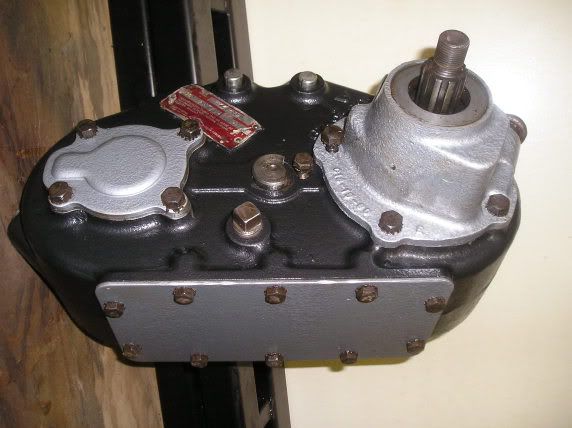
After:
Enjoy.
-Tim
 04-24-2006, 12:22 AM
Tim... thats fucking pretty!
| « Previous Thread | Next Thread » |
| Thread Information |
Users Browsing this ThreadThere are currently 1 users browsing this thread. (0 members and 1 guests) |