|
|


 03-18-2009, 03:29 AM
shit dude... i hate those wire wheels.... always im picking freaking wires out of my arms after using them... that why i have a face shield, even if i dont hardly use it when grinding or cutting, but always with the wire wheel!!


 03-18-2009, 08:55 PM
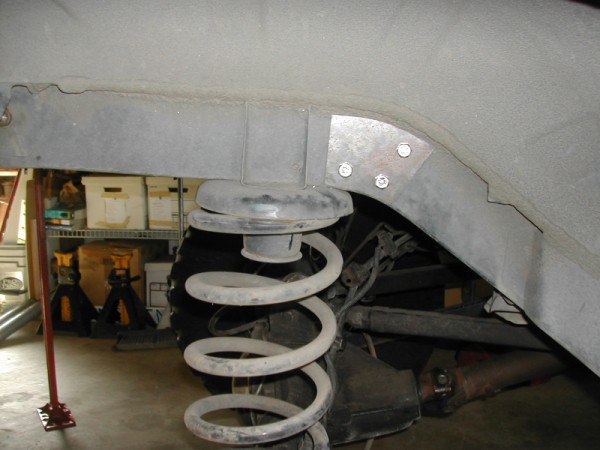
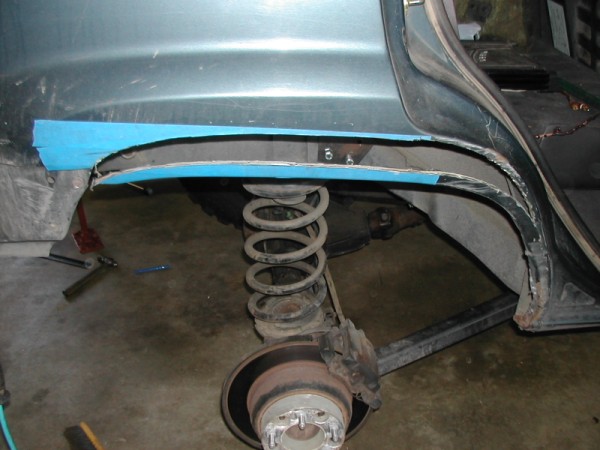
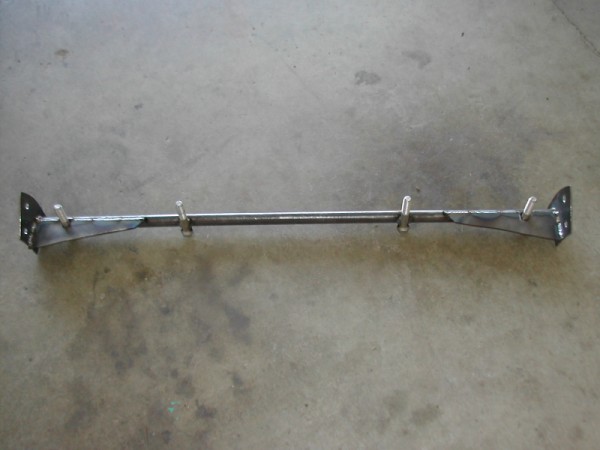
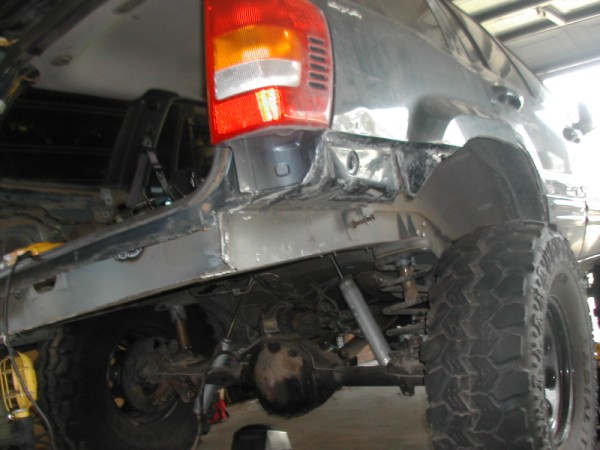
Alright got most of the shock crossmember done, need to build some lower shock mounts and gusset this little guy.
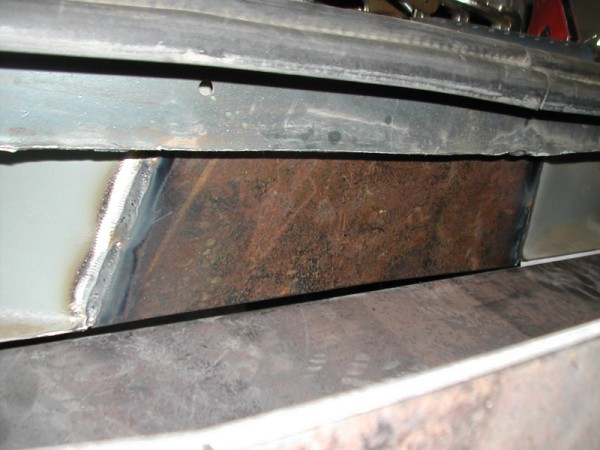
Sandwiched the frame rail
Inside the frame rail
out and welded up
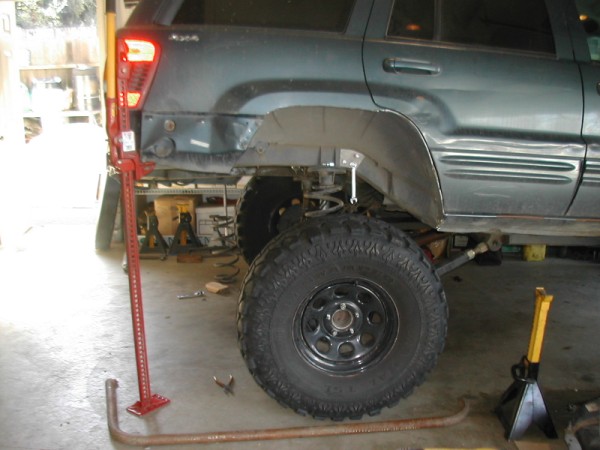
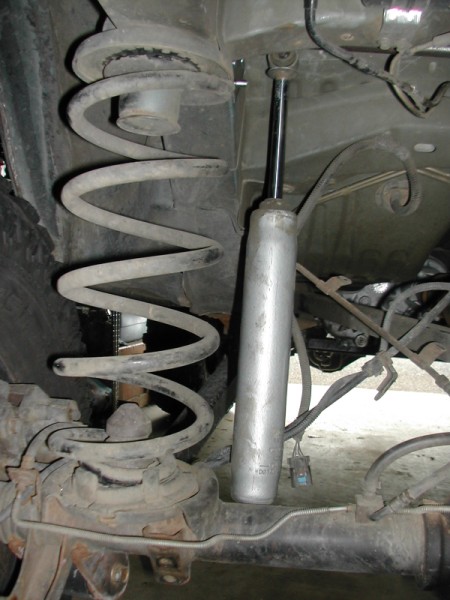
New shock location. I like it. I'm going to be adding bump stop extensions to the top posts and limiting straps, but I should be dropping the coil off the top perch by a few inches with this setup if I wish.
03-19-2009, 08:56 PM
More pics that I didn't put up:
Going to be gusseted
Mmmmm
 03-20-2009, 11:39 AM
Why not make the crossmember out of square and run the bolt through the square?Originally Posted by AgitatedPancake

03-20-2009, 11:43 AM
Because this is what i had haha. I dont think ill be having any problems with it once i give it a little support
03-21-2009, 02:21 PM
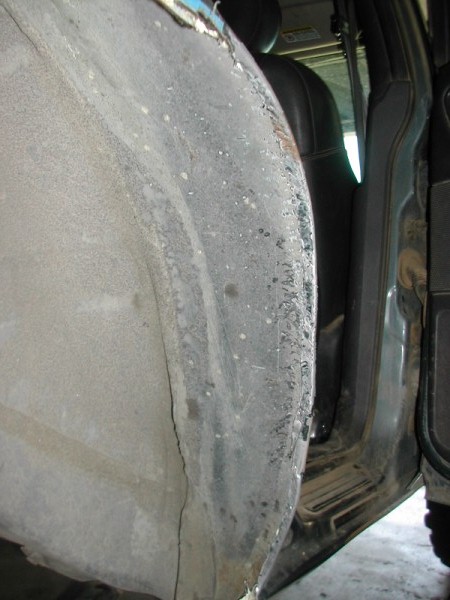
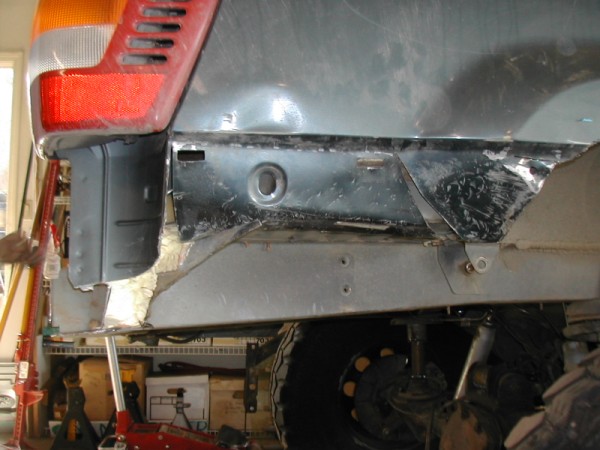
Did some more yesterday, finally cut out the pass side fender. I kinda wung it on this one knowing how I would change what I did on the last one, this one turned out WAY better. I left probably 3/8" in the front near the door, I took a body hammer and pounded the inner fender in then folded the outer fender over it. A little sealer, maybe some welding and paint and it will be golden.
I also left a little extra down at the rocker that I was able to work up into place to seal off the rocker.
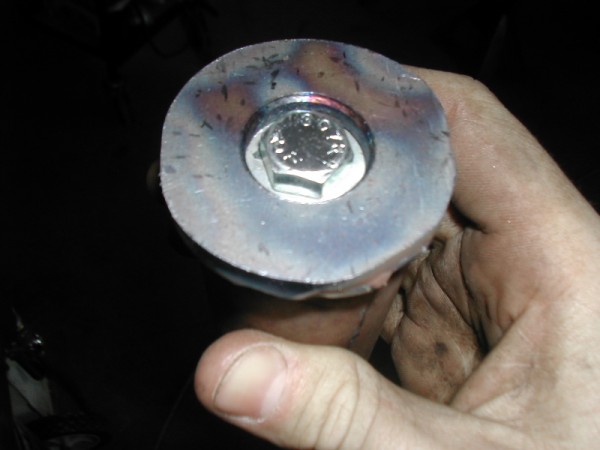
My new bumpstop extensions.
I welded a nut to the factory bump pad
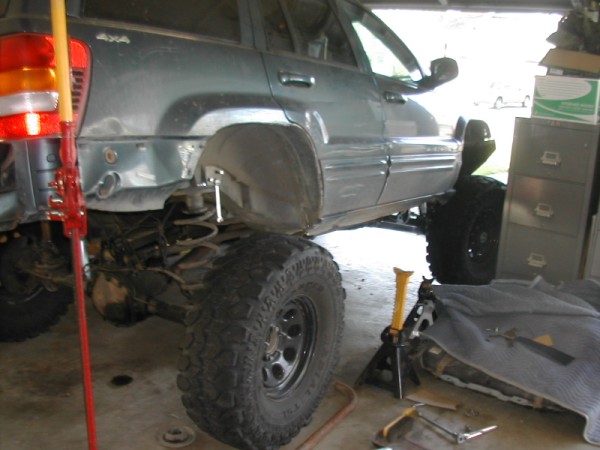
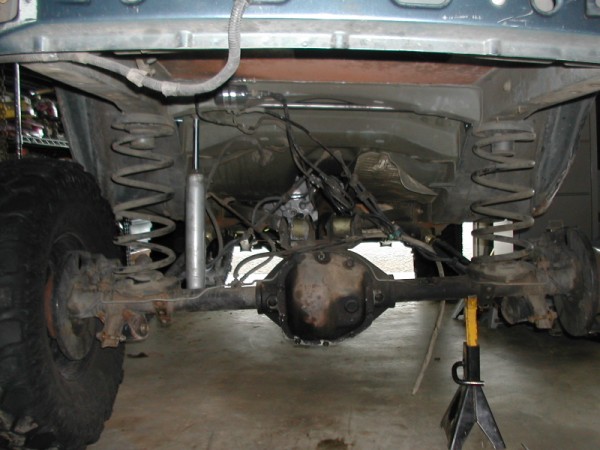
I should be able to get at least this much with the new shock location...damn those 35"s are starting to look small haha.
Hardcore garage flexin

Last edited by AgitatedPancake; 03-21-2009 at 03:35 PM.
 03-21-2009, 03:04 PM
Haha, nice....that last pic is the ultimate unlevel garage floor
 03-21-2009, 05:17 PM
I will never complain about my garage being too small ever again.
Great work.... the jeep is looking good!
03-21-2009, 06:41 PM
Thanks man. Yeah the garage is actually a 3 car, I just get the small side =P You cant work on anything where the front end is right now, but out where the rear is I can get it open to work on. With this undertanking I've been really trying to keep my tools organized and my work space clean for pretty much the first time, and I'm LOVIN it.
I felt like a hung over bum today so I didn't do anything.
03-22-2009, 07:23 PM
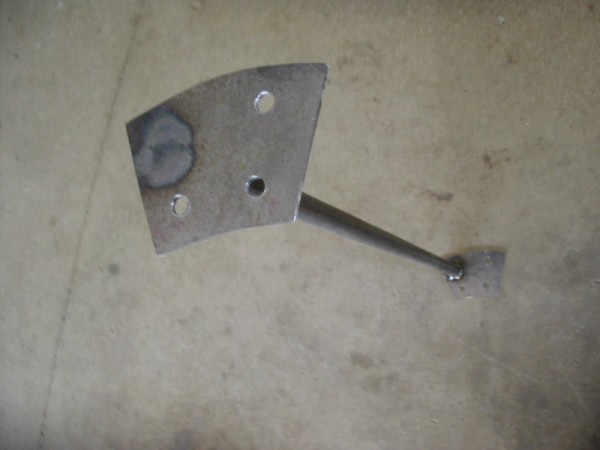
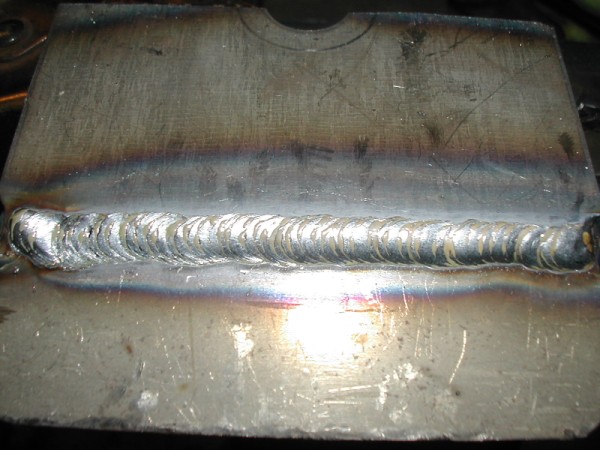
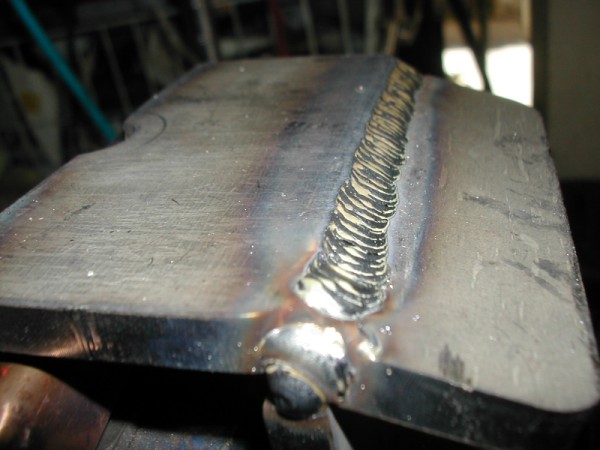
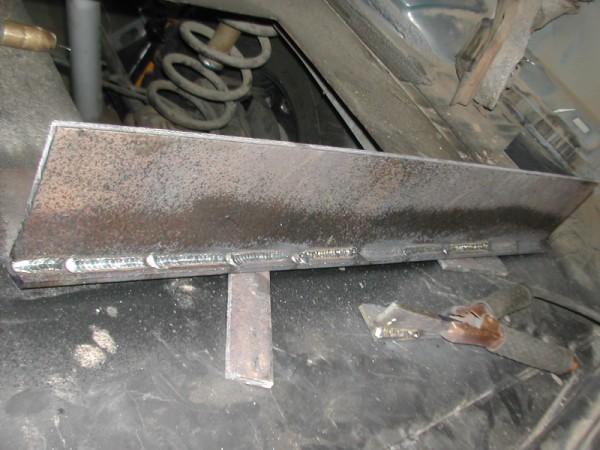
I built the lower shock mounts out of some 1/4" plate today, and built the other bump stop so yeah.
I need more practice
But it looks good from here
And here they are.

03-23-2009, 05:46 PM
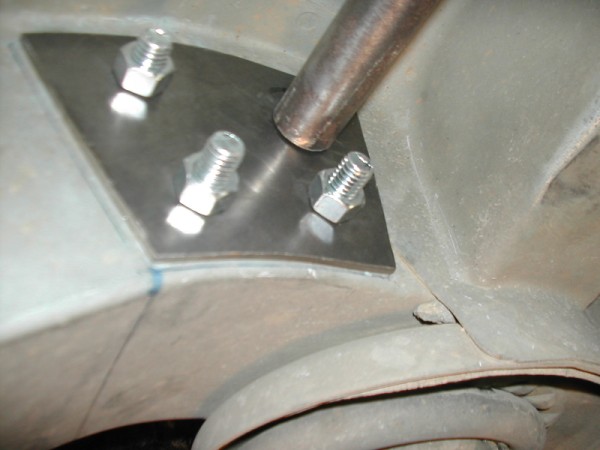
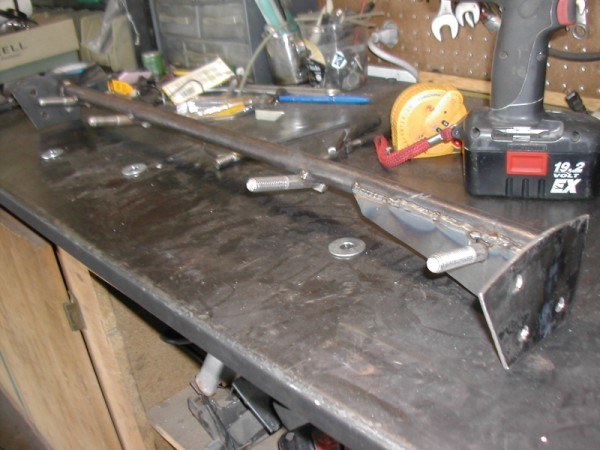
Today I've installed the other bumpstop, added some more mounting locations to the shock crossmember and gusseted it. I think it'll hold up now.
3/16" plate
03-23-2009, 06:21 PM
What are the inner bolts for?
03-23-2009, 07:33 PM
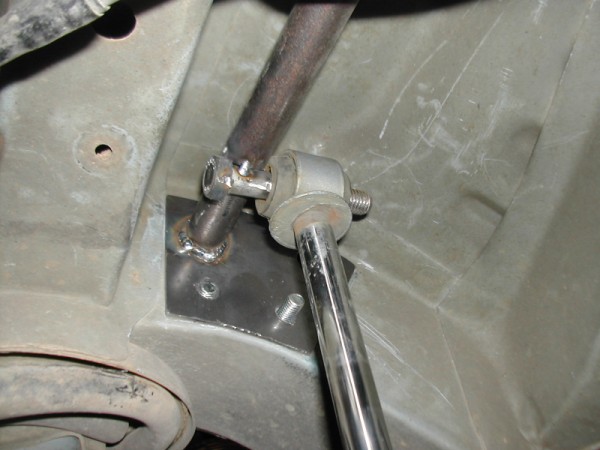
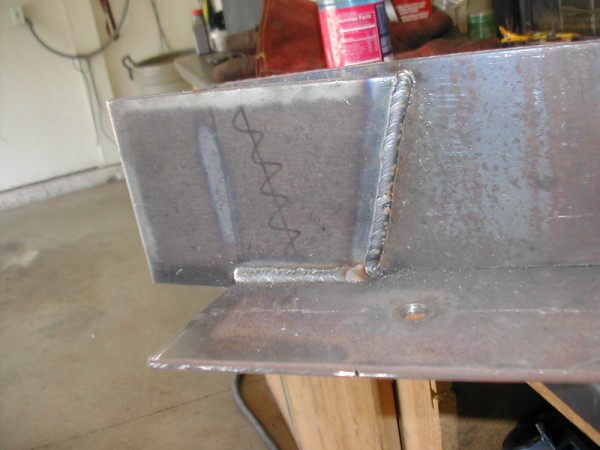
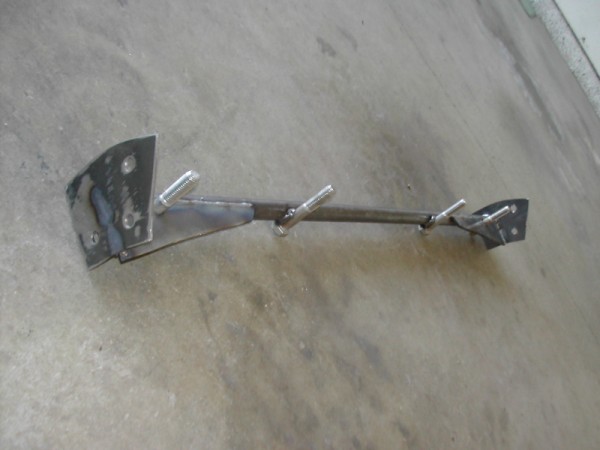
different locations for the shocks to mount, to triangulate them a little or have them vertical.
Heres the example:
Having them towards the outside they are just a TINY bit too long to where even bump stopped the shock would have to mount at the bottom/just below the axle tube not to fully compress, with them slightly triangulated they dont hit at full compression. If I don't like the ride on the street with them this far inboard I can just pull the shock and put it on the outer bolts and do something about my bump stops.
03-25-2009, 06:09 PM
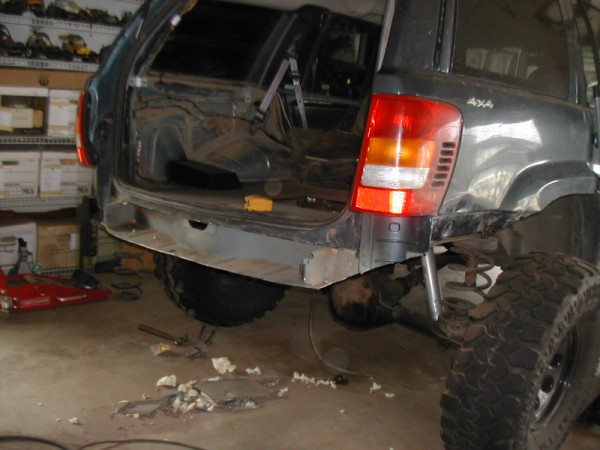
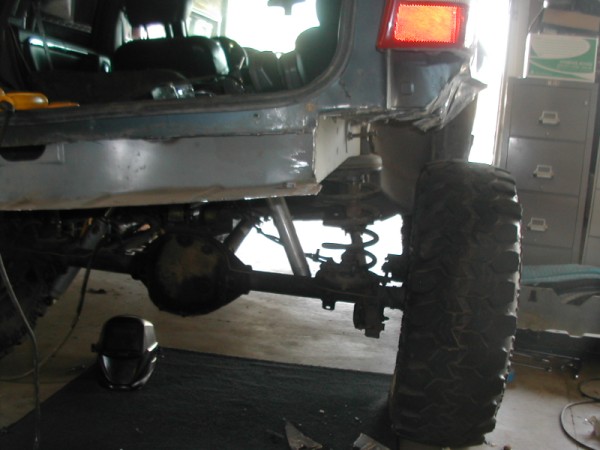
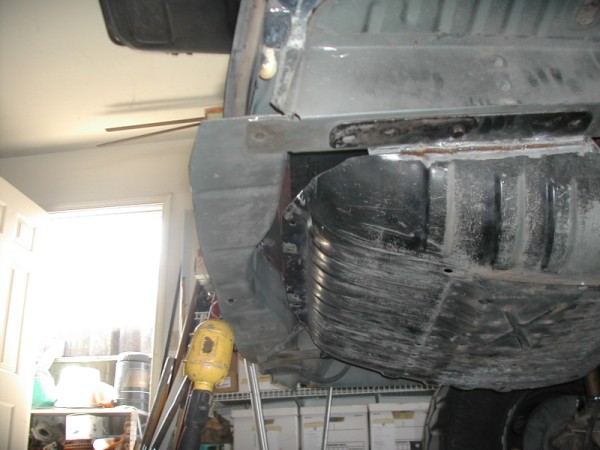
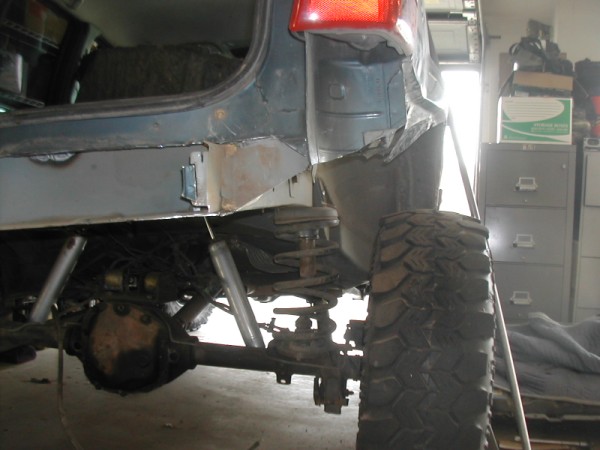
so my camera is beind wierd right now, but I started today pissed off...thats a good way to get yourself in trouble. I cut off that rear "bumper" and started hacking away at all that shit behind the rear tires that kill ground clearance...when I get around to the bumper is should be pimp.
03-25-2009, 08:02 PM
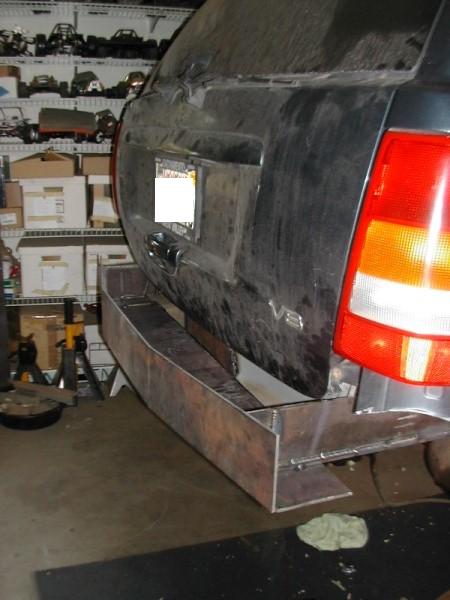
Hmmm
This isn't fully cut out yet, but you can see how high the rear bumper is going to sit, nothing hanging down anymore.
 03-29-2009, 12:29 AM
Than sonbich is turning out really nice; can't wait to see the rear bumper. Keep it up; lifted blue-WJs FTMFW.
03-30-2009, 06:03 PM
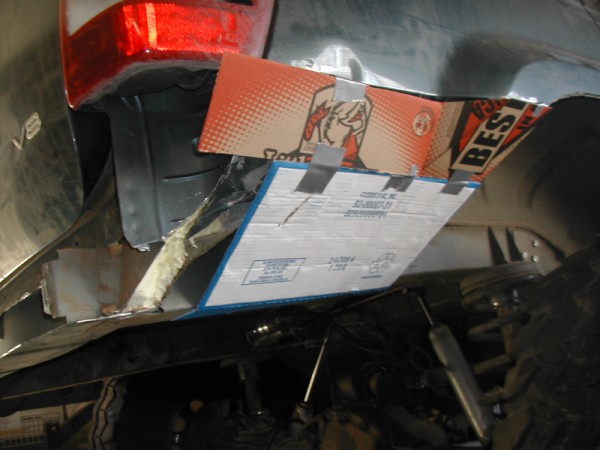
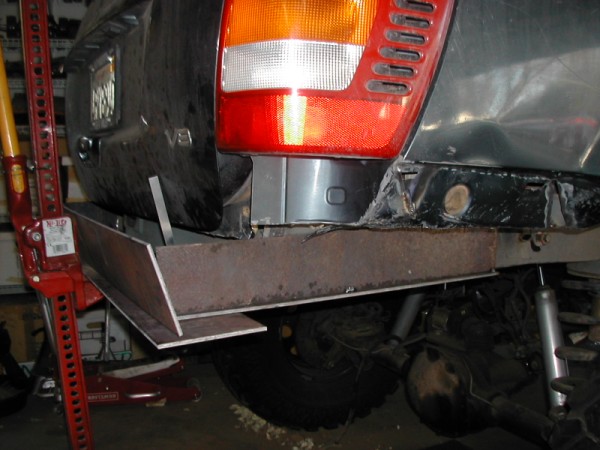
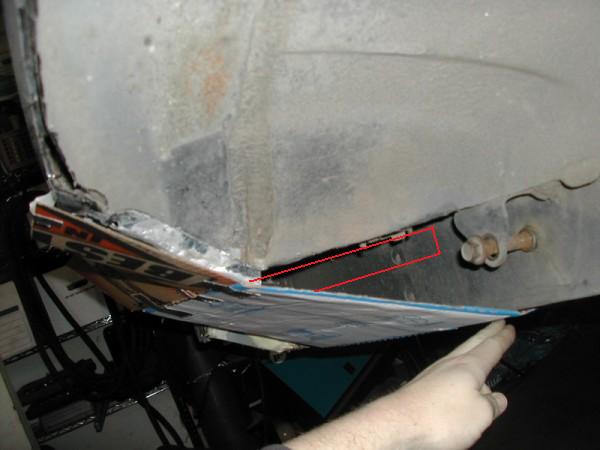
Alright so I'm tinkering with a little mockup for the rear bumper right now, tell me what you guys think! Any input welcome.
I know its hard to see whats going on because of the colors of the cardboard, but yeah.
So I have it sticking out to protect the fender,
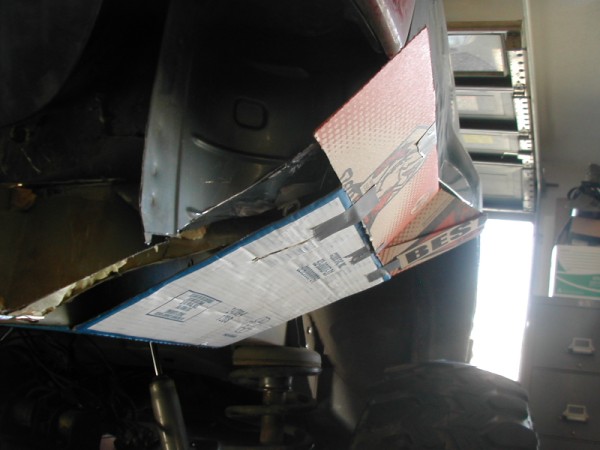
In the second picture, the part that says BES will be on the same plane as the white/blue that goes down to the bottom of the frame rail.
Here you can see the plane differences. I'm not sure how much I like that look, but I just threw it together a couple mins ago. This is where I need input!
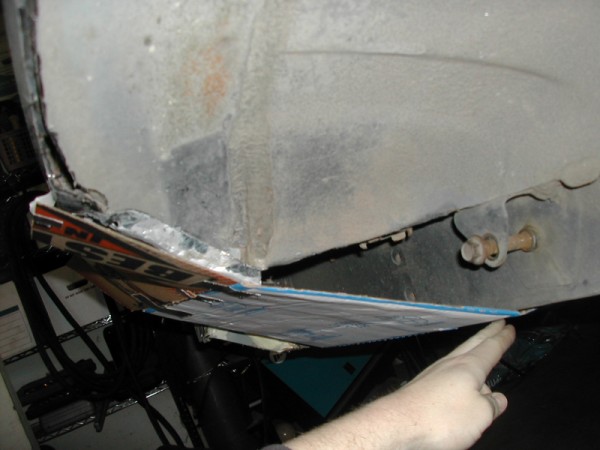
I haven't welded the remnants of that peice to the floorboard so its pushing out, but here you can see how they will be for the final assembly.
For frame attatchments I'm looking at getting some 4x4 angle iron or 4x4 box tube (and cutting it out), so the side of the frame rails have material to weld supports to for the sides.
Example: Go from the angle iron/box out to the sides right on the bottom of the floorboards with 1" square tubing or something.
03-30-2009, 06:33 PM
i like it.. it will give you tons of clearance for sure. the BES part being flat with the blue box will look good i think.. roll with it!
G-
 03-30-2009, 08:57 PM
whats with the date?... its 3/30??
 03-30-2009, 09:40 PM
I've been stuck on the idea that today's the first, I dunno wtf is up with me.
That or I'm posting from the future =P
03-31-2009, 03:49 PM
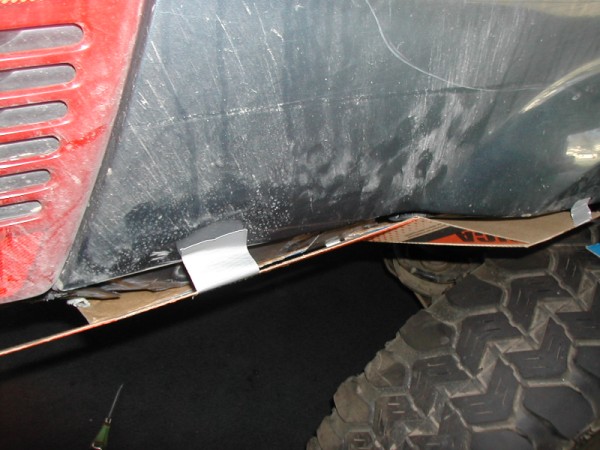
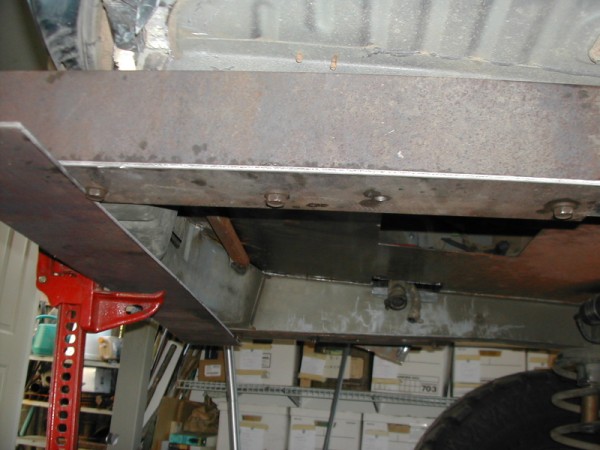
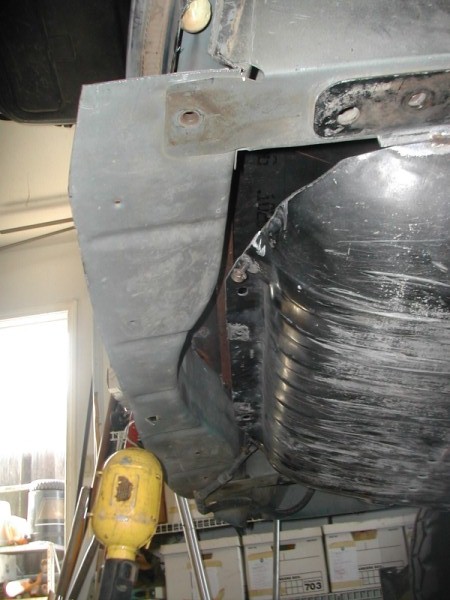
Alright took another look today, and decided things would be much simpler if I chopped up to the floorboards instead of trying to cut all those angles. I'm much happier with the cutting, and its making my mounting solutions easier on me.
New cut:
I put the gas tank skid up to check clearance back there. Its also nice because the bottom of the frame rails are in the same plane as that sheetmetal still hanging off the back, I am literally gunan end up with my mounts going straight back off the framerails into the bottom plate of the bumper.
And now I'm thinking about cutting all of that sheetmetal out that I can, I can gain alot of space in here for storage if I bring the inside of the bumper as close to the gas tank as I can. Yeah, I still want to do a storage bumper, we will see if I can pull it off clean or not.
04-02-2009, 07:09 PM
No pics today, but I did some stuff. I cut the other side to match, welded up the drivers side so those little panels are held in place and the outer body isn't as flimsy anymore. I started taking measurements for how much plate I'm gunna need, then I'll be buying =D
04-05-2009, 08:30 PM
Alright got some plate and started the fab...here are some pics for ya guys.
1/4" plate on the bottom and outside of frame rails.
It will use all the bolts that the hitch and gas tank use. It may be a PITA to install as it and the gas tank have to go at the same time but oh well.
I got my bends started on the rear peice...
And the potential storage area.
It will end up with a little less than this
finish welding the frame rail "L"s.
I got pissed at my welder. I cleaned it all up with a wire wheel on the grinder, welded most of it up then the last 2-3 welds all got bad porosity...I cant figure out why. With the first one I thought it was because of wind so I shut my work area up, then the next one did it as well. I can hear and feel the gas coming out of the nozzle, and I cranked the output up to like 27cfh with no change. This has happened once before and went away on its own. I'm running a miller 180, 220v with .025 wire (I know a little thin for heavy metal like this.) and co2/argon mix.
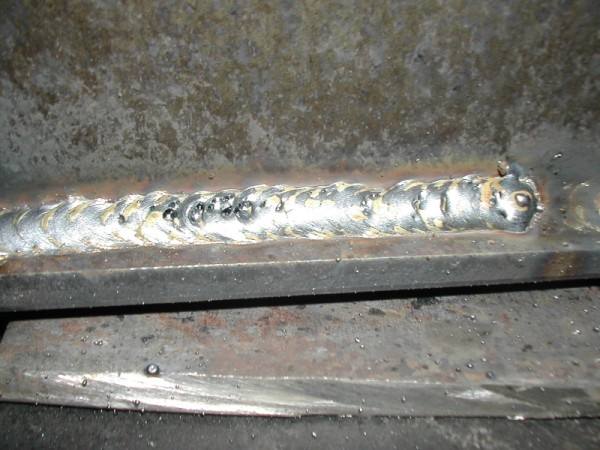
04-06-2009, 02:47 AM
so after that I pretty much quit for the day, but I checked out the welder afterwards. I pulled the nozzle off and found a little spatter in a couple of the gas holes. Not completely blocking or anything, but I cleaned it up and it seemed to fix the problem.
04-06-2009, 07:37 PM
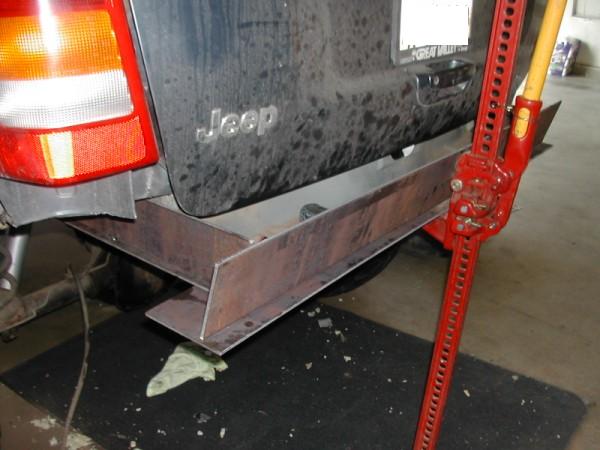
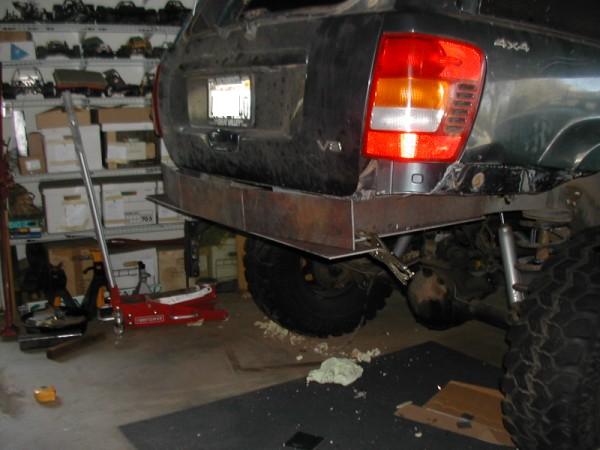
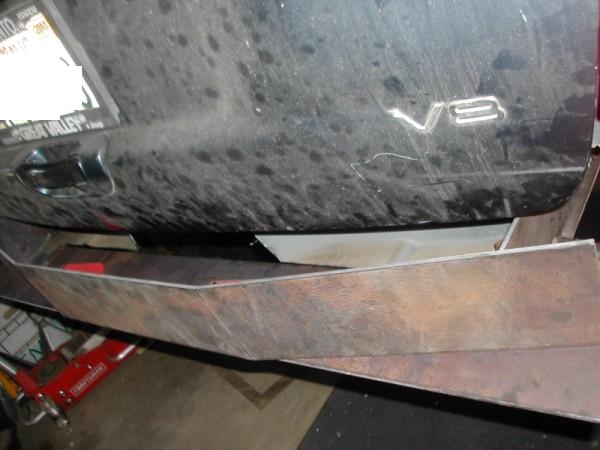
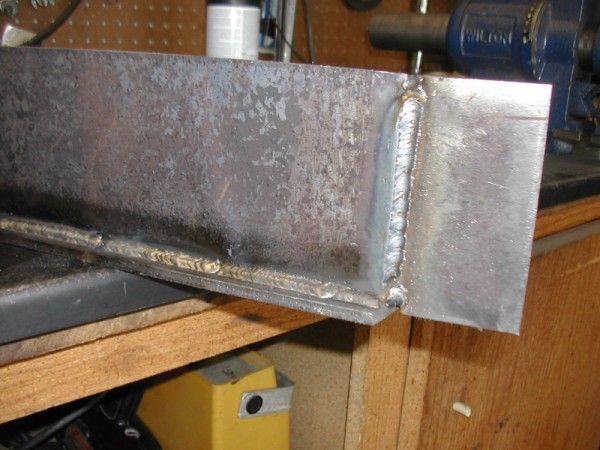
Got some more done today
I had to extend my L's, I didn't like how close the bumper was to the body.
Back side
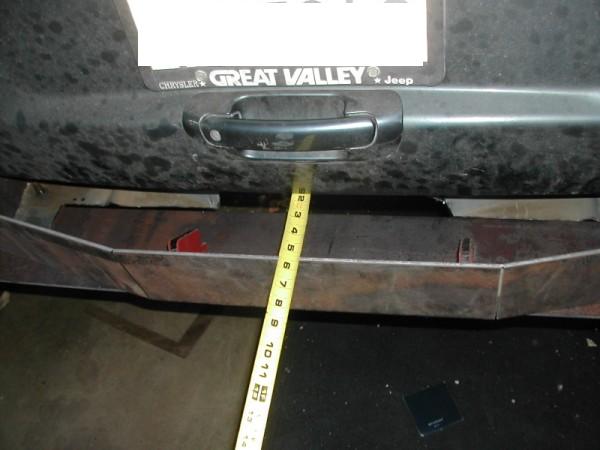
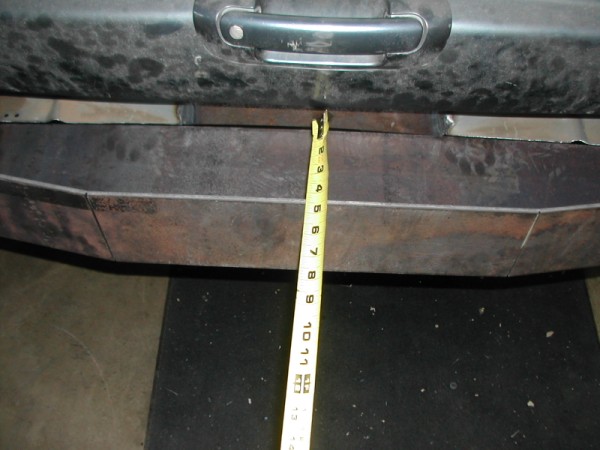
around 4.5" to the bottom of the tailgate. I wanted it to stick out to where if I backed into something or got rammed my tailgate wouldn't take the hit.
In the storage area, I cut out a part that was intrusive and welded in a peice of plate. The area is about 42" wide, 7-8" deep and 4" tall...I can carry pretty much whatever I want back here (though I don't have the hitch in yet...)
| « Previous Thread | Next Thread » |
| Thread Information |
Users Browsing this ThreadThere are currently 3 users browsing this thread. (0 members and 3 guests) |