|
|


 05-08-2018, 12:24 AM
Welp onto day 4. Did not get a whole lot done. Went to 4 separate stores, none of which have the gradual drill bit. Its gotta be wider than 9/16th on top and 11/16th on the bottom. What are they even called even? Its not a step bit, I know that. Any ideas?
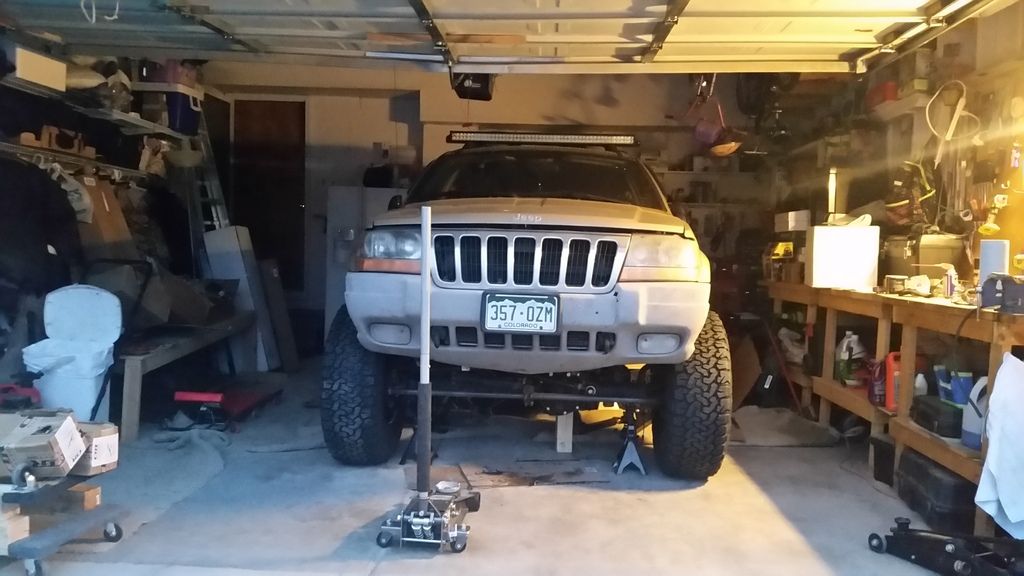
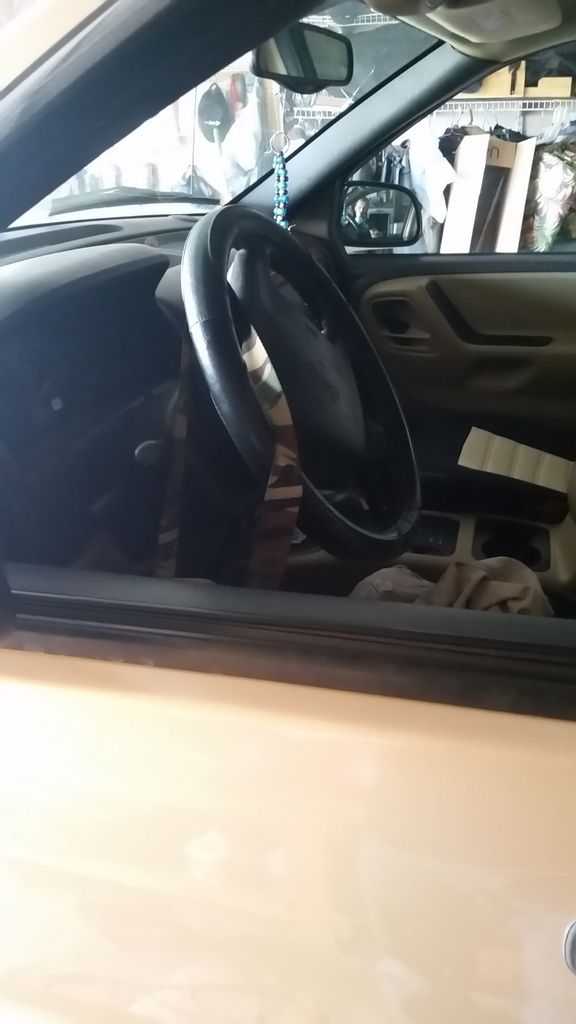
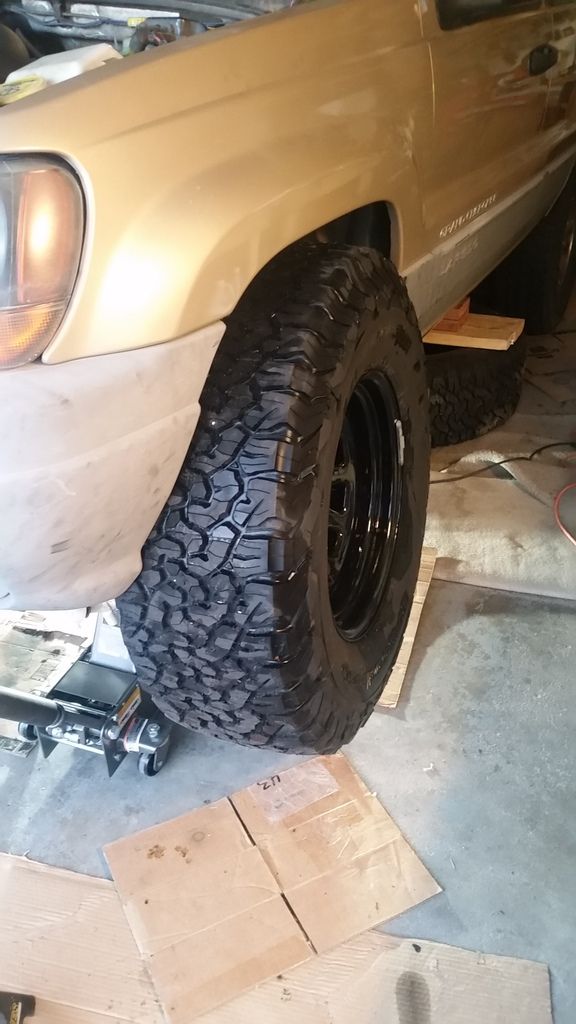
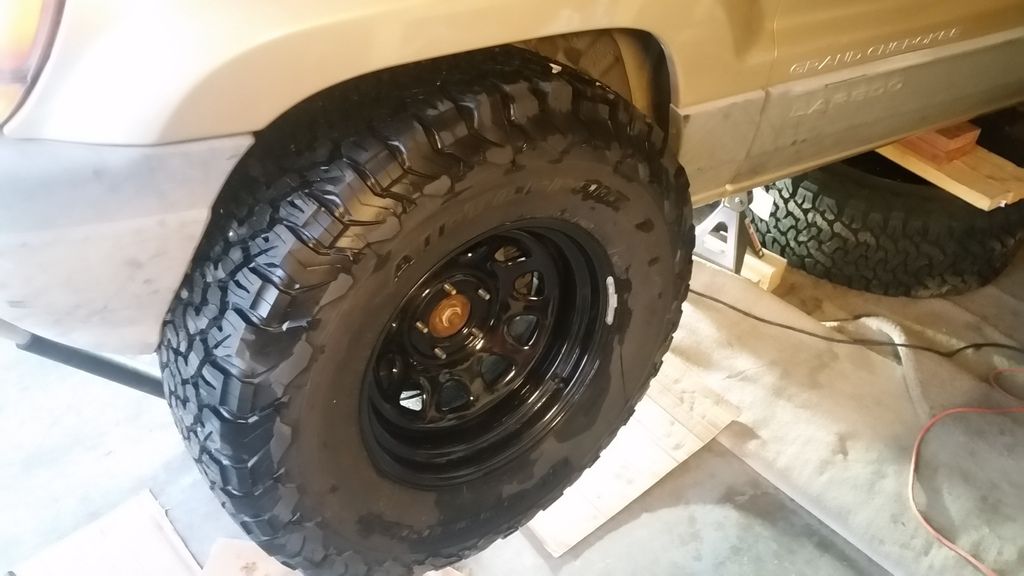
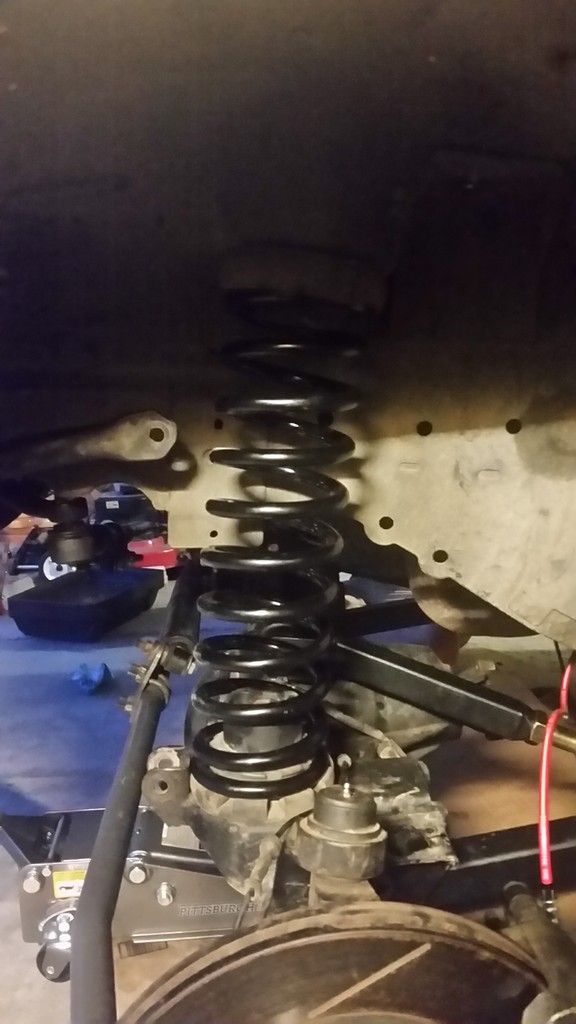
Meantime, here is a mock up of Hippo. This will be his new stance (approximate). The height is close to what ride height will be once all is bolted up
Now I need your help guys. The location of the axle is critical. So Clayton for the stock axle has a recommended setting (36"). I have a completely different axle. How do I go about setting the alighnment and location of the axle? Here are my thoughts:
1) put the spring in temporarily and see where it sits. The bottom marks the location of the axle and set the control arms to that length. The caster will be set to ~5.5 degrees
2) measure from the center of the spring mount on the axle side to the location of the lower control arm bolt on the stock axle and on the new one. find the difference and add that difference (or subtract) from the recomended Clayton measurement. same caster as above
3) just use clayton measurements
I will take hippo to a alighment shop and get it set right once its done, but until then, what do you guys recommend to do?
Also, I have the rest of this week booked up so next update will come sunday. Please share your thoughts
 05-08-2018, 06:16 AM
I would drop a plum bob from the upper spring perch to locate the lower spring perch, I think. Do you know your approximate ride height? Because you want to set your axle location at ride height and that would be difficult using the springs, as you would have to compress them.
Edit: Thinking about it more as I wake up, I would drop the plum bob for axle centerline. Your spring perches may not quite line up, even with the axle in the right location.
The tool that you want is a tapered reamer. You need one with a 7 degree taper to match the tie rod ends.
Sent from my SAMSUNG-SM-G930A using Tapatalk
Last edited by Yjsaabman717; 05-08-2018 at 06:39 AM.
05-08-2018, 08:59 AM
Okay thank you. I'll look for a reamer then. The ride height is approximately 42". so then drop the plum bob from the centerline of the upper spring perch and locate the axle with the center of the wheel hub?
How does one set the track bar also?
05-08-2018, 09:37 AM
Drop the plum bob from where you want the center of the axle to be and use the center of the hub, or even the center of the axle tube.
Sent from my SAMSUNG-SM-G930A using Tapatalk
05-08-2018, 09:58 AM
Okay, dumb question then, Where do I want the center of axle to be? Or am I making this more complicated that it needs to be
05-08-2018, 12:27 PM
Yes and no. The axle will move forward under compression and move back under droop. Chances are you have more droop than compression, so it will be moving back more than front. You also have to watch things like the trackbar mounting and interference through the range of travel with things like the exhaust and oil pan. So, it may best to bolt the axle up with Clayton's base measurements and cycle it to see if it works and where it puts the axle at your ride height. If your going to trim, you can accommodate the wheel not being centered in the opening at that point, if that's what works best.
Sent from my SAMSUNG-SM-G930A using Tapatalk
05-11-2018, 12:25 AM
Day 5. Today plans were canceled so I worked on Hippo. Got the axle attached, squared, caster set. Here is how. The Jeep is still sitting at ride height (within an inch or so) so I am taking that as an advantage
The Clayton suggests to set the lower control arm to 36". The distance (approximate) of the stock axle between the centerline and the hole location for the lower control arm (LCA) is 2.5". On the new axle, that distance is 3.25". So in theory, if I set the Clayton LCA to 35.25", it will be as in stock location. Well thats not an option as the clayton LCA only goes between 35 9/16 and 36.5". So as a compromise, I set the length to 35.75". Wound up using the spacers that came with the kit. I thought the new axle accomidated for the spacers already, but it didnt. On the driver side, the spacers were to tight of a fit. So after some grinding and painting them in black, they slid in. The passenger side worked right out of the box.
Now for the caster angle. Hippo on jack stands sits at about 1.90 dergees. Clayton recomends caster of between 5 and 6 degrees. Also, after talking to them, on the WJ after you set the vehicle at ride height, it will lose about .5 of a degree. so 5.7+1.9=7.6. The end result after tuning was 7.8, but thats still within spec. Nothing is tightened at this point. To double check that the axle is square, on both sides I measured from the front wheel to the corresponding back wheel. on both sides the measurements were 105.5". Thankfully that worked out and I dont have to do anything to it.
The spring angle seems to be working out as well. Looking at mom's stock jeep, the spring is angled backwards. As a matter of fact, the axle spring cup seems to end roughly where the upper begins. Using plum bobs, this is were its working out on Hippo as well. The bob is located in the middle of the body spring location. There is a hole there.
The only thing that this axle is not is centered to the body. it need to come about .25" to the passenger side and the track bar can be set. That is the plan for sunday. Also, then I will bleed the brakes and connect the lines, put springs on and shocks, route the locker and wire in abs. That is the plan anyway, will see if it actually happens.

05-14-2018, 11:51 PM
Alright Day 6. At this point there is a bunch of little things to do. Starting with centering the axle ans the track bar. So I centered the axle on the middle of the spring mounts and body side spring mounts.
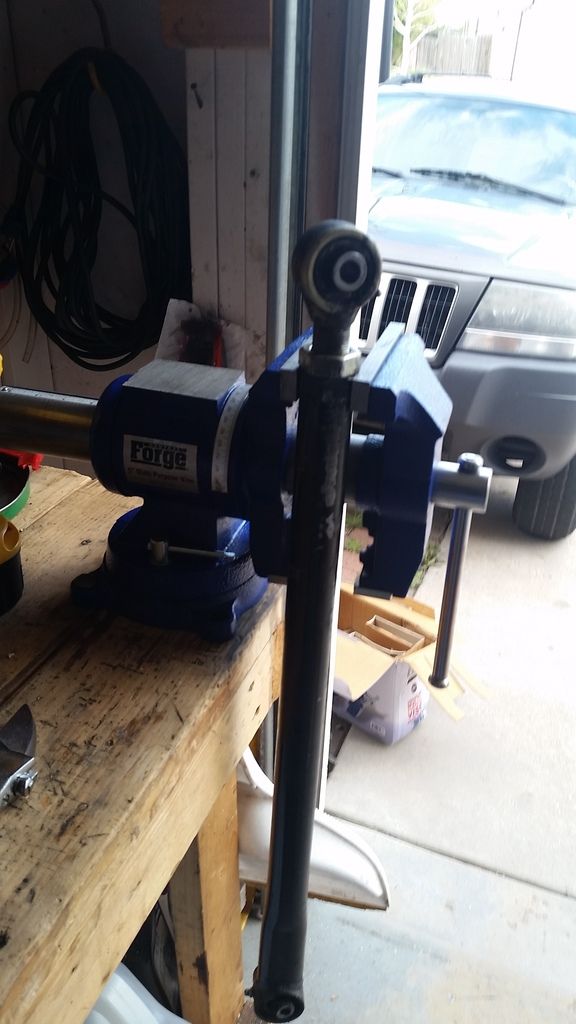
then removed the new track bar and using a vise with some torch heat I got the jam nut off
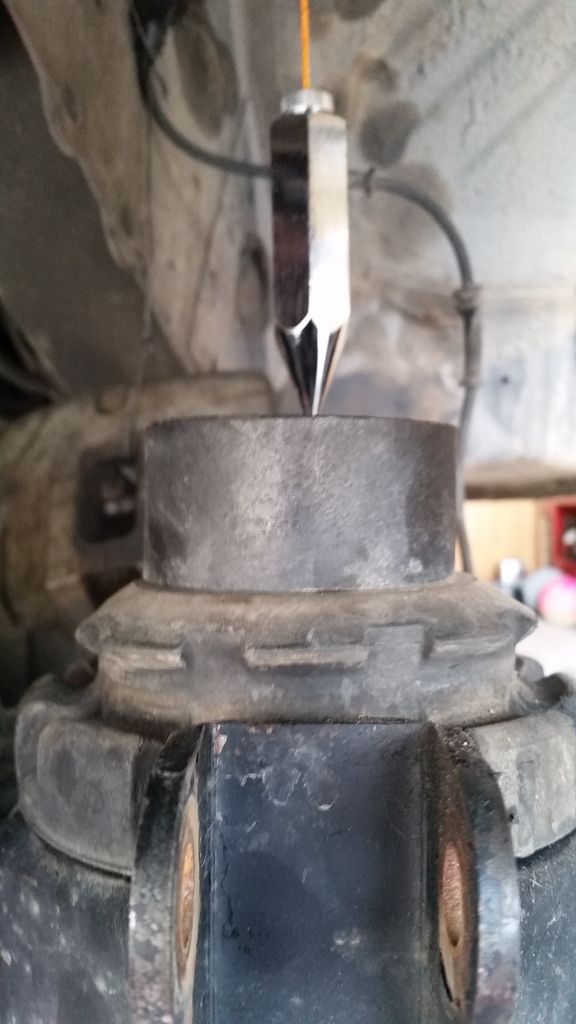
Then just set it to the right length (make sure the johny joint itself is set perpendicular. Next onto the steering. The reamer finally arrived and after reaming the hole on the pitman arm, I slid the tie rod end in and begin to tighten. The end is spinning in the rod :/ figures. The nut is not a castle nut and its tight. So there are 2 options.
1) use pliers to hold the rod while i tighten the nut
2) get a castle nut
Im going to look for a castle nut tomorrow, but otherwise this will have to do. As for reaming, a simple battery drill works, but make sure you hold it tight or the reamer will catch inside and whip your hand. The other part thats hard is the pitman arm itself has stuff behind it like power steering lines, etc. But if you turn the wheel all the way to the left and hold it there by feeding a strap through it and holding it with the door, it comes out all on the outside of the unibody rail.
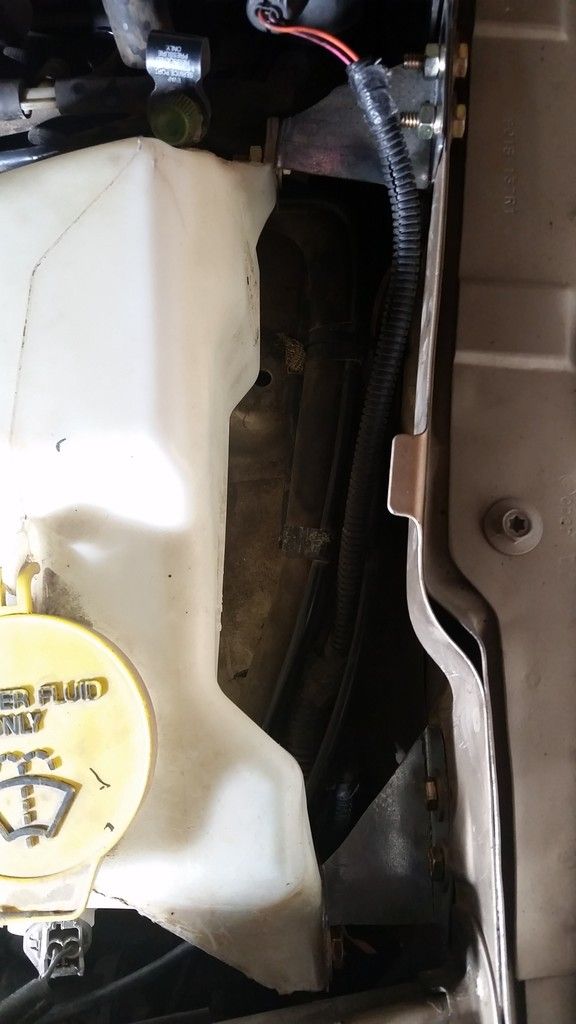
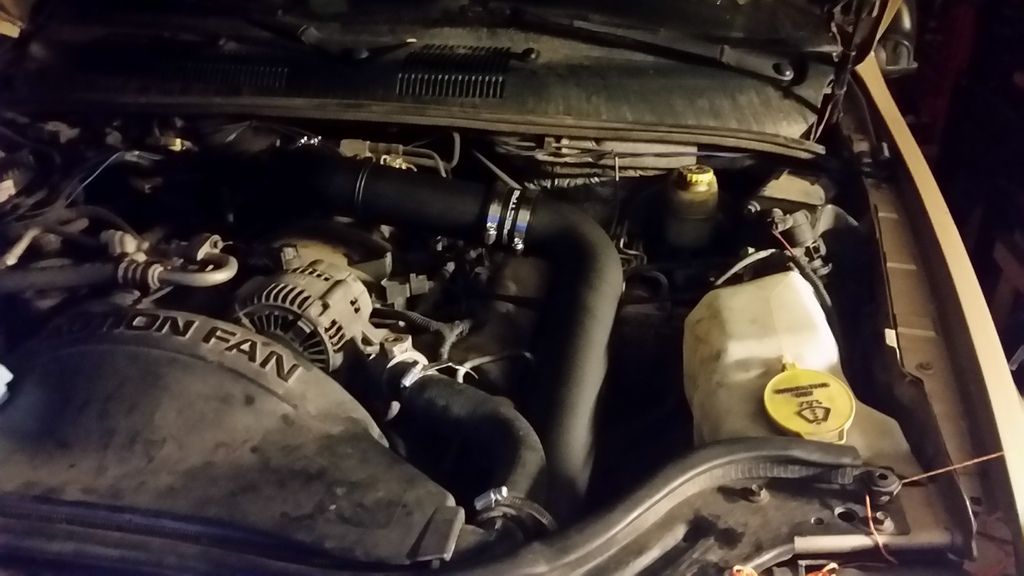
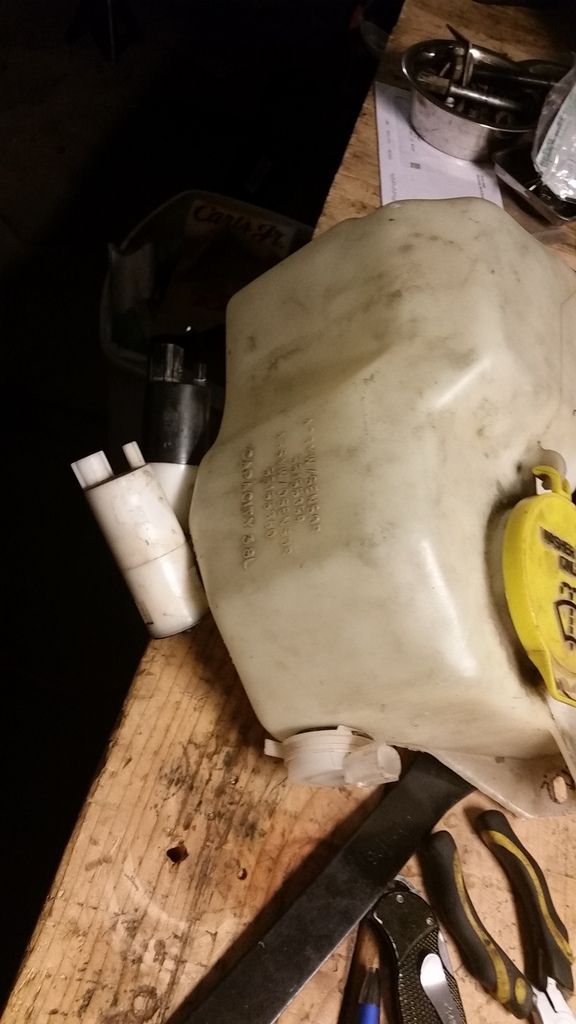
Also took out the washer bottle and the intake box. The washer bottle is held by 3 bolts. Hardest part is to disconnect the electrical connections. They were kinda stuck. on the pump that is on the left of the vehicle, there is a red tab that needs to be moved up before you can press the clip and disconnect it. Total of 3 connections: 2 pumps and the sensor. On the new washer bottle (out of a ZJ) the pumps went right in. The only thing that needs to be done is a hole drilled for the sensor.
The intake box on the throttle body is help by 2 10mm bolts (i think). The filter box is help by 3 13mm ones. One of them is kinda hard to get to, but doable with a wrench. After that, I began mocking up the new intake and washer bottle. Here is the result
Ended up taking one of the brackes that is on the evap canister and making it bent a little bit more
So now onto the big puzzle. After cleaning the brakes and connecting the new brake lines from Clayton, where do they actually connect? There is a screw on fitting that is at the end of the new brake line but I do not see it on the stock brakes. Help guys? Kinda need brakes lol
05-15-2018, 12:05 AM
You can bypass the sensor for the washer bottle. I do not remember if it is normally open or normally closed but it is not all that critical in my opinion.
Sent from my XT1650 using Tapatalk
05-15-2018, 12:05 AM
Brakes are highly overrated
Sent from my XT1650 using Tapatalk
05-15-2018, 06:12 AM
Pics of the brake bits would help.
Sent from my SAMSUNG-SM-G930A using Tapatalk
05-15-2018, 11:59 PM
Day 7.
Went to local ACE hardware and picked up 2 castle nuts. A 7/8 standard and 21mm Can't rememeber what thread they were. Even though the one i took off was metric (it was tight) the standard one went on there nicely and now all the steering is castle nutted
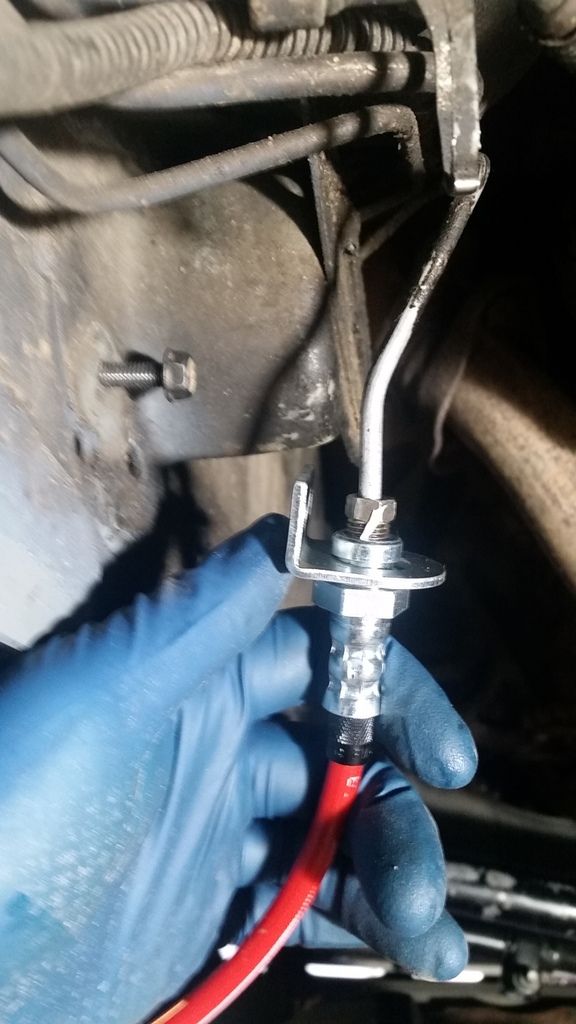
Next went onto brakes. Come to find out, the brakes run up to just in front of the stock control arm. This was a messy job as you are underneath the jeep and the brake fluid will be dripping on you. So here is the procedure I went through:
1)Put some penetrating oil on the nut so you dont strip it
2)Install the new lines onto the caliper
3) top off to the brim the brake fluid in the reservoir
4)get a 10mm socket or wrench, 3/8s wrench, 3/4 wrench, loads of paper towels, some form of drip pan, some plumbers tape
5)slightly loosen the brake line (3/8) while its still connected fully to the body. Only want to get that started without it leaking out yet. make sure that the wrench is fully seated too. don't want to strip it and have to get a new line
6) unbolt the 10mm bolt of the bracket from the body.
now the following have to be done as quickly as possible to minimize mess
7)quickly undo the rest of the brake line
8) put some plumbers tape on the threads of the brake line that is from the abs pump
9)put the new mounting bracket onto the new brake line (it will just hang for now)
10) connect and tighten the old and new brake line.
11) repeat on the other side
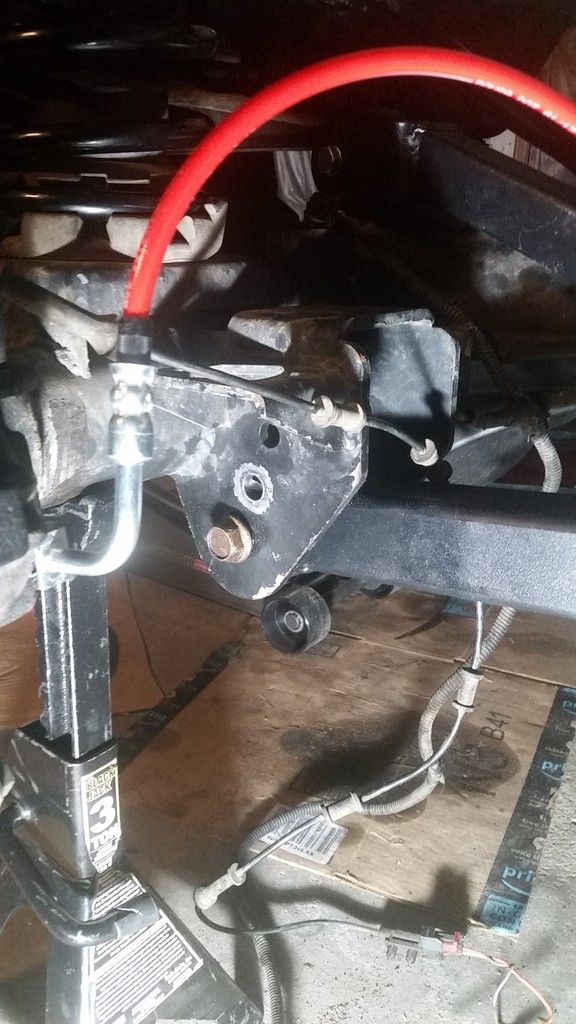
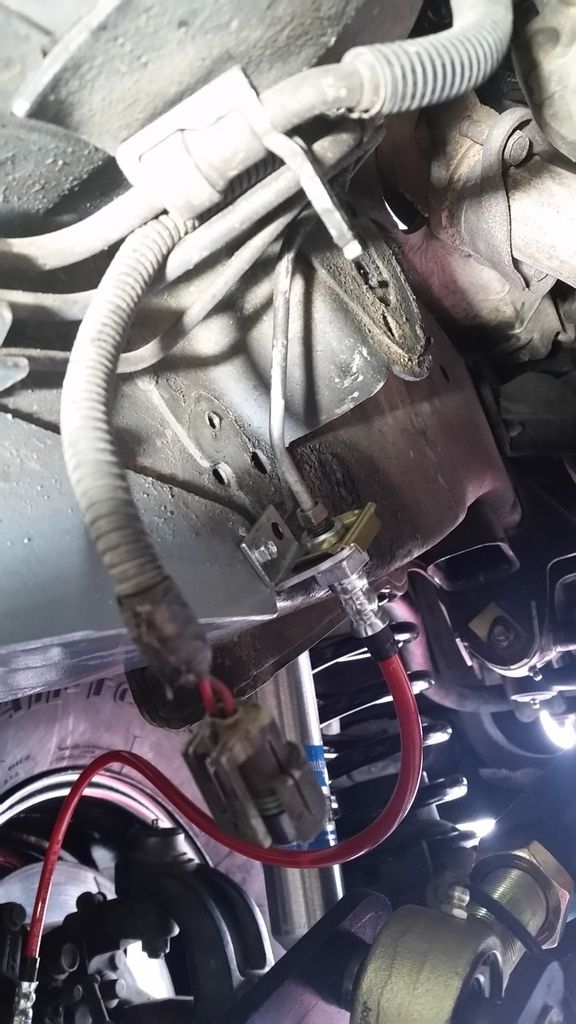
result may look something like this:
My only concern is if the lines are actually longer. JK's mounts right there on the unibody rail in the wheel well, but these mount further back. Will see how well they work. Still need to bleed them and mount the brake lines to the body.
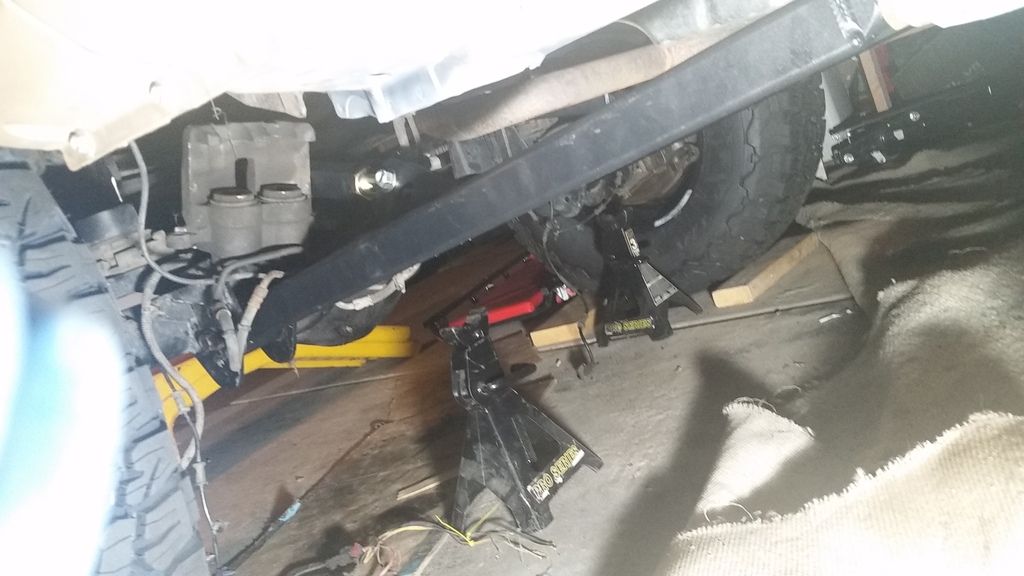
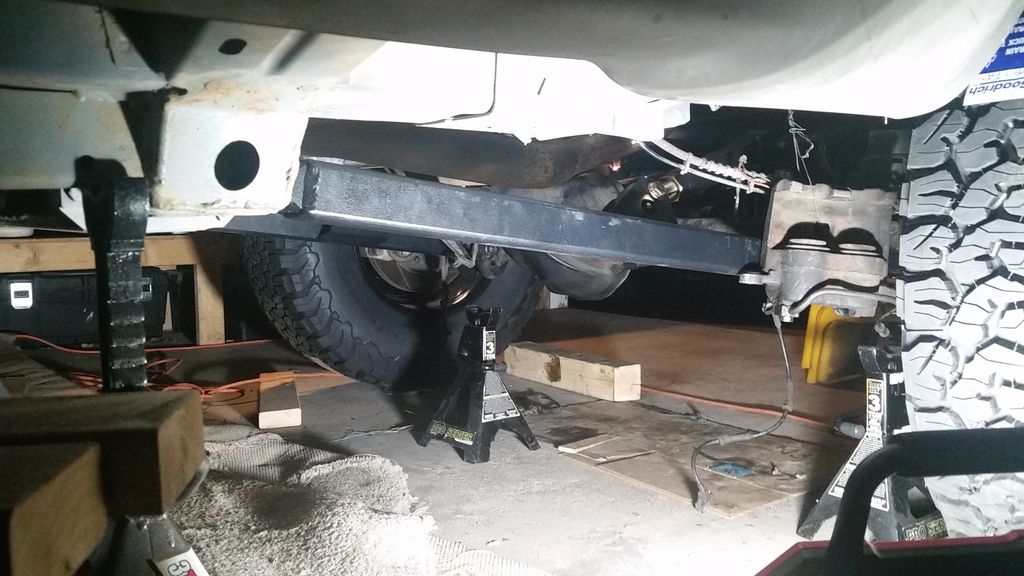
Next I tried to measure for bimpstops. So without springs and shocks I articulated the suspension. The new bumpstop location on the new axle is different, so will have to figure something else out, but here are the pics. Its rubbing bad on the front bumper lol. no surprise
Seems like there is a bit of uptravel, trimming will be required. Installed new springs. not what id call perfect, but thats what the alighnment shop is for lol. Roughly at ride height but the body is still sitting on the jacks
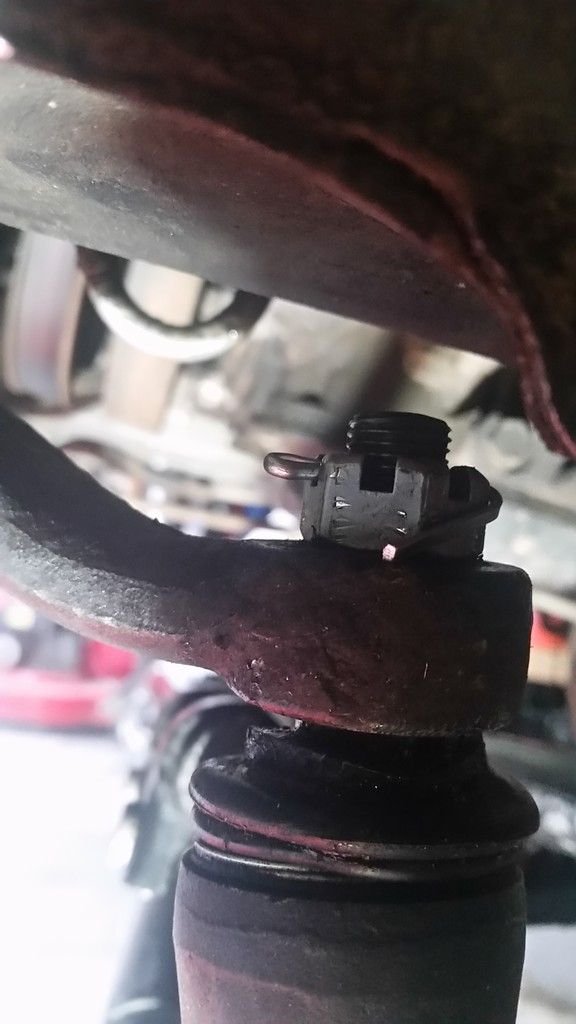
Did also some measurements for the washer bottle brackets. Will have pics later. Now for another puzzle. So I have been told that this axle has a Rubicon elocker in it. Here are the connections from the pumpkin:
The connection furthest on the left is locker itself, but whats the one on the right (middle of the pumpkin) applying power to it didnt seem to do anything. Any ideas? may be its a sensor and not needed?
Next time, I want to bleed the brakes, snug the suspension bolts, finish the washer bottle and integrate the abs and locker wiring. Still need to install shocks and jks quick disconnects. After that, onto the rear axle. hopefully friday the front will be done
05-17-2018, 04:45 PM
So the more I look at that spring, the more i dont like it. There is another hole on the lower control arm bracket of the axle that will bring the axle back I think about an inch, but its also about an 1.5" lower. That also means I have to reset up the entire axle. Should I do it now or wait until the jeep is sitting on its own weight? What do you guys think?
05-17-2018, 05:31 PM
PM sent
Sent from my XT1650 using Tapatalk
 05-17-2018, 10:40 PM
Looks to me like that's the breather. Needs to have a vent hose put on it and run somewhere up in the engine compartment. If I remember right, on my ZJ it's on the other side of the diff, but maybe WJs are set up different? Plus it's aftermarket, the factory one is steel and pressed in from the top not brass and threaded in the side. Look on the other side of the pumpkin, see if there's another breather tube there or maybe it's smashed flat? I'd probably pop off the diff cover and take a look inside to make sure you don't have a milkshake instead of diff fluid in there.The connection furthest on the left is locker itself, but whats the one on the right (middle of the pumpkin) applying power to it didnt seem to do anything. Any ideas? may be its a sensor and not needed?
 05-17-2018, 10:48 PM
If the tires clear with the axle pulled back in then that's your easiest good choice. If the tires are where you want em then you need to live with the springs bowing.or, best (imho) and most difficult option, move the coil buckets on the axle further backOriginally Posted by Tuzmaster

Sent from my Pixel XL using Tapatalk

 05-18-2018, 07:32 AM
You can clock the Springs to minimize bowing. The ends of the spring are not flat the last 1/2 turn of the spring is higher and will tilt the spring when in the spring bucket.
Ignore how the lower rubber isolator is locating the spring.
Rotate the spring so that the bottom 1/2 turn is toward the front of the Jeep. That will tilt the spring back.
That will help, short of relocating your spring buckets.
05-18-2018, 09:20 AM
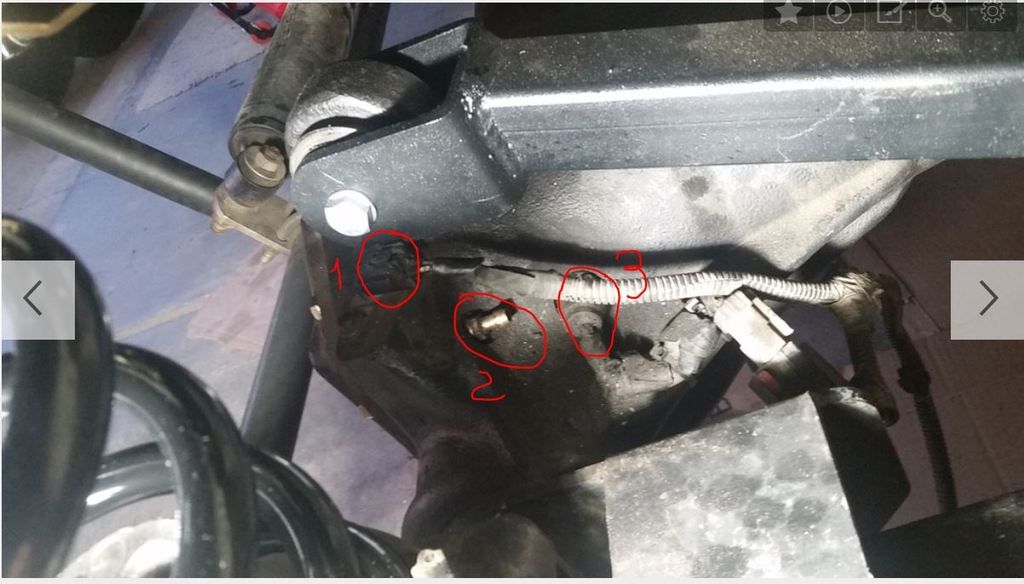
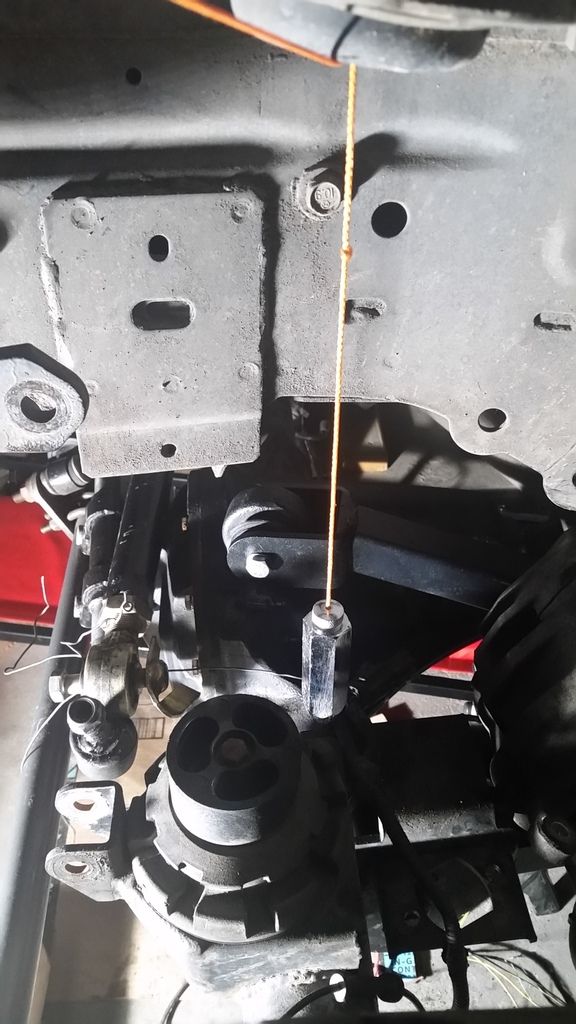
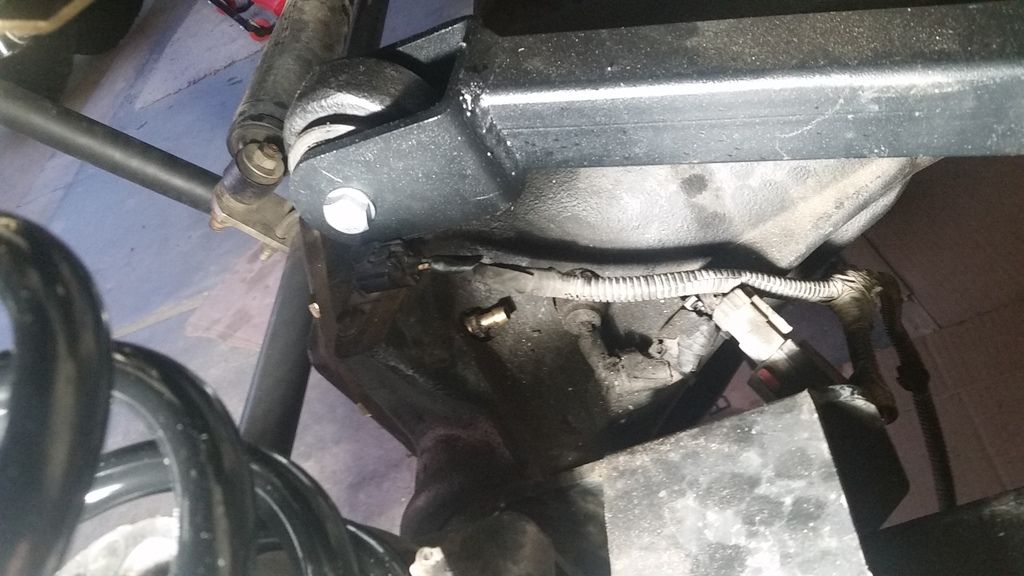
So thats not what i was talking about. Here is a pic with stuff highlighted:
1- that the locker wiring
2- breather
3- ?????
Thats the question of what that is. also, the inside of the diff is in really good shape. I have pics earlier in the thread. The diff fluid that came out was in brand new shape. Almost feel bad for wasting it lol
05-18-2018, 09:39 AM
Day 8
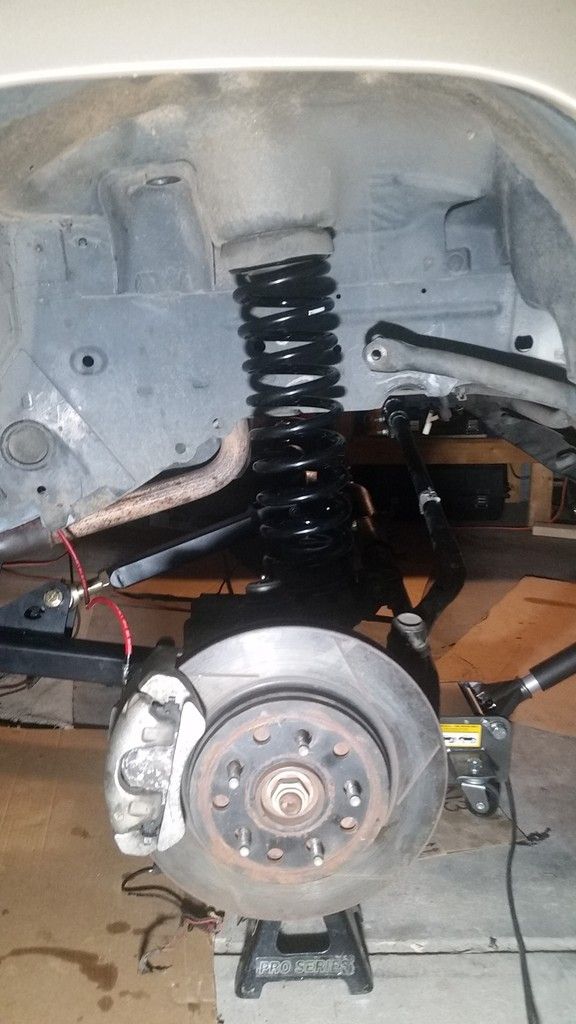
So I goofed a little bit before which us why the springs were bowing. There are 3 lower control arm holes on the front axle:
Initially I went with the middle hole because it seems thats where previous guy put it. While browsing the web, I have found the kit that is made by Clayton that shows the exact spring mounts that are on the new axle. Thoss interested the part number is COR-1106130. The pic shows that kit having the lower control arm bots on the lowest hole.Well the lowest hole actually moves the axle towards the rear about .5" which is the difference that I could not make up between the location of the stock axle and the new one if the middle hole is used. So I am not sure why previous guy used the middle location, but at the lowest location the spring look really good:
Also bled the brakes which make them feel much better than stock 2 piston ones (new ones are off of JK I think). Only concern is if the brake line is long enough. May need to have it lengthened at full droop and turn. Now its onto the little things. Made one of the brackets for the washer bottle.
So tonight Im hoping to do trimming, shocks, route the locker wiring, ABS connection, and snug tight all of the bolts so on monday (weekend is busy) I can start on the rear axle
 05-18-2018, 11:55 AM
#1 is the wiring to activate the locker.
#3 is a switch that senses when the locker is engaged. You don't necessarily have to wire it.
05-19-2018, 01:11 AM
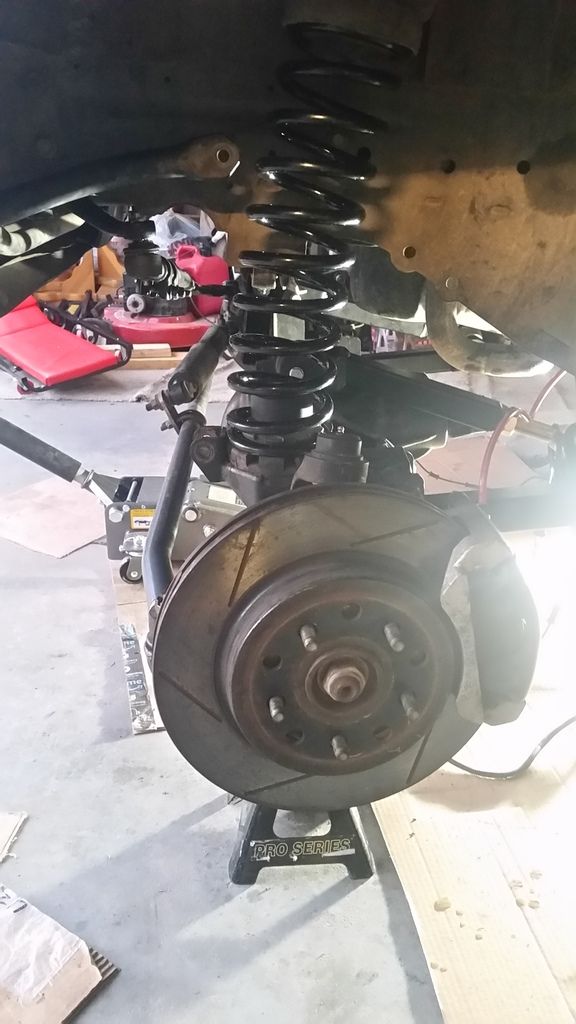
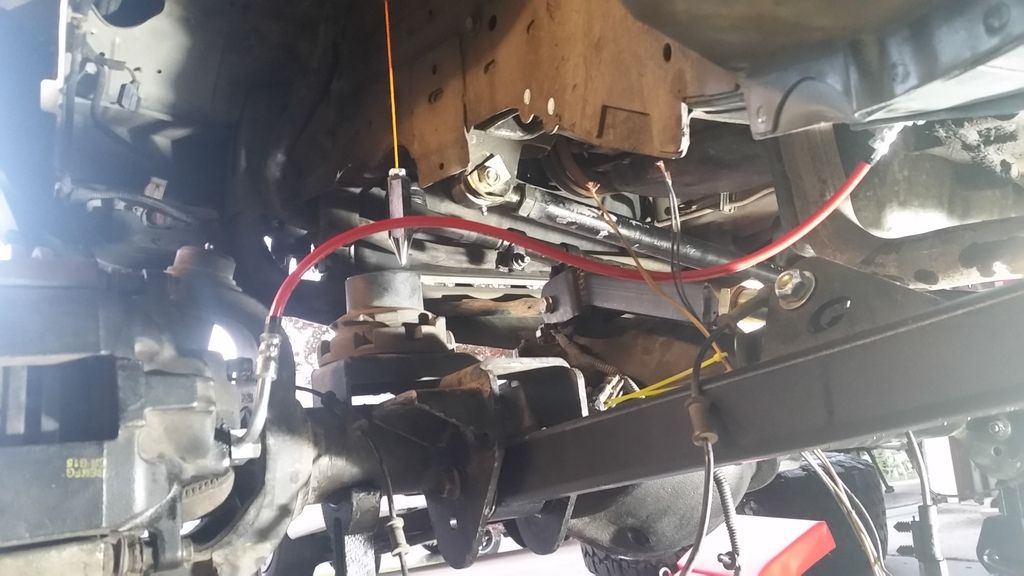
Day 9. When putting the tires on, under steering it seemed that the tire was too close the the back including the structural weld of the body. So to solve that, the long arms were extended to 36.5" (max long arms can be extended). After tightening the bolts and shocks, Hippo is sitting at 41" of ride height on his own weight. Man it feels good. The angles look good, but alighnment is in order:

It does not look like much trimming is required.

One of the other things that have to be figured out are bumpstops and some for of sring retainment. Cause after a full droop the springs pops way out and the tire is nowhere near it seems to be at its lowest. Shock still has some length to go too but not much:
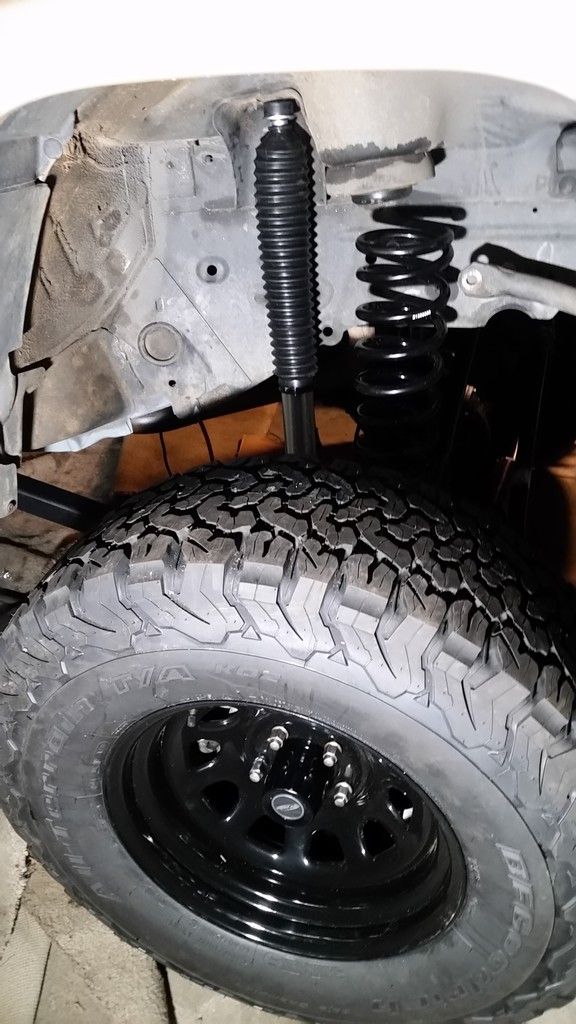
Any ideas guys? for retainment and bump stops. I was kind thinking something like what XJs have cause there is a hole in the middle of the top spring purch.
Next time I need to wire in ABS still, locker, gasket and oil for the front axle and finish the washer bottle and air filter.
05-22-2018, 09:23 AM
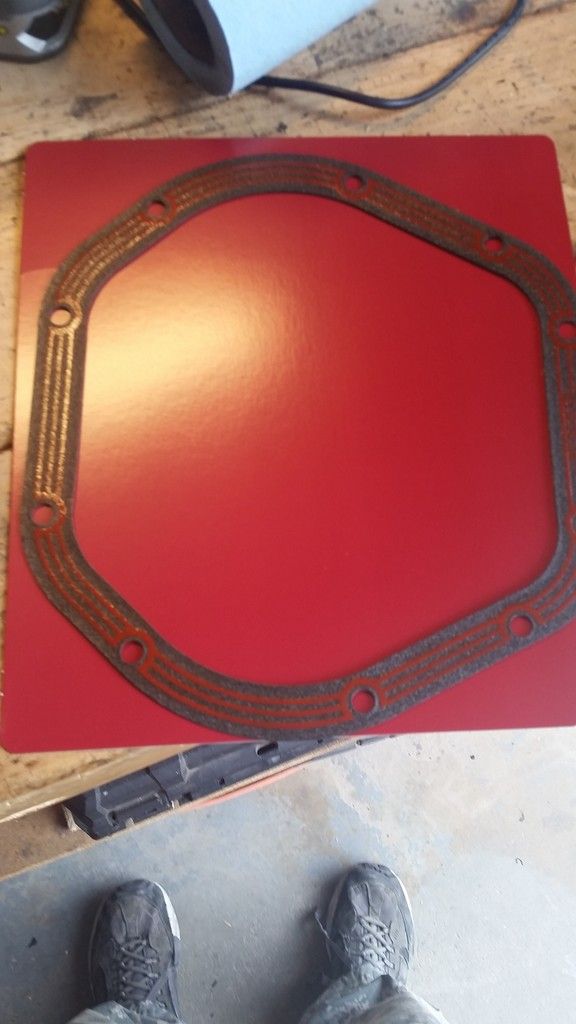
Day 9. Right now its the little things. Started off with sealing off the axle. got an expensive gasket, but this should be worth it. Lubelocker got at 4wheel parts. one for front and rear. torqued to 22 ftlbs and the axle took about 2 qts of 80w90 oil
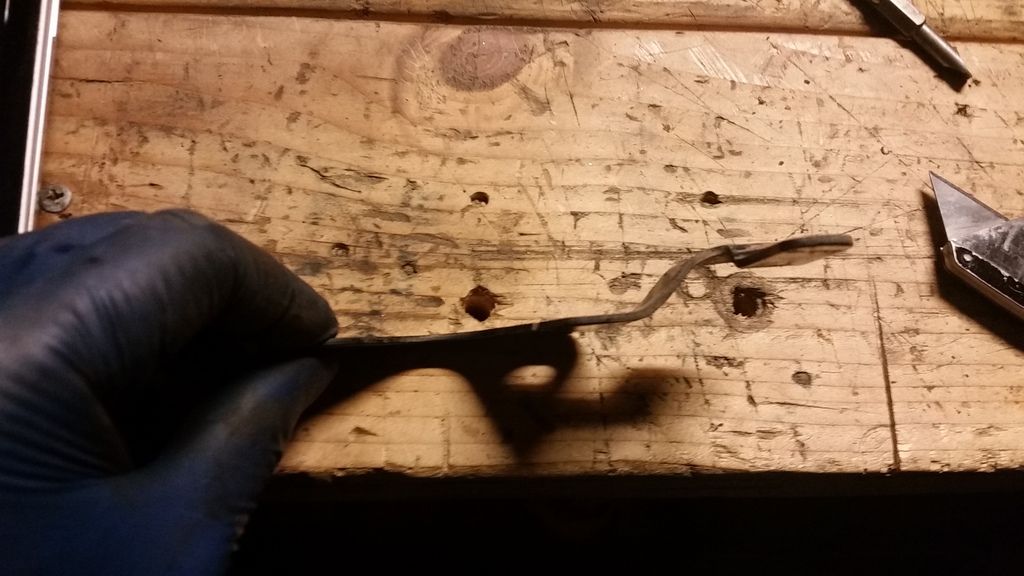
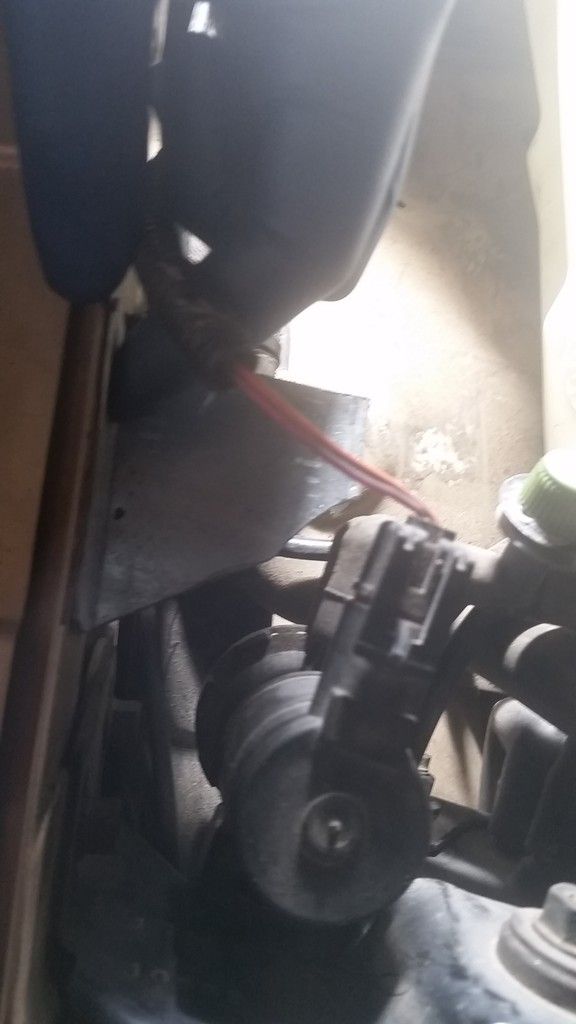
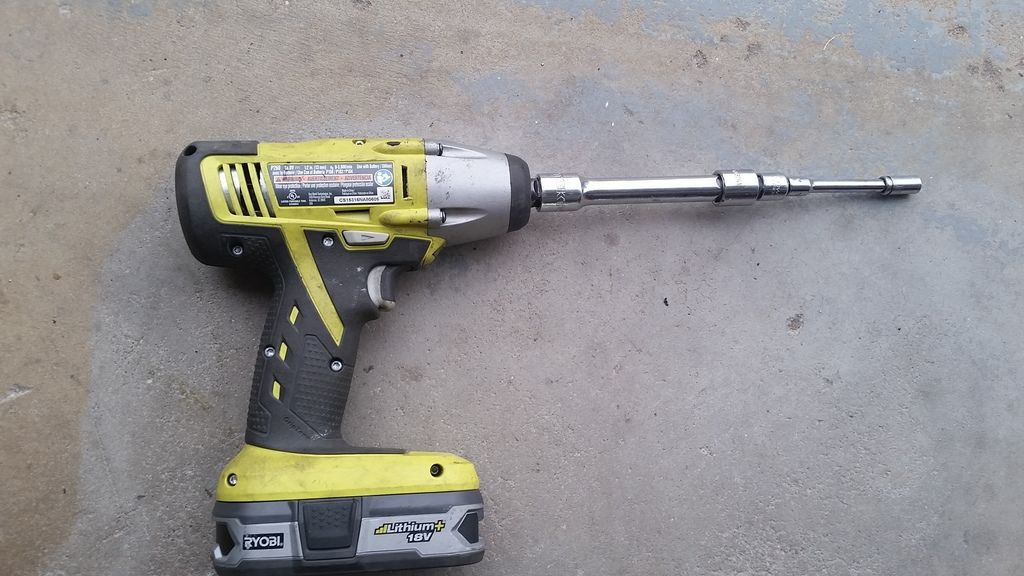
then did the brake line mounts. The extended brake line kit came with some self tapping screws. Well, when you go hog wild on those little 8mm ones with an impact and then finally catch the sheetmetal, they go in very quickly and snap off. Fortunately we had some laying around. passenger side is a pain to get to cause there is exhaust in the way, but with a long enough extention, one can get around it. Here is the extension:
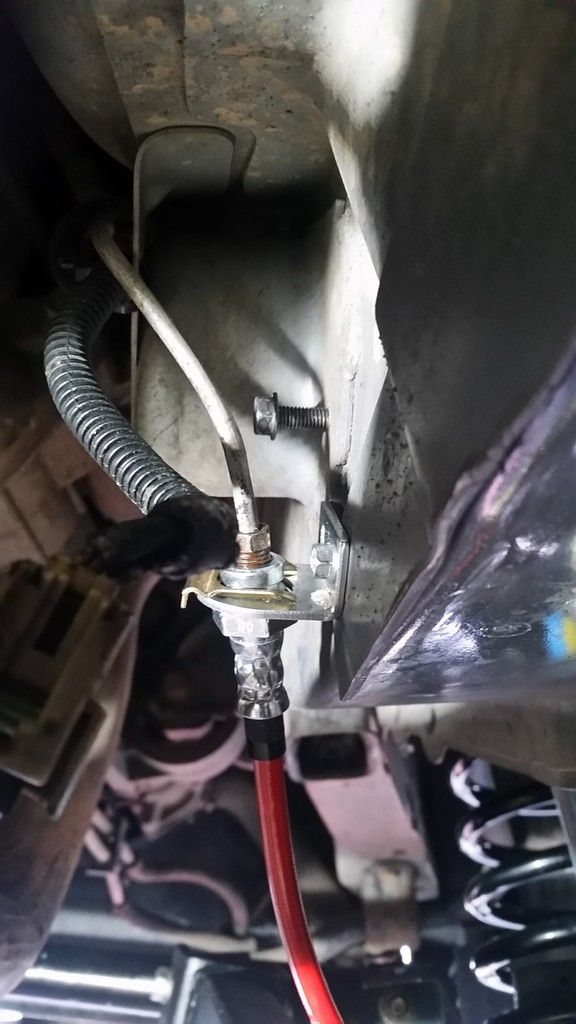
I tried to give the brake lines as much slack as I can. earlier there was a possible issue of brake lines not being long enough if I turn wheel to the lock and axle is under full droop. (still need to figure out bumpstops and spring retention btw). Driver side:
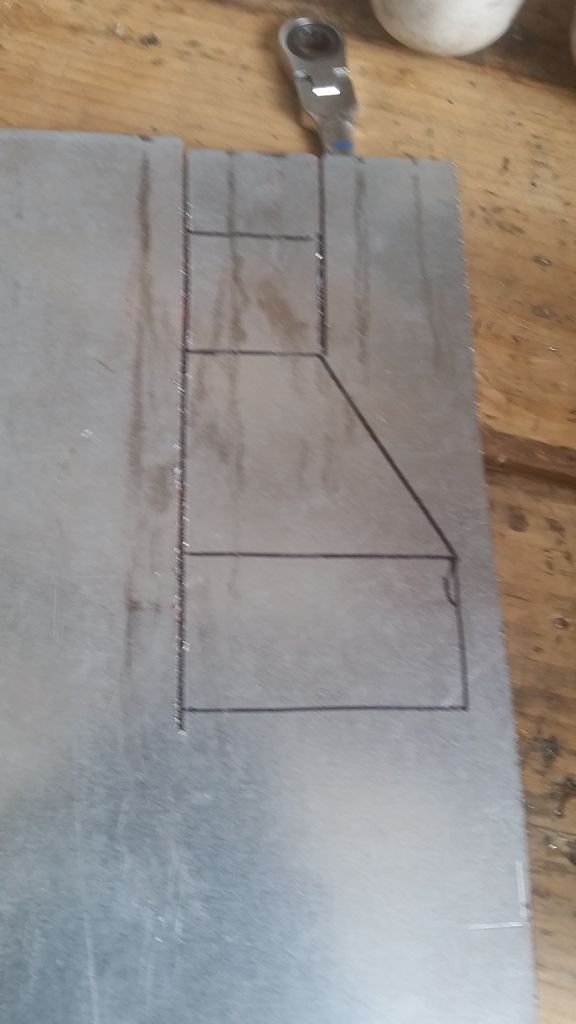
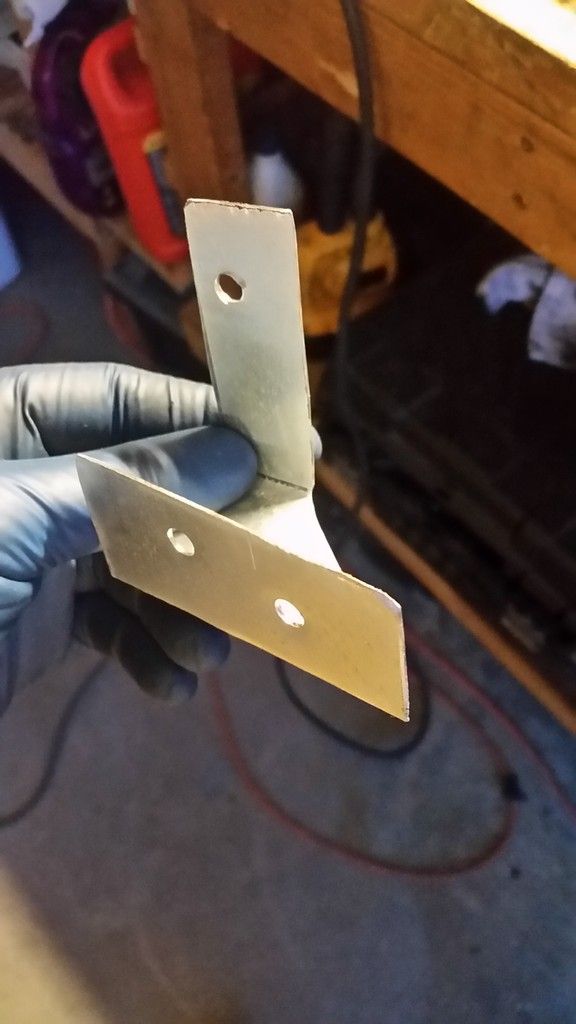
Onto the next part. Washer bottle relocation. I already built one of the brackets to hold it, so I just needed another. Here is the sketch:
after some bending, cutting and drilling the final bracket looks like this:
Moved onto the washer bottle itself. ZJ's had the holes big enough for the WJ's pumps, but it did not have the hole for the sensor. So after drilling a 7/8s hole and using the original gromet, the washer bottle now looks like this:
After dismantling the wiring harness inside the bumper, wound up keeping the wiring for the light for now.

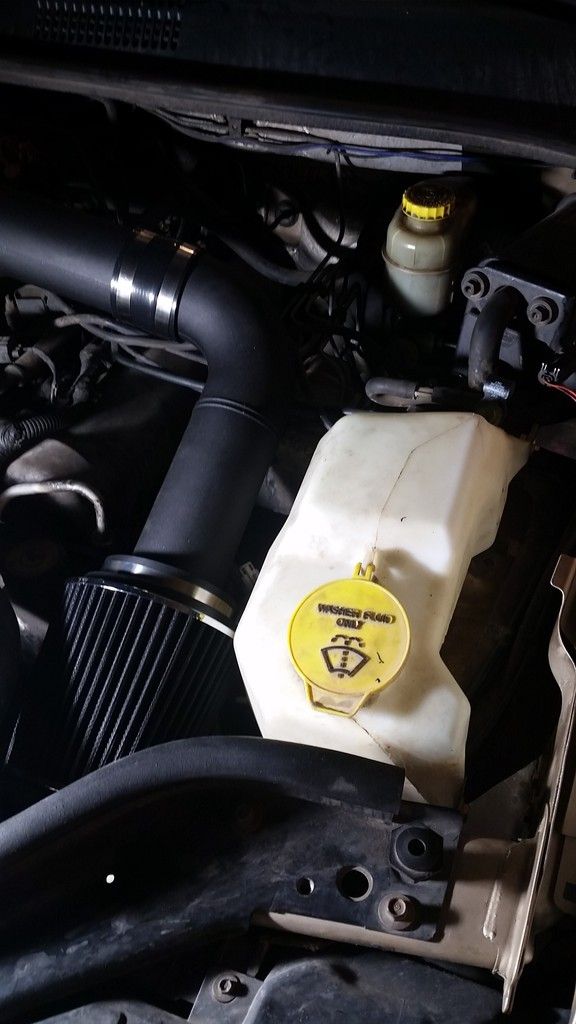
Remounting with some grade 8 hardware (bit of an overkill but whatever) here is what it looks like now:
So tonight I still need to connect the pvc pipe to the new intake, still wire in the ABS and wire in the locker. I may do locker later as I really want to get started on the rear. Perhaps thats the plan for tonight. Also while doing all of this, I managed to brake the hook latch wire (or disconnect it somehow). Found out after the hood was closed. fortunately there is a way to open the hood with cable broken using just pipe that comes with jeeps jack. So now that needs to be replaced
05-22-2018, 11:34 PM
Day 10. Not much update tonight. wired in ABS. finished the intake. Decided to wire both lockers in at once so for now just leave the wires hanging. Then i made a bit of an oops. I didnt rrim the bumper or anything yet, so when I went to turn the jeep around which took 1000000000000 point turn since i can barely turn, there was a battle between the tire and the front plastic bumper. The bumper lost lol.
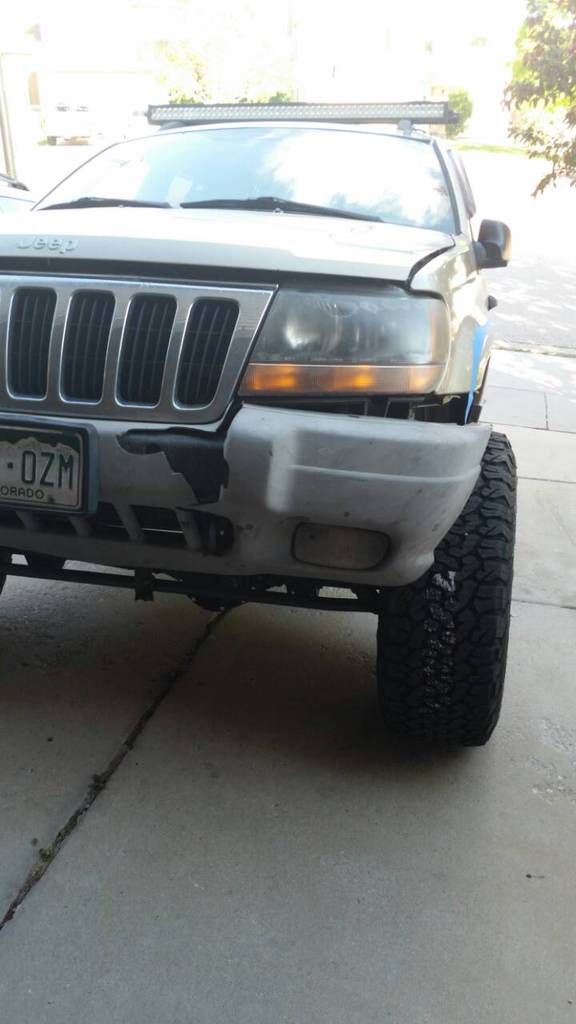
It was already cracked and this did not help. upon first little drive, the suspension does feel a lot better but brakes are a little bit squishy still even after bleeding. May be the master cylinder is due for a change, will see. Are there any parts that are an upgrade to the WJ master cylinders? everyone is switching to WJ ones, but what if the WJ needs an upgrade? XD
In the meantime, its onto the rear axle disassebly. Gonna have to use some oil on those bolts as initially nothing wanted to move. figures
05-23-2018, 12:29 PM
I just swapped my ZJ's master cylinder for a Dakota master cylinder. Went from 1" to 1-1/8" and was a bolt on swap. I'm not sure if the WJ is the same.
05-23-2018, 12:35 PM
Do you have abs? How did you bleed the master cylider?
Sent from my SAMSUNG-SM-G900A using Tapatalk
| « Previous Thread | Next Thread » |
| Thread Information |
Users Browsing this ThreadThere are currently 1 users browsing this thread. (0 members and 1 guests) |