|
|


 04-03-2018, 02:50 PM
So after a little chat, it turns out what K2 is talking about is later models where the evap canister is in the rear near in the reat on the 02 and later models. So, looks like the only decent option it seems is the first picture. But i still dont know what the pipes are made out of. Any ideas guys?
 04-08-2018, 08:26 AM
It really does look like a trip down the plumbing isle at the hardware store for that intake. Cheap and readily available, that's for sure. A couple of rubber elbows and a couple of straight pieces.
Sent from my SAMSUNG-SM-G930A using Tapatalk
04-08-2018, 09:02 PM
There is another way I think. There is a UBI kit, but instead of getting the whole thing, Im only going to get the tube. After that I'll need a reducer, 3 connectors with hose clamps and a filter. Those parts I can get off of amazon. I will coat the tube in some thermal paint to insulate from the heat. Next, get some sheetmetal and build a box that uses stock locations, but have the box part itself off to the side to make room for the ZJ wash bottle that was gotten from the junk yard. Once I actually do this, Ill post pics. I have an exam next week and final 4 weeks of class. once those are done, all the parts can finally start going under hippo and stop collecting dust.
Just out of curiousity, is there anyone here who is following this thread? Just curious if there is anyone.
 04-08-2018, 09:18 PM
Even thought I have a ZJ, I've been following and reading all your posts and watching the progress. I like seeing how people are re-working their brands, and I try to offer help where I'm able.
04-08-2018, 09:24 PM
I'm with Ken L. Regardless of what it is, it's great to read other's projects for inspiration and ideas.
Sent from my SAMSUNG-SM-G930A using Tapatalk
04-09-2018, 08:19 AM
Well I meant to say "Grands" but spellcheck had different ideas.
04-09-2018, 11:11 PM
I too keep track of your progress
Sent from my XT1650 using Tapatalk
04-11-2018, 09:27 AM
So the sye arrived. And here is the caveat. I got an impression there were 2 different SYE's for the NP242 off of WJ. Those that replace the main shaft and not the crappy hack and tap one. One by Iron Rock Offroad and another by advanced adapters. When I called Iron Rock Offroad, they said that their kit fits the WJ tcase. Advanced adapters said that it doesn't. So I ordered one from IRO. The box that arrived was from Advanced Adapters. So, there is only 1 SYE kit for the NP242 and its made by advanced adapters.
Fortunately, in the NP242 thread on this forum, someone posted the 2 pictures of the main shaft of the old 242 and new one off of WJ's. The back half of the main shaft looks to be the same between the 2 cases. The main difference is up front. Of course, that's based on pictures that don't give you dimensions. So will see what happens. I cannot install the t-case now because I do not have driveshafts and the jeep is still a DD.
By chance, has anyone put an Advanced Adapter's SYE into a WJ tcase to verify that it fits? Everything mentioned is still a theory
04-16-2018, 03:18 PM
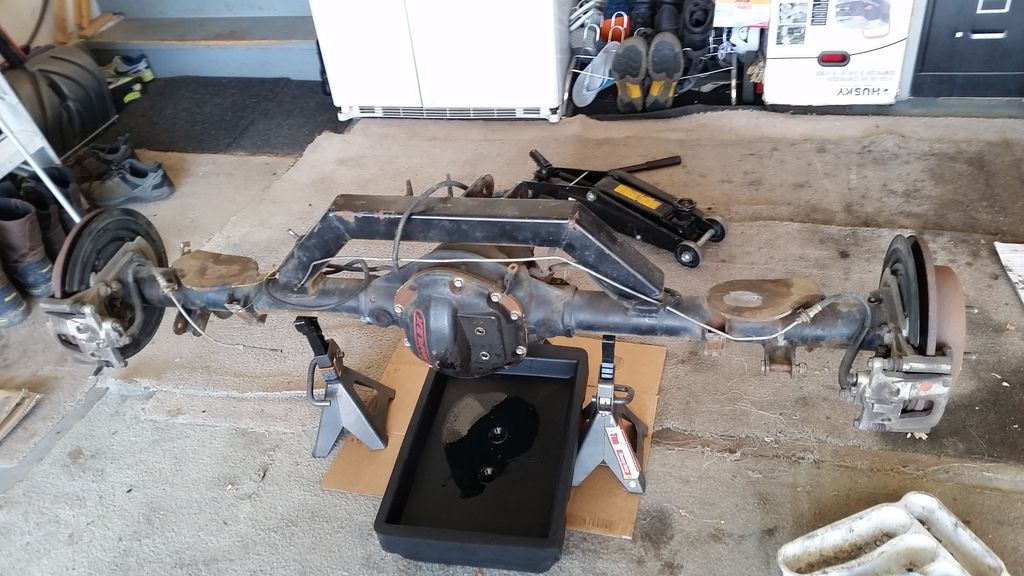
A little update. So on Sunday I decided to inspect the new axles thoroughly. Started with the rear. Definitely glad I did. First off to moving them. They are a heavy bastards and with a massive pumpkin that would possibly drag on the floor, I wanted something that works better. We had 2 wooden dollys laying around. Went to Home Depot and got some 4x4 blocks, cut to size and viola, a way easier method of moving these things around
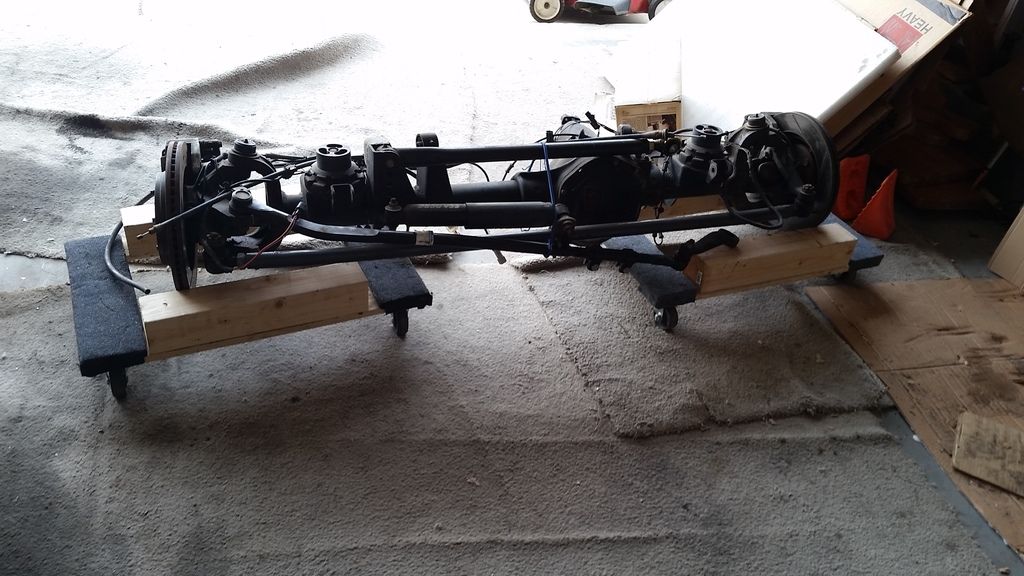
The front axle is the heavier of the 2 so I left it on the dollys for easier maneuvering later. Time was of a crunch and I only got rear inspected. Using 3 jacks its easy to hold the whole axle
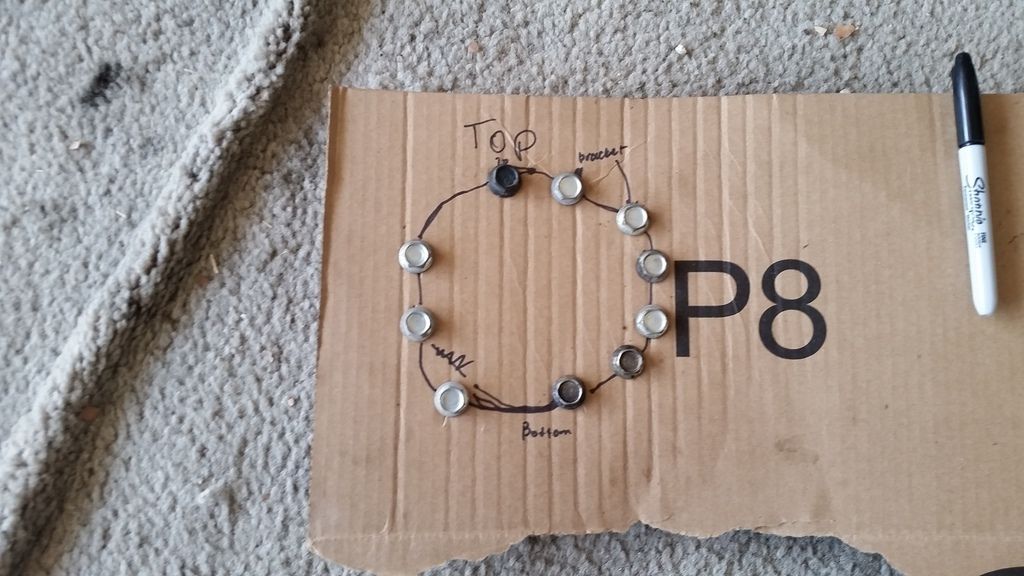
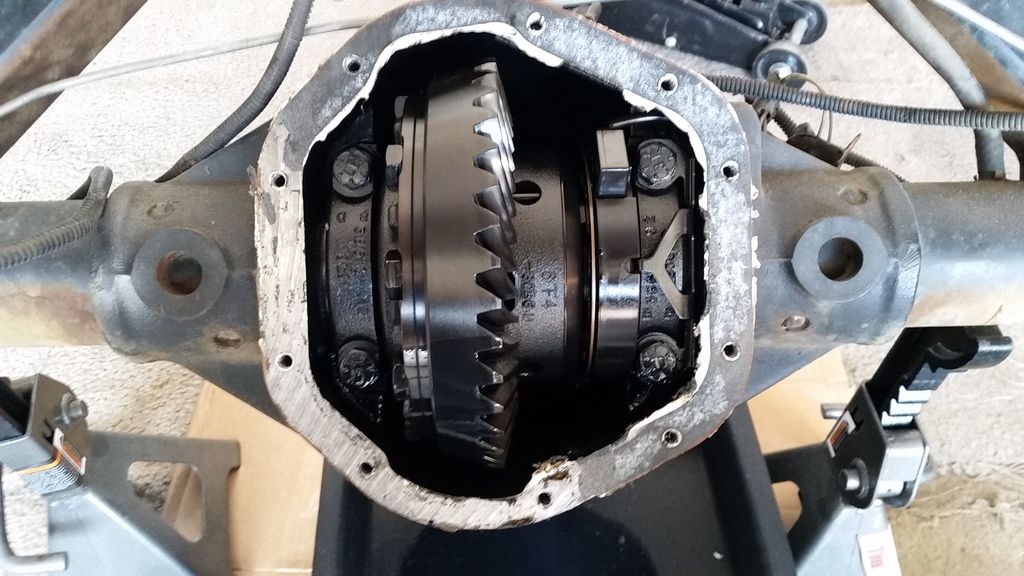
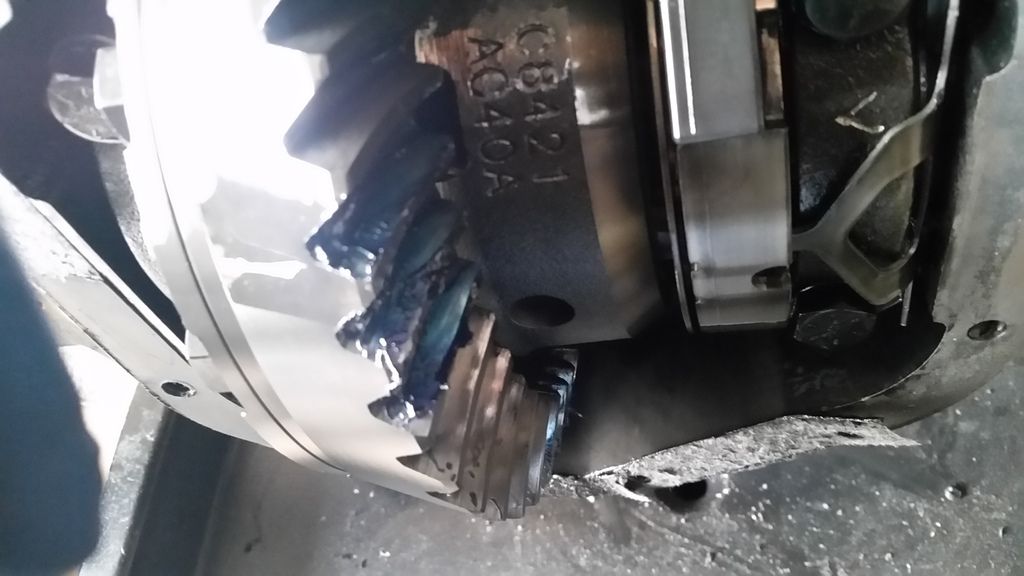
After taking off the cover, the inside looked very nice and sturdy. Checked the e-locker for function and it works. There appeared to be some difference in length of the bolts for the pumpkin so a little cardboard template helped.
removed the cover and everything looked good. checked the pattern as well and wasnt as good as i thought it would be. It seems okay and the guy I bought these axles from said he did wheel them hard and they are in one piece. Perhaps if the need arrises, I can resetup the gears or have someone else do it
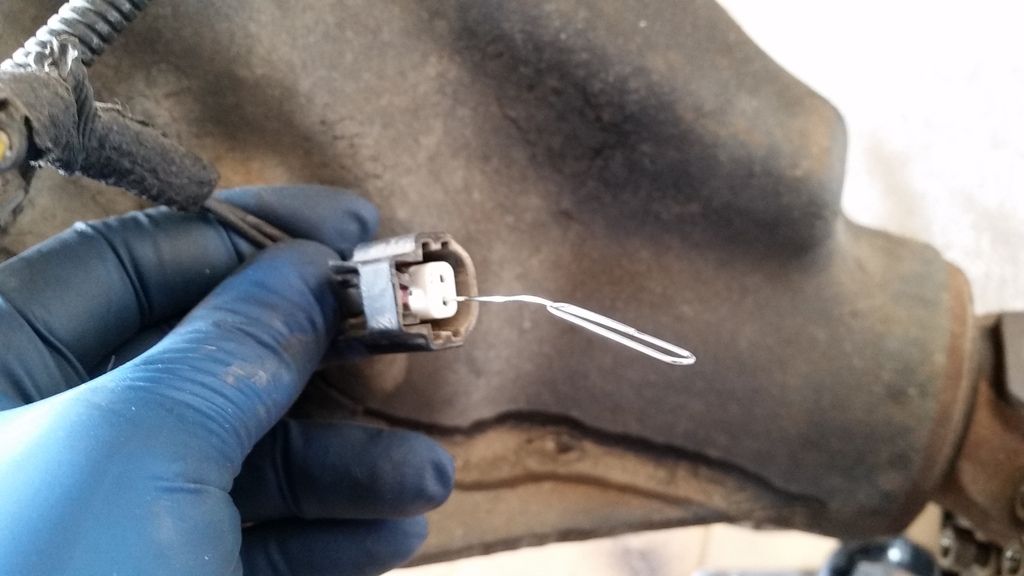
Another little trick that is useful. When checking the connection from a female connector to something else and you can't use the voltmeter probe cause its too thick, use a paper clip to "extend" the connection. Just make sure you aren't shorting anything else with it haha
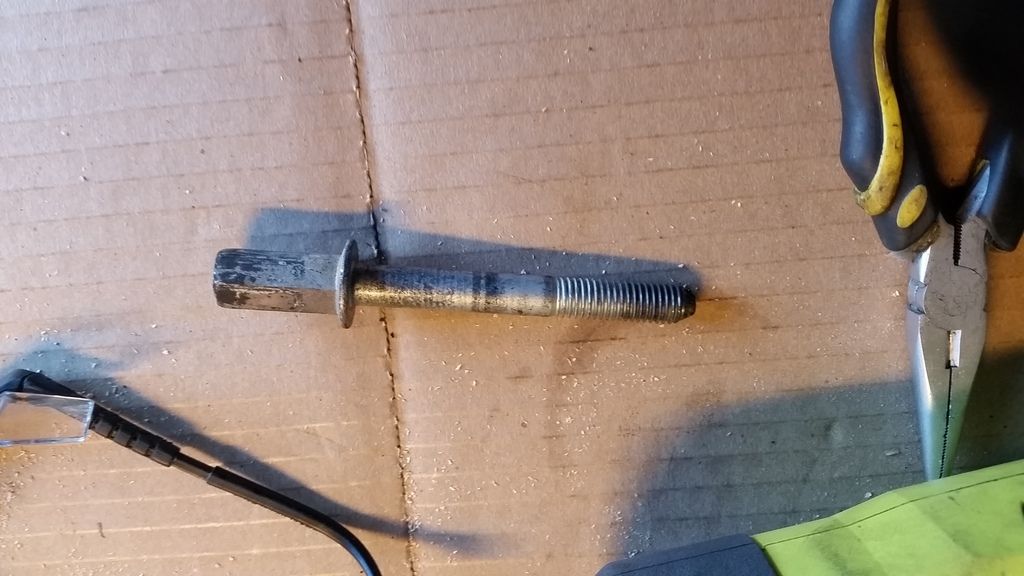
Going to put everything back together, got the cover on and a bolt snapped. fortunately it snapped at the head
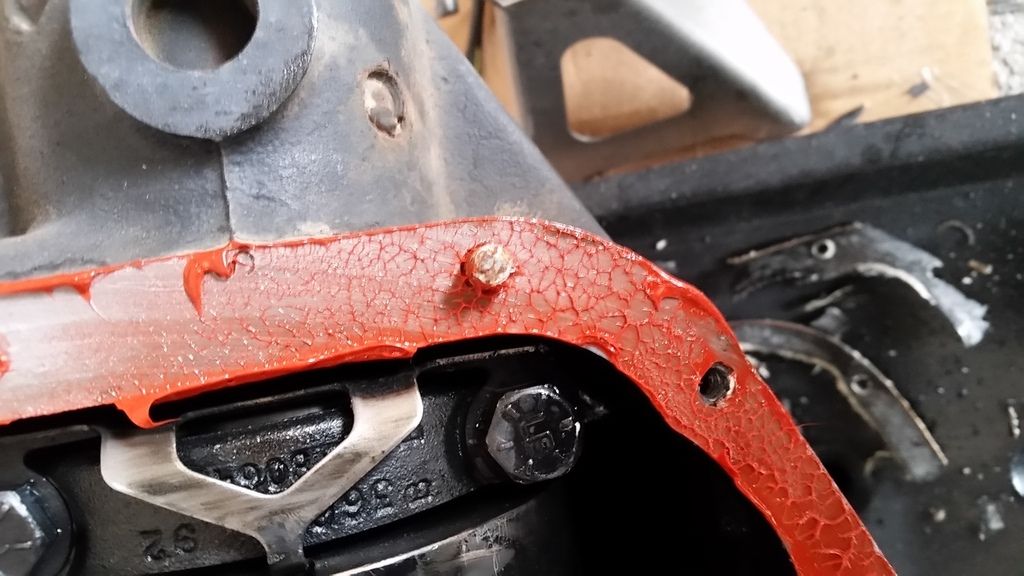
It was so rusted that even little bit of force broke it. taking it out wasnt an issue with a small pair of pliers. as I was putting this back together again (thinking its 1 bolt issue and I'll get another one later) another snapped just like the first one. Now I have taken all of those bolts out and they will be replaced with better grade 8 hardware. turns out, the bolts that come with teraflex house are complete junk to begin with. everyone who reviewed those covers said to source your own. While at it, the rear diff cover can be repainted again as it was not powdercoated. After that little fiasco, I went and loosened all the bolts on the front axle as well and they will be replaced too.
Does anyone know the torque spec for heavy duty diff cover bolts? Looks to be 20 ftlbs. I was just going to tighten them by snug, but this way may be better to prevent leaks
04-19-2018, 10:19 AM
Something just came to mind. How are the brakes in low range on the WJ's with 4.88 gears? The axles I got do have JK calipers, but the brake master cylinder is still stock of the WJ. Are they going to be okay?
One of the guys in the 4 wheeler's club on his JKU is going to upgrade to RAM 1500 parts. Is that something feasable? or not needed?
04-23-2018, 09:57 PM
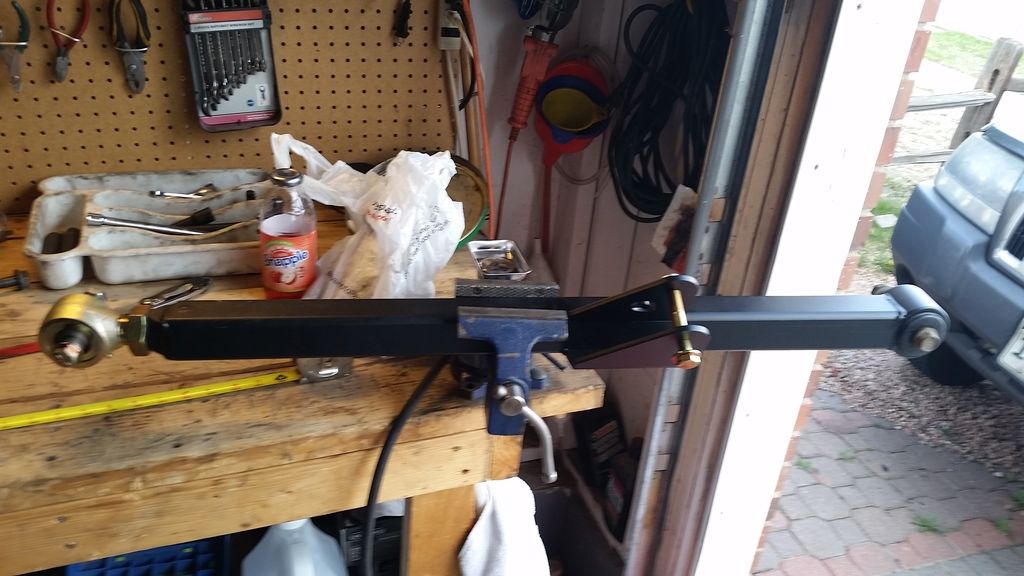
Okay, another solution to be tested. The original exhaust hangars will be unusable since that piece of pipe will move. So off of amazon I got myself 2 of these:

Fully adjustable 2.5" exhaust hangars. I also ordered the summit racing 2.5" hot rod build kit that ill use to route the exhaust to the back and a build it yourself pipe cold air intake kit from AIRAID. Once they arrive ill put the pics up. Its almost time to start on this beast. I got 3 weeks of school left and once its done, the bolt on will begin haha. getting tired of parts just sitting in the garage collecting dust.
05-03-2018, 10:58 PM
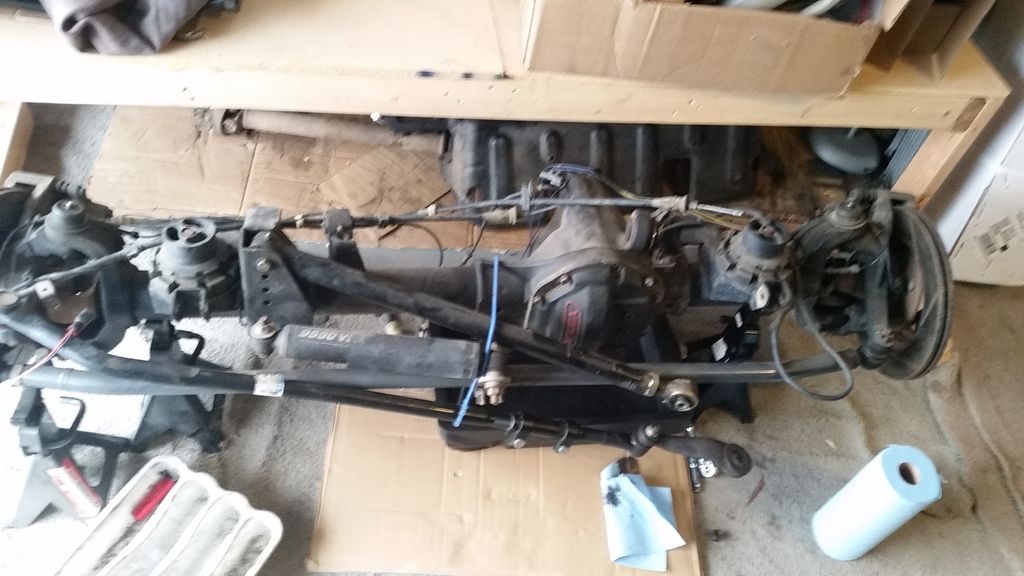
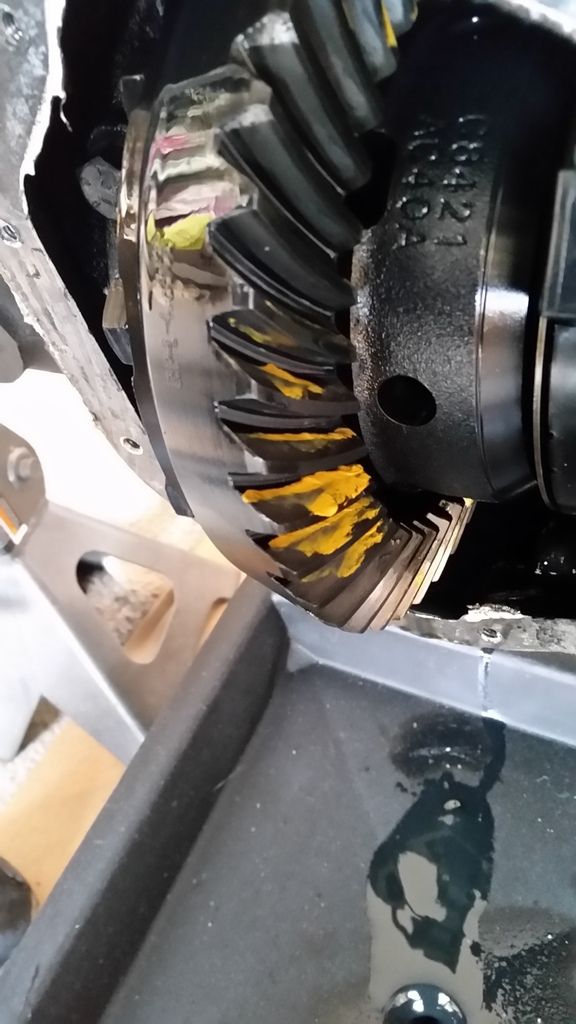
Alright guys, this is it. The madness begins. First, inspected the front axle. It was built by predator 4wd (highly reputable) so needless to say it was in great shape. Here are some pics
The gear pattern in spot on and appears to be way better that the rear axle. Noone sells the yellow gear pattern stuff for some unknown reason so the blue will have to do
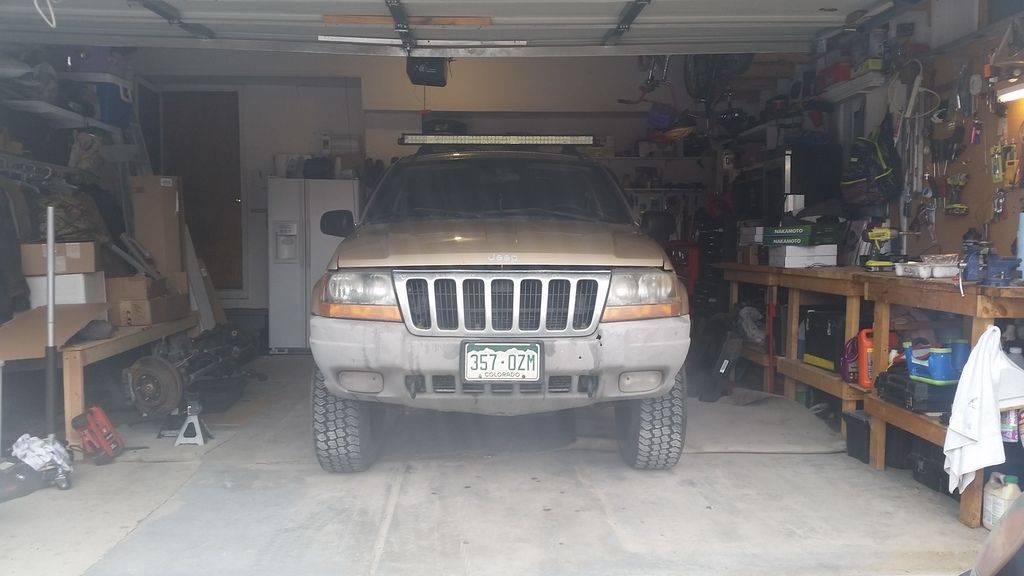
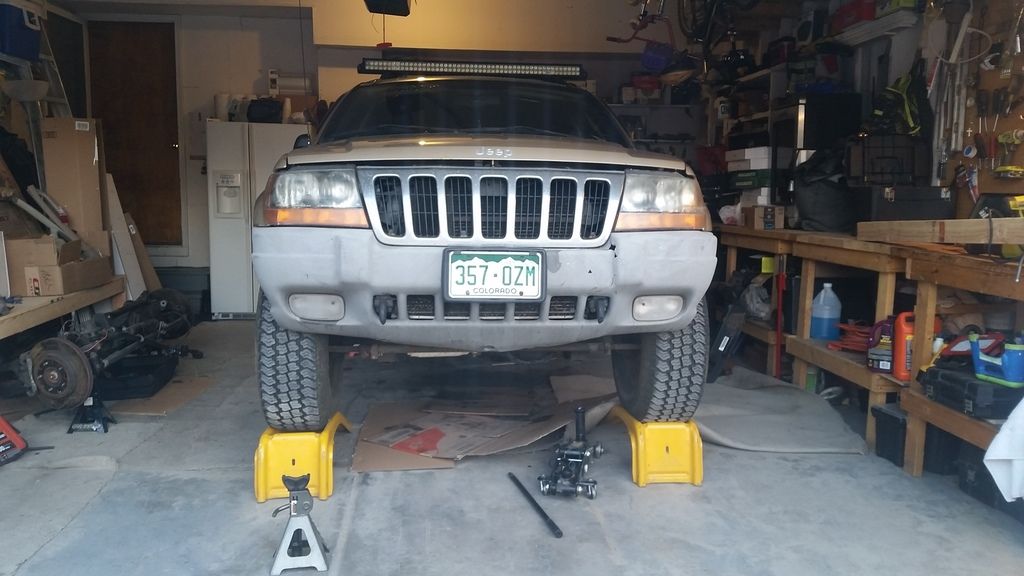
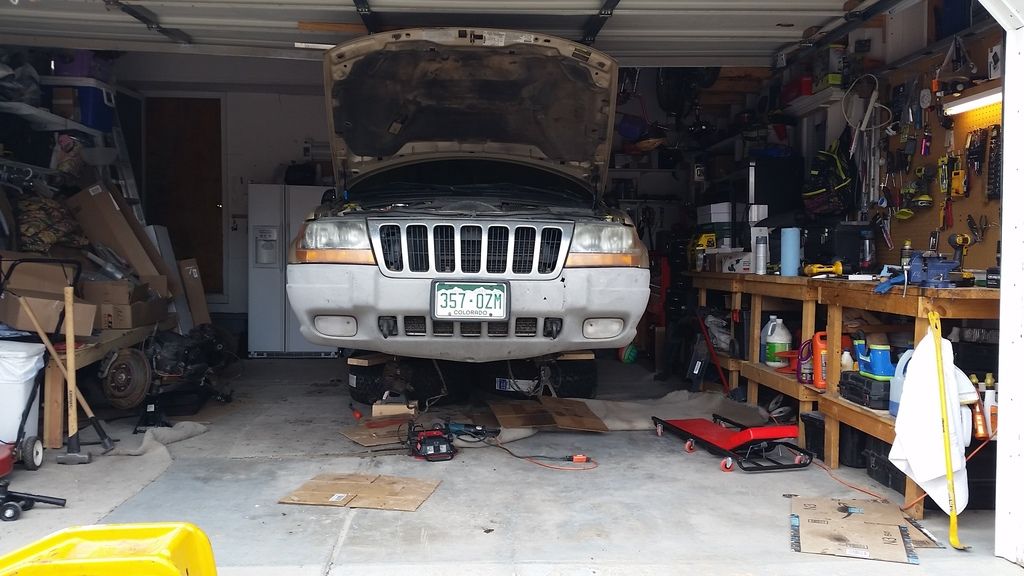
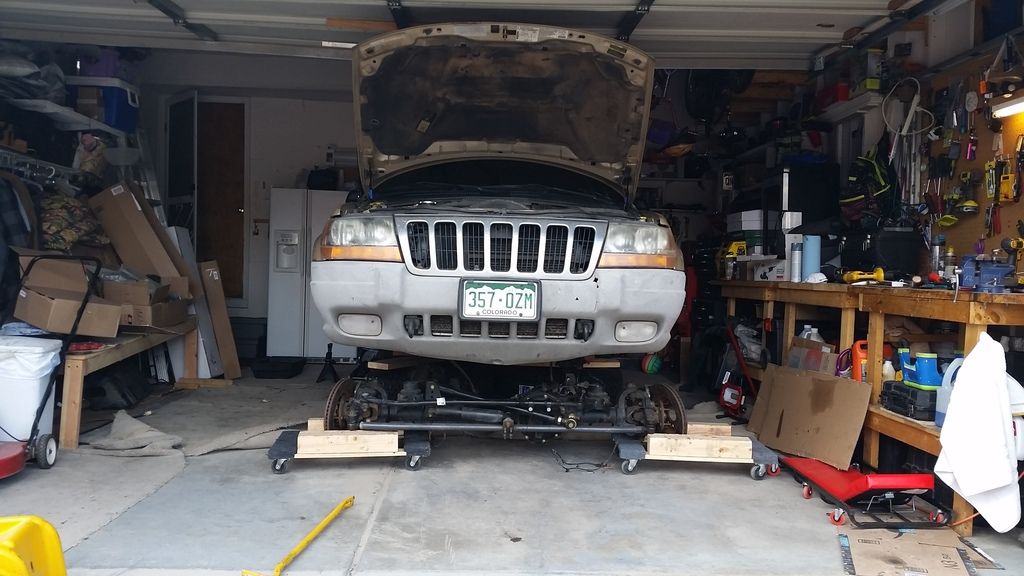
With the axle inspected, this is what the jeep will look one last final time before all the new hardware goes on it.
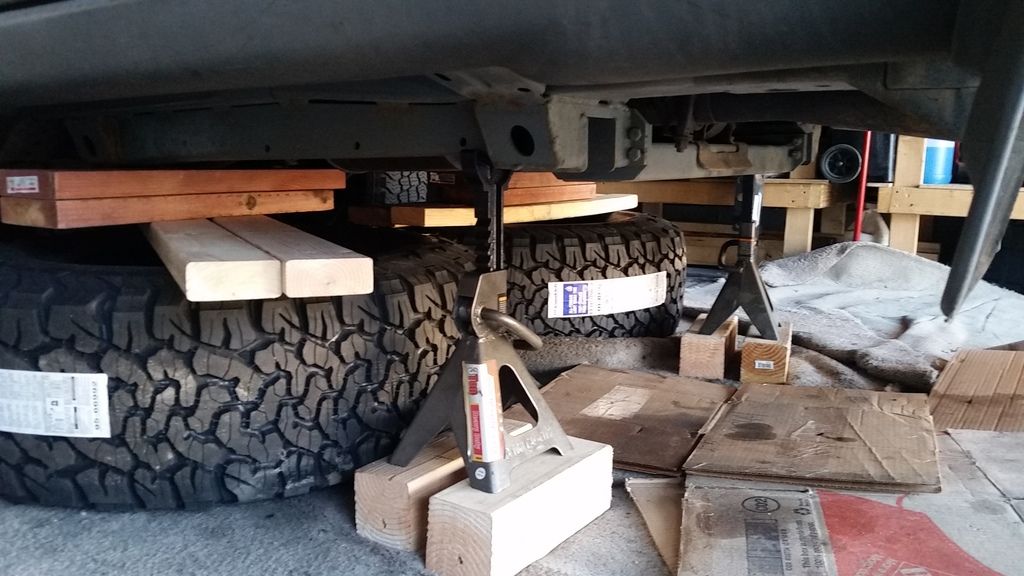
So to lift it up and hope its got enough clearance for a 6" lift and new axles, I put it on the metal ramps
As support, the 35" are finding its use and a jack stands with some wood.
Unfortunately i didnt get much done as I had to get the final project turned in and inspect the axle. Tomorrow's plan is to get to hopefully removing the axle. Sprayed some penetrating fluid onto those bolt. I will try to work on it daily, but I got weekly commitments on saturdays and wendnesdays. Hopefully I can post daily updates on the prograss
05-04-2018, 09:50 AM
Am i the only one that cant see the pictures?
05-04-2018, 10:07 AM
There is a way. I believe there is some extension that needs to be downloaded. I was trying to find info on it, but didnt. Someone did solve this on Comanche club Web siteOriginally Posted by cwm

Sent from my SAMSUNG-SM-G900A using Tapatalk
05-04-2018, 10:41 AM
I can see them
Sent from my XT1650 using Tapatalk
05-04-2018, 12:23 PM
Look fine to me.
Do work! I need to repair before I can do anymore mods, and I'm not up to this level of mods, yet.
Sent from my SAMSUNG-SM-G930A using Tapatalk
05-04-2018, 12:26 PM
So just everyone know, the parts that I pull out (axles, tires and wheels) will be on sale. If you want them pm me and we can talk price
Sent from my SAMSUNG-SM-G900A using Tapatalk
05-04-2018, 10:14 PM
man photo bucket sucks ass!! but found a work around
https://chrome.google.com/webstore/d...fnflicjjgj?hl=...
https://addons.mozilla.org/en-US/fir...ed-fix/?src=ss
05-05-2018, 12:03 AM
Yep, thats what I had to do. Could not find the links. At least thats solved.
Onto Day 2 of the build. I was close. The goal for today was to pull the front axle. Got close. Here is what happened.
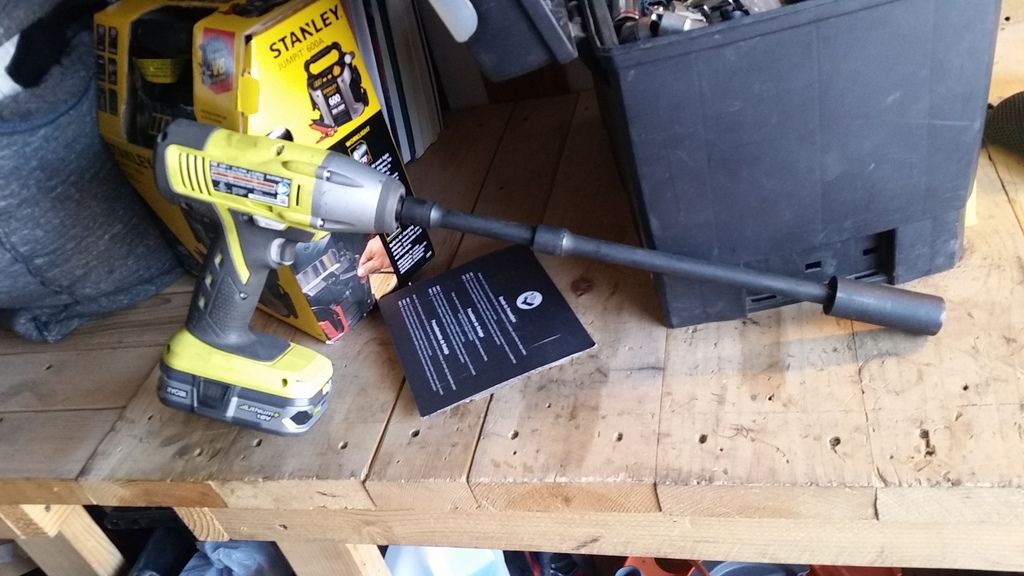
First off, get yourself one of these if you don't already have one. This little electric Ryoby has so spend this process up
Removed the driveshaft. This is a CV style shaft on both sides. Six, 8mm bolts on axle and tcase side. This one is pretty crappy and the cap on the tcase side was falling off.
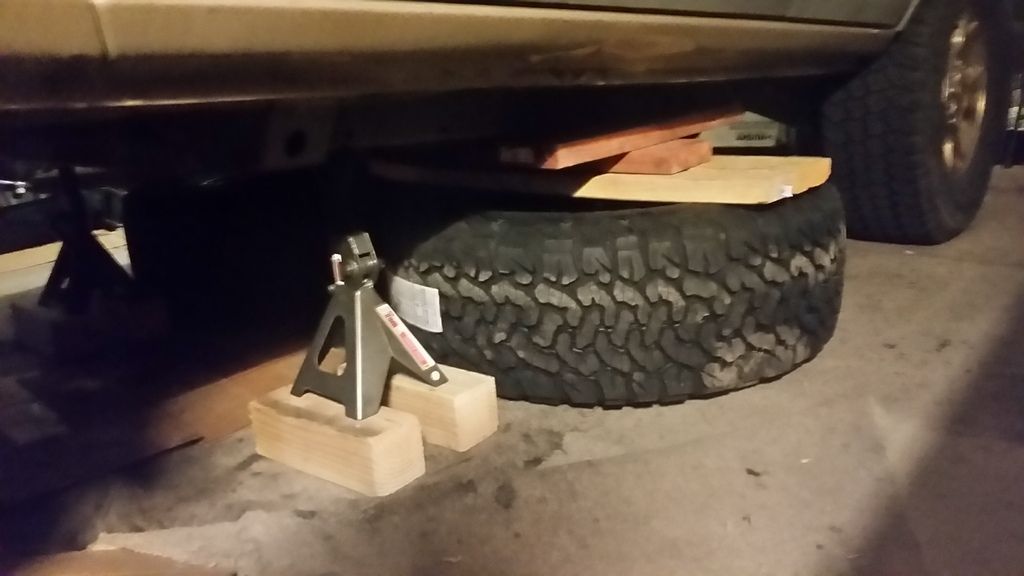
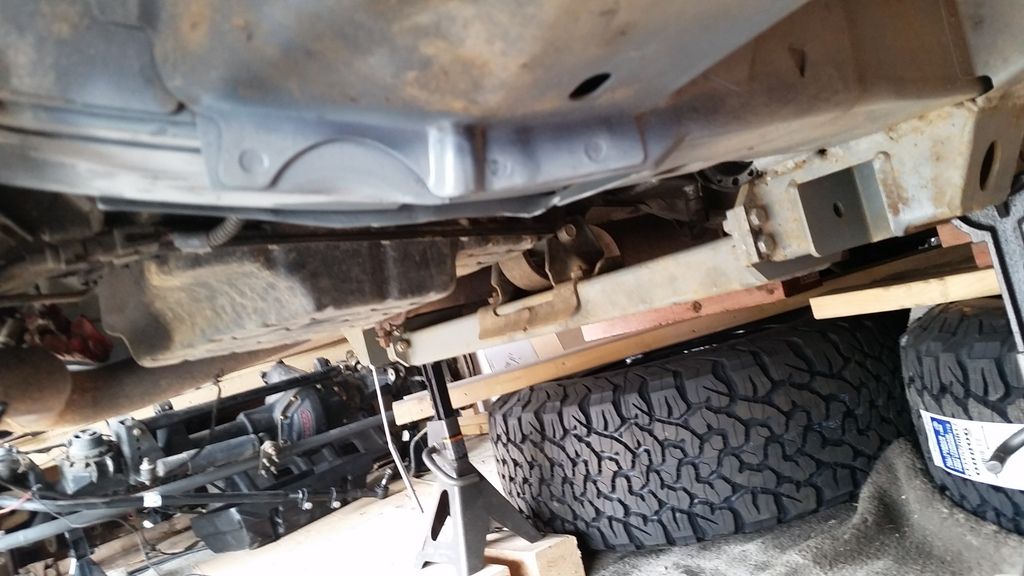
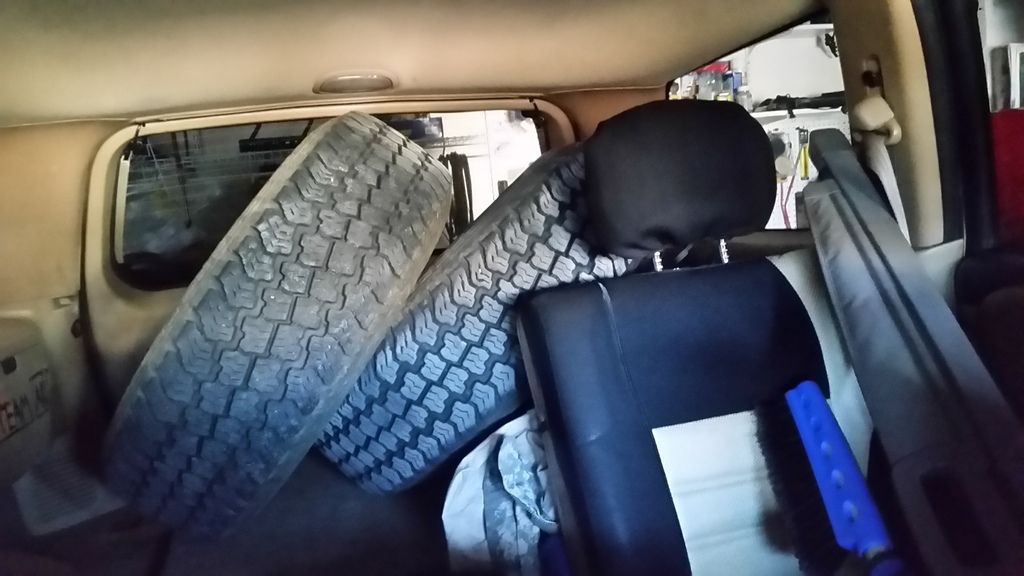
I had to support Hippo on jack stands kind of far into the body. Right where the Clayton unibody is ran. This a little too far for my liking since there is a ~450 lb engine in the front. So the front 2 tires went to the back for some weight distribution
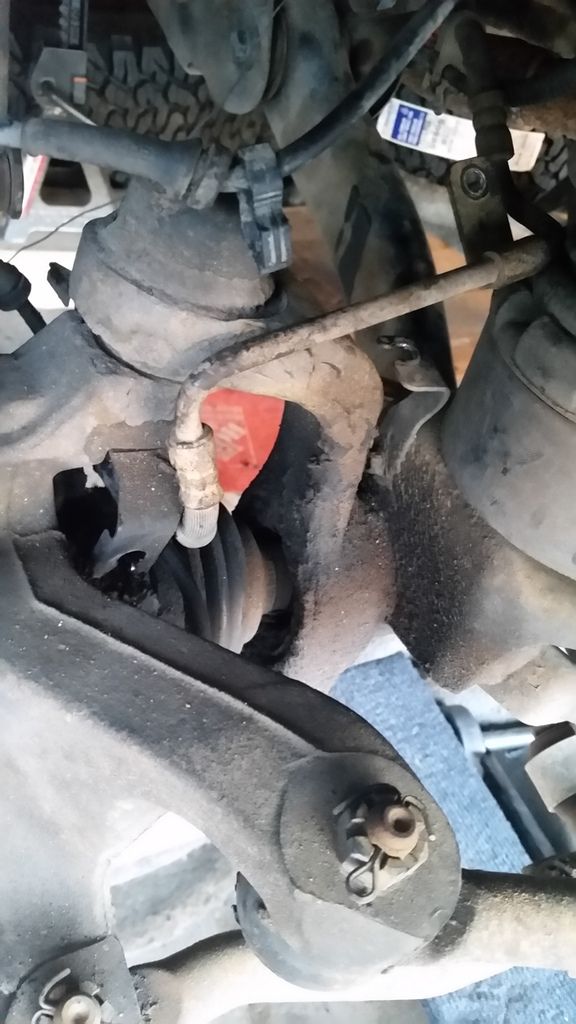
Okay, now onto actually disconnecting stuff. In order to remove the ABS sensor line and the brake caliper, the shocks have to be removed. The wiring is routed in between the spring and the shock.
After pulling the sensor wire out of its little brackets, you have to unbolt the bracket that holds the brake line. that is one, 10 mm bolt (both sides). Then you get to stupid part. The brake line itself is routed through the knuckle.
Not sure why the engineers did that. I could cut the brake line, but I dont want to bleed the entire brake system as it will all leak out. There is no easy way to get around that. So, top off the brake fluid canister, get a drain pan and put it underneath the brake. Now, you gotta work quick. The bolt that hold the brake line to the caliper is 14mm. Quickly unbolt it, take the line out of the knuckle and connect it back up. Make sure its tight enough that it doesn't leak. Top off the brake fluid and repeat the other side.
Now, we can move onto disconnecting the axle from the body. Its connected in 6 total locations:
2 upper control arms (13 mm bolts)
2 lower control arms (21 mm bolts)
Pitman arm (33 mm nut) <- the new axle has a pitman arm attached to it so ill be using it cause why not
Track bar (18mm I believe, but I have upgraded the bolts and bushing on the track bar previously to help with the death wobble and bump steer)
All but 1 of those bolts came out. The passenger side upper control arm bolt is stuck in the metal part of the bushing. Not sure how that happened cause it managed to back out to the point there its out of one hole. Can't get a screwdriver in there either cause there is transmission in the way. Can't cut it cause of the exhaust. Gonna have to figure something else out. thats a weird looking thing
Another thing that was found out (I knew that already though) is grass wins against metal. Awhile ago the jeep sat on grass for about a year, and the spring cups disentagrated. pretty much literaly. I put the BB on and it seemed to at least hold the springs in place. I ordered the replacement weld on cups, but never got around to putting them on. So there is a little weld project whenever I get a welder
Right now the axle is only connected to the Jeep at the track bar and pitman arm. Will have to get a pitman arm puller. They arent that expensive (i think). The plan for next time is to fully remove the front axle including the troubled POS upper control arm bolt and mock up the new front axle. Have the links connected and may be even do the alighnment. That is all for Sunday. Then Ill have almost all day to do this.

 05-06-2018, 04:15 PM
It's fun for me to read your build because it brings me back to when I first started modifying my grand over a decade ago. Keep up the work and have fun with it buddy
Sent from my Pixel XL using Tapatalk
05-06-2018, 09:31 PM
Thanks guys. Alright onto Day 3. This is a no turning back day.
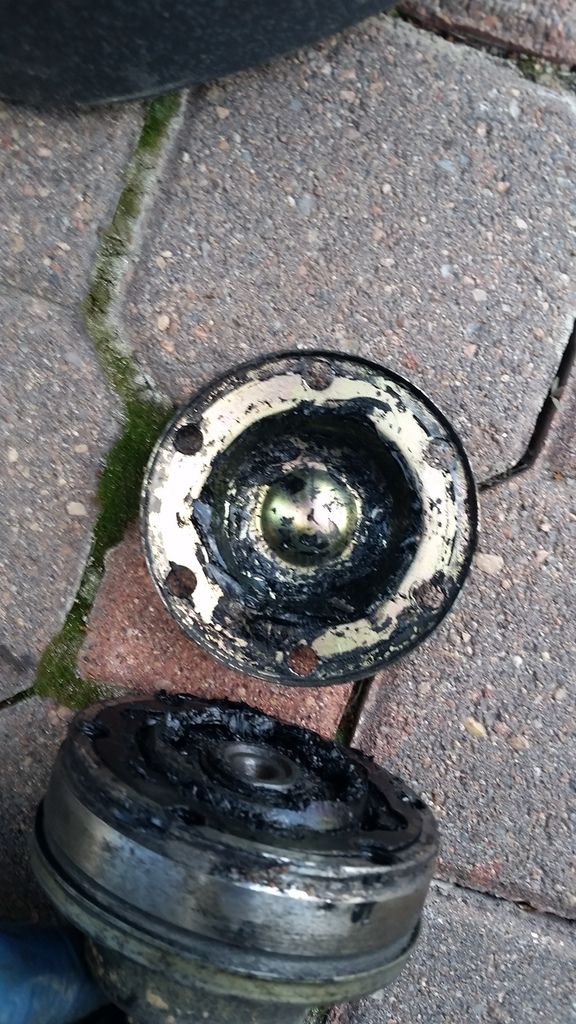
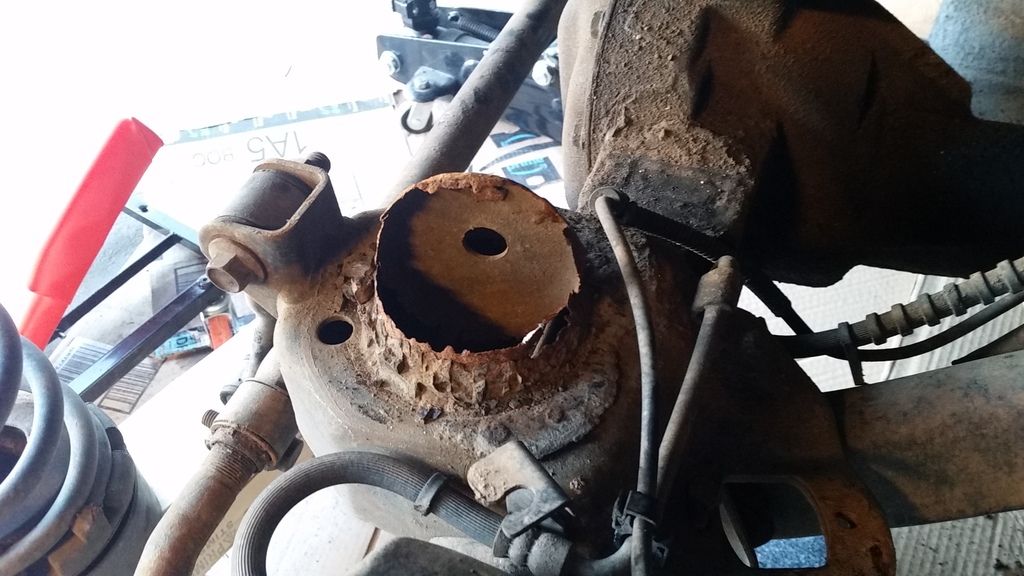
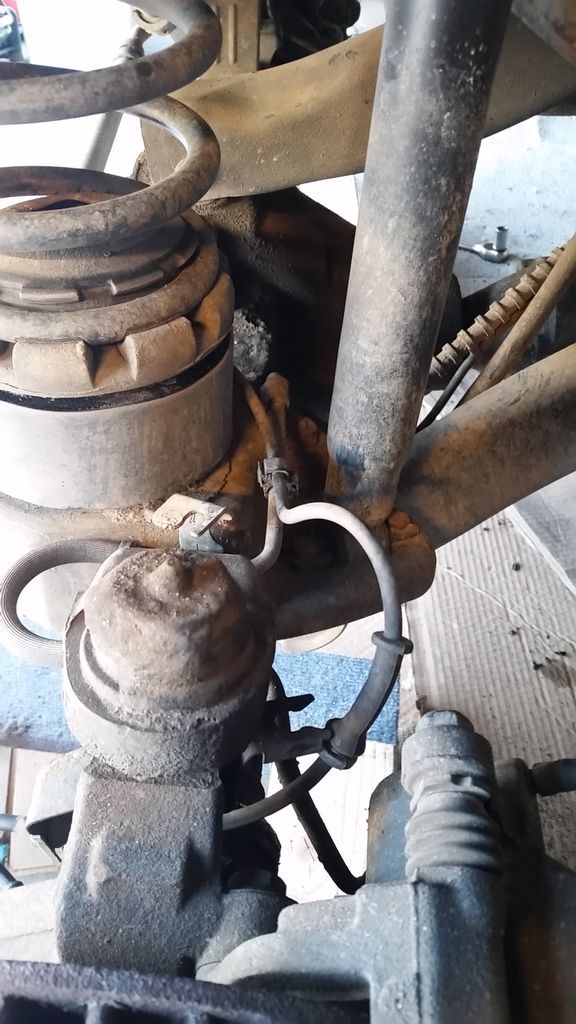
Started off with removing track bar bolt and slid out no problem. The problem came in when I tried to slide out the pitman arm. I got the puller and started using it. The impact topped out. then my strength with breaker bar. so using the big handle of the new jack, used that as an extenstion. So the whole thing was about 4 ft long. All of a sudden i hear a pop. Keep in mind, yes the 33 mm bolt was loose and i was drenching the thing in penetrating fluid and JB80. Welp, when i look under, this is what i see:
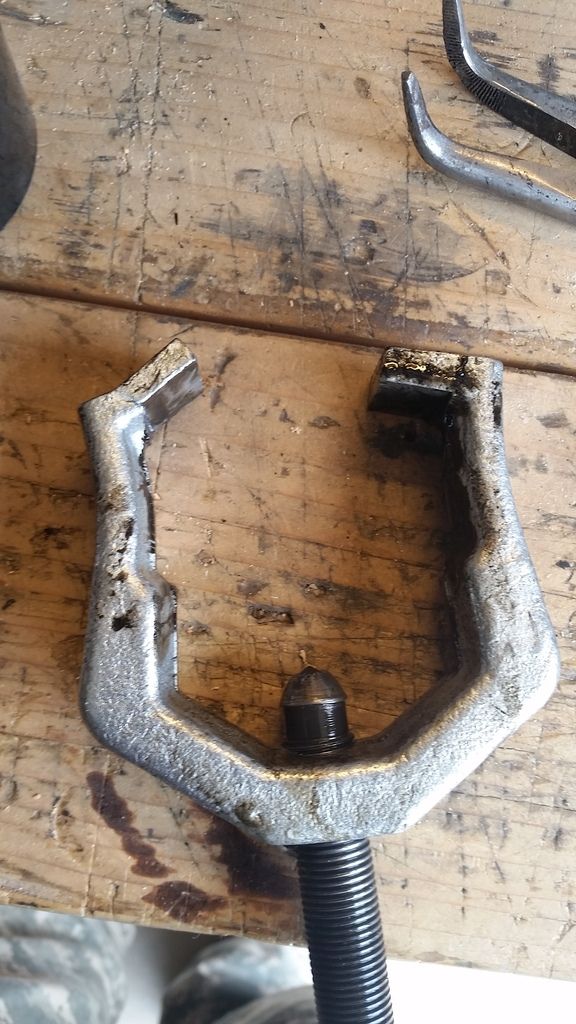
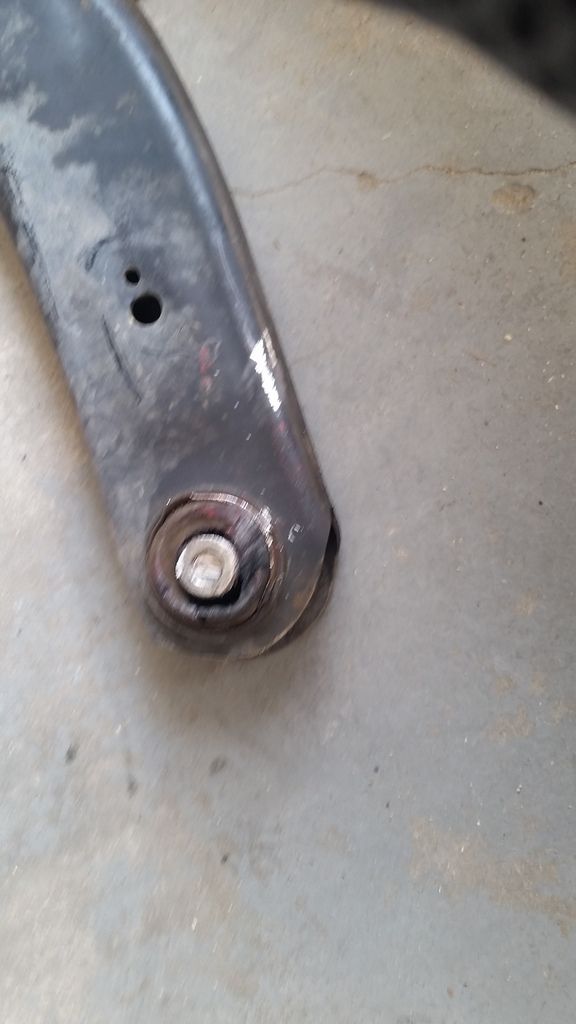
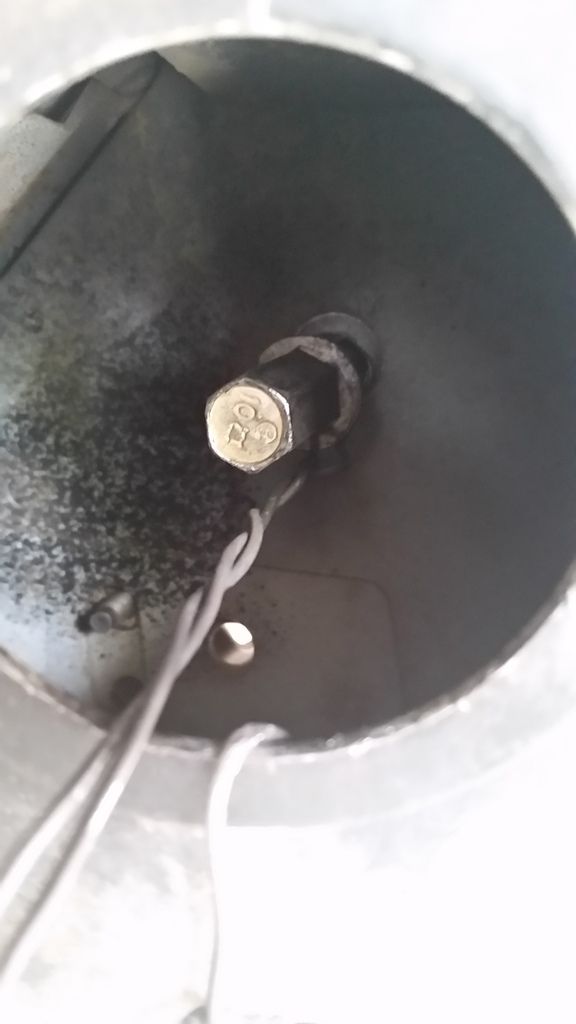
The puller lost. Luckily, the pitman arm that came with new axle is the same part number. The only difference is the hole is honed out to 11/16. So a trip to a parts store and tool store. Onto the next big pain in the ass. The upper control bolt thats stuck. Nothing would get it out. I was hoping that a "pulling teeth technique" would work. Tie the wire around the bolt and use a BFH to pull on the wire. It didnt work. Broke wire twice
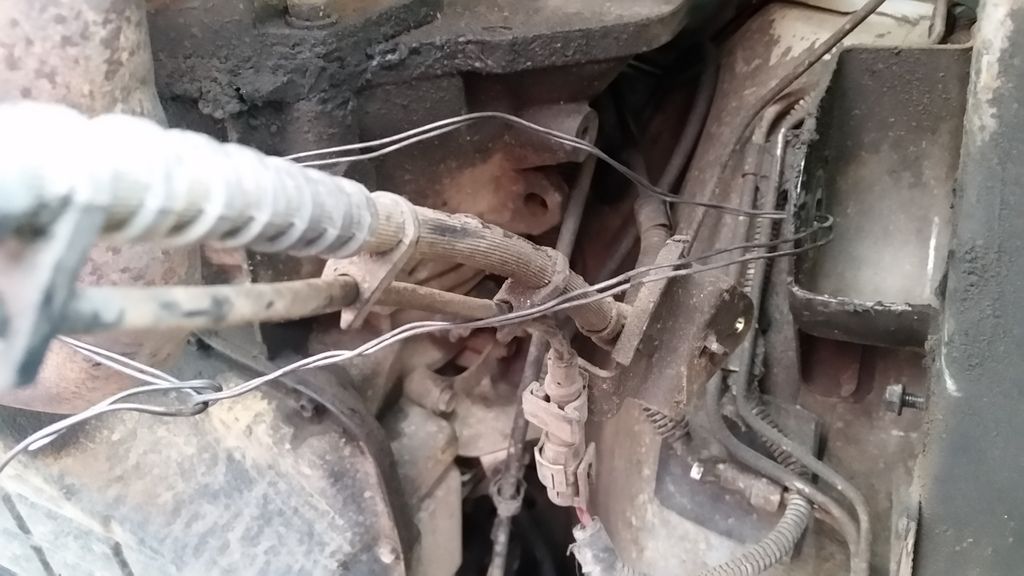
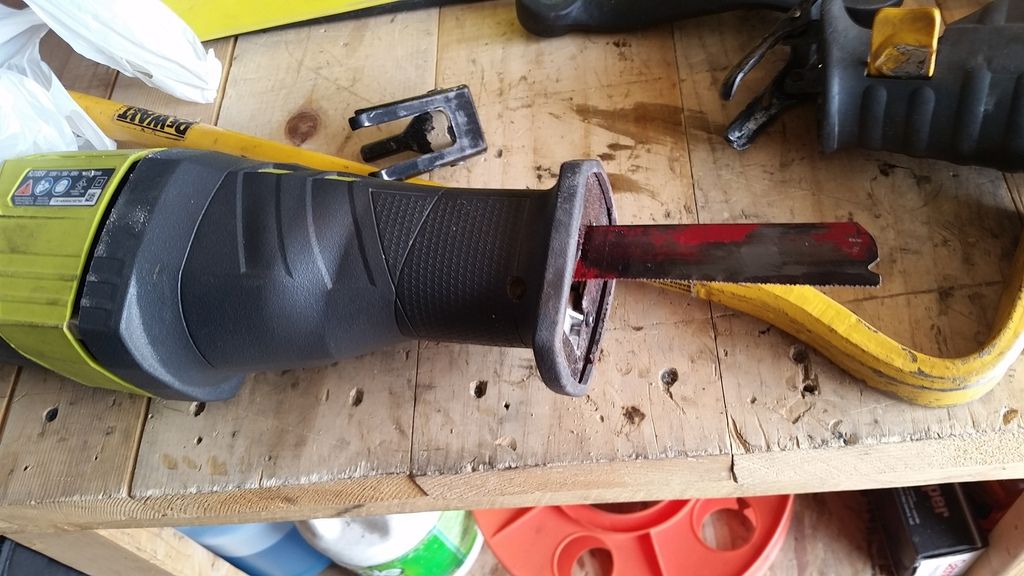
The 7" cut off wheel did not fit. fortunately, even a short metal blade on a ripsaw seemes to do the rick. word of advice. No matter how convinient the battery powered tools are, always have an AC version. The battery powered one was kinda slow and vibrated a lot. The AC powered one was way quicker.
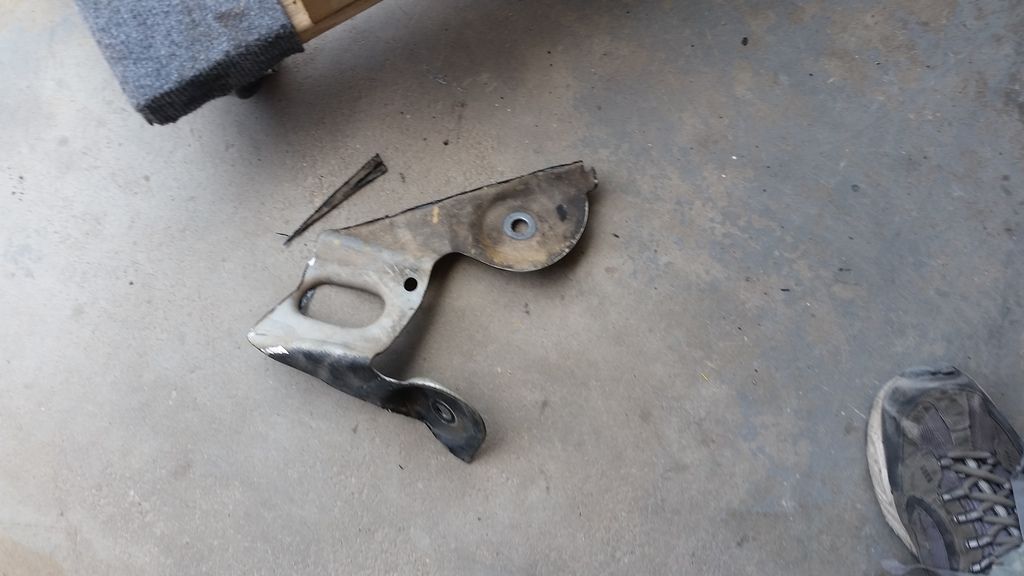
The catch is that you gotta have some one on the other side holding a rachet with a 13mm socket on so when the bolt gets cut, it doesnt fly down the unibody rail. cause its sealed and hard to get to. Took me probably 45 minutes to get the stupid thing out. Its finally out though.
Next is the point of no return. Cutting of the lower control arm brackets. To prep, I moved the brake line braket that held them away from the cutting area. there are plenty of spaces to tie them temporarily to.
Driver side:
Passenger side:
A 7" cut of wheen made short work of it. One thing to watch out for are the sparks. Wound up wearing a thick jacket, a backlava for the neck, and a motorcycle helmet for the head. The cutting was always done from the outside side of the vehicle. To do that, cut the outside most side of the bracket (closest to the edge of the vehicle), then cut the back side of the bracket and then the inner side. The result should look something like this:
Once done, sand over the edges, and paint. One other thing to look out for is the pinch points where the body kind of attach to the rail. I left those alone. They stick out about half an inch down so the control arms shouldn't interfere. Then just sand and paint to prevent rust. Here is what I'm talking about:
After some cleanup, here is what Hippo looked like with no legs XD
Now comes the fun part. Finally, after months of waiting the new control arms are opened. And the new axle rolled under Hippo.
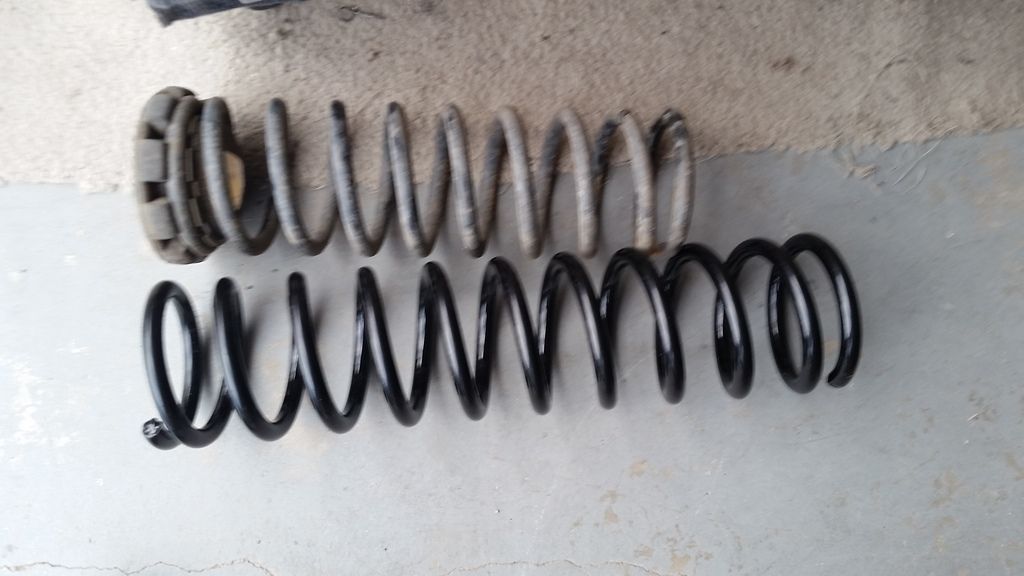
New springs vs old ones. Even with 19 years of sag, the new ones look way longer
The new control arms come with 3 bolts. you need 4. The last pair comes from the axle side of the lower control arms (the 21 mm ones). They are still a little wobbly and I may change them too as they are not as thick at the neck as the bolts that come with the kit itself. Also the control arms arent marked which side is which. But the reference point is that the rubber bushing goes on the axle side. Also, the "C" on the arms goes on the outside. Then arms are beefy
The instruction says to set the arms to 36" for a 6" lift. Then I realised something. Thats a stock axle. The new one might be different. So tomorrow ill use center of where the wheel would be as a reference and measure out the distance from there to the end of the control arm bracket. If its the same, then no worries.
One other thing i havent mentioned are the stock bumpstops. The easiest way to remove them is via 2 scredrives (and no axle in my case). just shove them into the side with the long edge (hammer for persuasion) and squeeze them out. they came out eventually.
So next on the agenda:
-return broken tool
-get the progressive bit for 11/16
-may be new hardware?
-look at the new brakes
-longer brake lines install
-install the control arms
-route the locker and abs
-steering
-buy diff fluid and gasket for D44
-trim the fenders
-probably relocate the bottle
Am I missing something? Thought something else had to be bought. Oh well, Im sure itll surface when its needed
05-06-2018, 10:07 PM
Here's a tip for fender trimming and adjustment, leave the coil springs out but attach everything else. Then bolt on the tire and use a floor jack to raise the axle up . Sounds totally obvious, but my dumb ass spent entirely too much energy and time trying to flex my Jeep out with the springs and shocks in to dial in axle placement. Good luck
Sent from my Pixel XL using Tapatalk
05-06-2018, 10:13 PM
Thanks for that. The new bumber that is being made goes until the furthest bend on the fender. I was just gonna use that as a point. But I like your idea too. Will see what happens. Thanks for advice!
05-06-2018, 10:51 PM
It wasn't until I did it that way till I really perfected the axle location for minimal bumpstop and maximum steering. Also, I cut more of my outer fender than I really needed to.
I wouldn't order longer brake lines, shocks or bumpstops until you get your long arms installed and new tires mounted up. It's better IMO take measurements on your rig than to trust pretty much any other sources.
Sent from my Pixel XL using Tapatalk
05-06-2018, 11:32 PM
Uh, on the shocks and brake lines, those are already in the kit. Got them. Bumps top will have to wait
Sent from my SAMSUNG-SM-G900A using Tapatalk
| « Previous Thread | Next Thread » |
| Thread Information |
Users Browsing this ThreadThere are currently 1 users browsing this thread. (0 members and 1 guests) |