|
|


 02-13-2019, 09:14 PM
so i'm going crazy here not being able to drive the jeep i got complete 1 project and start another.
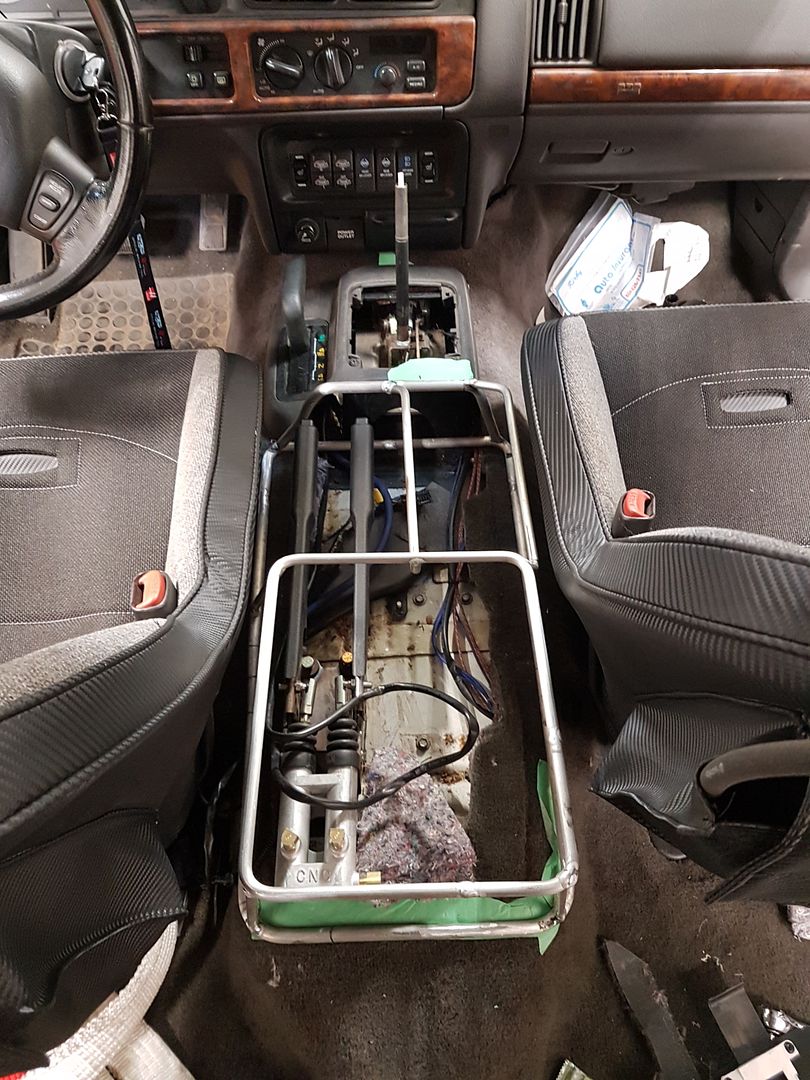
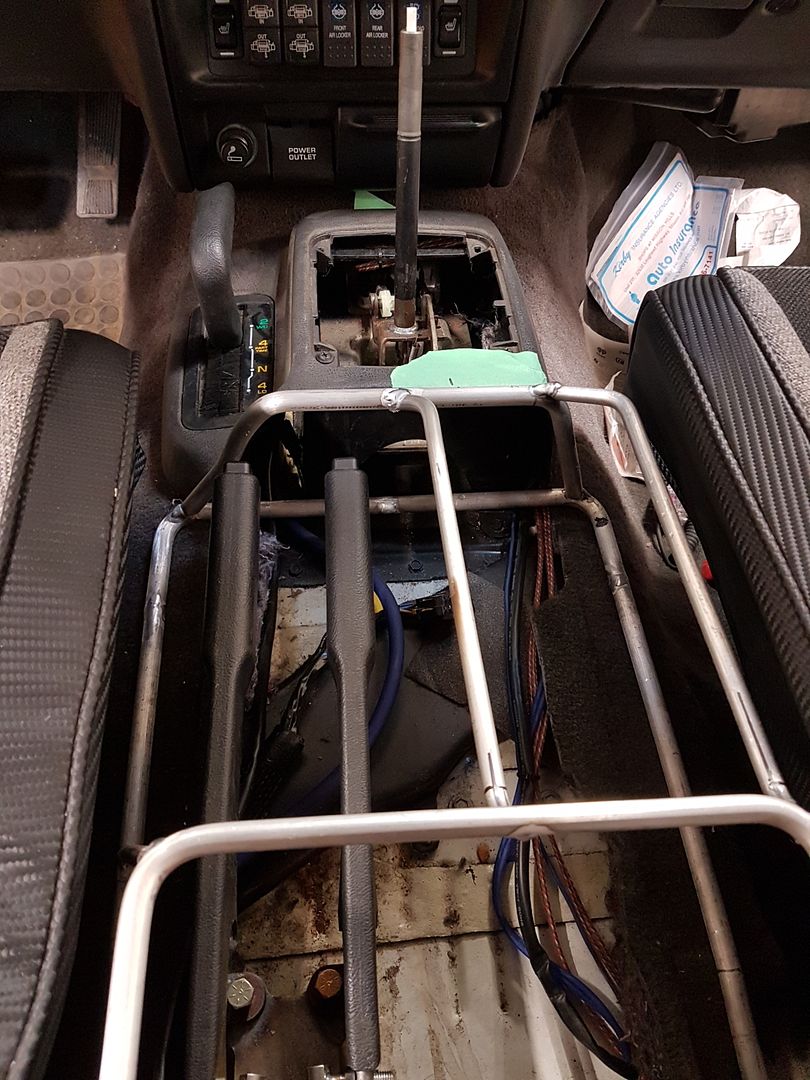
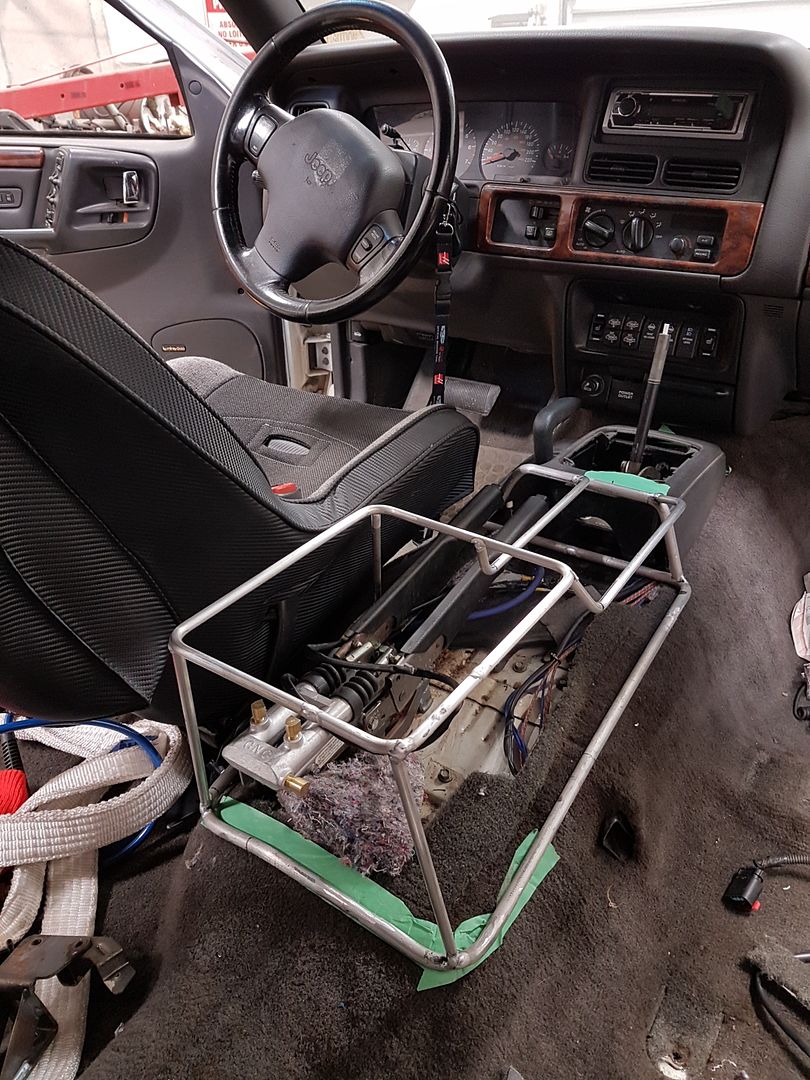
i got my steel racks up.
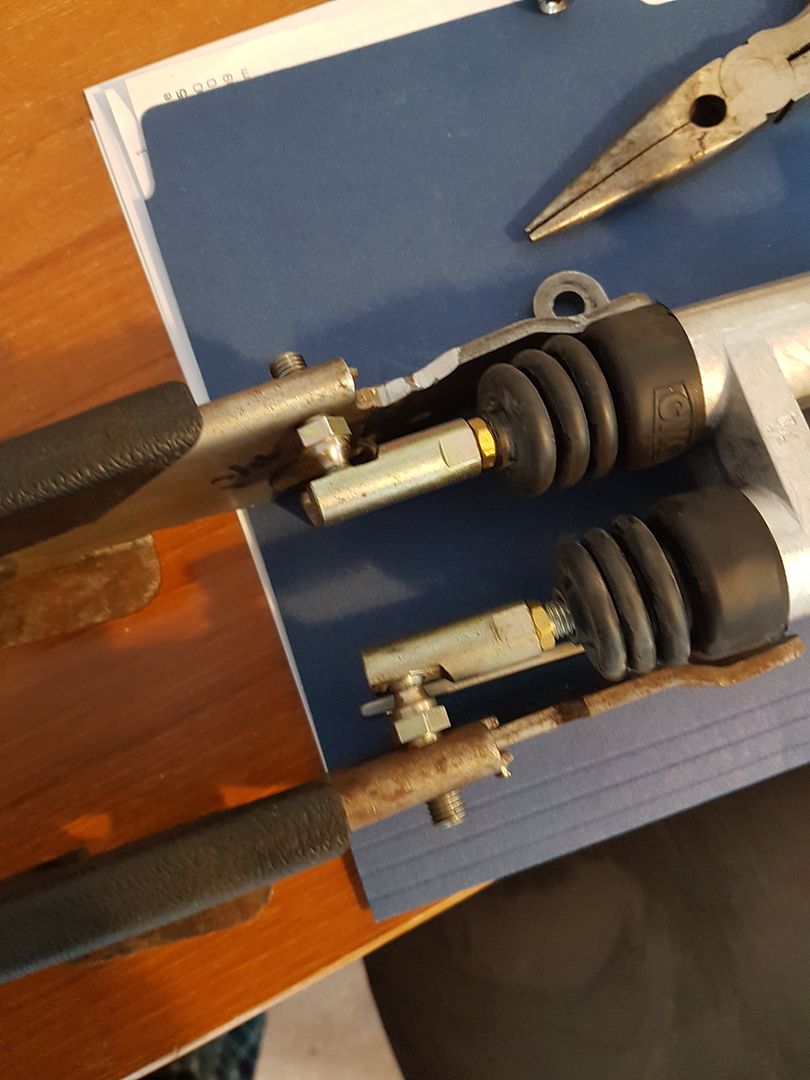
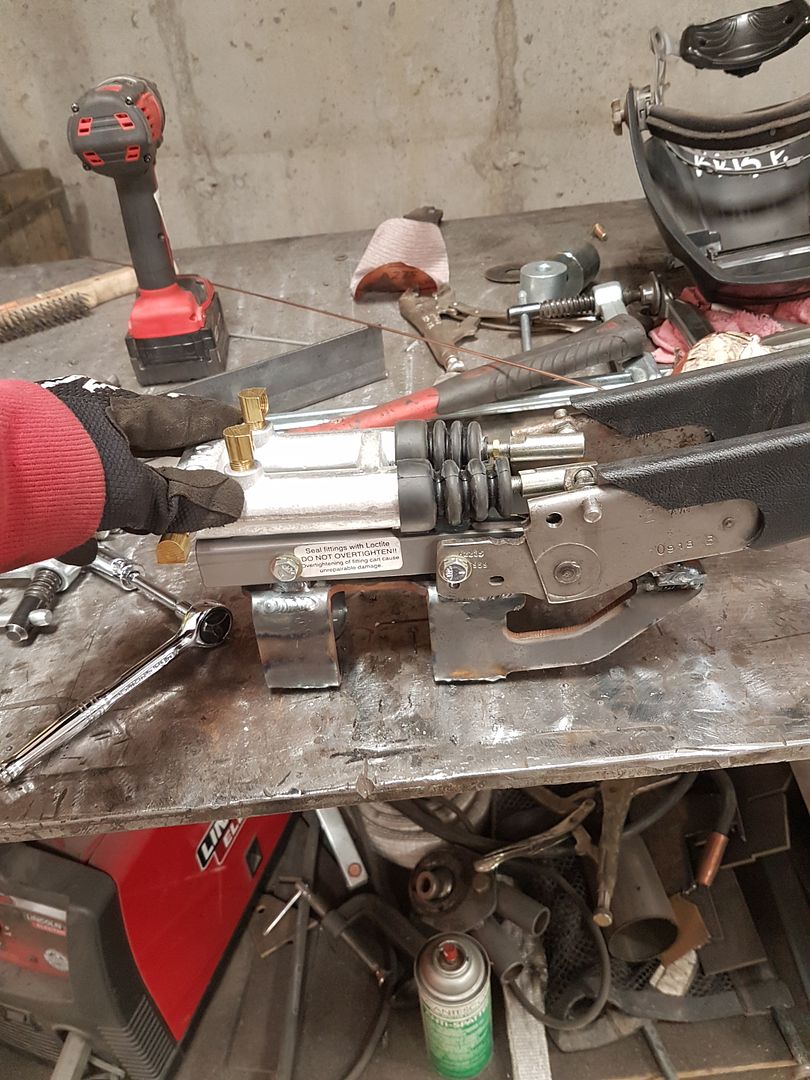
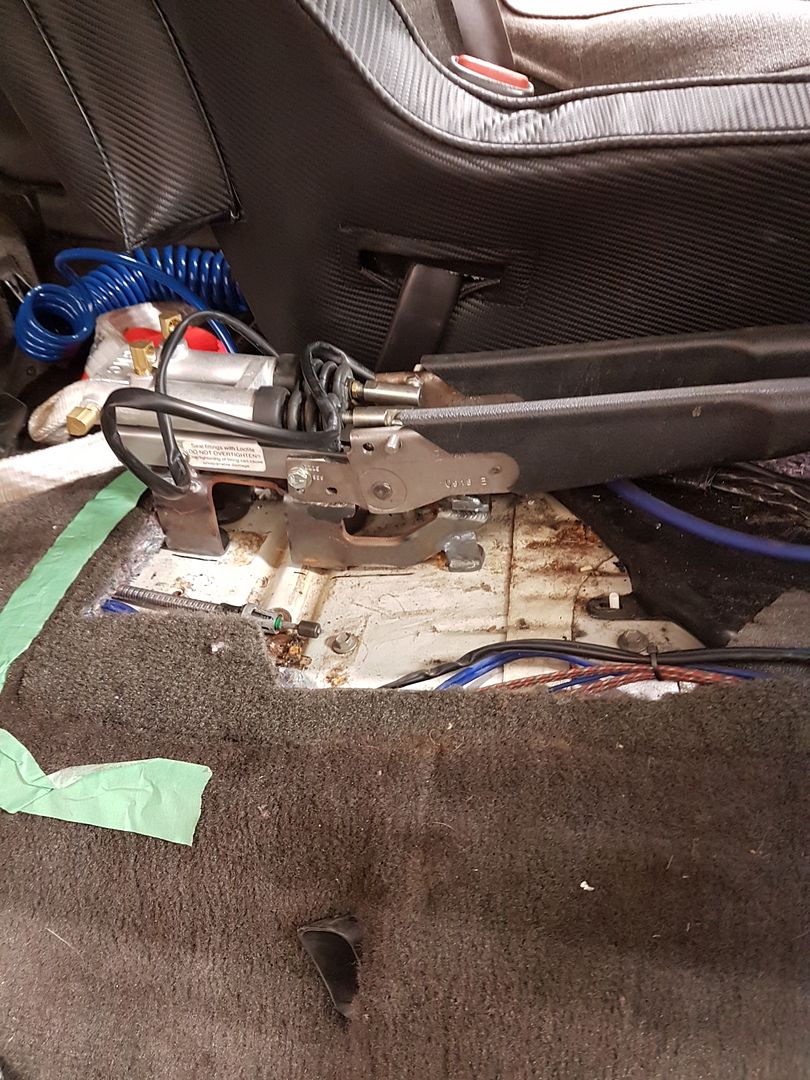
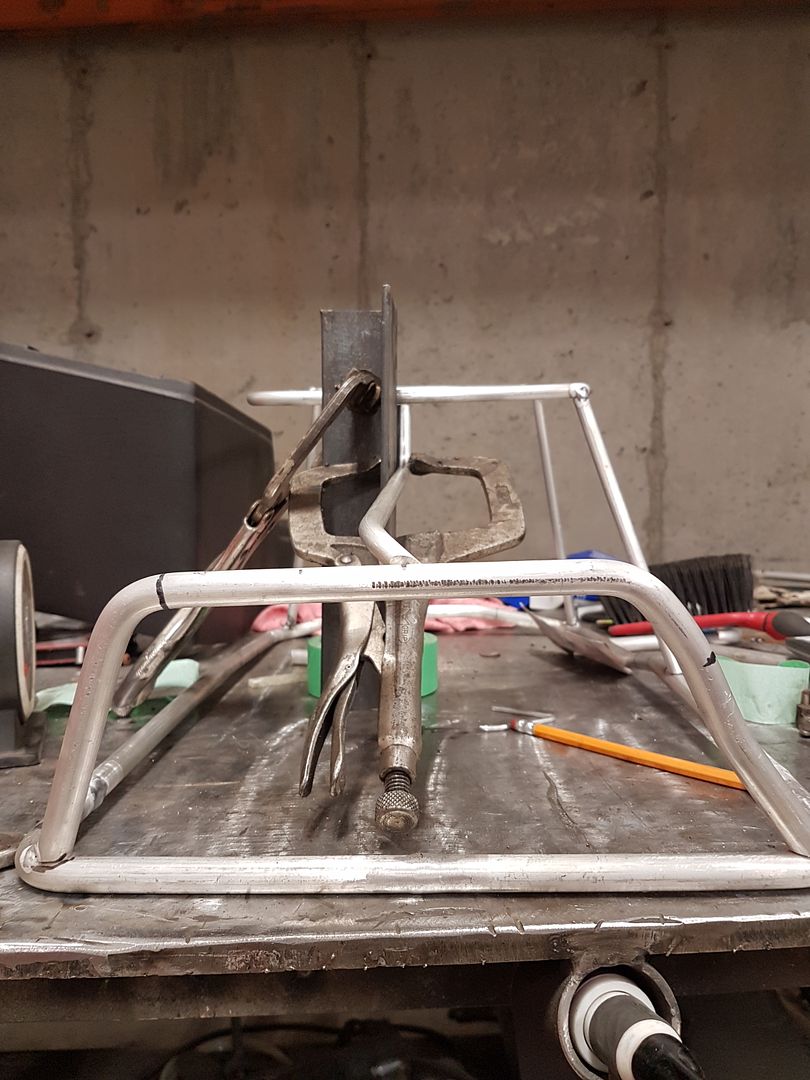
and i started to adapt the factory ebrake handles to some CNC cutting brakes for a new center console i will be building.
i still need to sort out a bracket to hold everything. i want this to look factory and be able to use the ratcheting mechanism to hold the cutting brake. i'm hoping if i get pulled over the cops wont know any better when they ask me to pull the ebrake. i do plan on leaving all the factory cables under the car in place so it also looks like i have a mechanical brake.
 02-15-2019, 11:50 PM
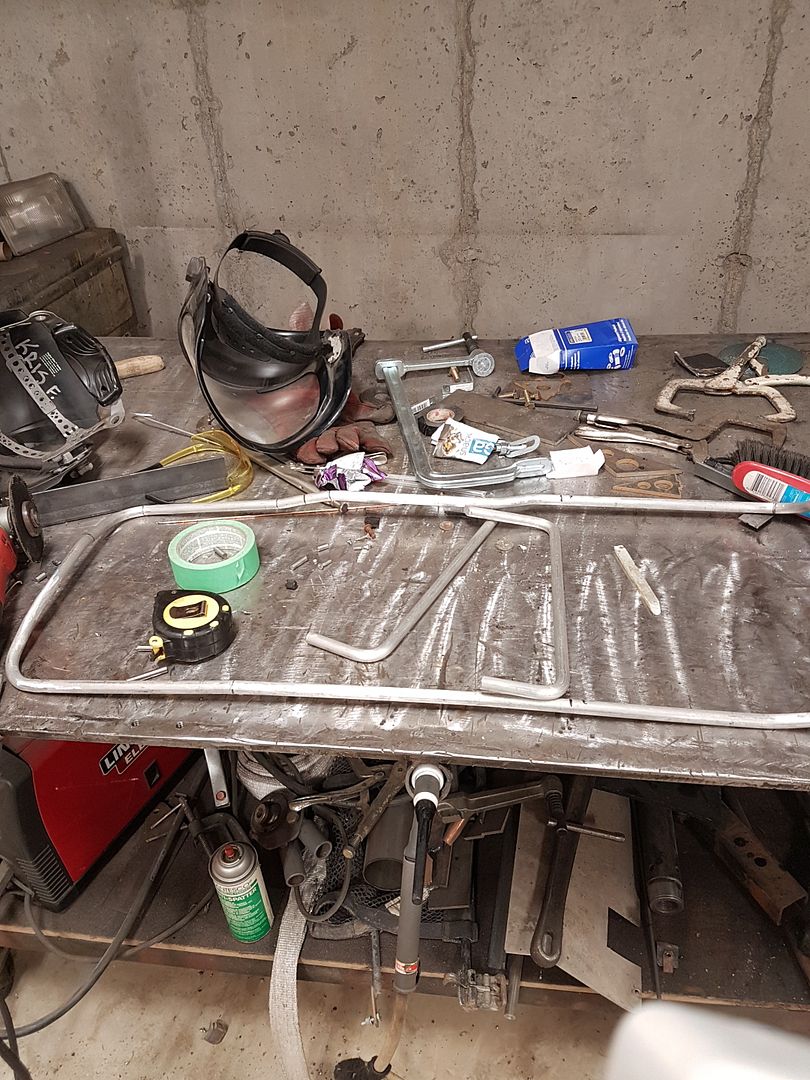
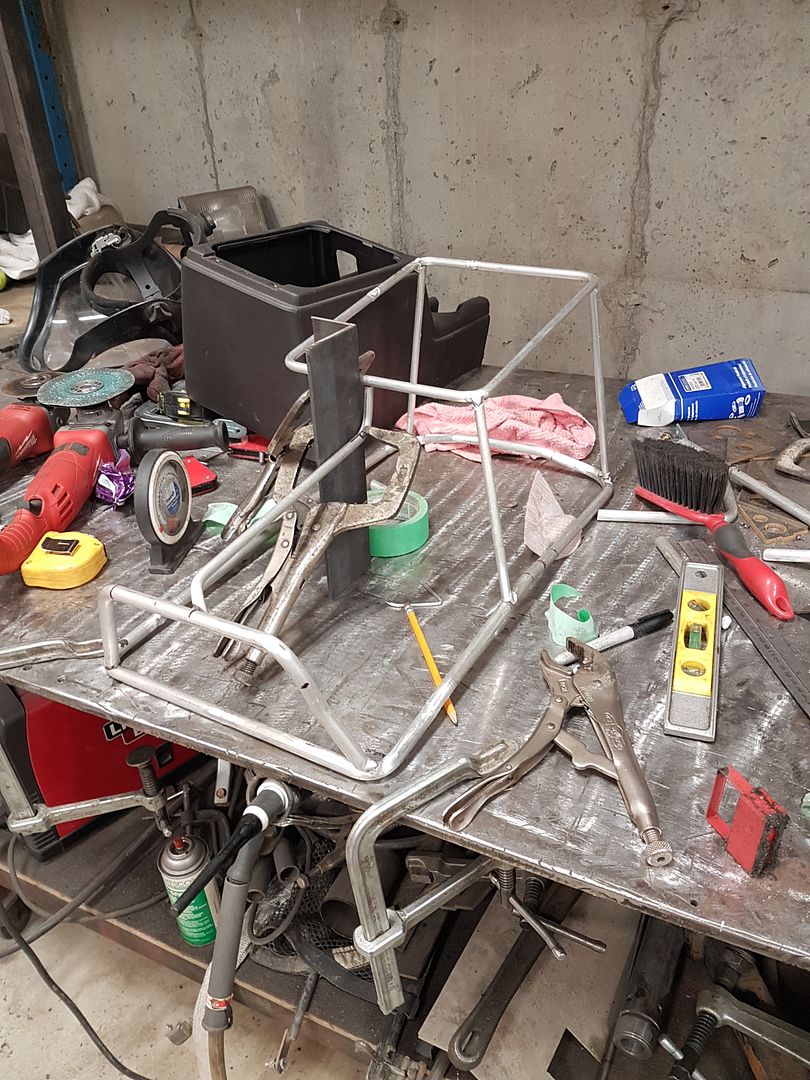
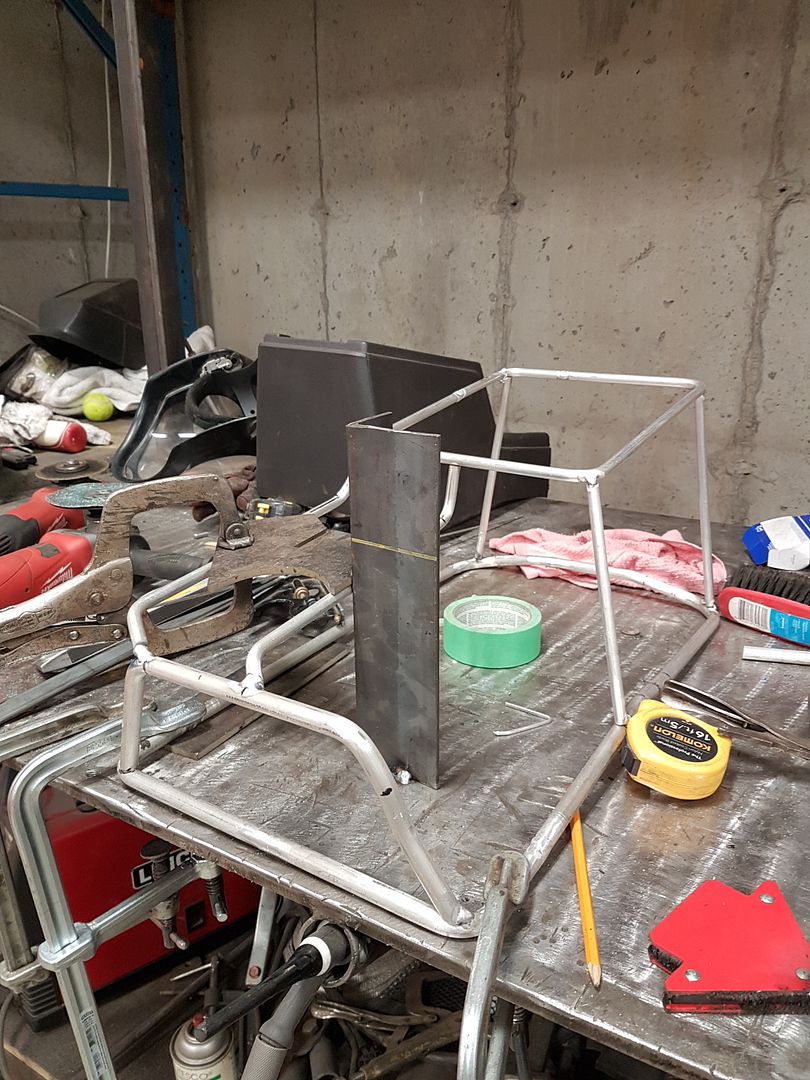
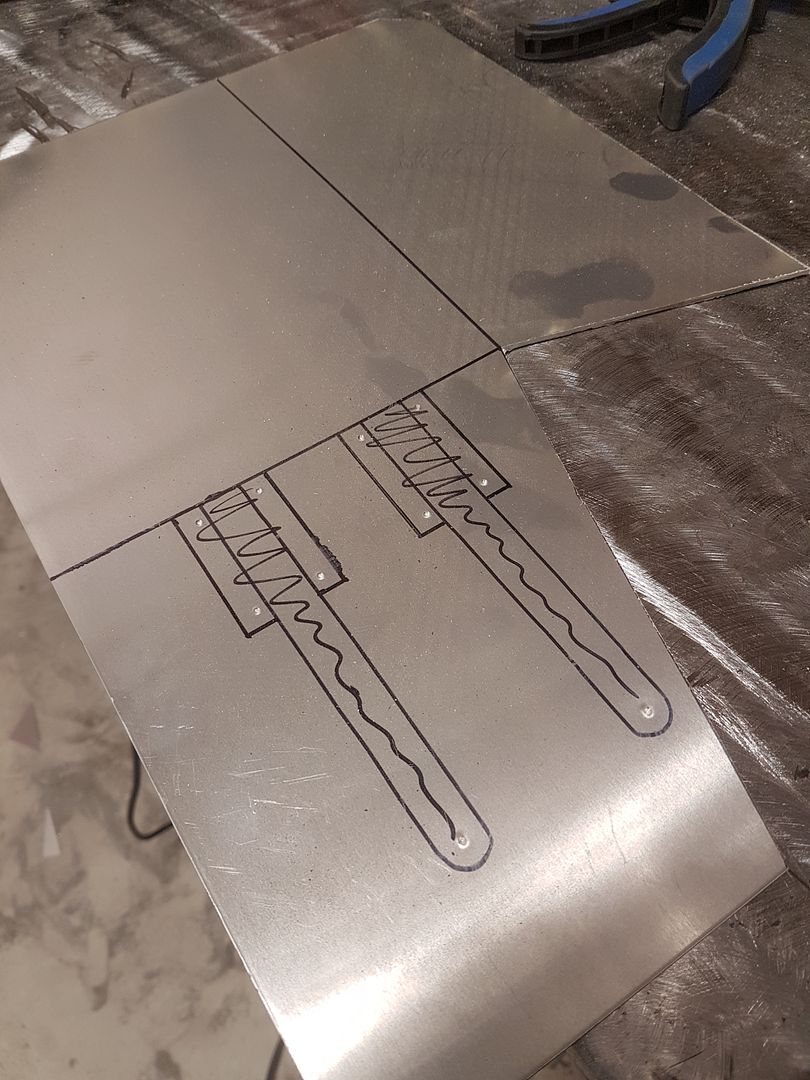
the start of the console build.
its 1/2" aluminum round bar.
02-19-2019, 08:53 PM
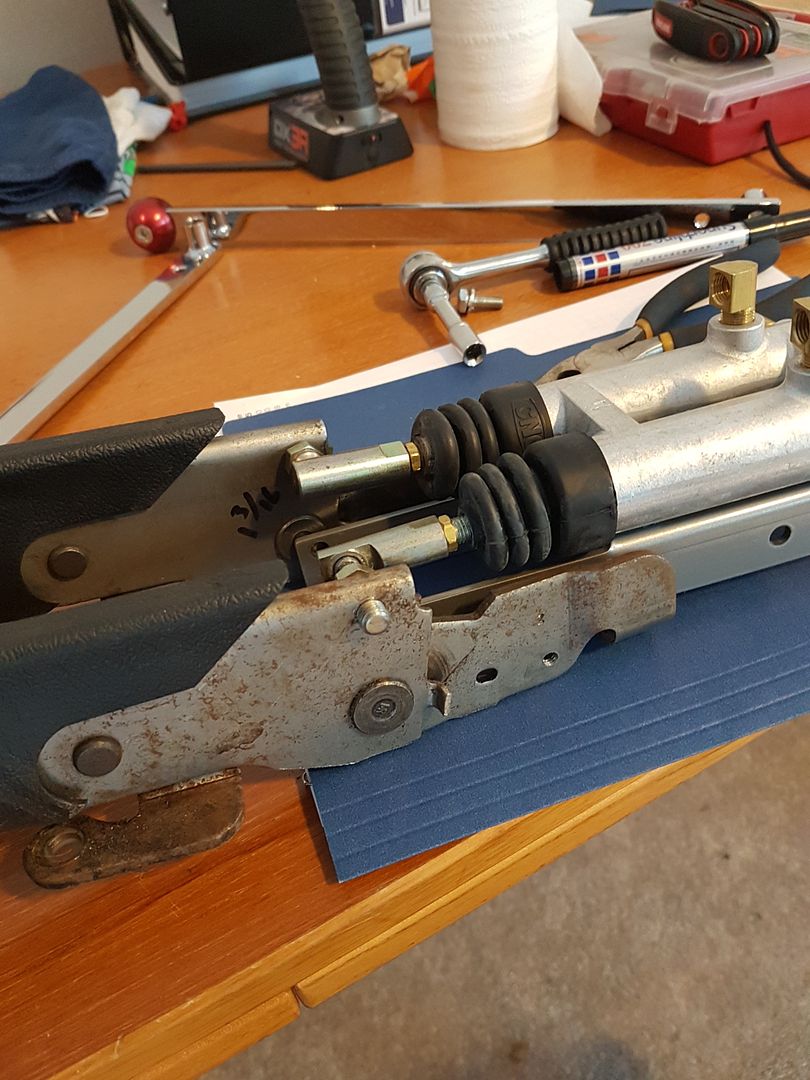
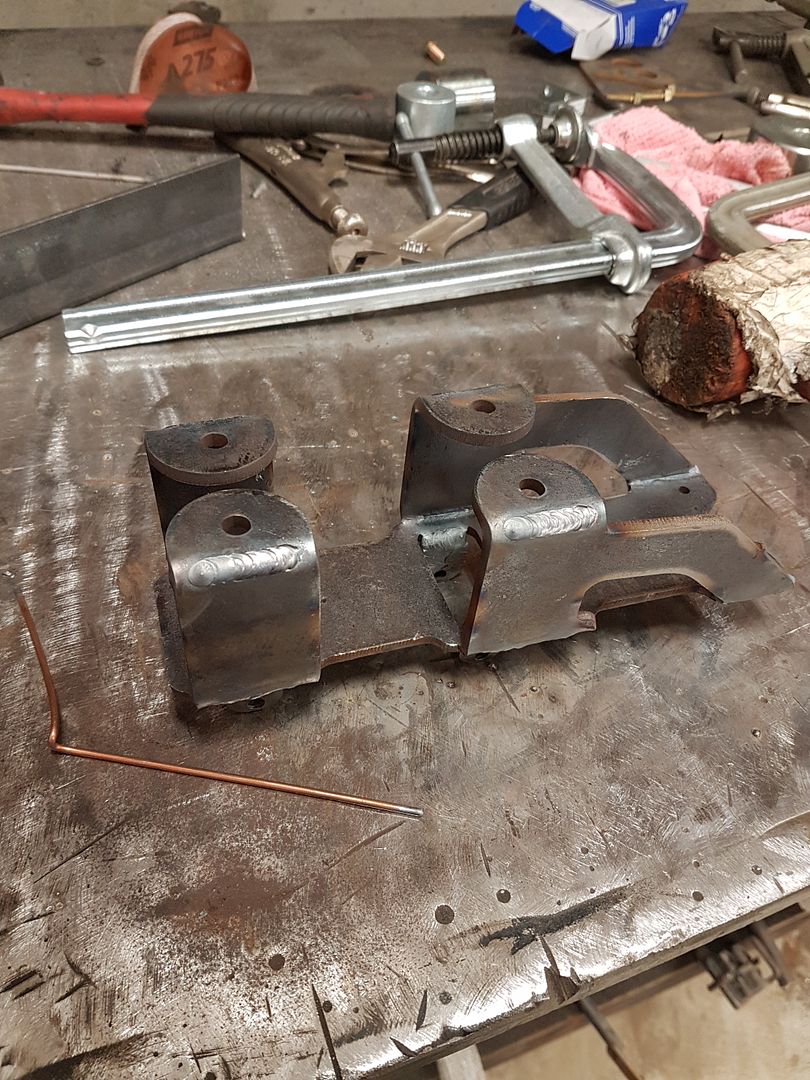
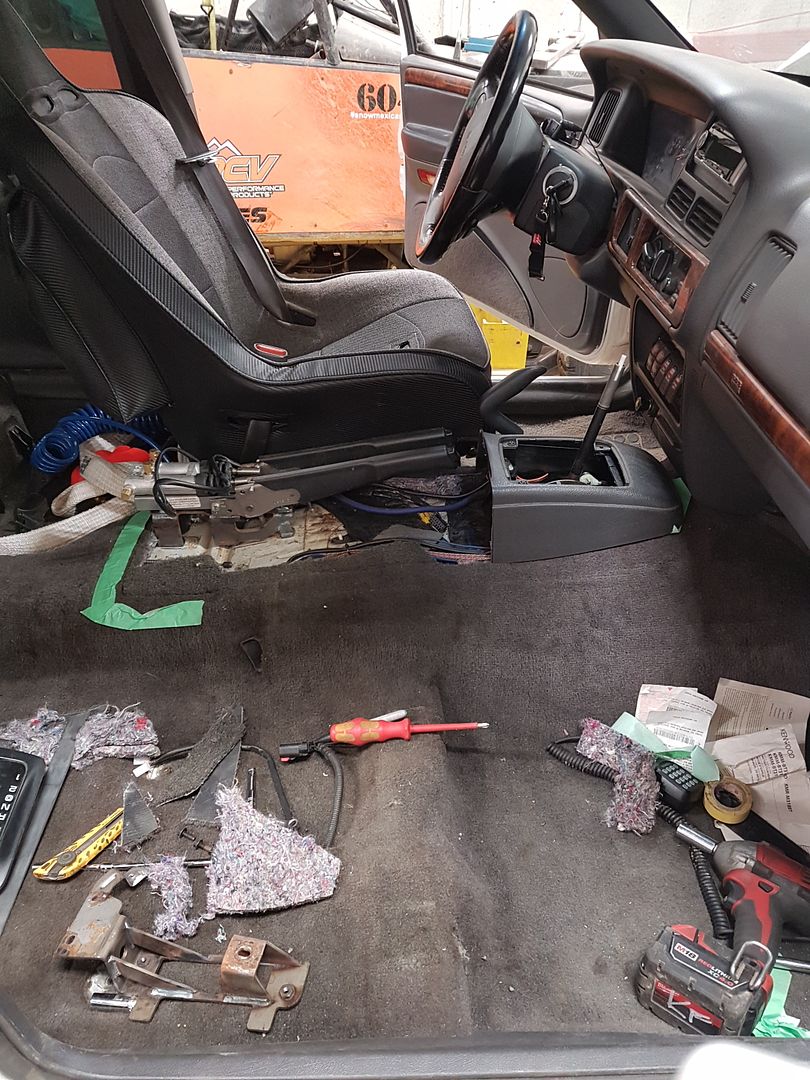
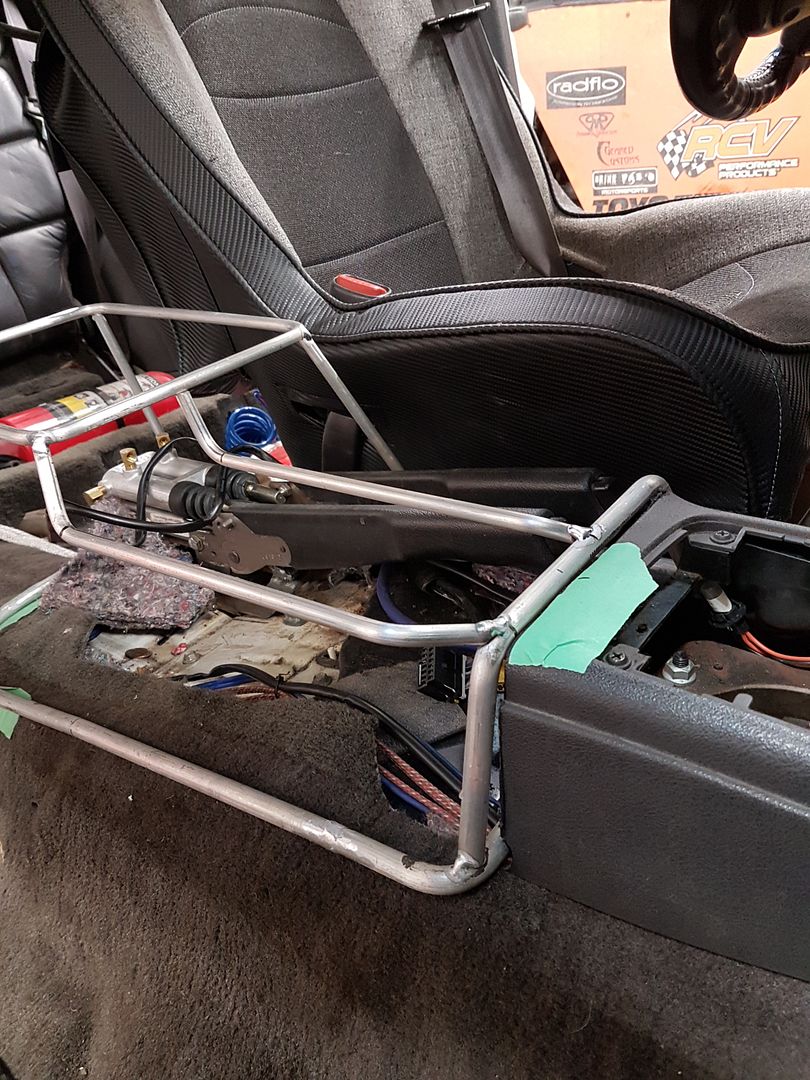
so i made some more progress on the cutting brakes.
folded and tig welded.
center punch for the new mounting hole on the factory ebrake handle
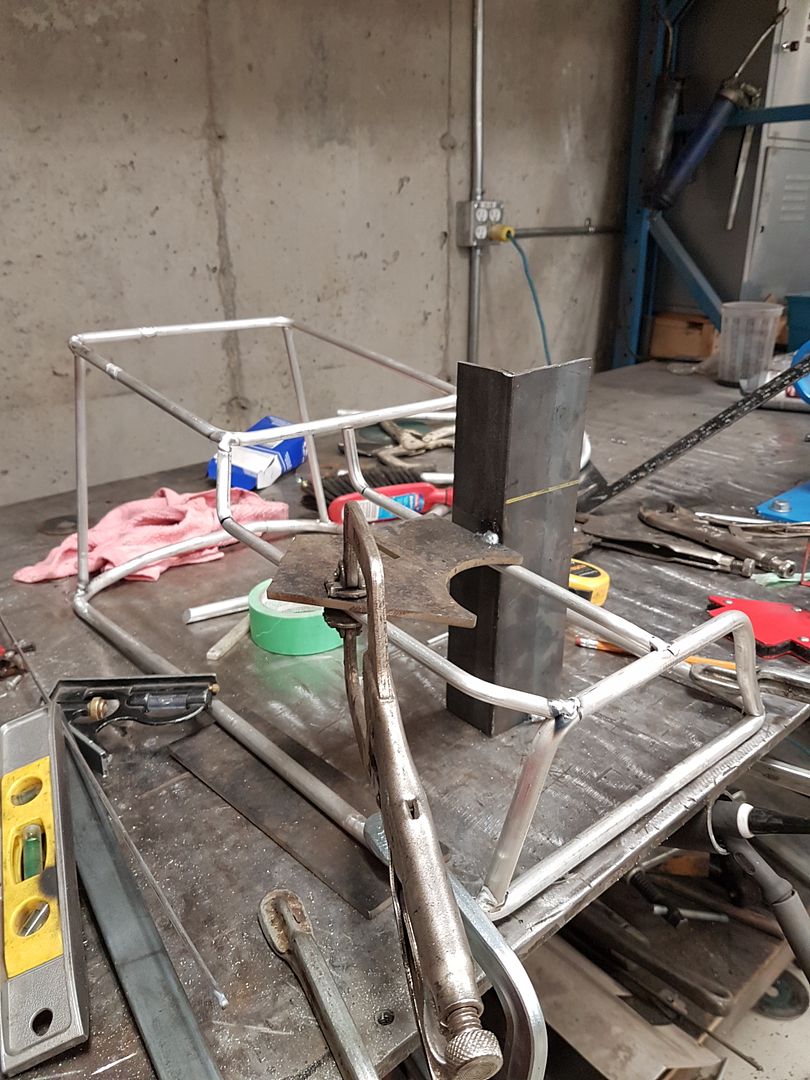
i machined a 1/4" spacer from aluminum to go between the ebrake handle and the cutting brake mount.
and here it is.
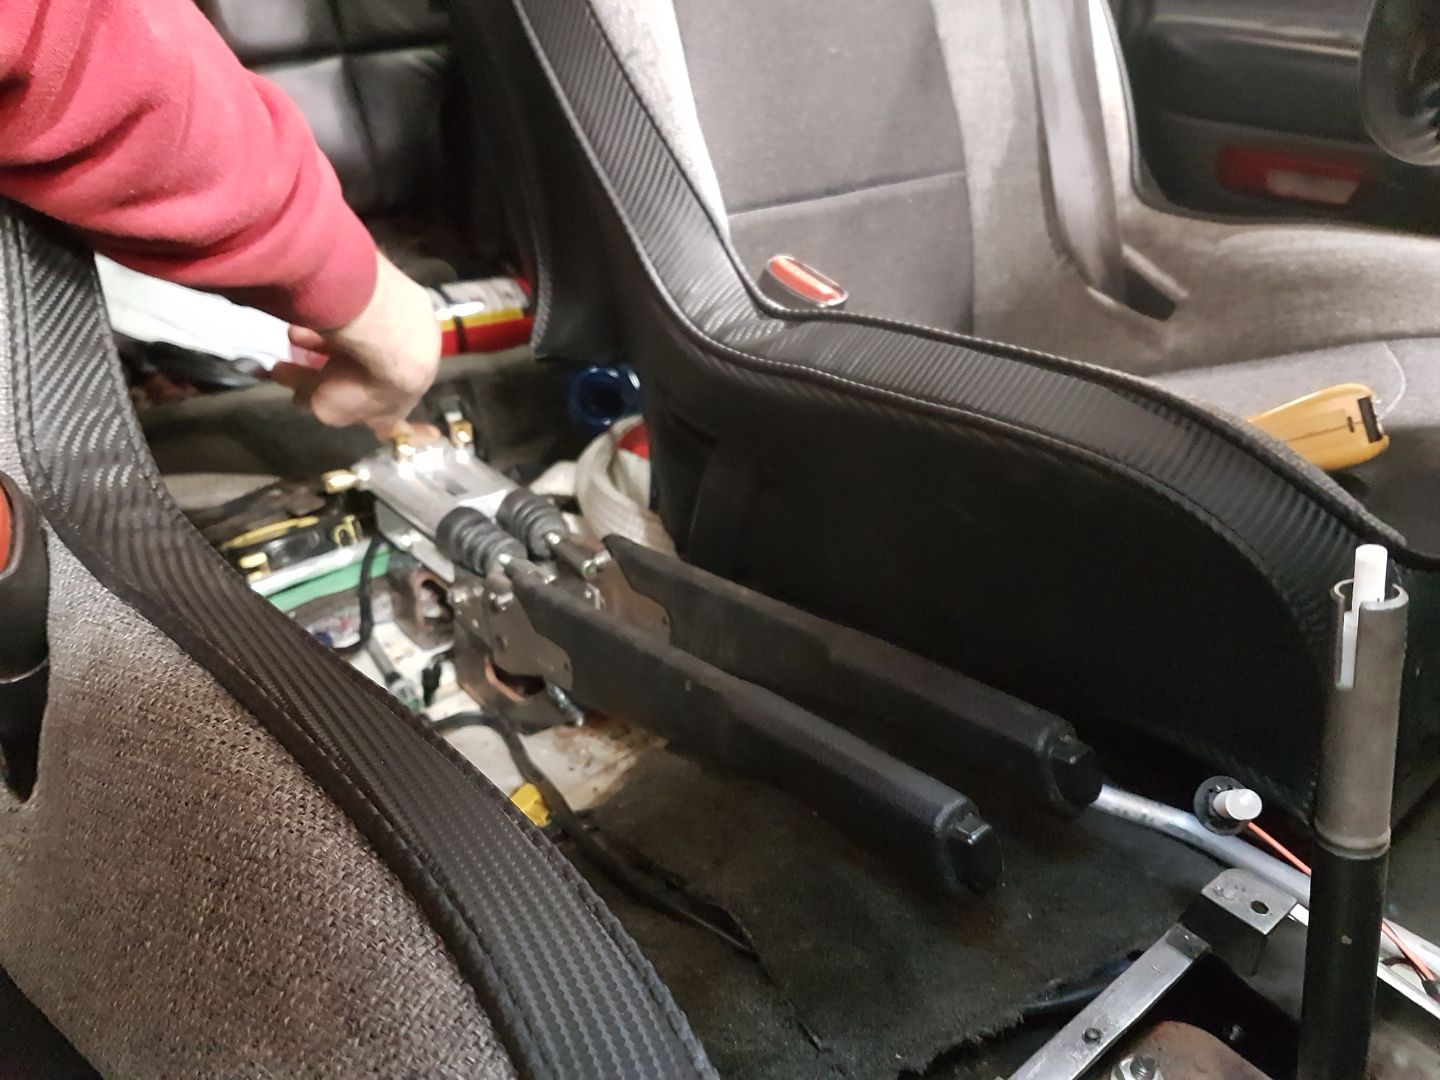
i still have to adjust the linkages. they aren't perfect yet. Also as you can see i had to drill a second hole for the ball socket heim i had the pivot point wrong and it wouldn't allow for full travel.
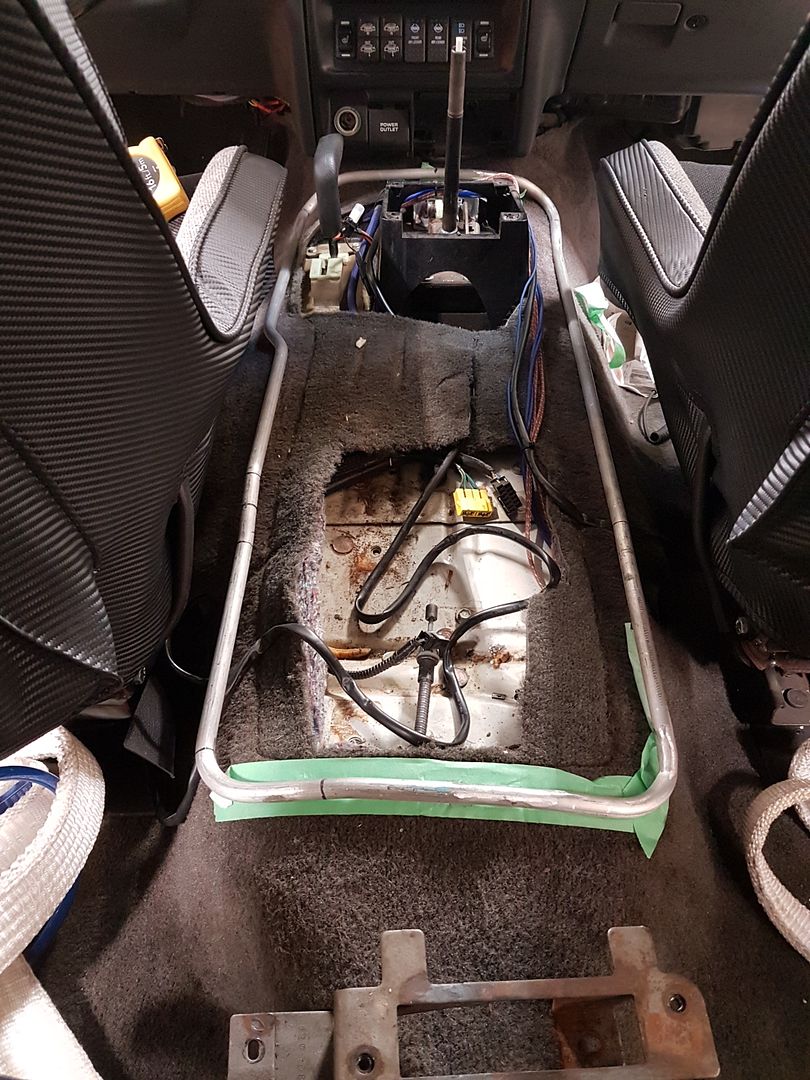
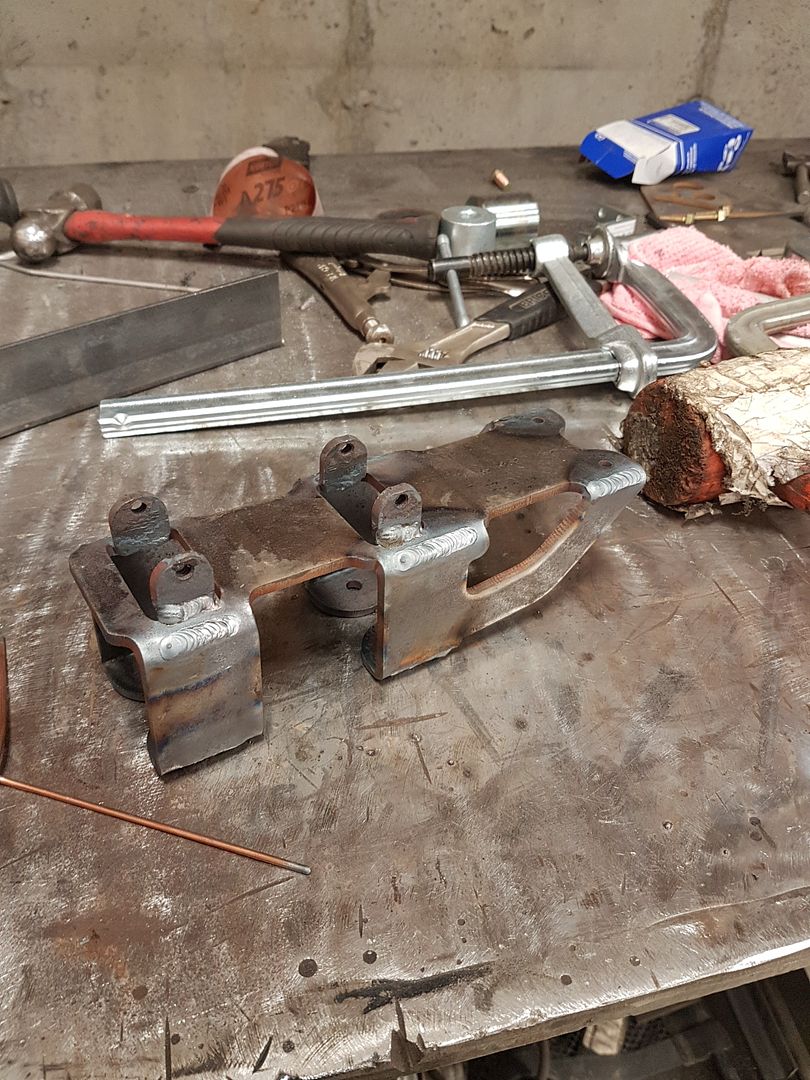
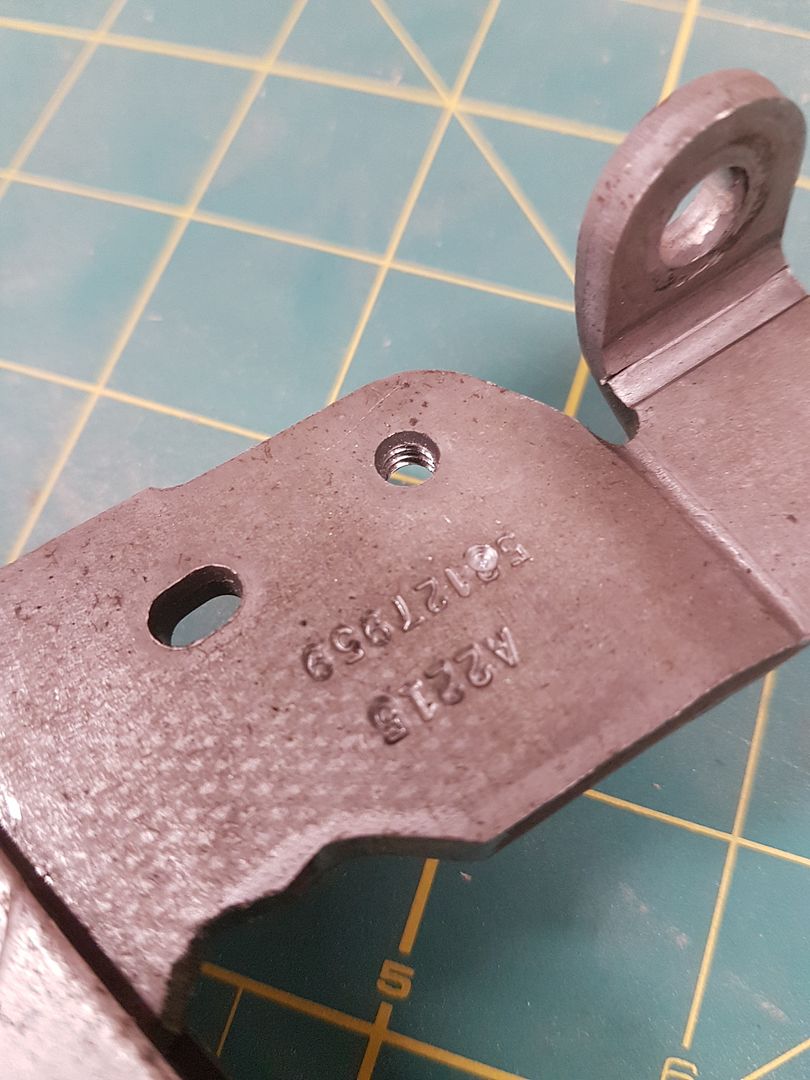
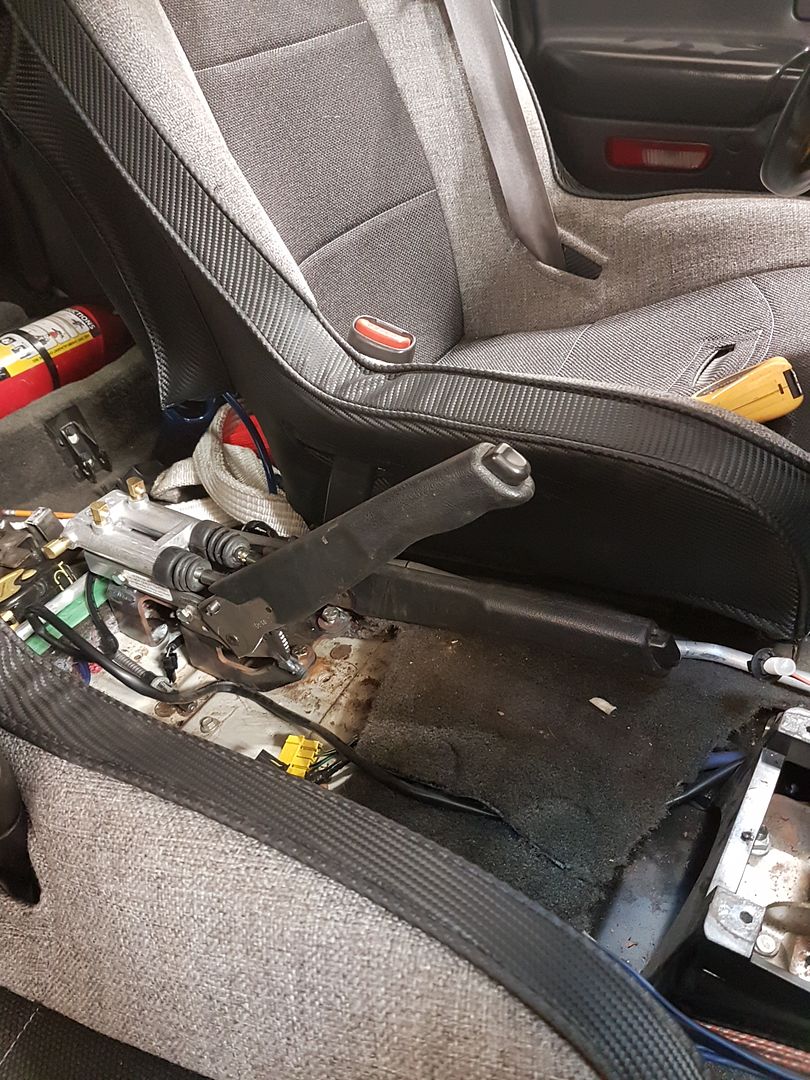
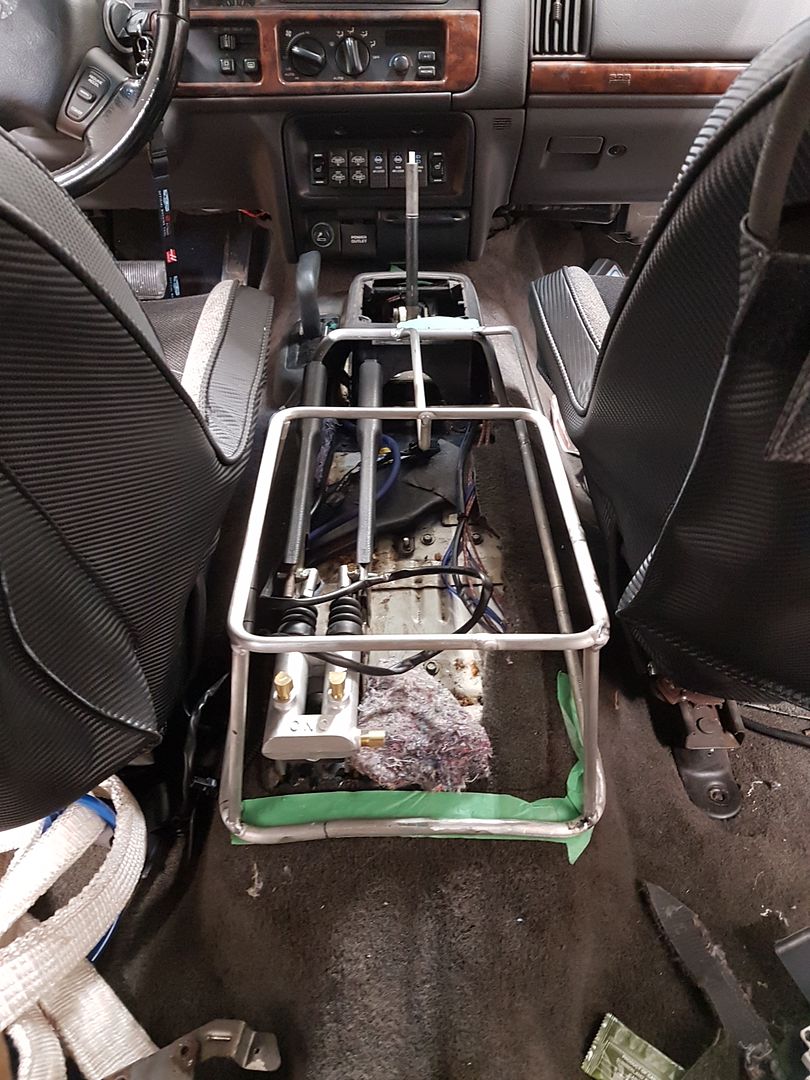
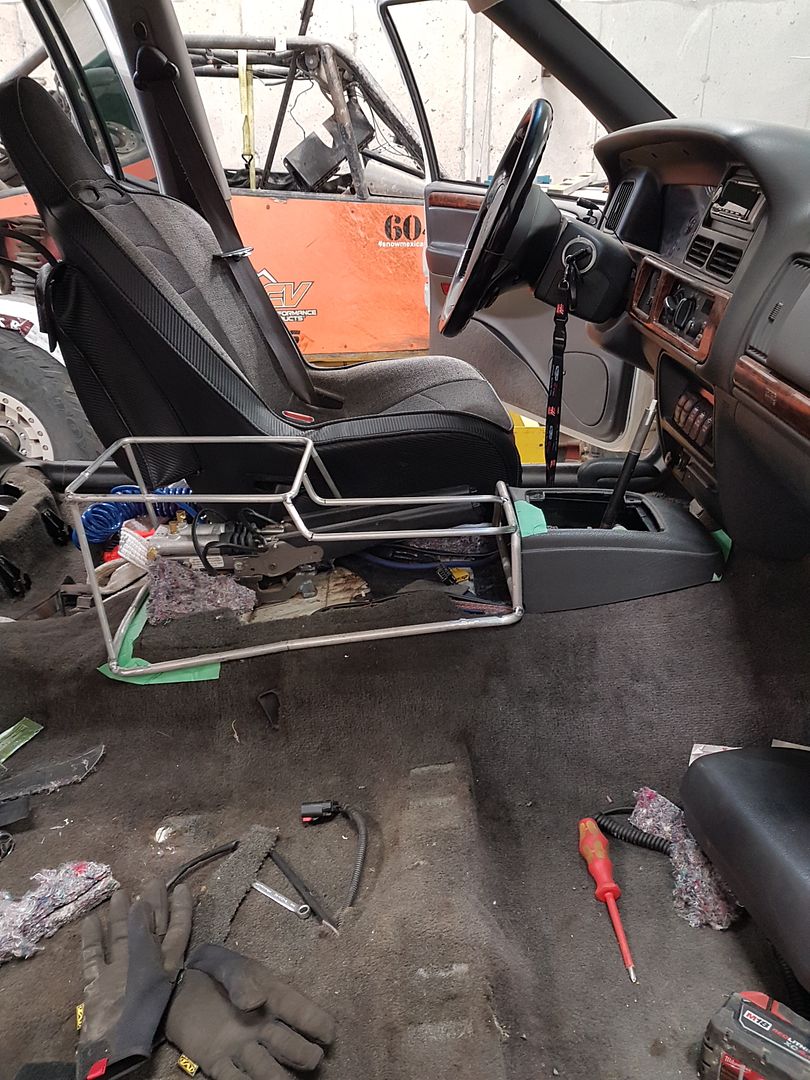
and roughly mocked up in the jeep. If i was smart i would have made the base mount to the factory locations. 2 of the 4 spots are only within 1/2" of the factory mounting holes.
and the entire point of this project was to be ale to do this.
i also kept the factory Ebrake indicator switch too. i'm pumped how factory this will look then complete.
 02-19-2019, 09:14 PM
Of all the impressive shit you've done on this Jeep, this blew my mind possibly the most. Cantilevered suspension is up there lol
Sent from my Pixel XL using Tapatalk
02-19-2019, 09:15 PM
thanks Bruh.Originally Posted by egg

 02-20-2019, 12:27 PM
Very nice work as always.
I'm watching this closely as a console upgrade is one of the items on the list for my project.
02-26-2019, 04:30 PM
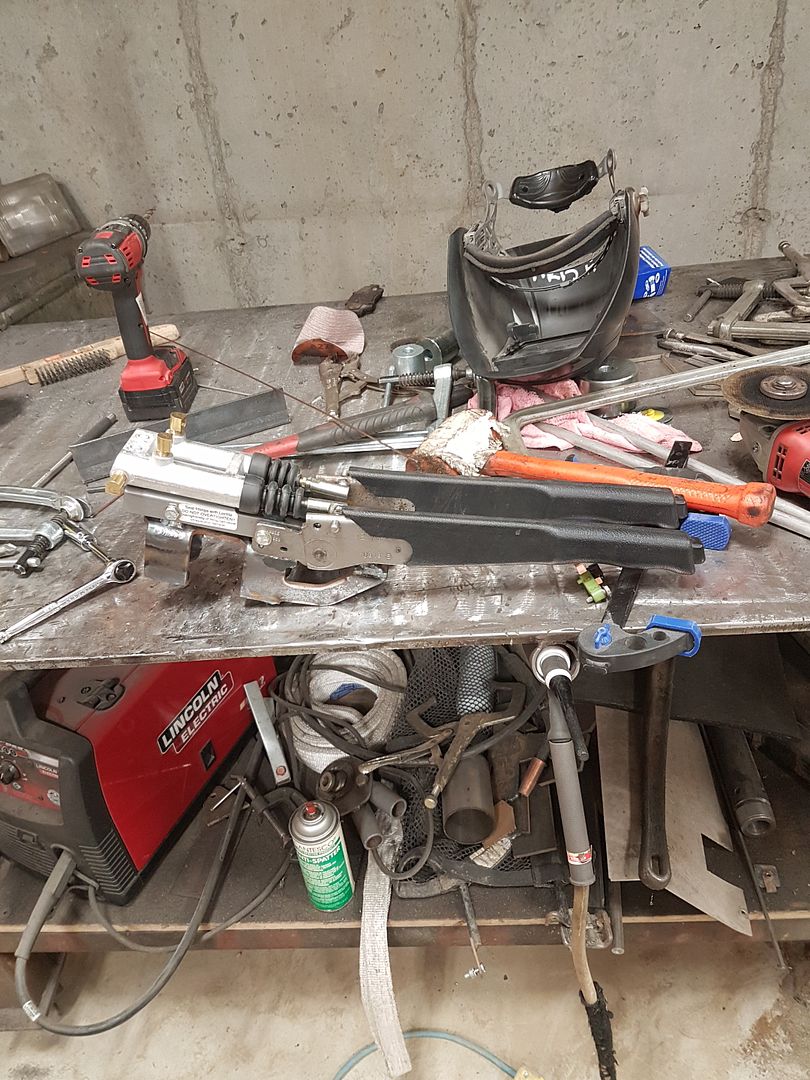
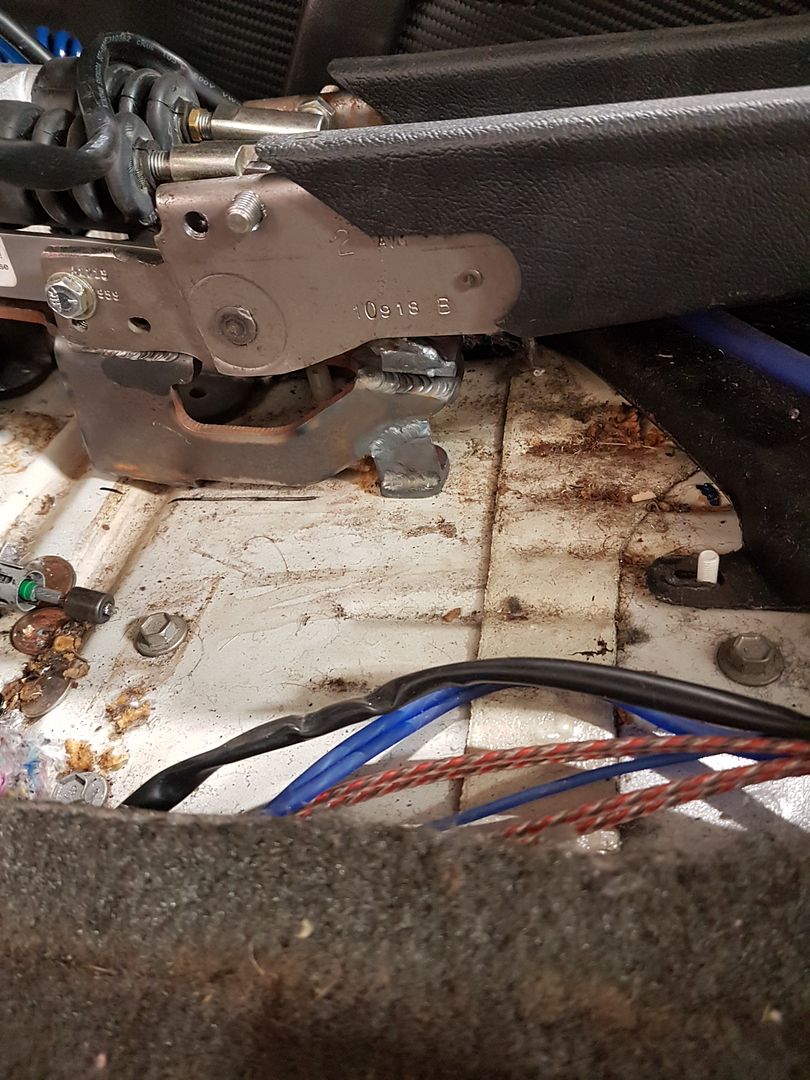
Thanks. Its been on my list for a while. I finally got out of bed today (chemo really kicks ur ass) and went to the shop to work on the console. I ended up organizing my tools, i built a few holders for things with the new little metal bender i have and then managed to get the cutting brake mount to pick up 1 of the factory e brake mounting holes. I found a way to get it to pick up one of the other factory holes too. Im heading out to get a riv nut tool cause im going to be mounting the console and remaining cutting brake mounts with riv nuts. More pics will follow.
02-27-2019, 10:11 AM
I'm really sorry to hear that you're going through chemo. Hang in there!!
Sent from my Pixel XL using Tapatalk
02-27-2019, 01:27 PM
X2. Cancer is the suck, I've seen too much of it on my wife's side of the family. Best wishes on a full recovery.
Sent from my SAMSUNG-SM-G930A using Tapatalk
02-27-2019, 06:43 PM
thanks guy's i'm pushing through the treatments.
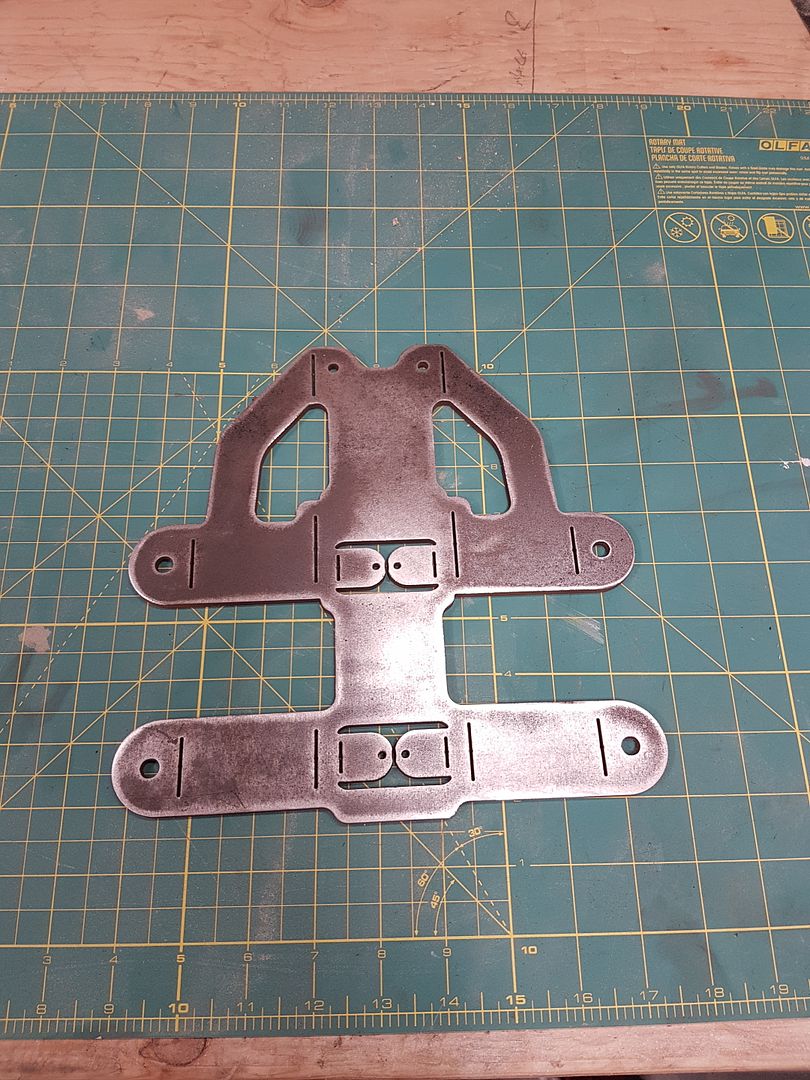
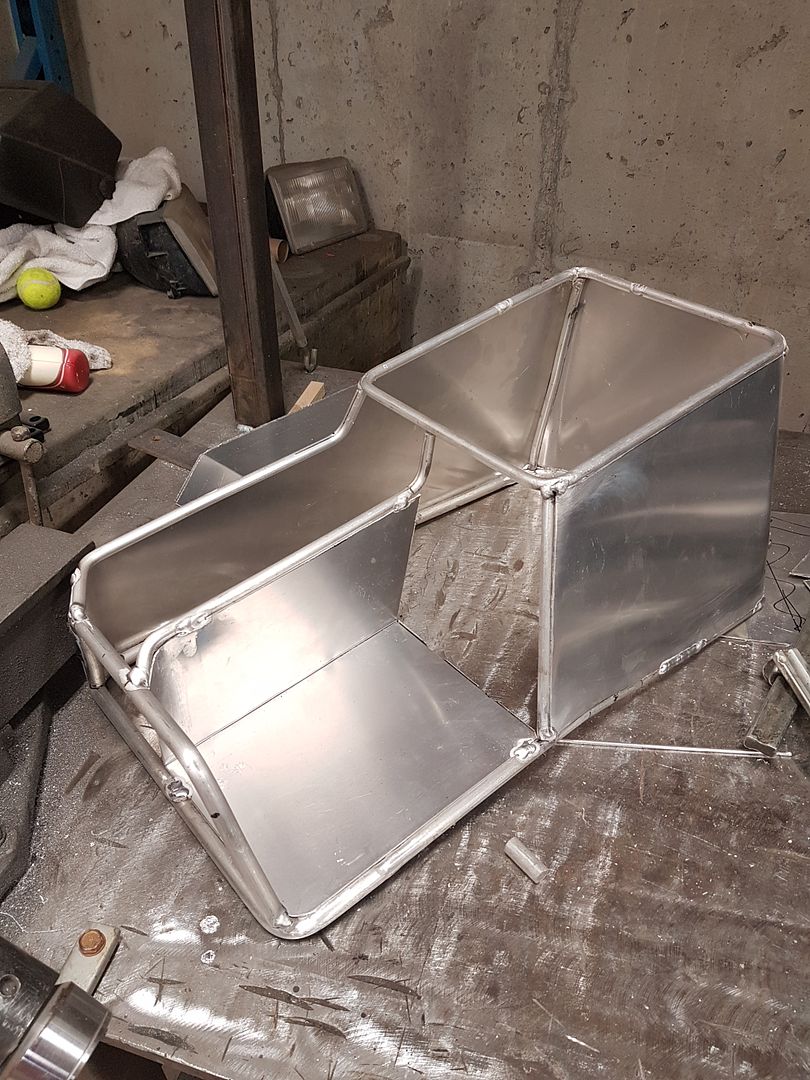
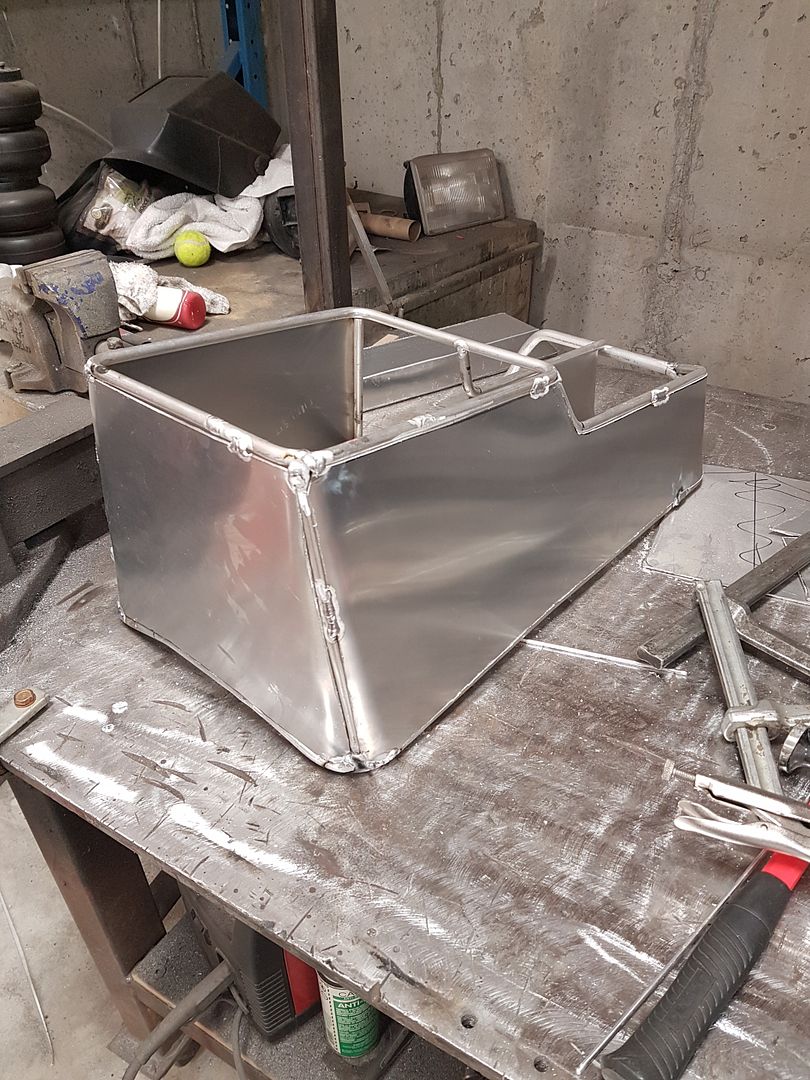
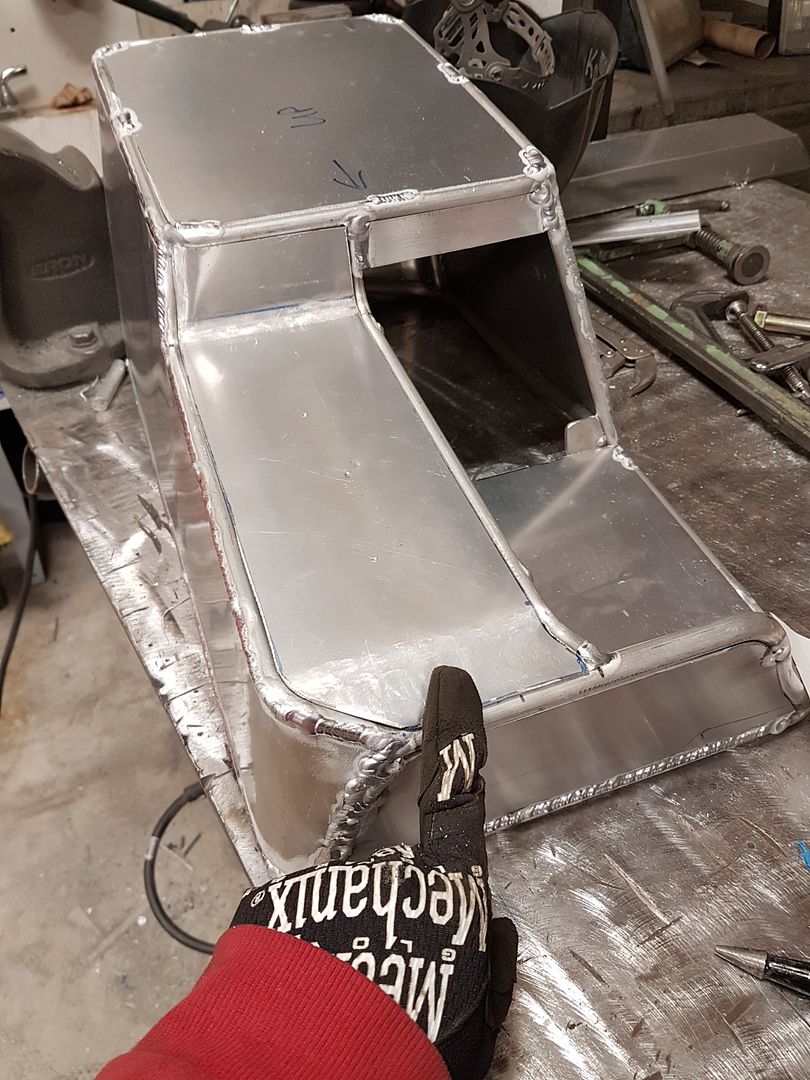
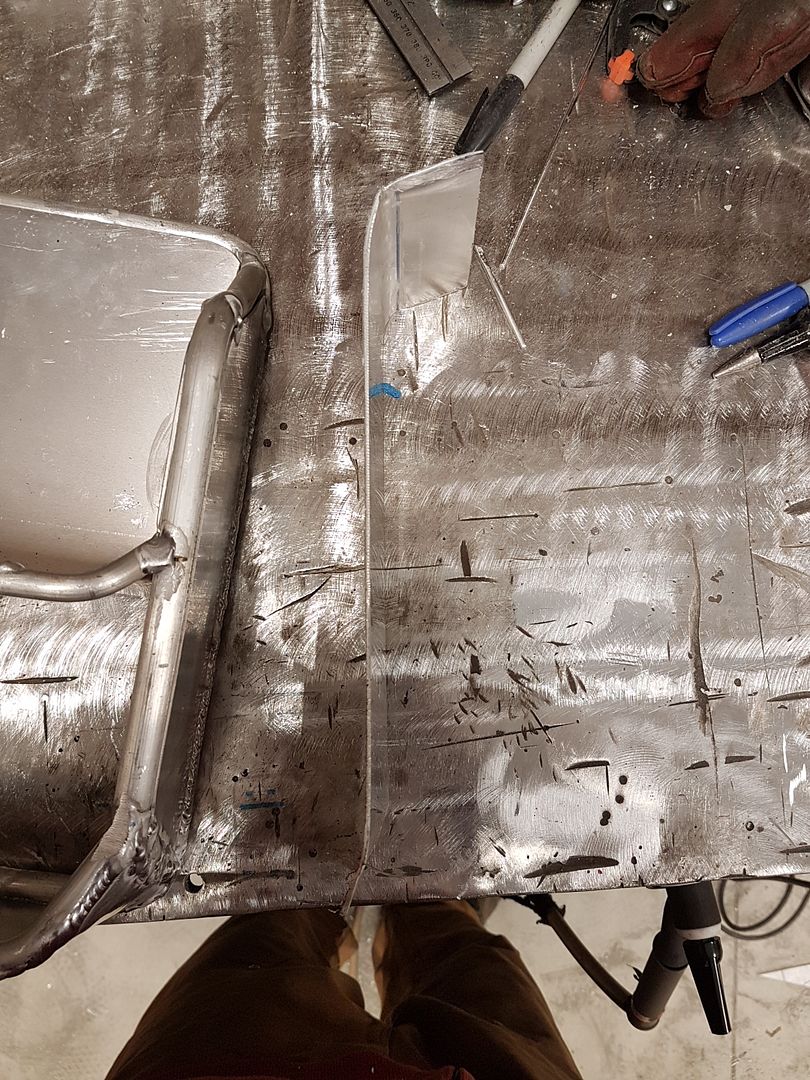
moar progress.
i added another mount to the cutting brakes to pick up another factory mount.
i also decided that i didn't need to remake the front of the console since i'm not changing anything, so i'm going to make a hybrid using the front portion of the factory unit.
which means i'm modifying my original aluminum frame
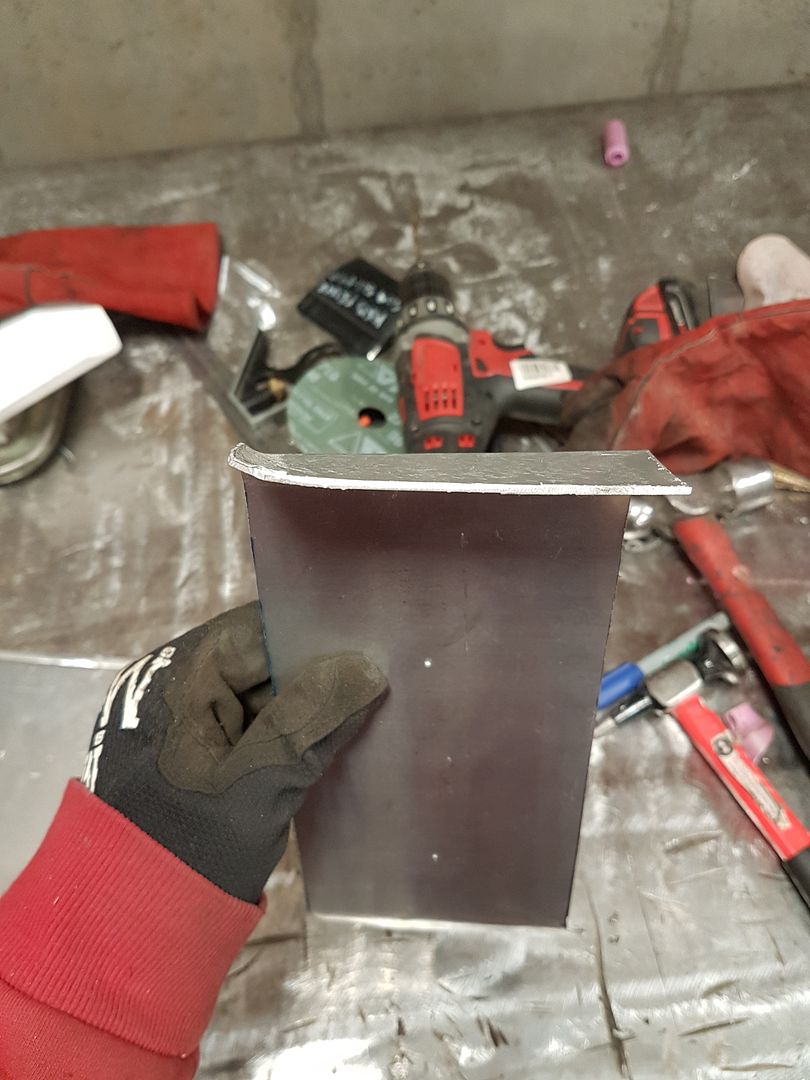
I cut it here and added this new piece
then onto more fab work
this is a full 3" wider then stock. it fills the gaps between the seats nicely.
i think it blended into the factory front quite nice.
i am looking forward to the cardboard part of this doing all the templates for the skins.
i also haven't sorted out the lid yet.
 02-27-2019, 06:59 PM
Looks incredible so far. I really am looking forward to seeing the finished part.
02-27-2019, 07:29 PM
thanks. its been work...but still really fun. I can't wait to redo half of this when i finally buy an atlas t-case
 02-27-2019, 08:23 PM
Great work as always Kris. Do me a favor, and kick cancer in the nuts!
02-28-2019, 09:47 PM
I will dave. Im almost through it. !!
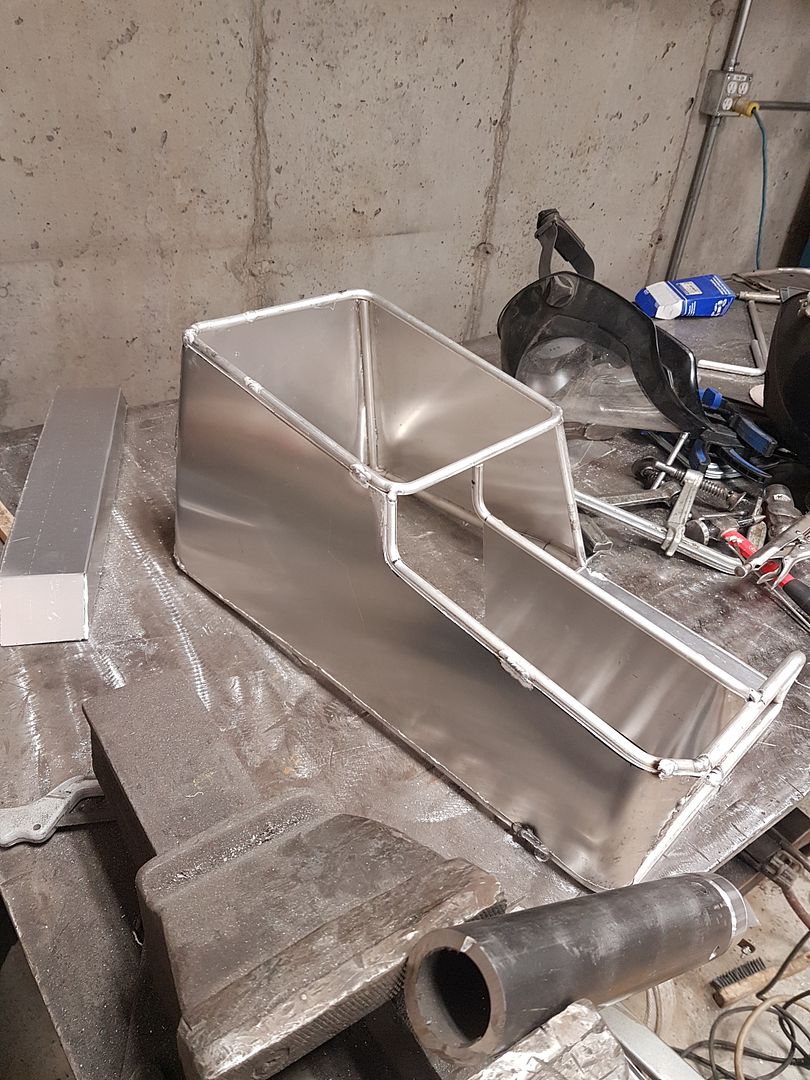
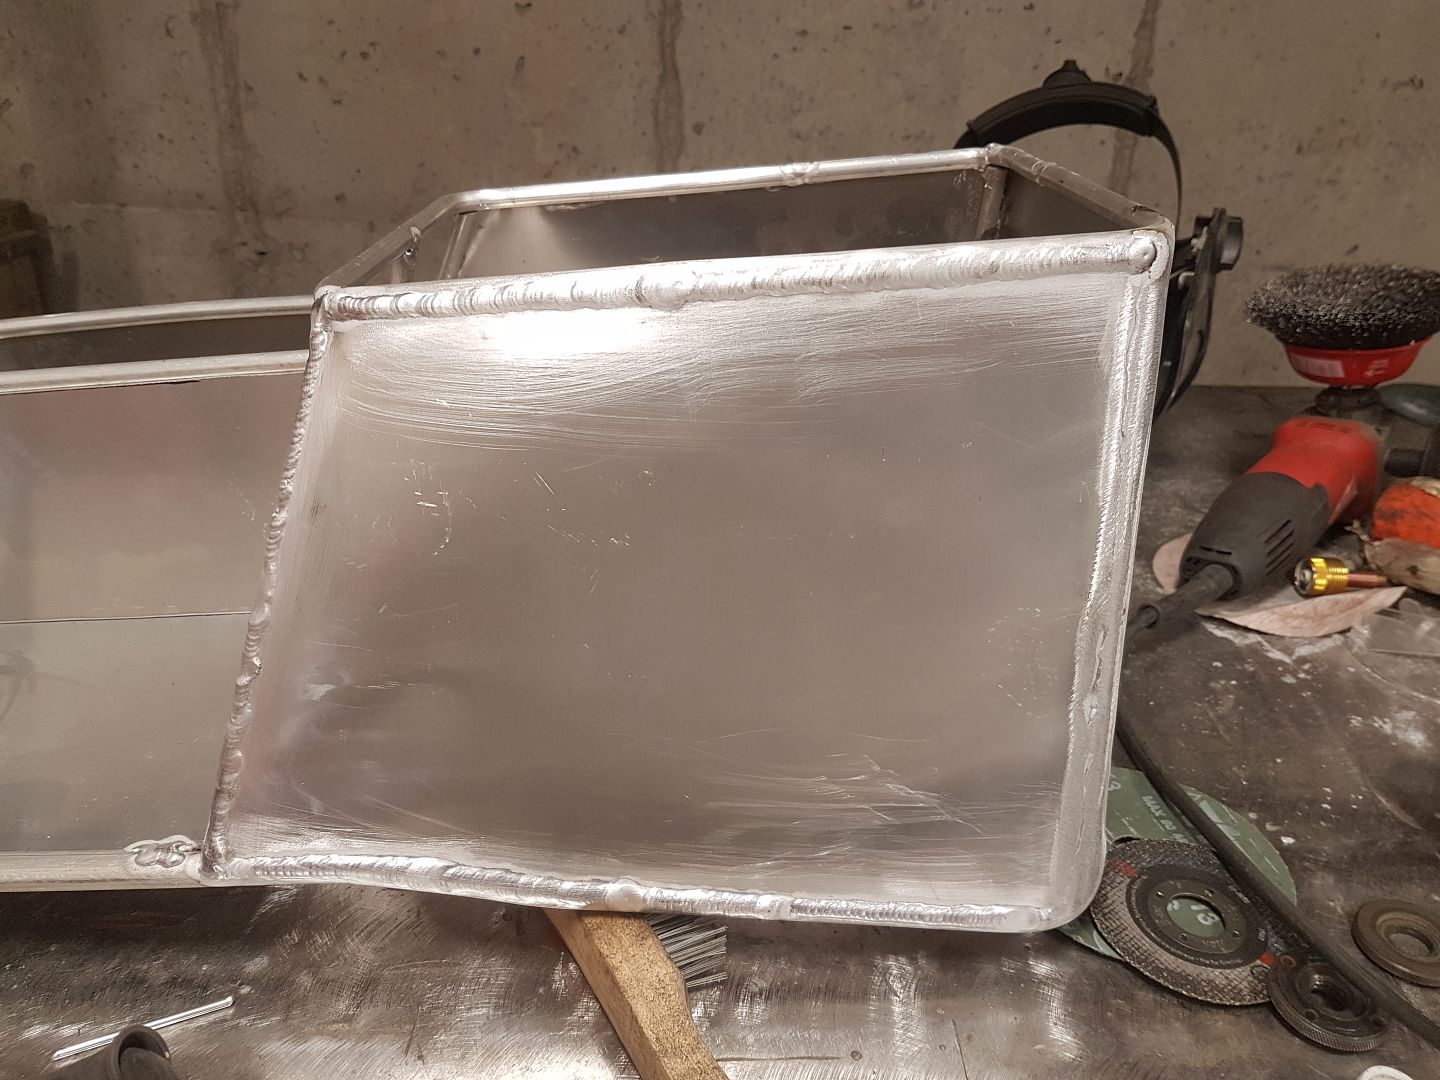
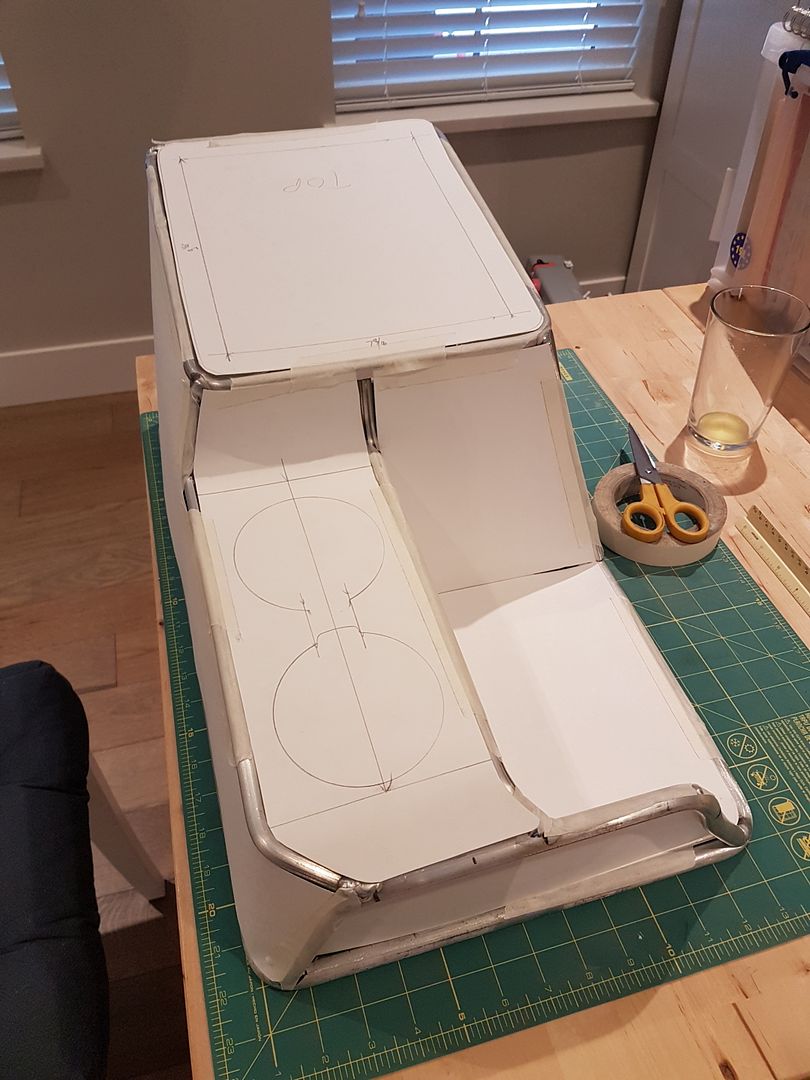
I got to play with some poster board today.
Cup holders will fit a yeti 8ball they will also be super deep so the drinks dont fall over like the stock one.
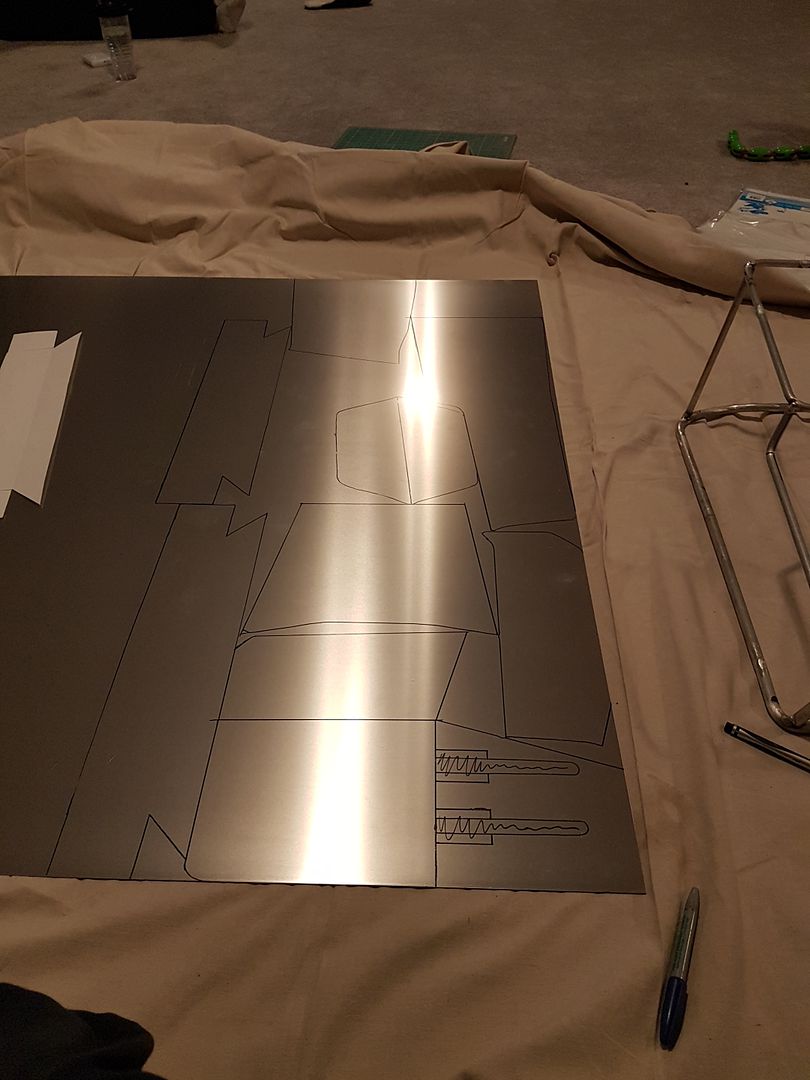
03-03-2019, 12:17 AM
0.063 aluminum
not looking forward to cutting this out by hand.
 03-03-2019, 08:26 AM
My fingers hurt just looking at that!
03-04-2019, 08:14 PM
it actually wasnt that bad.
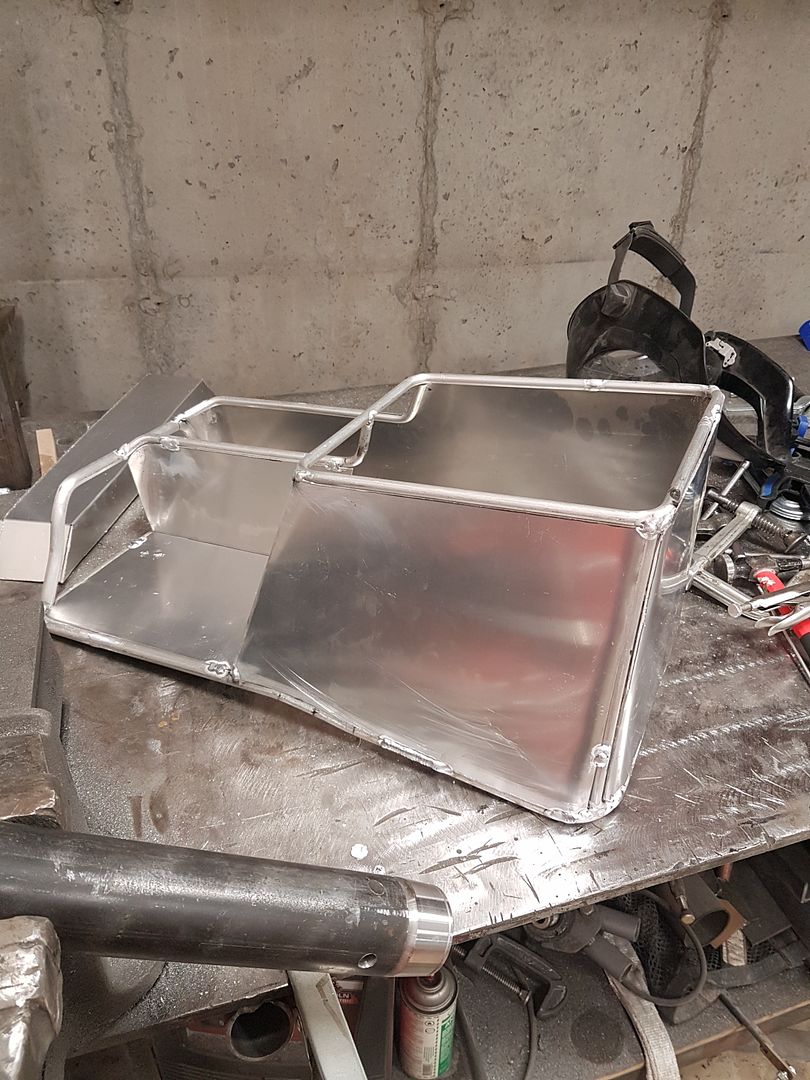
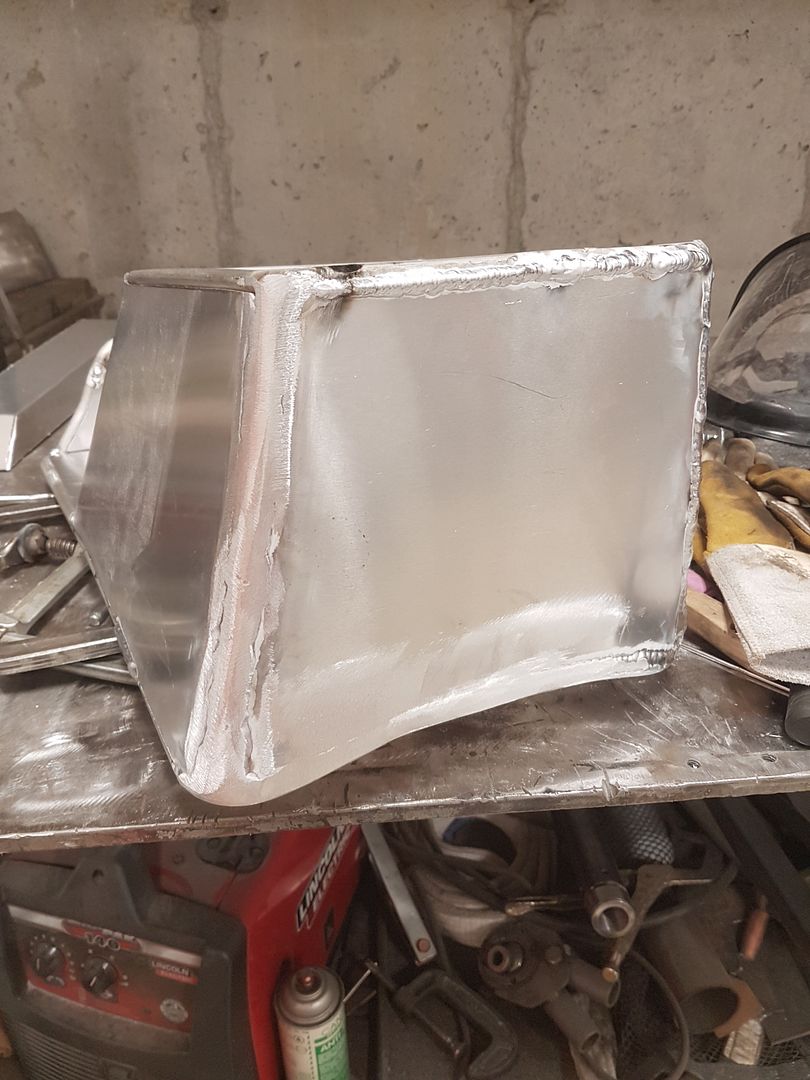
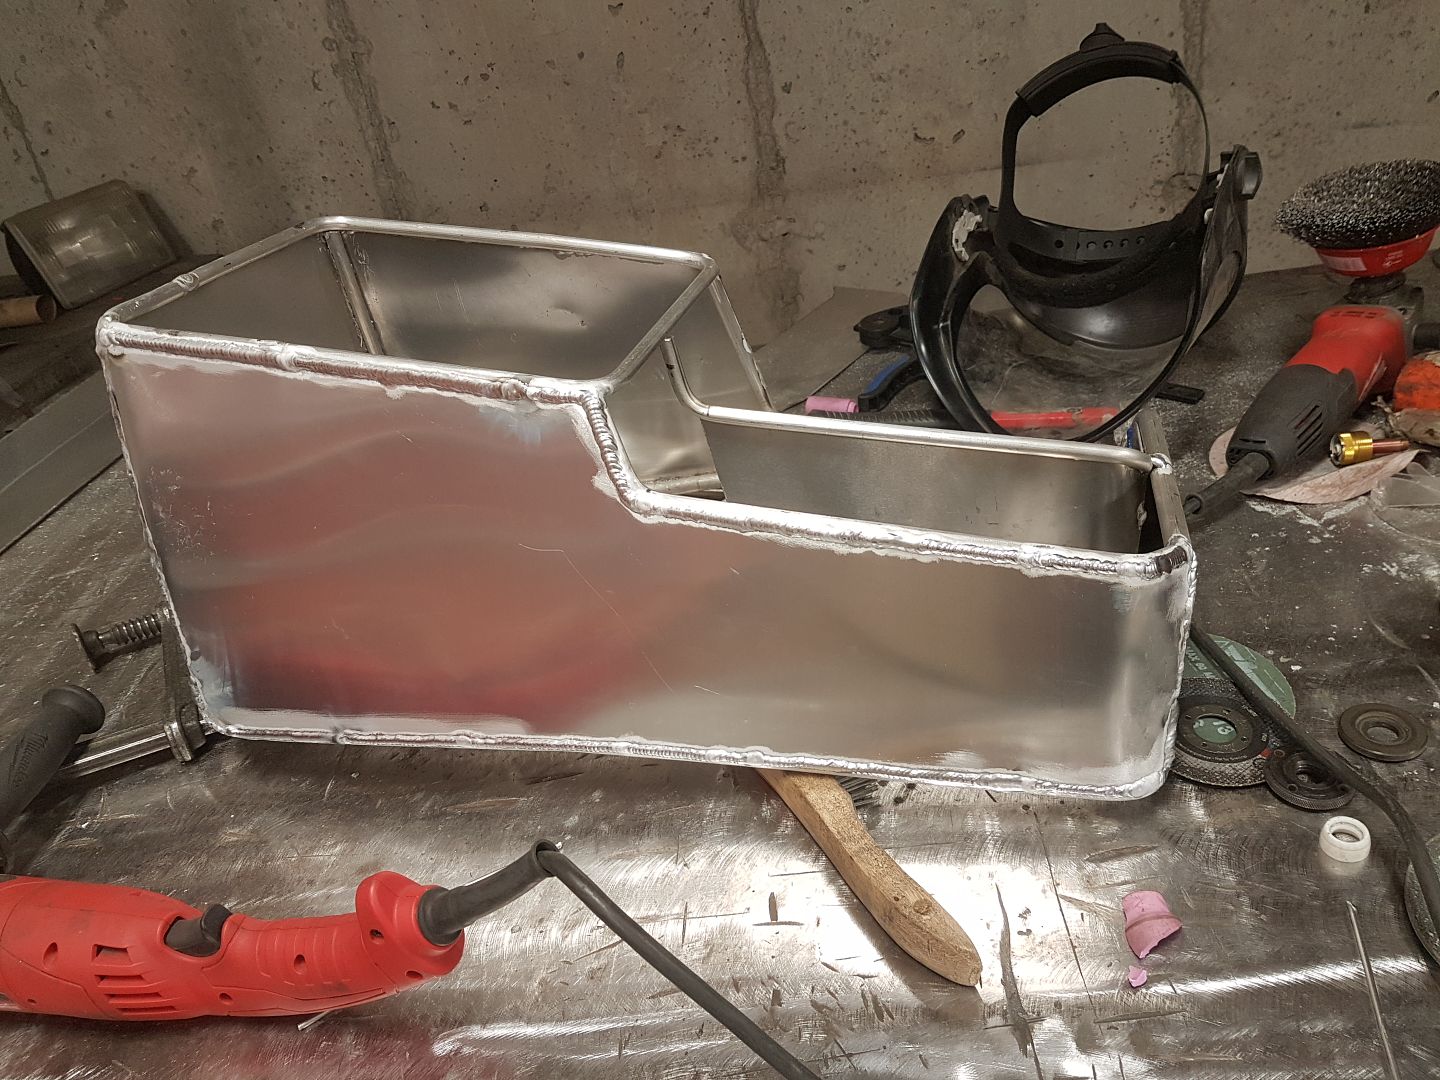
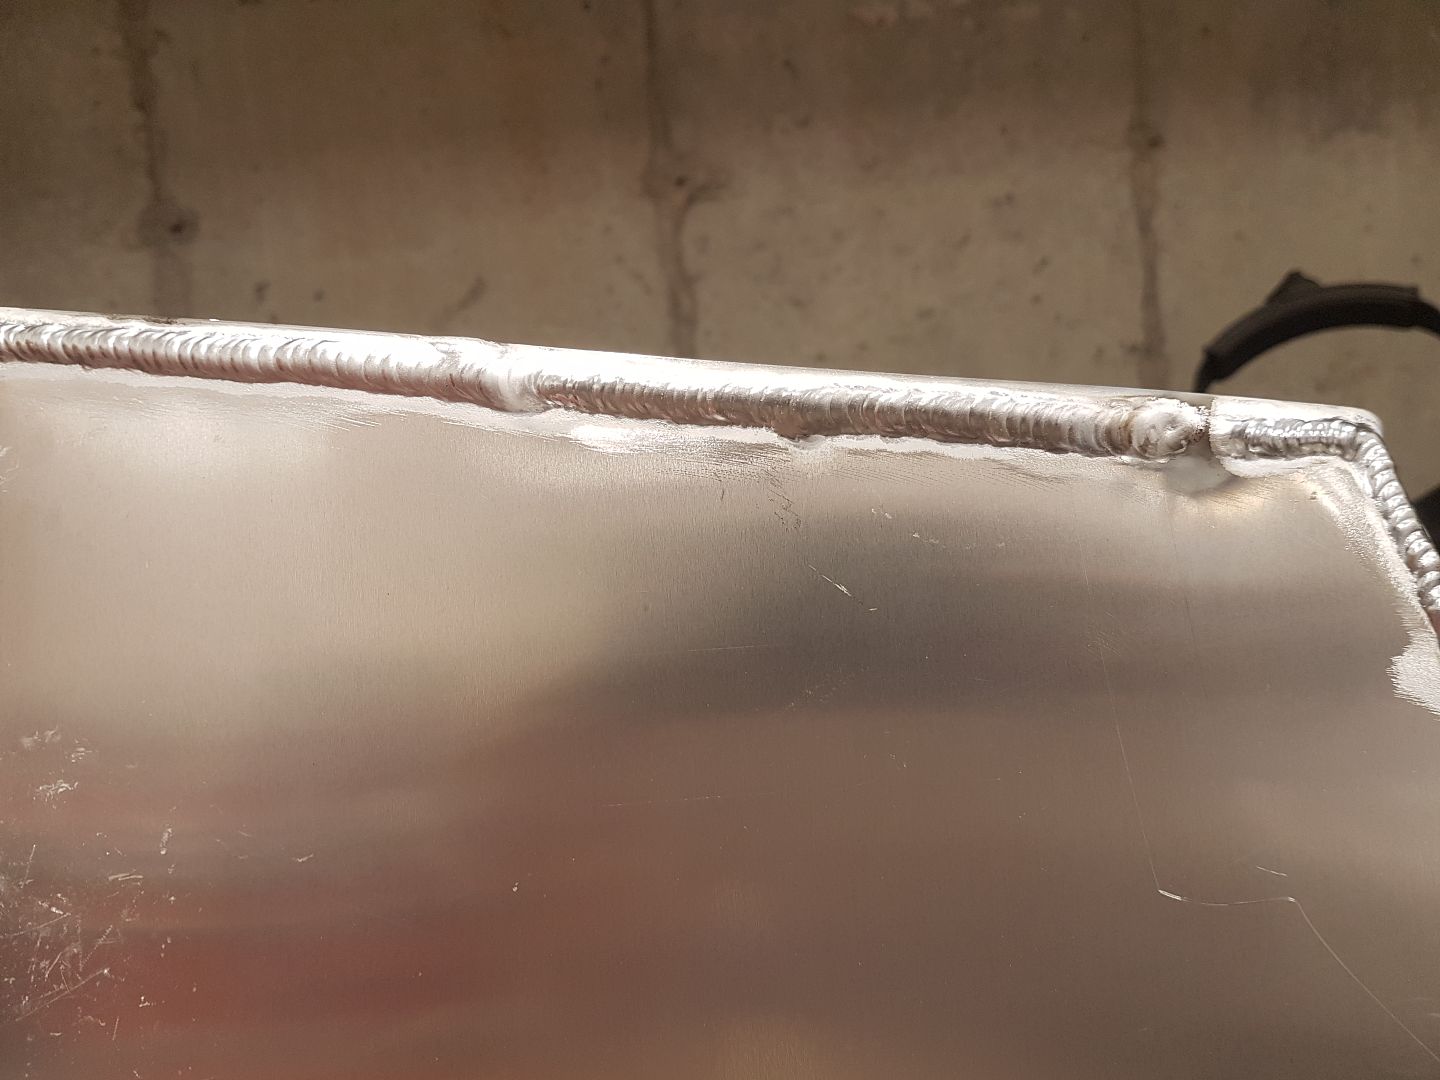
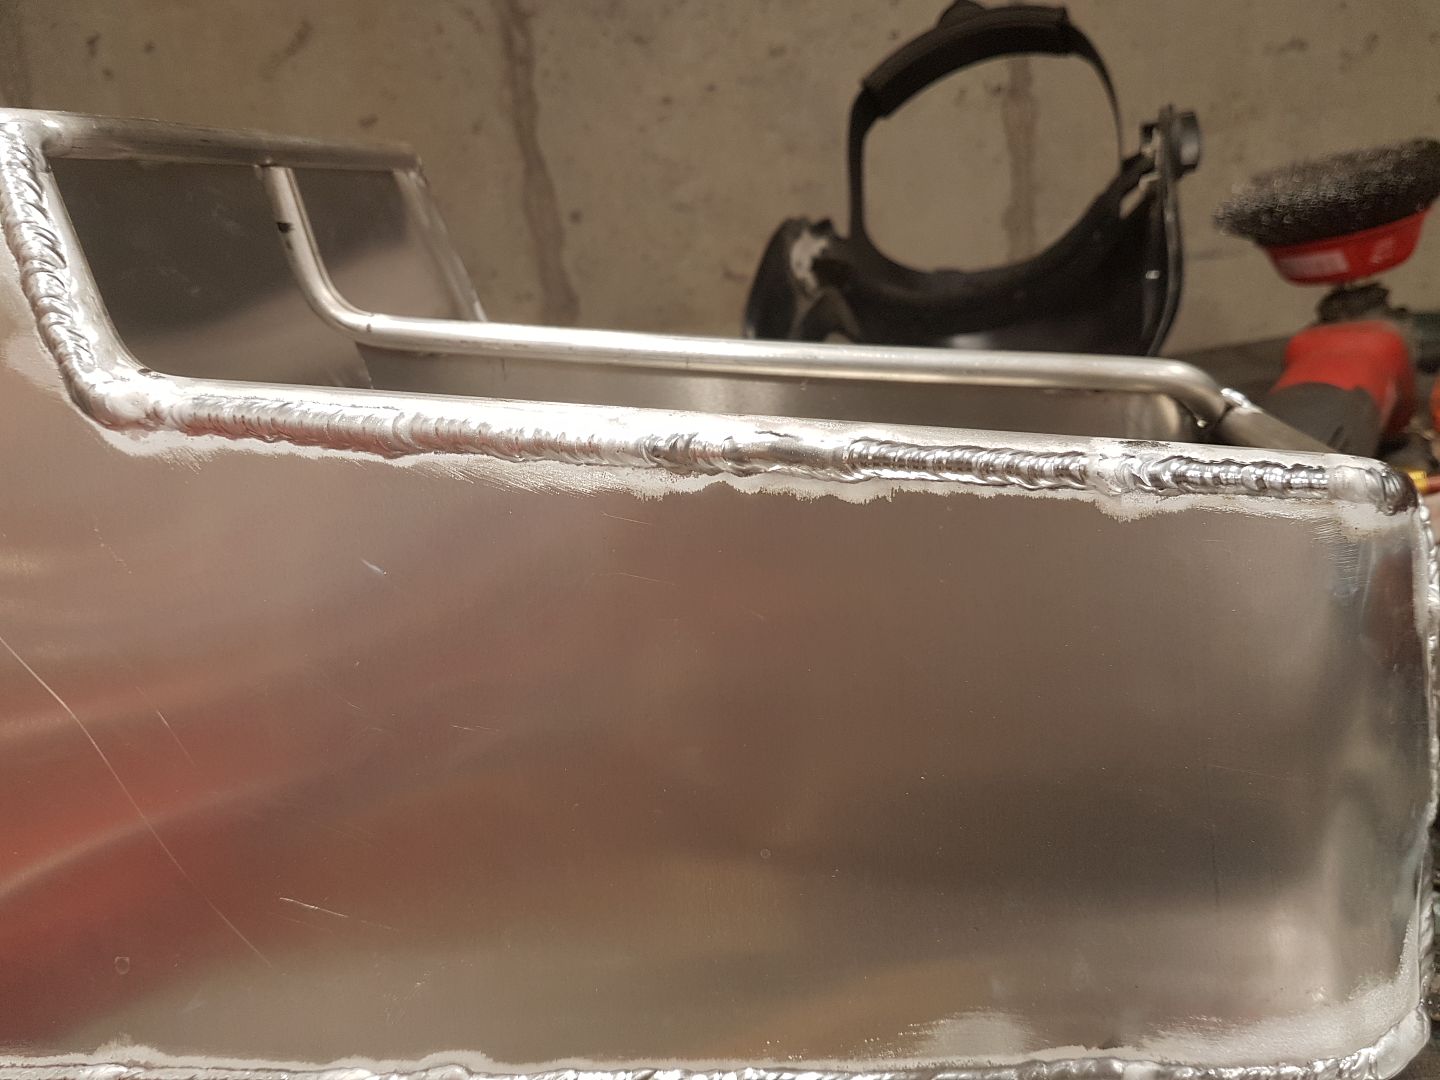
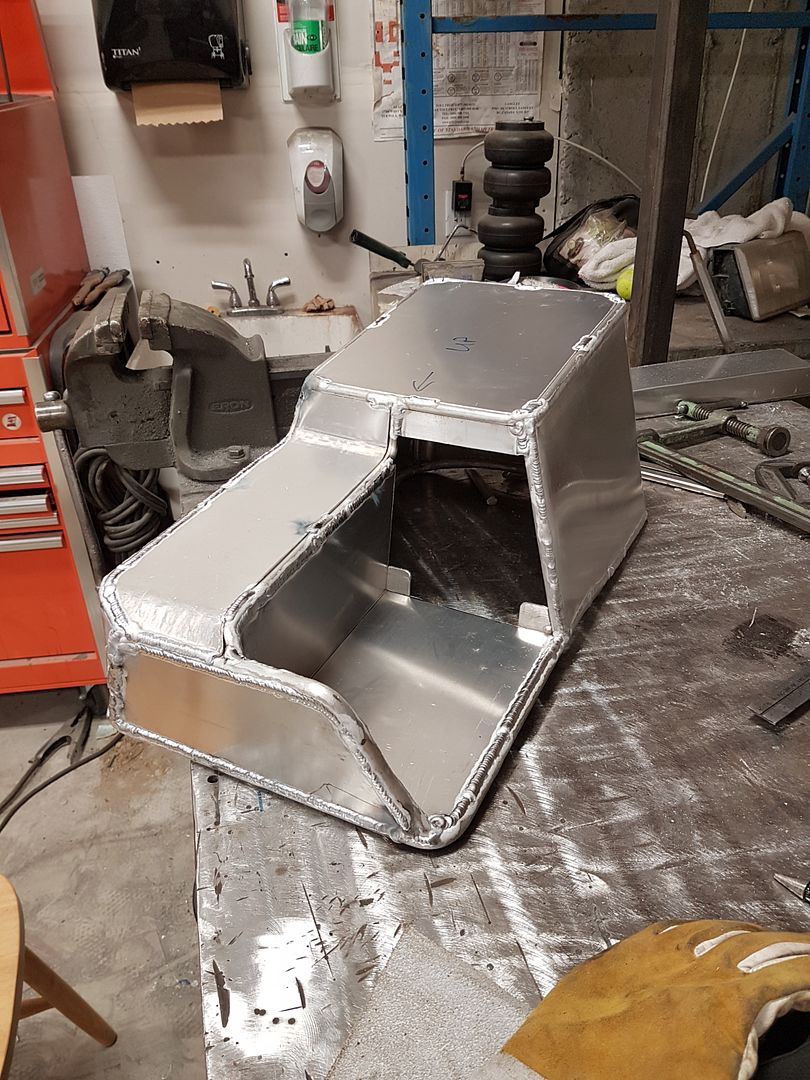
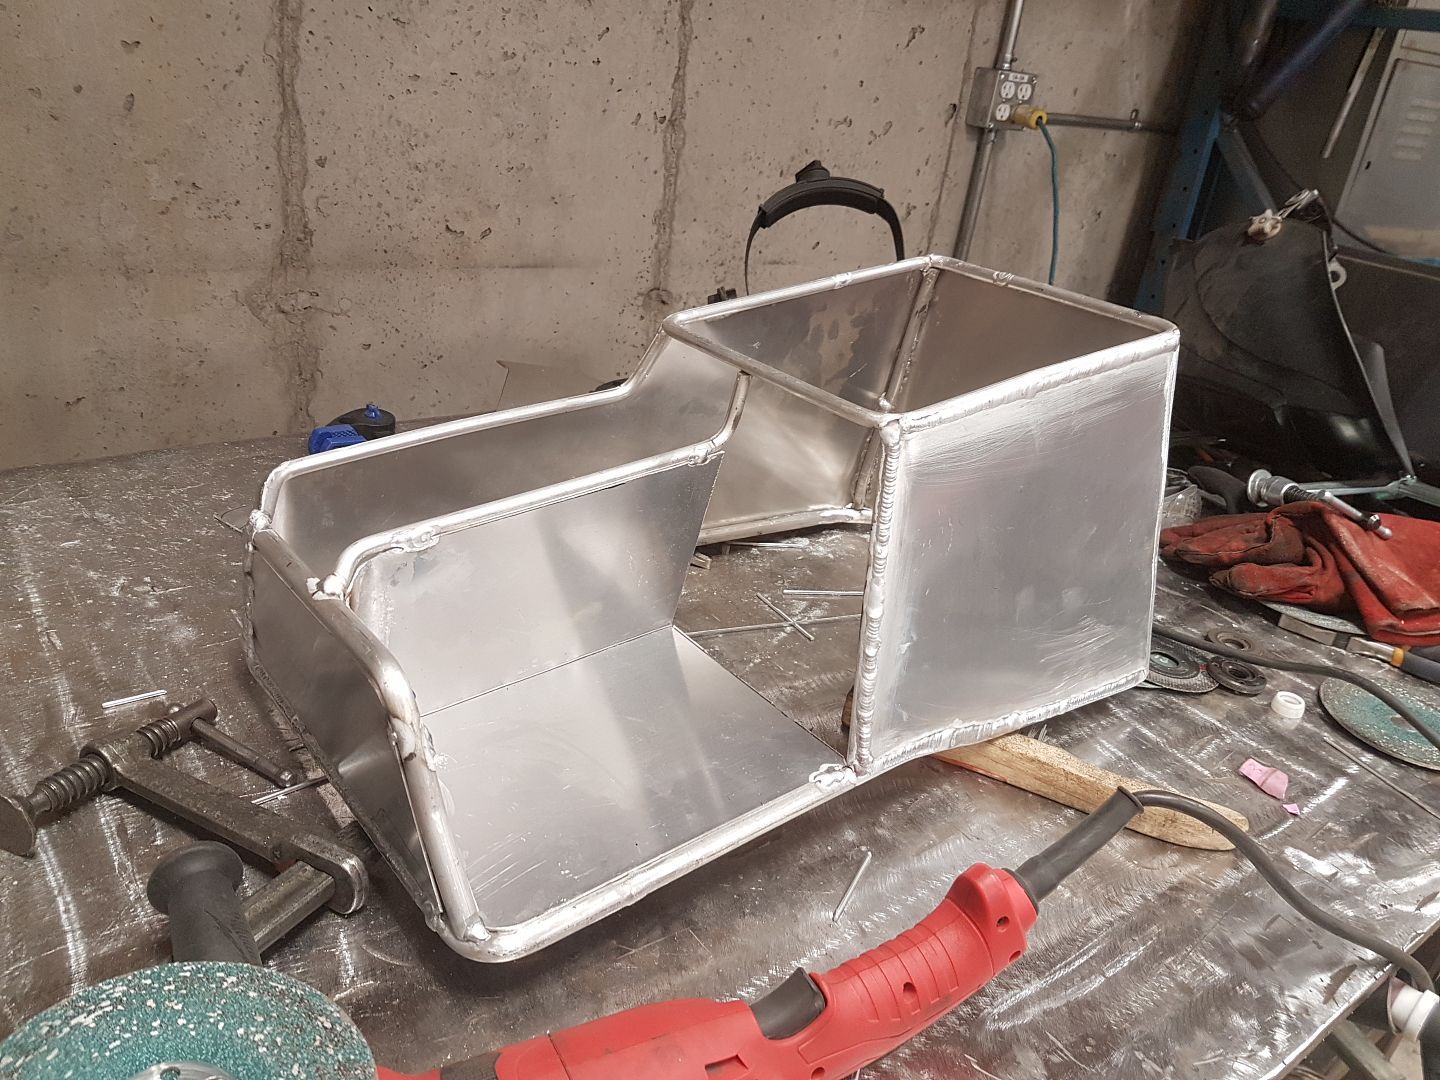
i got to the assembly today.
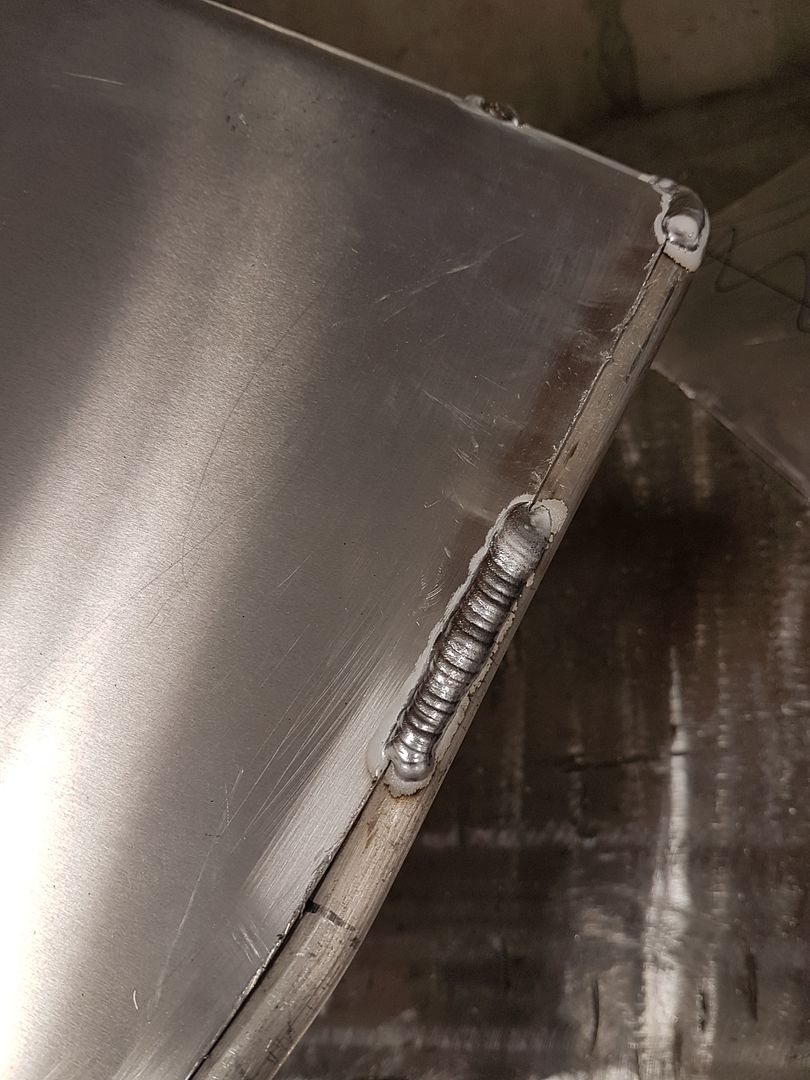
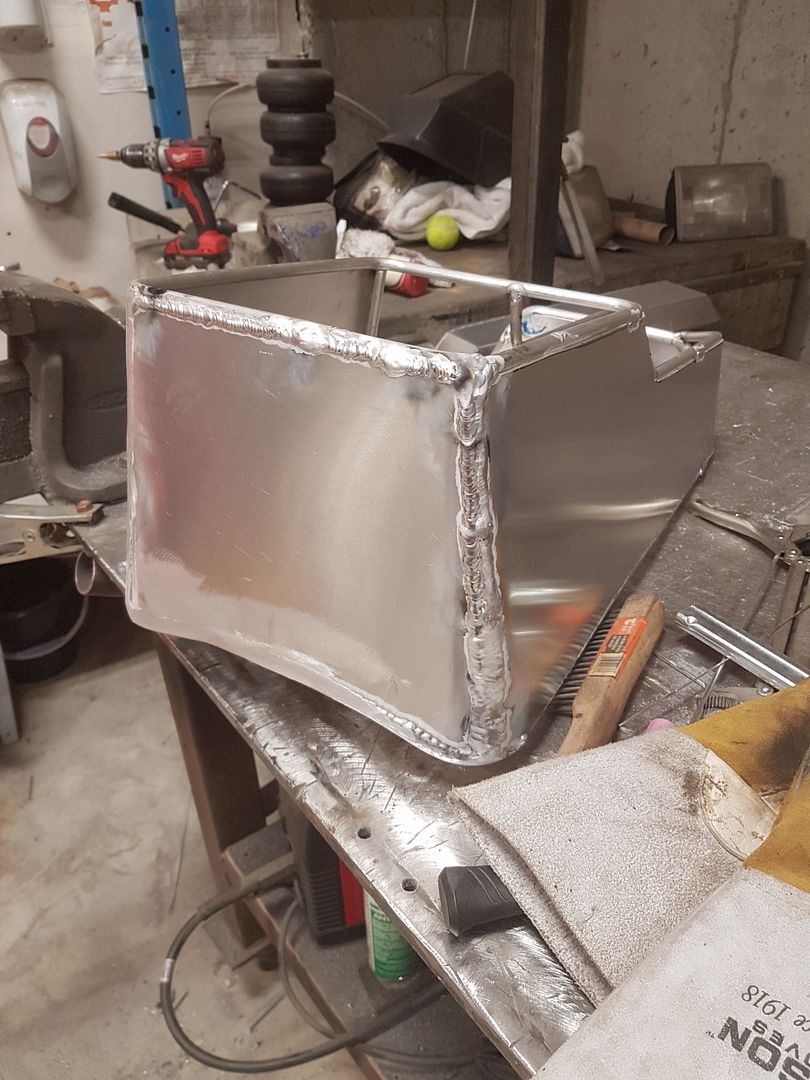
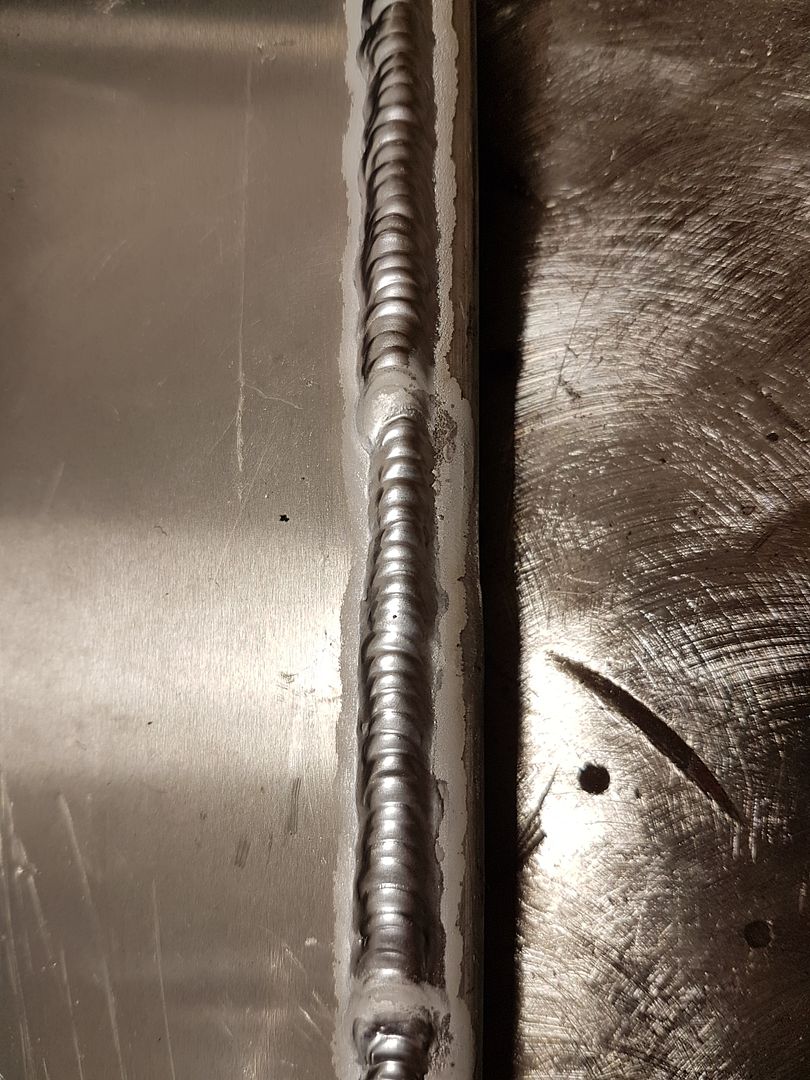
it wasn't as bad as i thought to weld the 1/2" and 3/8" round bar to the .063" aluminum. no burn through yet.
03-07-2019, 06:49 PM
i started to weld and rad out of rod. Wasn't too bad welding .063" to 1/2" round bar.
i need to go get some sanding pads to properly dress the welds and blend everything smooth.
i am by no means a good or even decent tig welder, but i can definitely see an improvement from when i started this to now.
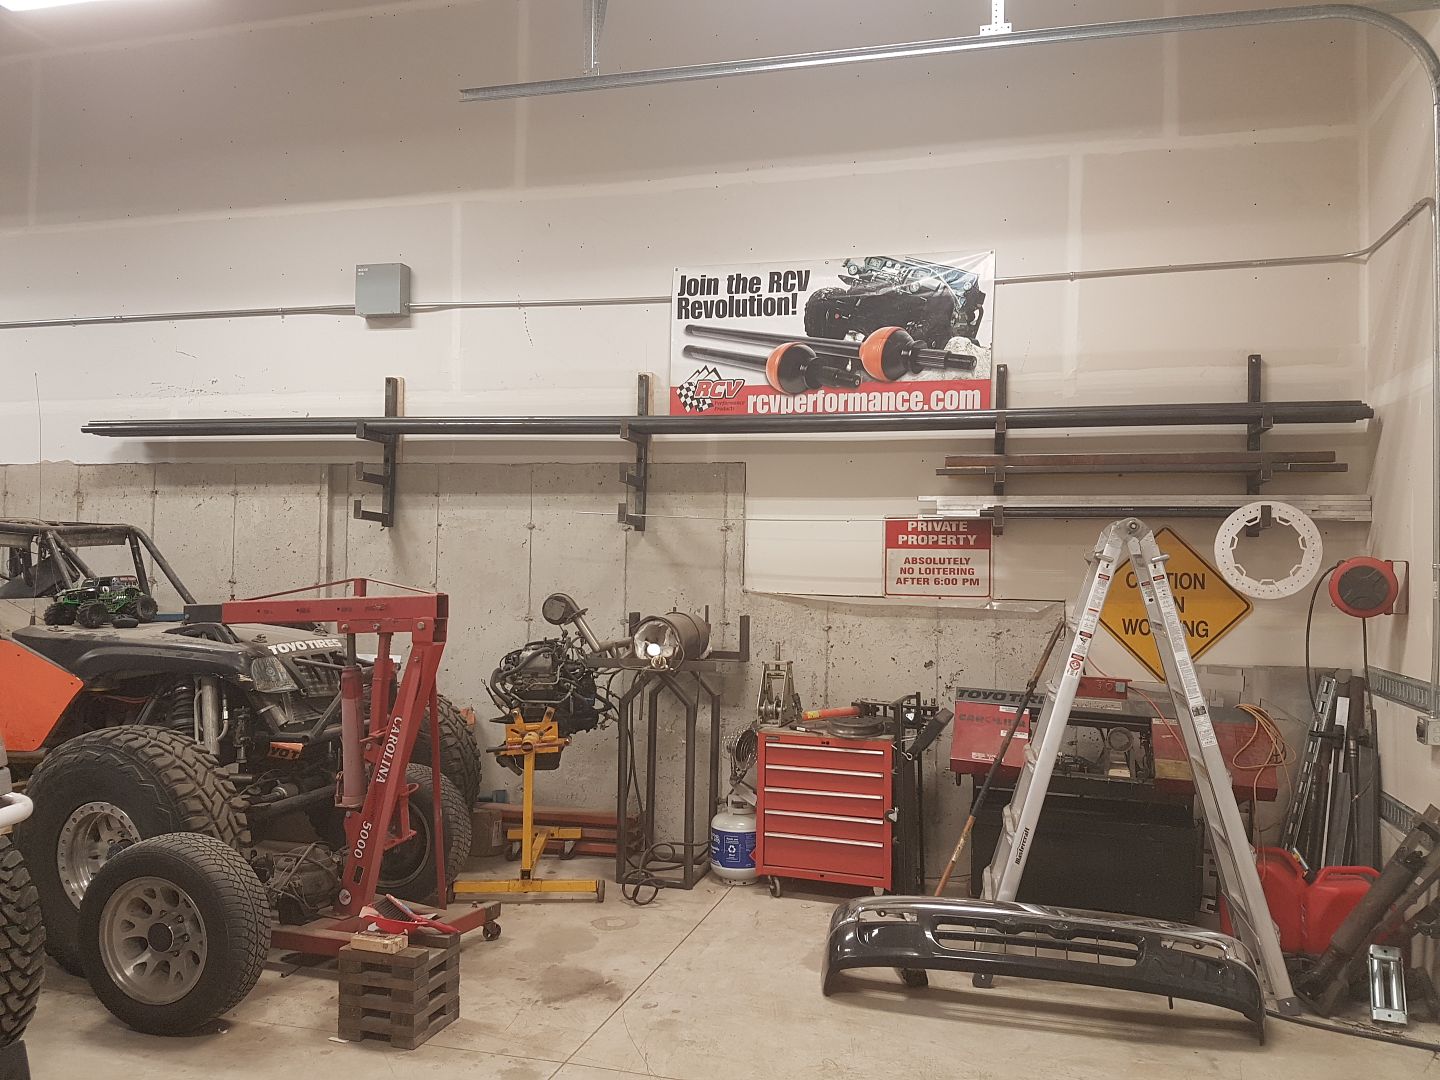
on a side note, Some 24' lengths showed up. 1.9" Handrail tube. this will be for rockers and fender bars.
03-08-2019, 07:20 PM
Will you leave it raw aluminum or finish it in some way? I'm thinking it'll look too nice to paint when it's done.
03-08-2019, 08:39 PM
i'm going to get it powder coated. I'm planning on trying to match the factory interior colour and texture. we will see how well that works.
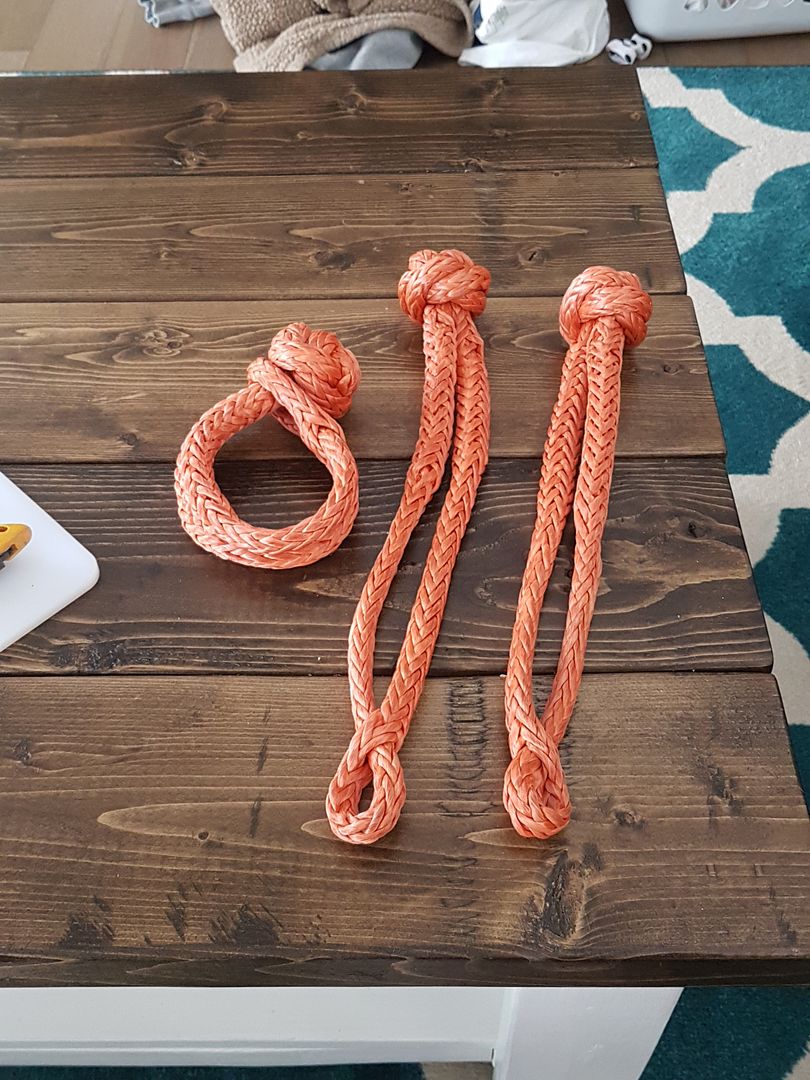
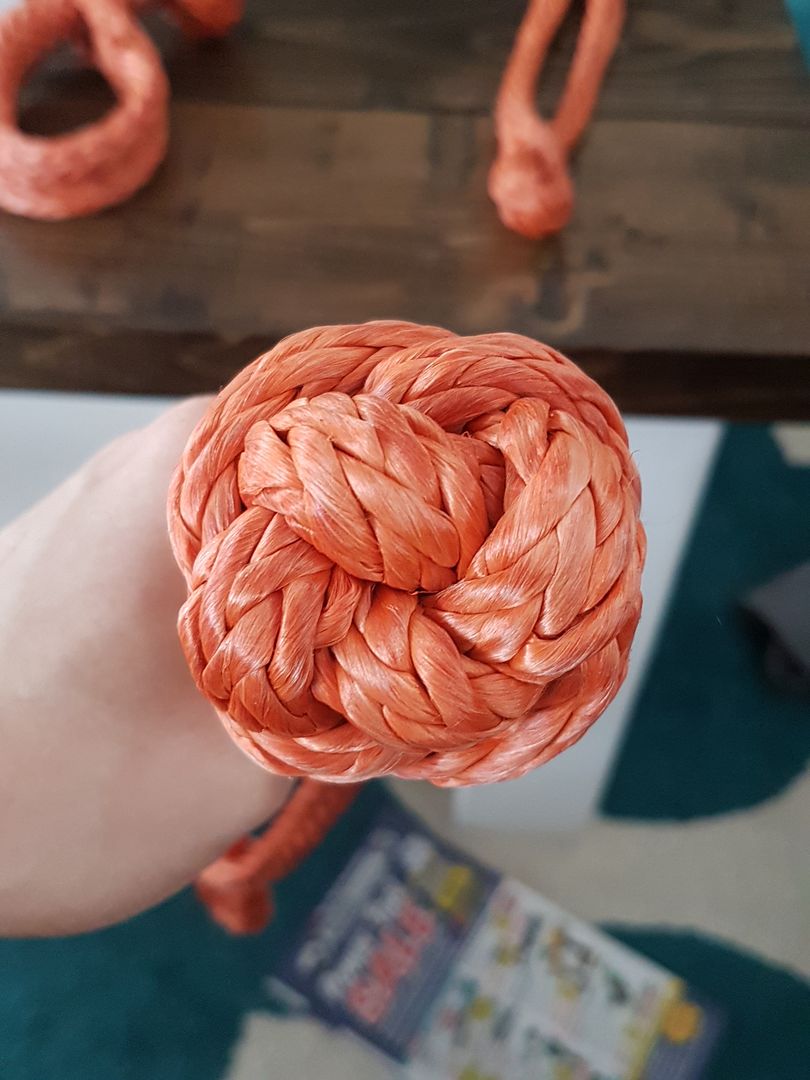
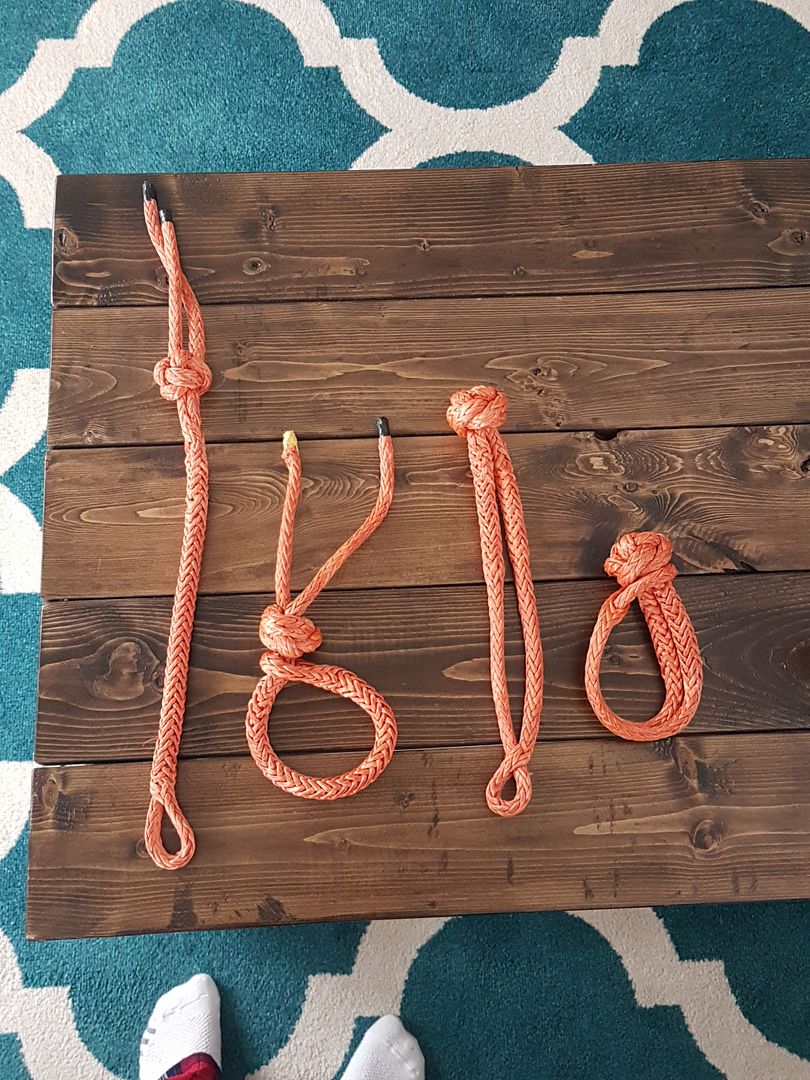
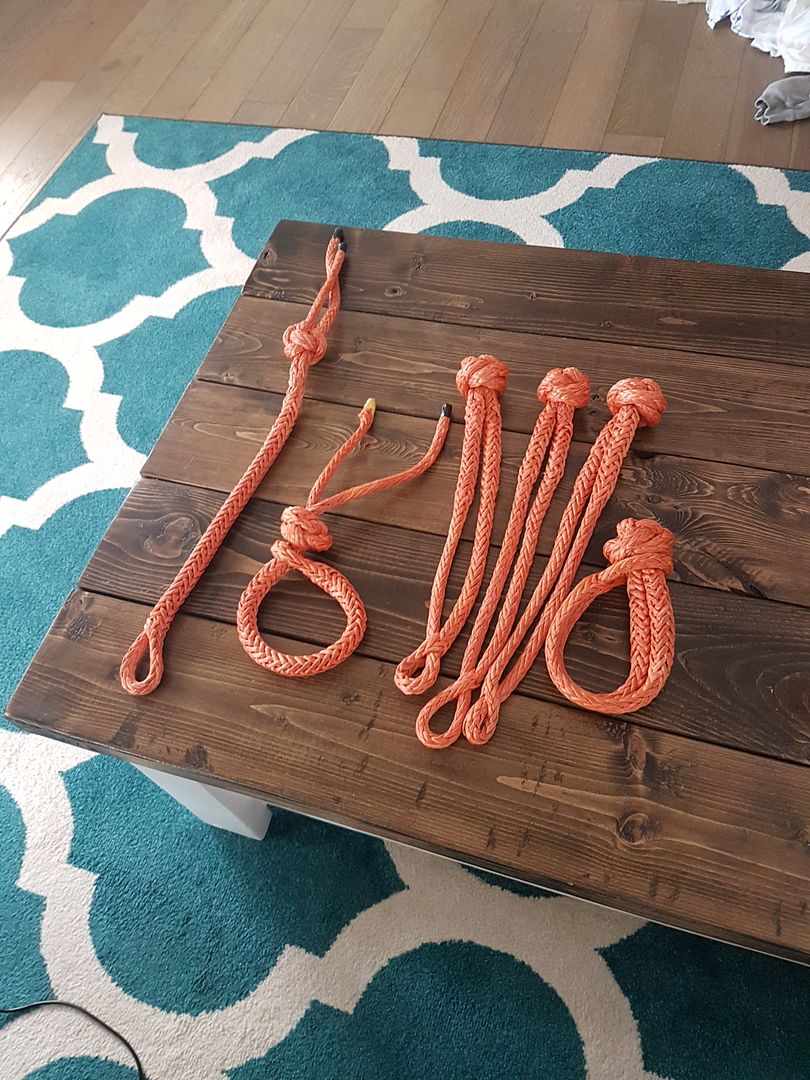
i had some time today before i went out to get more filler rod to convert some random lengths of extra winch rope to some soft shackles.
not sure what style i like better. the left or the right. the left seams to be the most popular with the winch rope companies.
takes about 5 min per shackle. i don't know why i didn't to this before.
03-10-2019, 05:21 PM
i got to smash a few filler rods while my 2 year old naps.
 03-13-2019, 12:46 PM
Man this build has really come along way. Hope your treatment is going great!
Got a few questions:
1) Can you show how you mounted the window shelf thing? I'd love to make one for my WJ
2) How did you separate the clear plastic in the taillights? Heat up in the oven?
03-13-2019, 06:29 PM
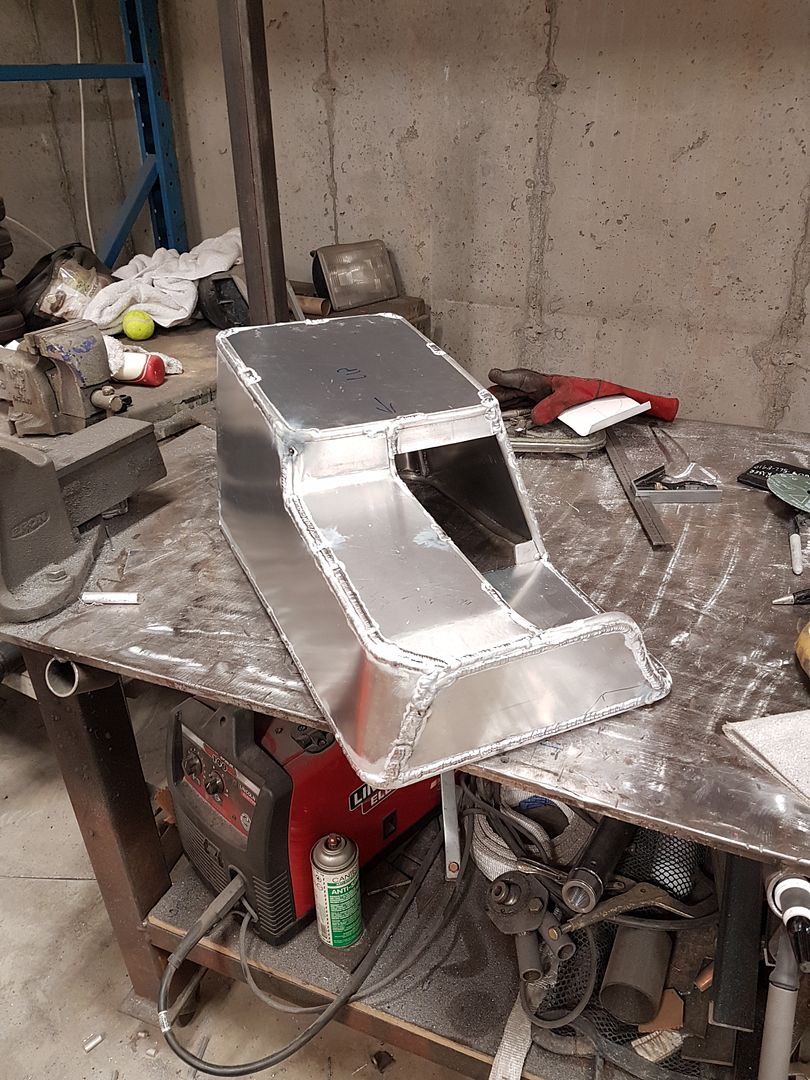
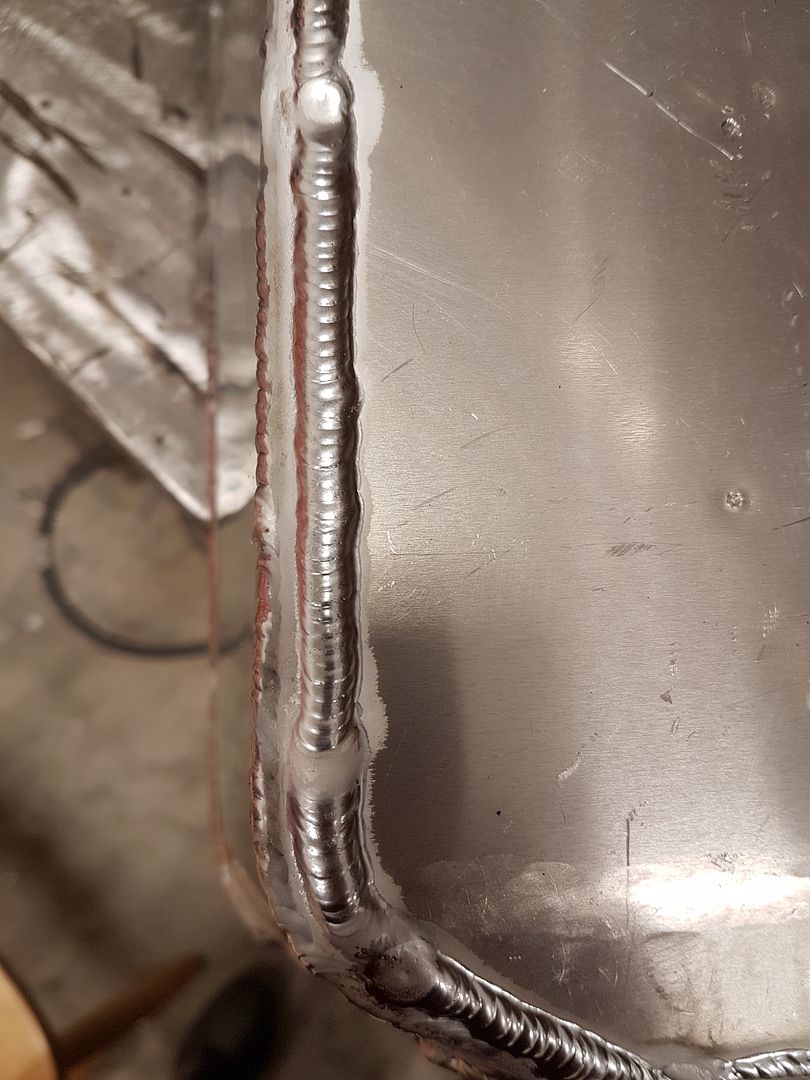
some more progress, ran out of gas today.
I'm pretty hapy how my tig welding has come along in this project.
Heres a shot to show panel fitment prior to welding
This has inspired me to make a few dollies for my vise.
03-13-2019, 06:32 PM
thanks!! treatment is going ok.
1. the shelf is just bolted to the molle window guard. I'm certain i posted mountint pics but if i didnt post enough info let me know.
2. the rear tail lights were just heated up in a kitchen oven at 265 F for 15 min. then they just pull appart.
03-14-2019, 09:39 AM
1) I looked through your thread yesterday and did not see any pics on how you mounted them. Would you mind posting them again?
2) also, how did you glue them back so neatly. If i try it, Ill wind up having glue all over the inside of the lens
| « Previous Thread | Next Thread » |
| Thread Information |
Users Browsing this ThreadThere are currently 6 users browsing this thread. (0 members and 6 guests) |