|
|


 04-20-2012, 11:22 PM
Nothing fancy, just thought I'd throw some pictures up if anyone was interested.
height: 39"
rationale: 1" below standing elbow height (I am 5'10" for reference). Recommended by most sites as the least fatigue/back problem inducing height choice.
width: 6'
rationale: left enough space on that wall for a drill press and hydraulic press
depth: 28"
rationale: roughly a comfortable arm's reach to the back of the bench
3" overhang for clamping
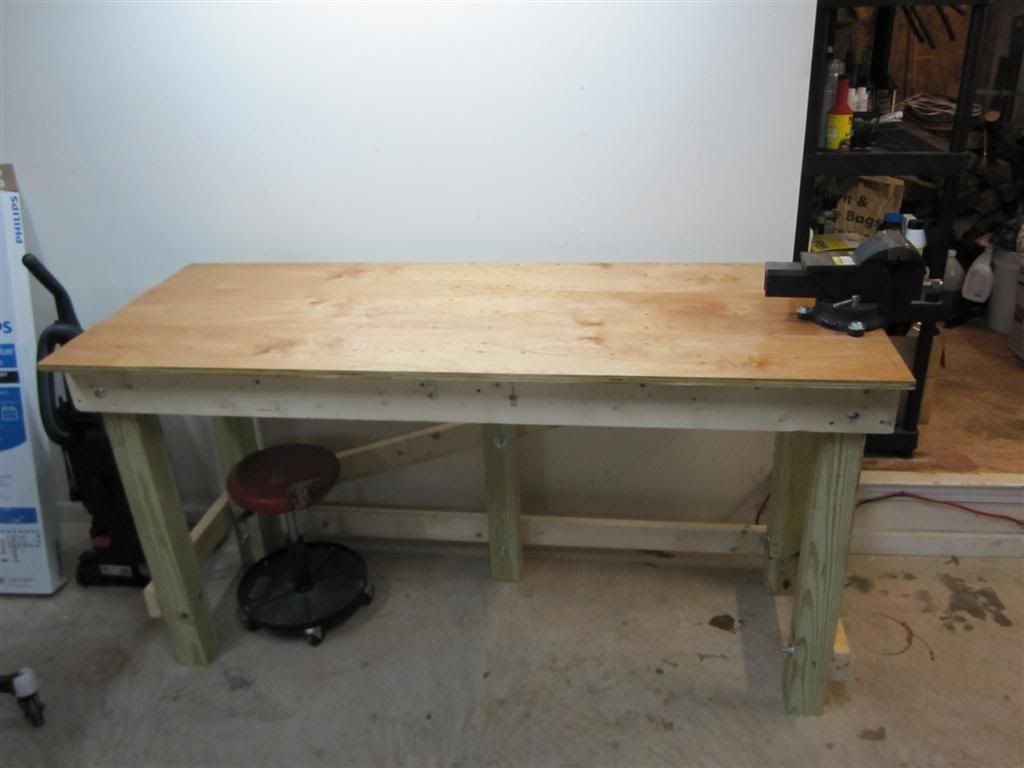
surface is 3/4" birch plywood, held down with ~50 deckmate torx drive screws. 4x coats satin poly to cut down on oil absorption
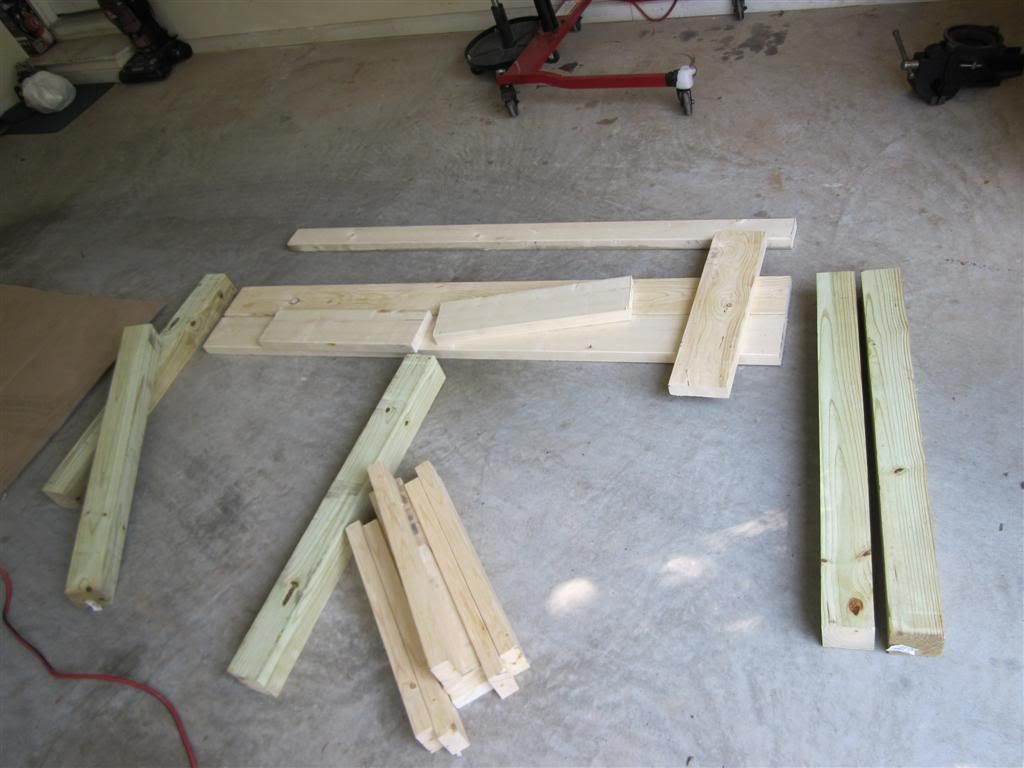
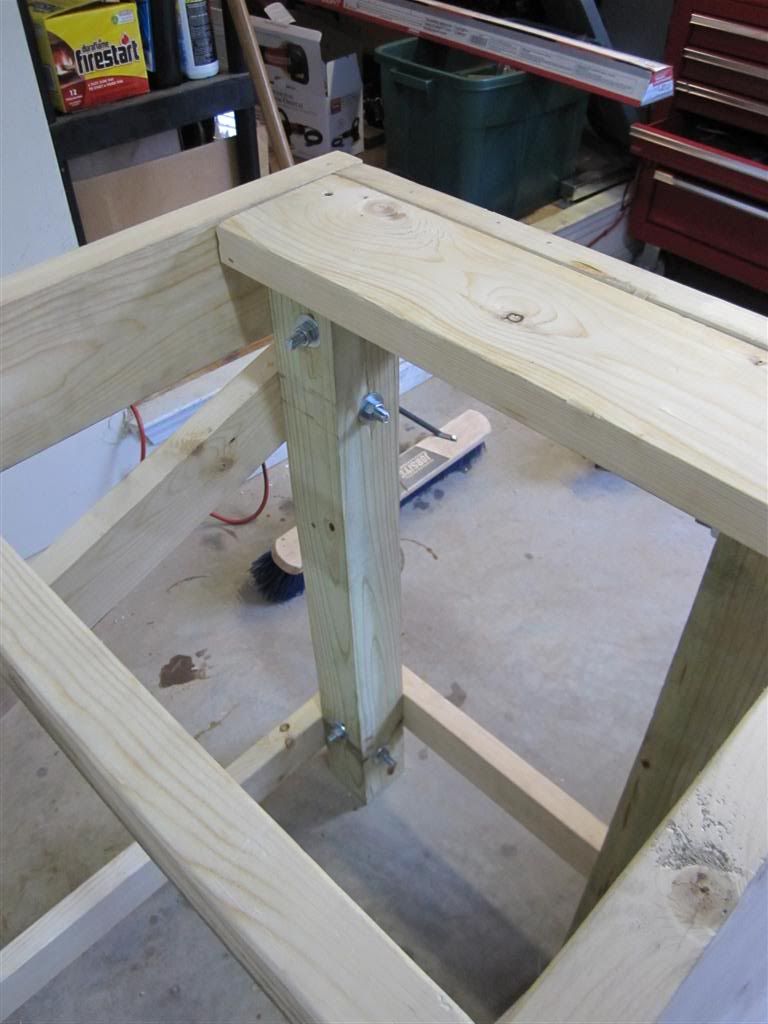
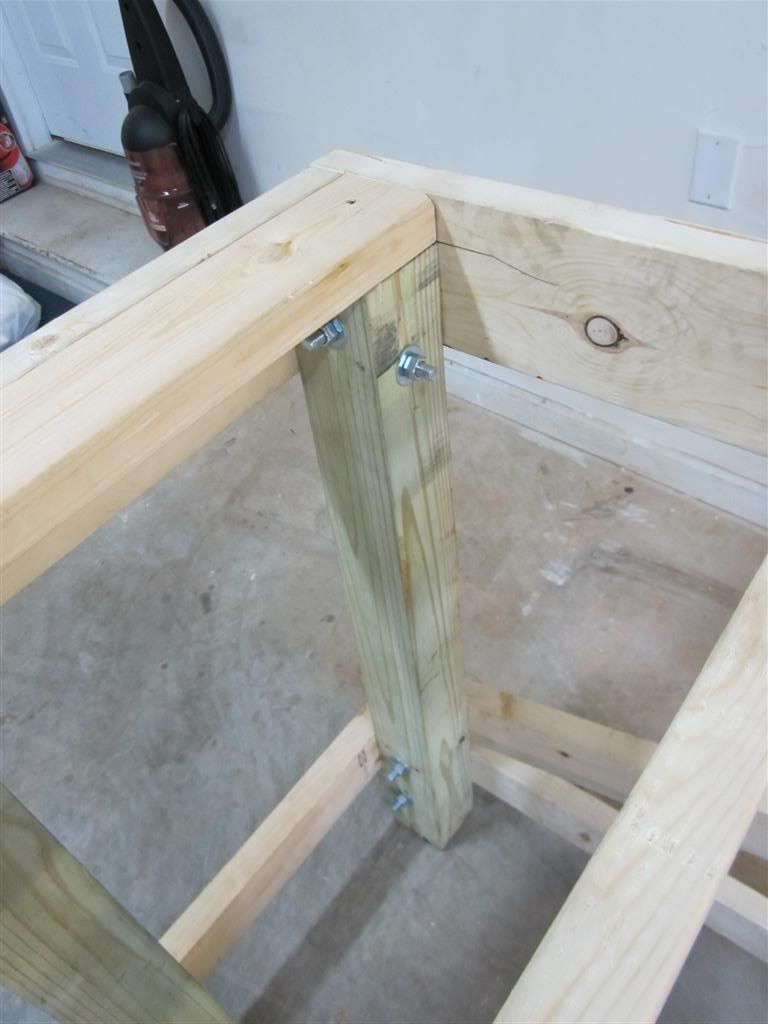
4x4 legs, 2x4 bracing, 2x6 main structure. 2x6 laid flat under the vice.
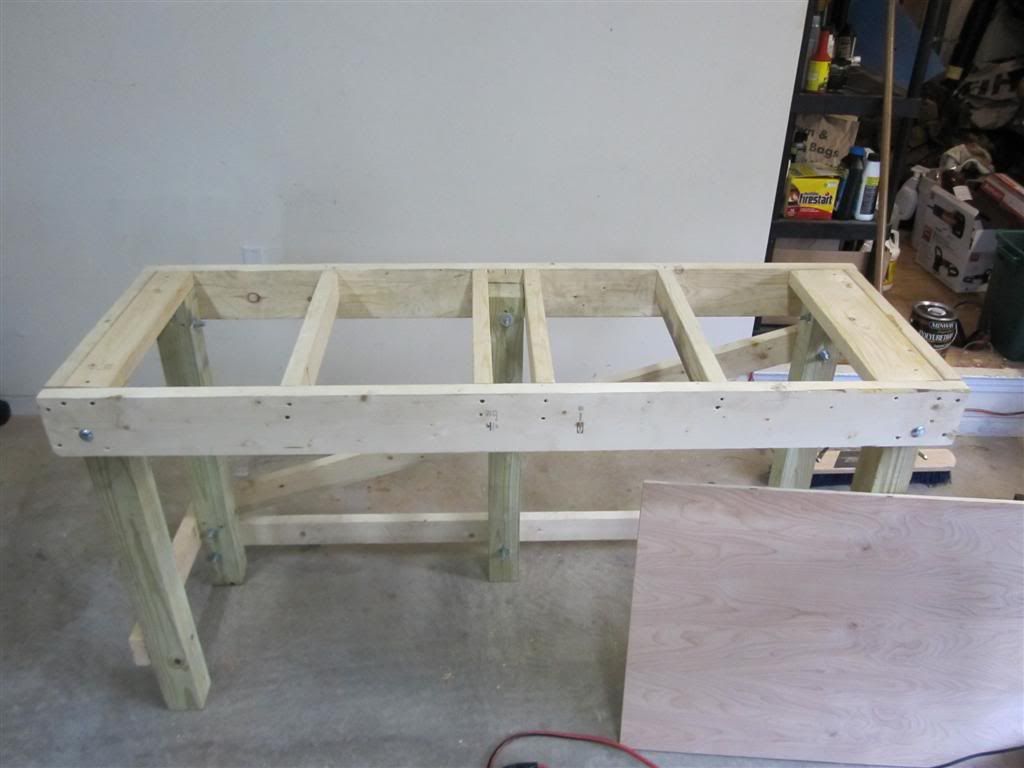
screwed together to set square with boxes of deckmate torx drive screws and then drilled and bolted with 1/2" carriage bolts.
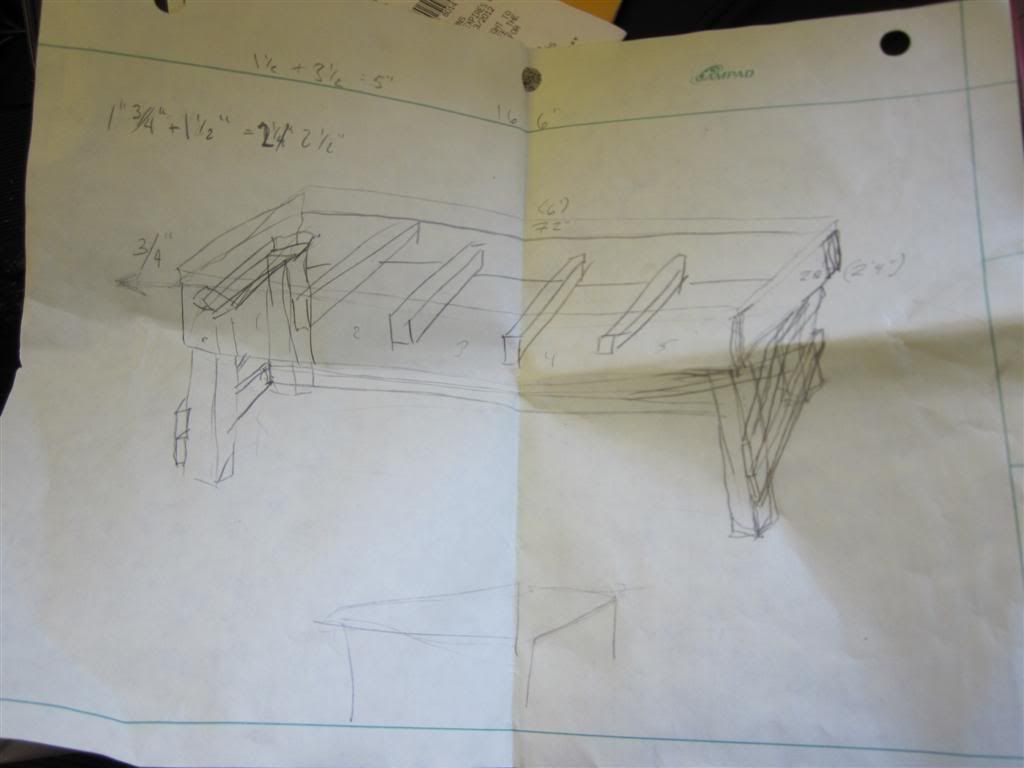
my brain barfed onto paper while i sat on the couch and brainstormed: (note elite math computations such as 1.5 + 3.5 = 5, etc)
cut:
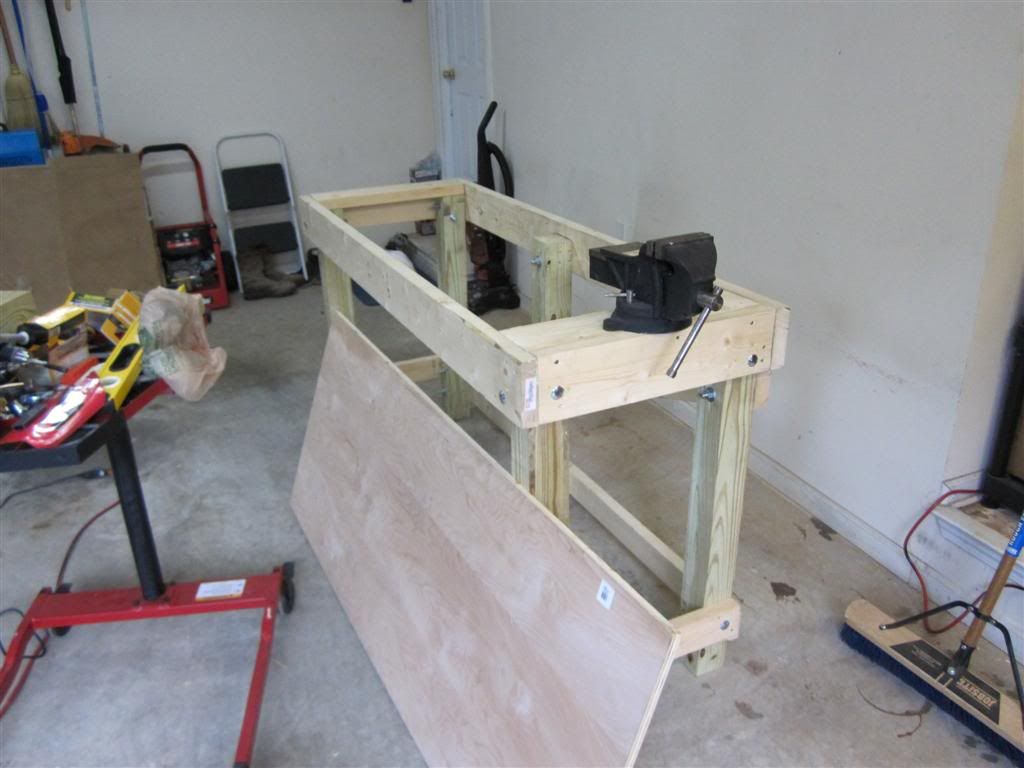
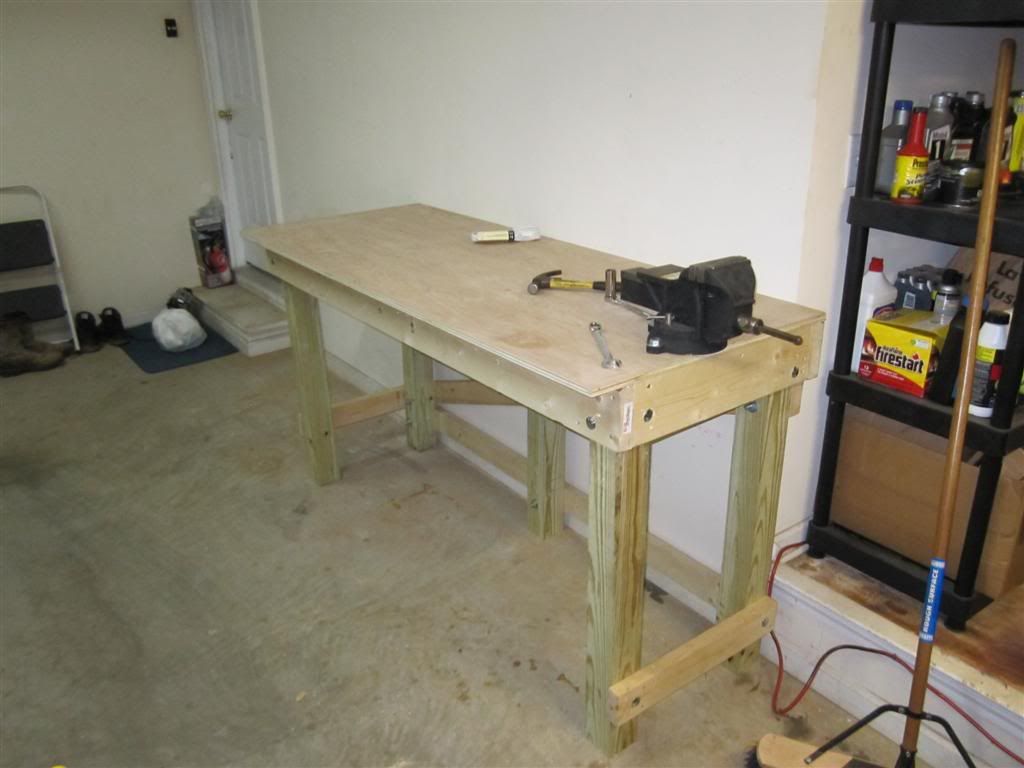
framed, test fit top and vice:
bracing in:
carriage bolts in:
done:
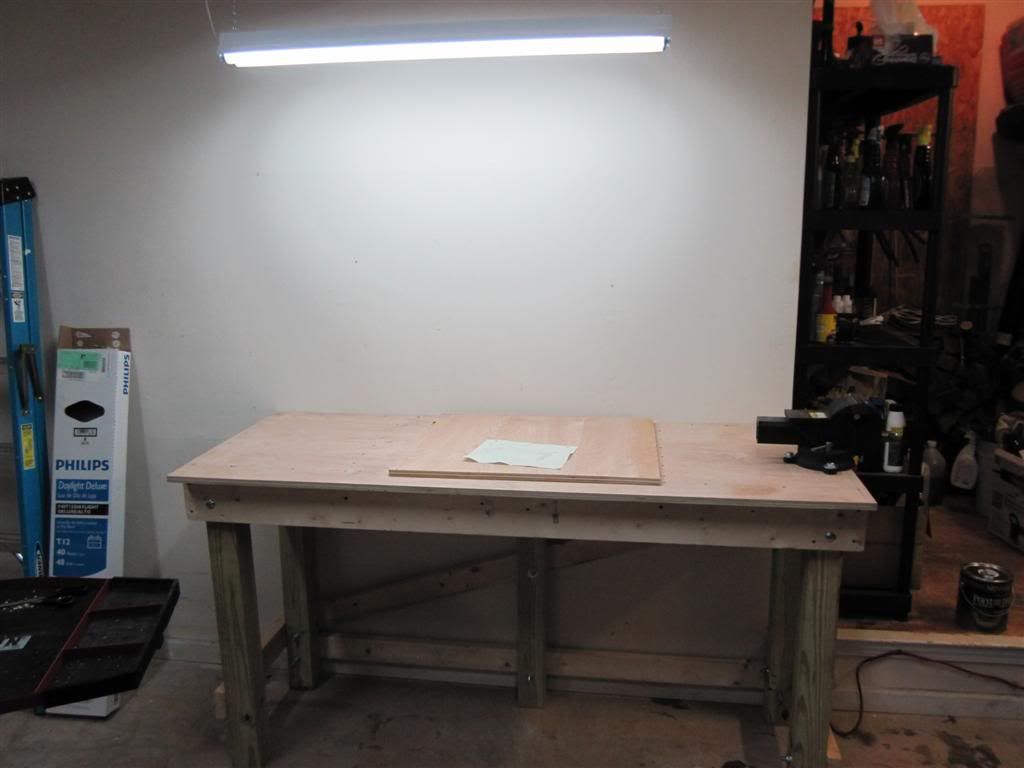
4' light installed above (I am a good lighting junkie...this marks the 6th one of these 4' lights in my 2 car garage):
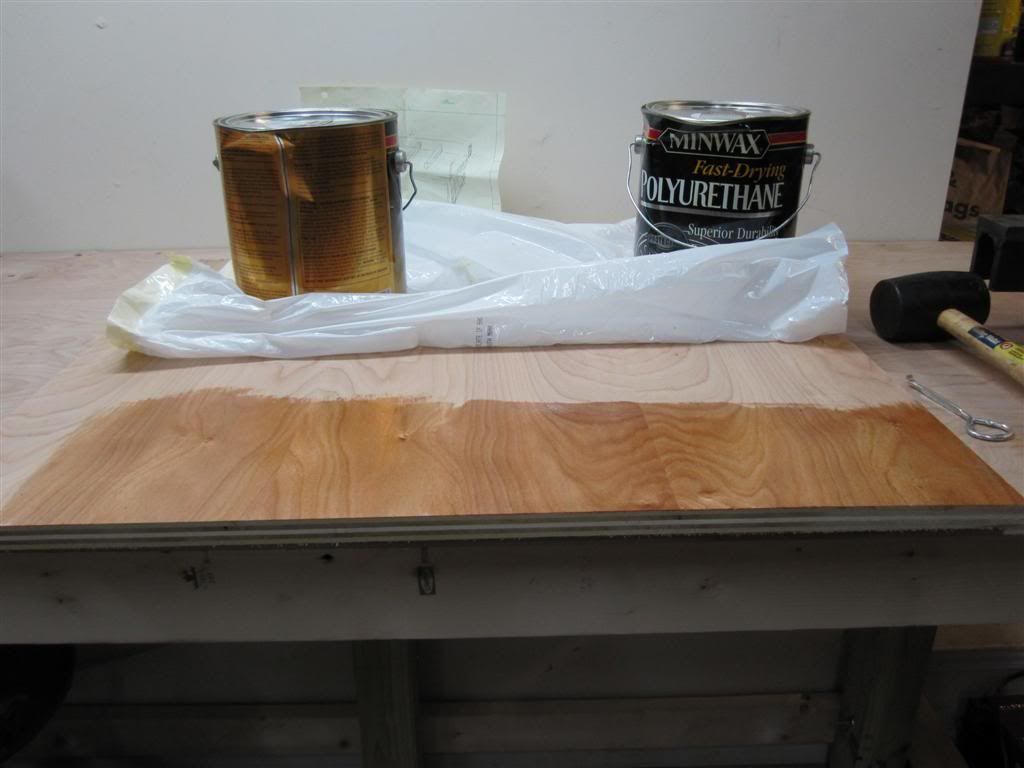
testing gloss vs satin poly (settled on satin, both are just going to get wrecked regardless, no point in the effort of gloss):
still wet, first coat of satin:
Probably going to grab a 2'x4' sheet of UHMW to plop on top if I'm going to be working with really heavy/sharp stuff.
Kind of considering grabbing my 350/465/205 from my parents house and slowly rebuilding/refurbishing them to a condition worthy to plop into something. Basically 0 funds for anything these days so elbow grease/low $ projects will be the name of the game....but I didn't want to do that shit on the floor.
Anyway - nothing earth shattering here, just thought I'd share. Have the cut list plus a CAD model handy if you're interested in copying.
Next project will be to run a sub-panel to the garage, or at least a 220v outlet. Undecided. Then a welding table that rolls under this one.
Last edited by paulkeith; 04-20-2012 at 11:27 PM.

 04-24-2012, 09:32 PM
Paul, I tried to reply to this post this weekend but my ipad had other ideas. I got frustrated and quit.
I like the bench. Good, strong, simple construction.
Have you thought about adding support under the front lip to prevent plywood casualties? Of course you wouldn't on purpose, but a heavy object dropped on that unsupported edge could potentially not end well. Maybe that's a risk you're willing to take on a $30 (maybe less?) sheet of plywood.
I would highly recommend 220 sooner than later. Go with multiple outlets if you can.
Last but not least: trade that 350 for a JY 5.3 and you've got something worth swapping
 04-24-2012, 10:35 PM
Good work!
Have you considered bolting it to the wall also? You'd be amazed at how much that helps when you really have to bend/pull/hit something, especially since you have the big vice mounted to it.
 04-24-2012, 10:37 PM
Hey Paul, nice bench. That should last a while. You're going to wish that vice was on the corner - ask me how I know. Do you think the short side needs any diagonal bracing?
04-24-2012, 11:46 PM
Also.
If you treat your workbenches like your paint cans this thing's doomed

Paul, I'll post some pictures of mine sometime. I just recently wired itwith outlets, one which is switched for lights
Sent from my DROID BIONIC using Tapatalk 2
Found a picture on my phone. Think mine is 42" to the bench top. Corner posts are 4x4s, it's about 6' in length total including the spot my box is sitting. I put down some laminate flooring over the mdf, it's held up really well so far and was super cheap
Sent from my DROID BIONIC using Tapatalk 2
04-25-2012, 08:22 AM
Thanks Cam.Originally Posted by ATL ZJ

Yeah, so - that was something I kind of was hung up on. Most of the threads I read, people said "if i had it to do again, i'd leave a ~3" overhang for clamping." So I did that, but had the same feelings as you - this is going to snap right off when i drop something heavy on it. A good path forward might be a piece of 3" angle, bolted to the face and bottom of the overhang.
220 is definitely the next project on the list. I keep waffling between the single outlet or a sub-panel - really just driven by price. Obviously know the panel would be better so I guess I need to just suck it up and spend the cash to do it right.
Yeah, point noted and agreed. I'm totally floored by how cheap 5.3s are getting. The game has changed. The 350 is at least a 4 bolt main, TBI and free....but for what i could unload it for i'm probably 1/2 way to a 5.3. This has been on my mind for sure.
Thanks man! Yeah, I'm still undecided on this. I had the stud finder out trying to locate the studs in that wall but the results weren't making any damn sense....never get the same answer with that thing. My whole house has always been difficult - even went out and bought other stud finders that all behave the same way. I will eventually anchor it somehow.
Thanks Ryan.
You know, that hit me like a ton of bricks laying in bed the other night. "why.......did i not put the vice on the corner? as soon as i turn the vice 90* i can't tighten it..." The mounting would get a little less simple over in the corner - but if it annoys me enough i'll just have to move it.
My original design had diagonals on the ends which you can kind of see in my elite level cad sketch. It wound up sturdy enough that I decided to skip them. Easy to add if she loosens up over time....
Yeah, about that. a little dried poly in the sealing lip plus a little "why won't this damn lid close" plus a little mallet..........
Nice man. How do you like the 42"? I was concerned about going over 39" but I'm not all that tall either. The laminate flooring is a pretty clever idea. I still think I'm just going to snag a slab of PE as a sacrificial surface.
Definitely need to get some outlets going on as well.
The height is prefect for me at 6'1". I like the laminate and it was cheap but if I did it again I might lay down a piece if sheet metal or solid hard wood. The outlets have been my favorite addition so far.
Sent from my DROID BIONIC using Tapatalk 2
04-25-2012, 09:24 AM
Yeah move that vise out on the corner and then out a little if you can. I happen to have this pic online but it's hard to tell I have it mounted on second layer of plywood that overhangs the top about an inch. Your bench will be plenty sturdy with those 4x4 posts and thru bolts. When I built mine I didn't want any cross members between the bottom of the legs so I opted for angle bracing and also attaching it to the wall. I've worked the vice hard enough for the wall to shake with the bench, but the bench stays solid. You may notice the few cords going up behind the shop vac. I put a power strip up under the bench so I could have several things plugged in at the same time and the cord be out of my way. I'm pretty happy with the addition of power on mine as well. I like it under the bench so all the cords are not laying across the top of what I'm working on or piling up on the bench.
Oh also like Cam said getting the 220 outlet in is a great next move. I actually did install a sub panel for my stuff. The old main panel was full and I had already robbed one breaker location for the welder. With the addition of a plasma cutter and 60 gallon compressor I really needed three 220 outlets. Two are 20 amp and one is 30. So I ran a sub panel from the old welder breaker location with a 50 amp breaker, properly sized wire and fed that to a sub panel with 3 double pole breakers. Very happy I did that as well. No reason to booty fab when it comes to that kind of power. Now technically I should have used something that could have supported all 3 outlets running at the same time, 70 amps. But, I'll never be in a situation where all three are in use at the same time. So I felt comfortable with saving cost there. The bigger you get the more the price really goes up on that stuff.
Last edited by Pearce; 04-25-2012 at 09:47 AM.
 04-25-2012, 09:38 AM
Sweet workbench!
There is a monster of a workbench in the basement of my new house -- wired with outlets and lights. There is no way that monster is getting through the door upstairs, so when I find time, I'll hopefully be able to take it apart and reassemble it in the garage. Otherwise, I may test out my carpentry skills and build something like you have. I never thought about the elbow height thing, so that's definitely going to be a helpful tip.
04-25-2012, 12:19 PM
Works out about perfect since you're 3" taller than I am. All of my steel stock is back in SC, I'm definitely going to cut out a half top for this thing from metal. Once the welder is running I'm also going to build a dedicated welding table.
Damn you all! I need to go see what it would take to bolt it down on the corner.
I just didn't want any bracing across the front - up against the wall didn't really bug me. Incidentally, for anyone building a similar design - make sure you get it the rear brace up high enough to clear the baseboard, if you're a high roller like me and have baseboard in your garage.
I think it is unlikely that I'll have a 220v compressor in this house, but I do have the plasma and welder. Back at my dad's shop we only had 1 outlet and I always switched between them - never used both simultaneously. Would be nice to not have to do that, but then that'd probably be 2 220v extension cords, etc.......I dunno.
Kind of settling on a sub-panel for the future expansion, just need to make sure I get it 100% to code. Don't want any bullshit from a future home inspector when we go to sell.
"Carpentry skills" is generous.
If you do end up wanting to duplicate this design, I've got a cad file and a cut list.
04-25-2012, 07:47 PM
Don't get too jealous of Pearce's vise. It's damn near impossible to use quickly unless you're a southpaw. At least yours is mounted to the right side of the bench
 05-05-2012, 03:09 AM
I like this!
 05-07-2012, 10:05 PM
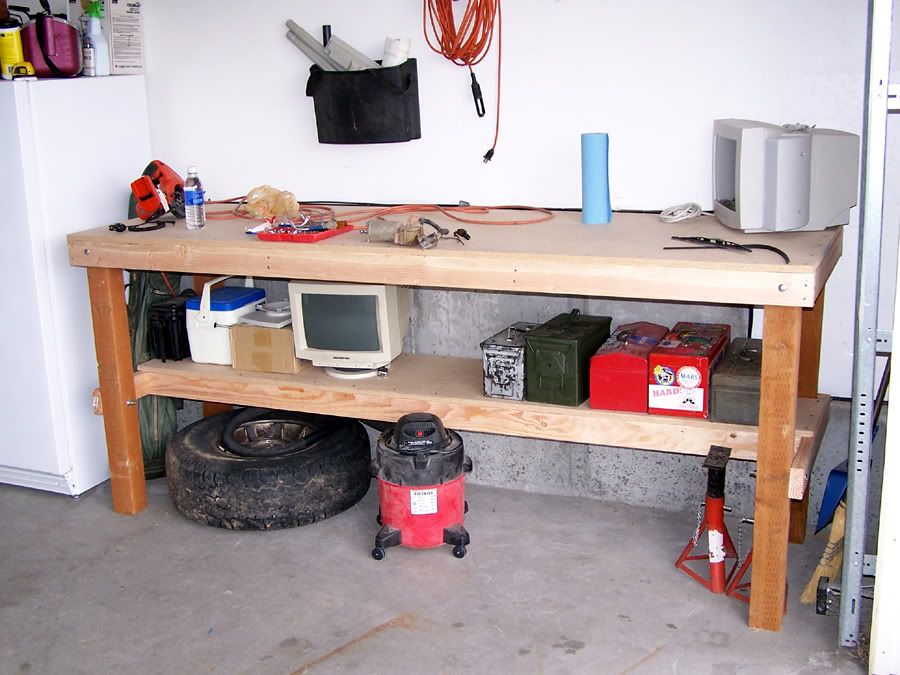
Really similar to mine I built 5 years ago...
8' long, 30" deep, 40" high, and an 18" deep shelf below.
05-07-2012, 10:07 PM
woah, yeah, sure is. nice work!
05-13-2012, 11:33 PM
Yours has more bracing under the top. I put screws in the 3/4" MDF fairly close together. I can stand on it in the middle and it bends a little bit. I never considered staining it. And I am NOT a woodworker by any measure. But I made it very similar to the shelves I built elsewhere in the garage. Not the sharpest looking, but darned solid.
Great minds, brother!!!
05-30-2012, 11:28 PM
I learned the hard way after lighting my bench on fire multiple times that sheeting it with metal is the only way to go
05-30-2012, 11:44 PM
Mine is destined for the same fate. Got a big sheet of 1/8" stainless that came with my house that's going on top soon.

Last edited by Heake1978; 06-13-2012 at 08:57 PM.
06-16-2012, 02:52 AM
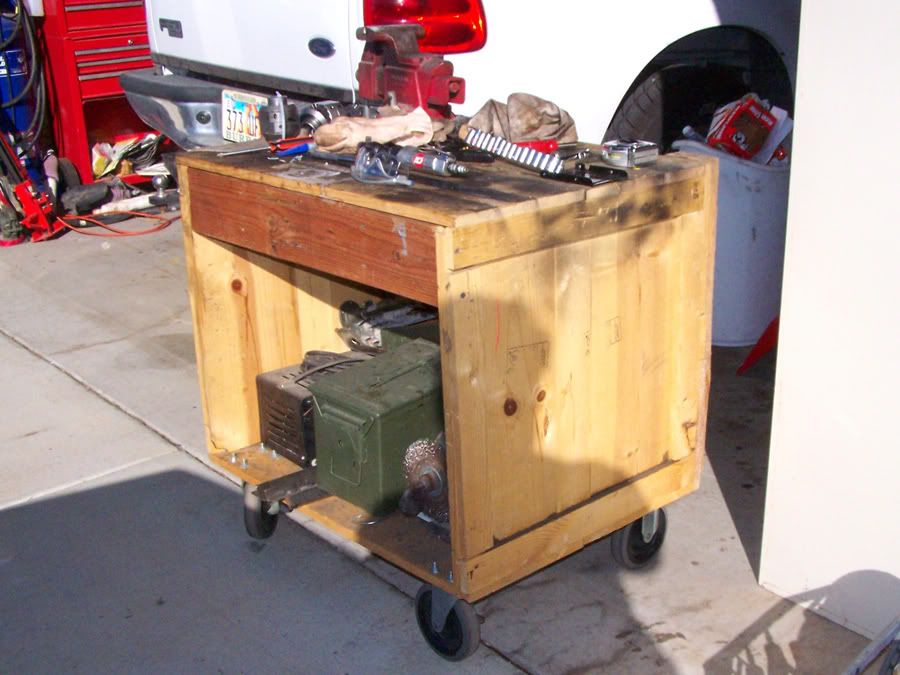
Keep thinking I will, but will likely sheet my rolling box...
What I should do is pull the top and rebuild solid, then sheet it.
02-18-2013, 12:39 PM
Bring this back from the dead.
Anything you'd like to change about it?
I was sifting through some of the junk the previous owners of our house left and found a slab of table top that should be perfect for a workbench top. I'll be going with a similar design to yours, except I'll probably tie it into the wall studs with some lag screws.
I do want to put something adjustable on the bottom of the legs since my floor is uneven, so what is the best way to do that with wood 4x4 legs?
Last edited by SirFuego; 02-18-2013 at 12:41 PM.
 02-18-2013, 01:05 PM
I don't have any pictures of it but when i was living with my parents one of the best uprades we did to my dads bench was to drop an 1/8" plate topper to the wooden workbench. Went out to the metal supplier, got it with a 1* wide bend the length of the sheet for the front lip of the bench. I'd want to add another bend right at the back as a backsplash to stop crap from falling off the back but it was fine without. Even though it's just 1/8", it's lasted awesome over the years with the support of the wood underneath. And you can wipe it down with solvents for quick cleaning
Just frame out the top of the bench from the wall, temporarily support it and level the top then add your 4x4 posts. Push the top up a little with a jack then tie in your 4x4s. Same concept as when I supported my workbench in my new shed. My bench although tied into the studs in the shed would droop a little with my weight on it. Now it doesn't budge at all
Even though my floor isn't uneven it will work about the same for you
02-18-2013, 03:47 PM
Thanks, I looked into doing something like that or even doing a cantilevered design. I've moved things around my garage 3 or 4 times already since I moved in last April and each time, I like the setup better than I had it before. So I don't know quite yet if where I'm planning to put the workbench is really where I want it. So I want a free standing bench since that can easily be moved, re-anchored or even castered (is that a word?) for mobility.
Last edited by SirFuego; 02-18-2013 at 03:49 PM.
| « Previous Thread | Next Thread » |
| Thread Information |
Users Browsing this ThreadThere are currently 1 users browsing this thread. (0 members and 1 guests) |