|
|


 08-29-2009, 08:03 PM
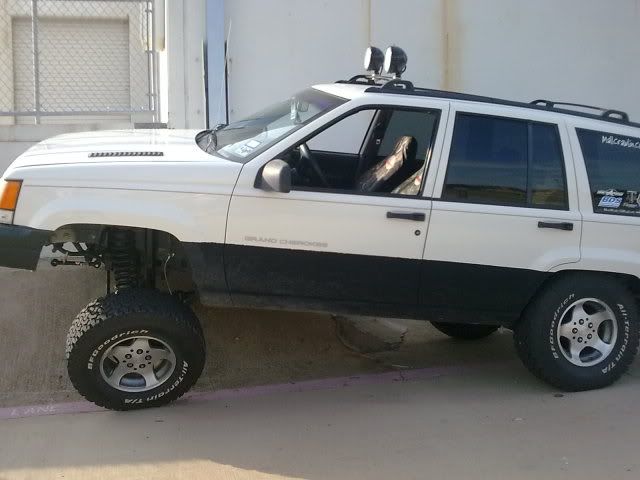
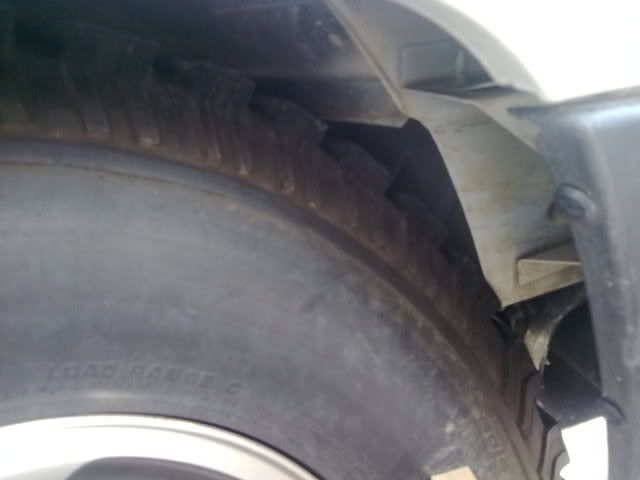
Finally found a place for a flex test, Mallcrawlin style!
Driver rear:
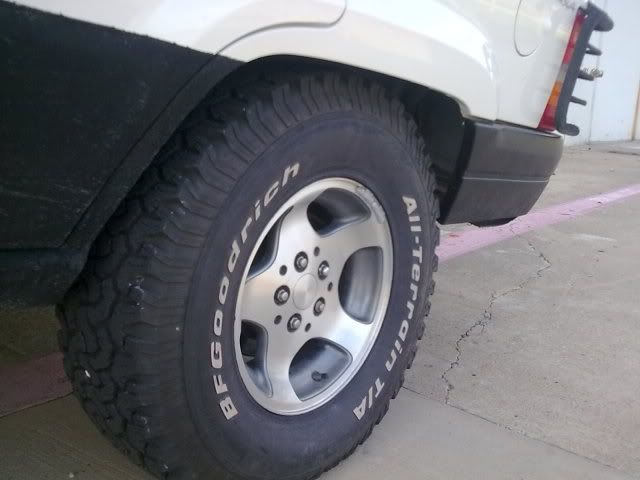
Pass. front:
Pass. front compressed
_______
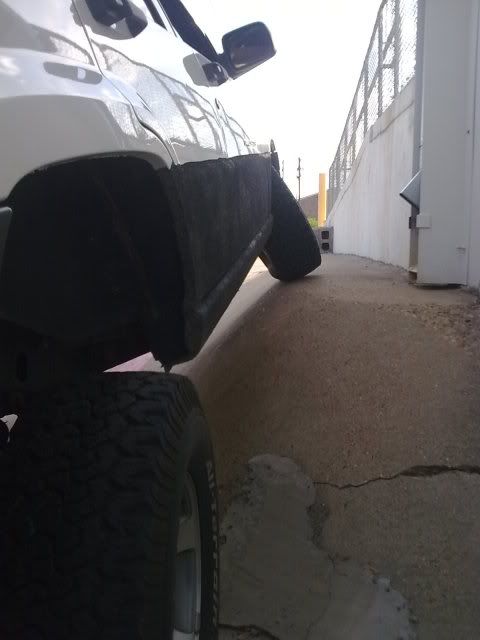
Overall I'm impressed with it, I found out about how high I need to set my bumpstops, and also think the fenders may need a little love sometime soon. Oh, and the 31" tires look reeeely small.
 08-29-2009, 08:04 PM
nice man!
 08-30-2009, 03:39 AM
Stalker pic...

08-30-2009, 07:11 PM
thanks maxx, come down here and I'll flex on your LTB's lolOriginally Posted by zj95maxx

the dun-uh-v and its original owner are reunited!
08-31-2009, 12:24 AM
Just completed what I believe is the best mod you could ever perform on a ZJ, maybe on any Grand. However, I couldn't do it by myself, and I'll give credit where credit is due. Thanks to jfowlzj95, the mod took less time than expected, and you can already see the results.
I was gonna post this in the FAQ section, but I'm pretty sure the tech would blow all the other threads away. Gents, I give you........
the TJ fuel pocket!

Last edited by dp96zj; 08-31-2009 at 12:30 AM.
08-31-2009, 12:28 AM
500HP mod woooooooooooo!!!1
09-15-2009, 06:57 PM
I think it's time to do the rear main seal (hat is there for scale)
___________
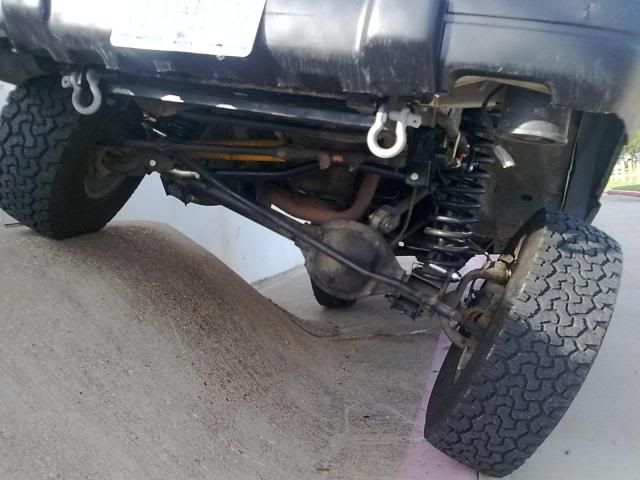
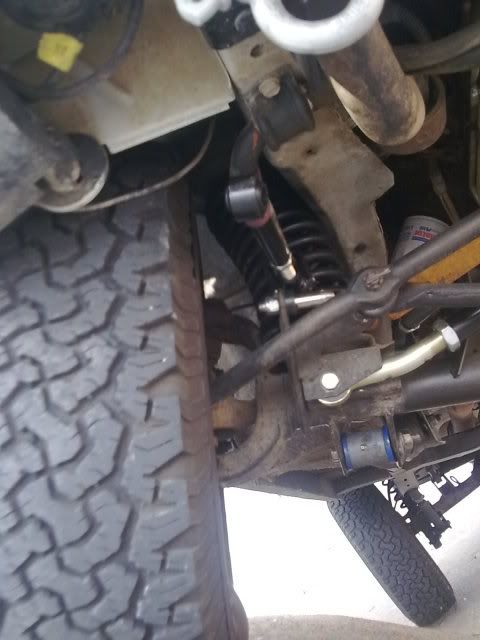
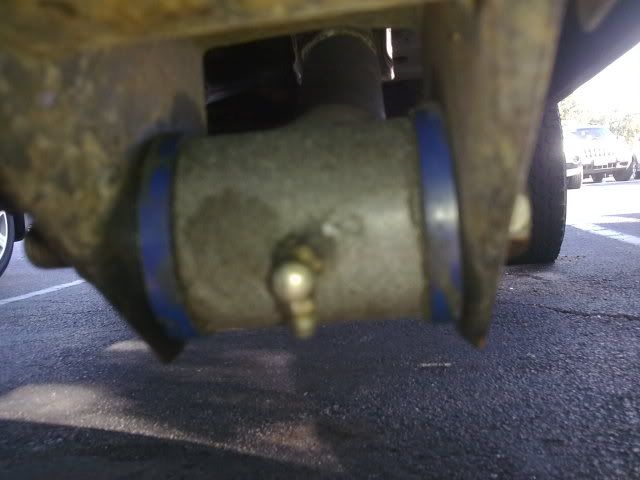
And the complaining on Jon's thread made me go out and look at my CA's. Apparently BDS wasn't thinking when they located the zerks on the LCA's.
Driver side Front LCA
Pass side Front LCA
First of all, I have no clue why one zerk is a straight on and one's a 90*. I have a feeling if the axle droops at all, those will rotate downward, and if there's a rock or something, they'll rip off. Would it be best to replace the 90* with a straight on one like the pass. side, or go to something like this:
http://www.mcmaster.com/#1095k16/=3nb806
09-20-2009, 06:33 PM
I wonder what was clunking.....
 09-20-2009, 07:04 PM
yep been there done that... you can go to vatozone and get the energy suspension poly ones to replace them, or get some rubber ones there too
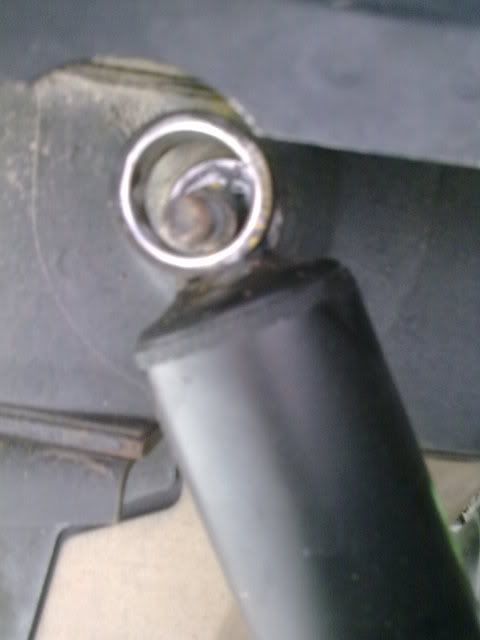
09-20-2009, 09:37 PM
Yeah my other rear shock blew the bushing out about a year ago, and I replaced it with the cheapo rubber replacement. I put one of those on this shock as well. The rubber one that I replaced a while back is starting to fall apart, so these things don't seem to last long.
I noticed the shocks are about 2" from full extension while its on ground level, so chances are I'll be getting longer shocks before I need to replace those crappy bushings again.
 09-20-2009, 09:50 PM
Is there enough of a gap to put on LCA skids (which might protect the grease zerk)?
09-20-2009, 09:58 PM
I'll have to check that out tomorrow. I bet if I plated the outside of the LCA bracket, I could extend it out a little further from the axle, giving it more clearance for a skid if I needed it.
But who builds up these turd axles anyway
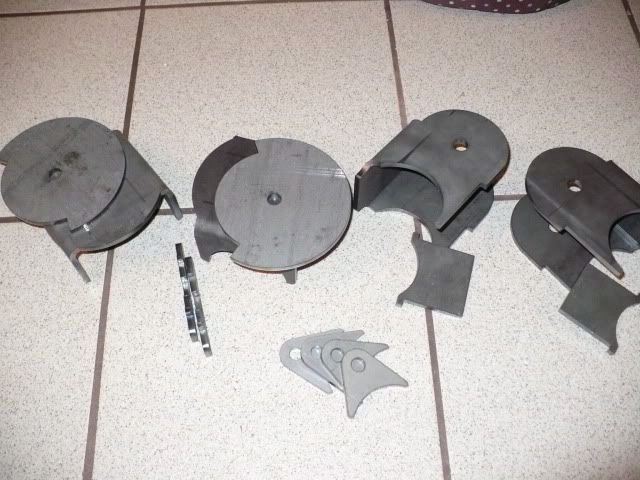
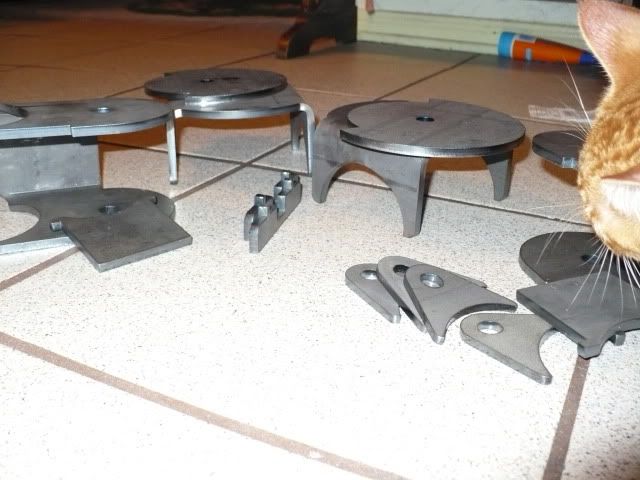
10-03-2009, 12:50 AM
Jon was ordering some stuff through ballistic fab and would save more money through shipping with a larger purchase, so I ended up buying some brackets for the 8.8 and combining the shipping. Let's just say the brackets won't be the weak link
100% beef:
*Cat not included
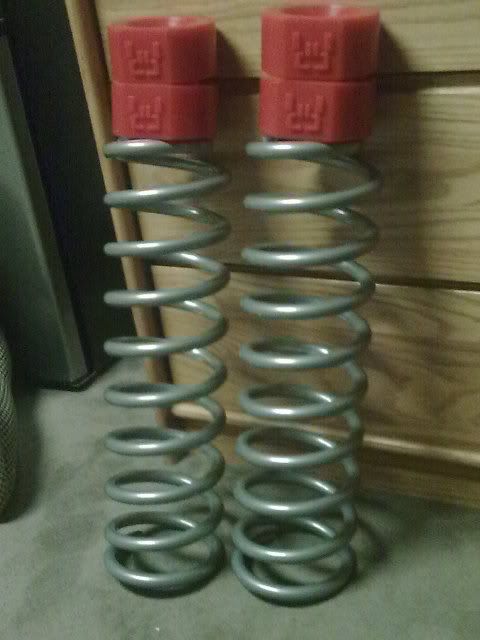
10-08-2009, 11:21 PM
My new rear setup:
net lift: 8.5"
10-09-2009, 12:14 AM
Hey your spacer logos are upside down
10-09-2009, 12:18 AM
nah dude, Tyler said it's supposed to look like that, so when you flop the rig the logo's right side up
Actually, the spacer design =
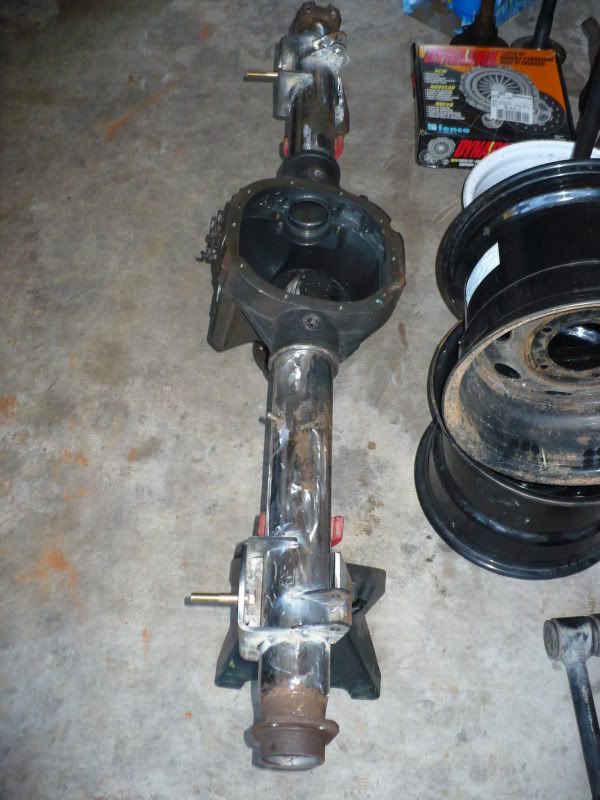
10-24-2009, 08:15 PM
Woot! Update!
Got the majority of the axle set up. In other words, the coil perches, LCA mounts, and shock mounts are tacked in. The final welds will be done by Matt (sasdranger) in two weeks, so the axle should be looking better by then. We were working with a crappy stick welder and an angle grinder, so after a long time of trying to cut off the D35 donor UCA mounts, we said screw it. Jon will end up taking his "torch" to them to get them off, then they'll be burned in as well.
Yes, the tacks are really ugly, hence no close up pics. Trust me, if you tried to drop a decent tack with this crappy welder/crappy wire combo, you couldn't do it either. If they hold up long enough for the ride back, then they've done their job!
Last edited by dp96zj; 10-24-2009 at 08:31 PM.
10-24-2009, 09:25 PM
I went into the garage to move some stuff, accidentally knocked the axle over and all the brackets fell off...
10-25-2009, 01:22 PM
I can almost guarantee 1/2 of them would fall off if it was knocked over lol
10-25-2009, 03:12 PM
those bolts on your perches are way to long to get that plate on easily when you go to install the springs. you would probably be better off using something half that size.
10-25-2009, 03:20 PM
Yeah they might be. I chose these over the 2" because the smaller bolts didn't have as much excess threads as I wanted. I don't see it causing too much trouble, but we'll see!
 10-25-2009, 04:22 PM
What do you want the excess thread for?
I found out by using mine I like the bolt being short. Turning a ratchet or ratcheting wrench inside the spring to tighten it can be a pain in the ass.
Also, it's hard to tell but it looks like there actually might be too much unthreaded section on the bolt to where the spring retainer wont be able to clamp the spring...cant tell though.
10-25-2009, 06:18 PM
The bolt length should be fine. Once the spring and retaining plate is on there, there will only be about an inch or so of thread left which the nut will take up about half of it. As for installing the spring, just slide the plate in where you want it and then drop the plate/spring straight down onto the perch. Bolt should go right through the middle. But if the bolt does end up being too long we can always cut it.
I thought this too when I first saw the bolt but when we tested it with an old spring I had laying around it worked find, if anything we could just add a washer in.
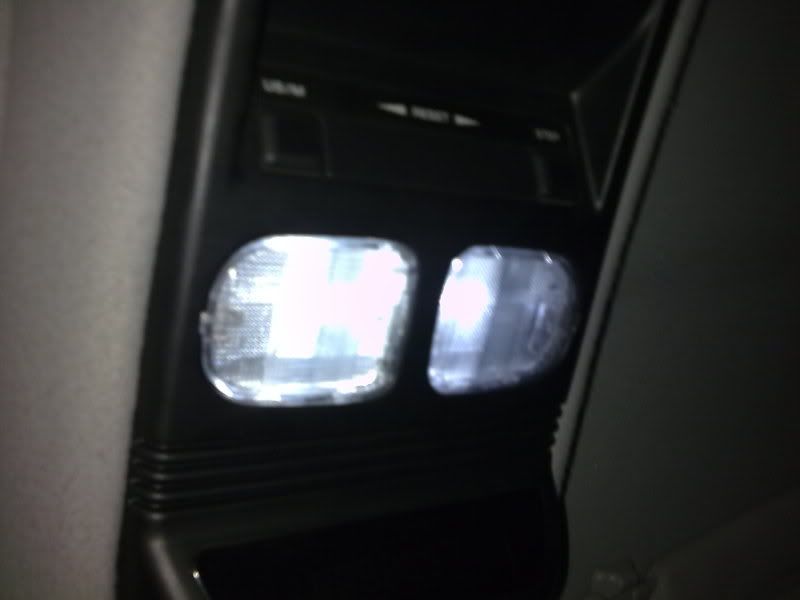
10-27-2009, 12:07 AM
Boredom + nowhere to wrench + $12 = this
I was bored, and one of the rear bulbs was burnt out, so I replaced em all. These are alot brighter and easier on the eyes IMO.
10-27-2009, 08:58 AM
copy cat
| « Previous Thread | Next Thread » |
| Thread Information |
Users Browsing this ThreadThere are currently 1 users browsing this thread. (0 members and 1 guests) |