|
|


 11-14-2008, 12:19 AM
This thread is getting a bit long so for those that don't have the time to burn reading the whole thing here's the executive summary:
Suspension: Clayton long-arm; 5.5" lift; Bilstein shocks; RE extreme-duty track bar; Currie steeringPowertrain: 5.2 V8; NP242 w/ SYE; Iron D44 rear w/ Detroit locker & alloy shafts; HPD30 front w/ Tru-Trac; 4.56 gears; Solid diff covers; Tom Wood's driveshaftsMisc: 265-75R16 BFG KM's; Pro-Comp 7073 wheels; skid plates; Aero muffler w/ custom tailpipe; Hanson bumpers
In the works: Rocker replacement, limit straps
-----------------------------------------------------------------------------
Sorry for the loooong first post. I've been hanging out over at NAGCA for the last six months or so but with all the problems over there figured I might as well post my build thread over here.
March 31, 2008
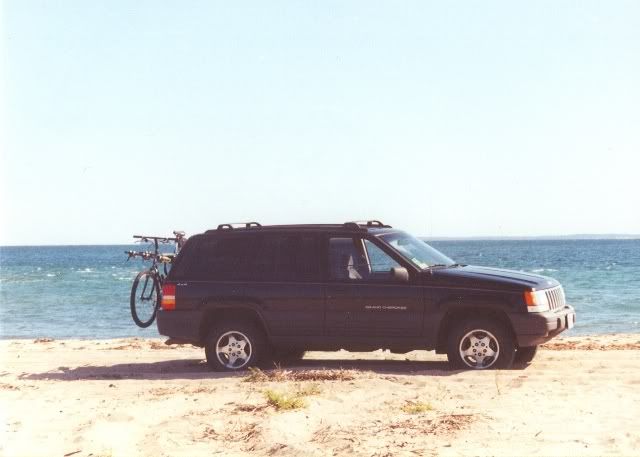
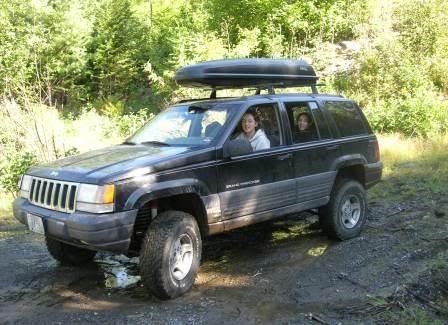
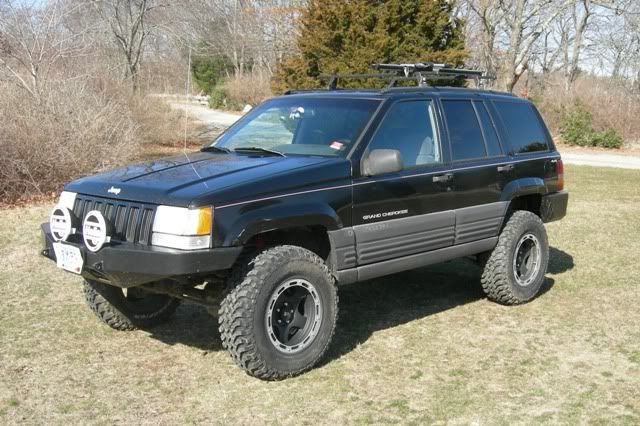
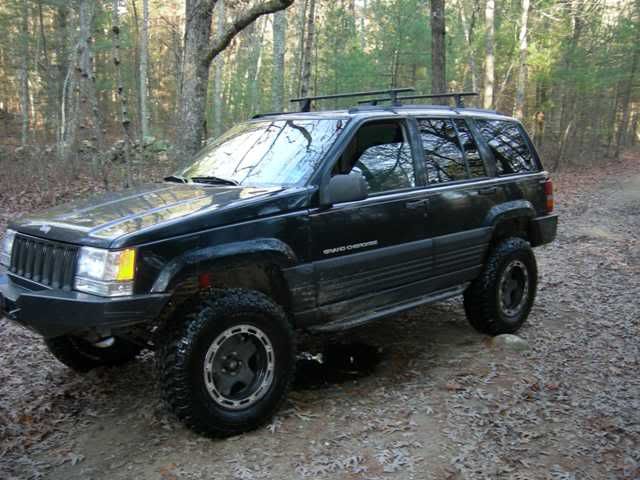
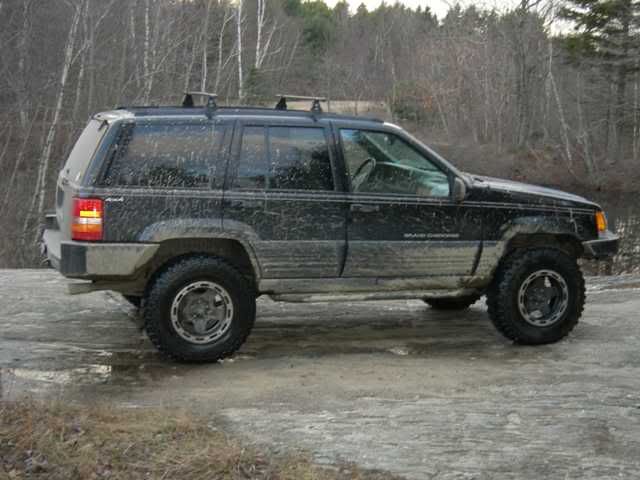
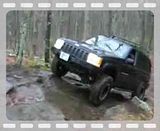
First, the basics. Its a 1996 Grand Cherokee Laredo that I purchased in 98 with about 33,000 miles. The vehicle was a lease that the original owner turned in early. I picked it up in virtually showroom condition for $22,000. It came with a 5.2L V8, Quadra-Trac (NP 249), Infinity sound system, and overhead console. For the first 5 years the vehicle was my daily driver and remained 100% stock. During this time I did a fair amount of off-roading but mostly fire roads and sand, very limited rock crawling and mud. Heres a pic of the stock vehicle:
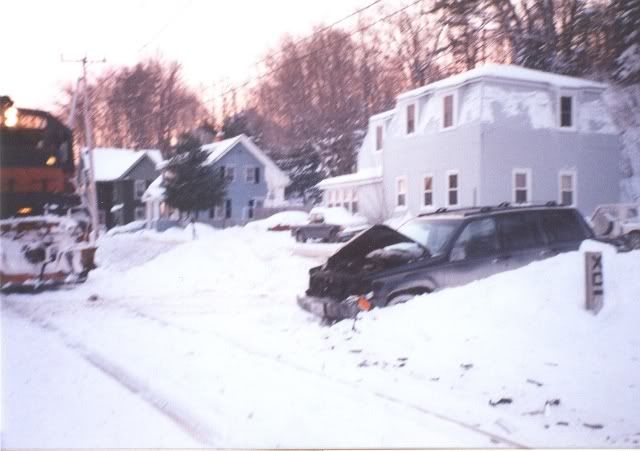
The following pic shows what can happen if you park too close to the train tracks. I was visiting some old college buddies up in northern Maine and arrived at their place late at night during a blizzard. I parked on the side of the road never realizing the tracks were there. In the morning I heard the train coming, blowing its whistle like crazy. I looked out the window just in time to see a railing on the front of the locomotive scraping across the front end. This little mishap landed me on the evening news. The fix cost about $4,500 which thankfully was covered by insurance. If I had parked a few more inches closer to the tracks then Im sure the vehicle would have been a total loss.
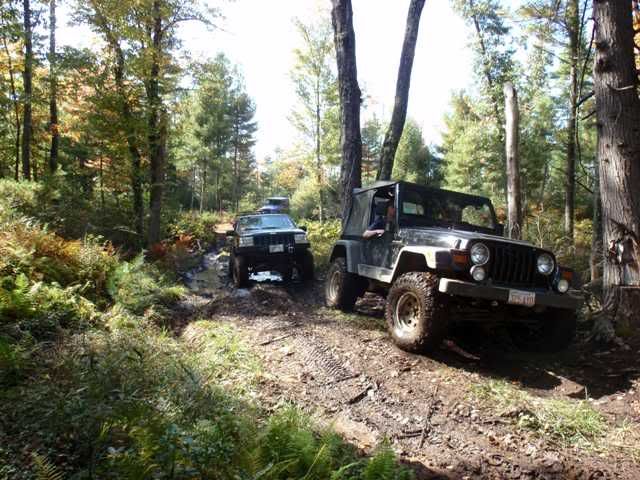
About 4 years ago I picked up a Mazda6 for my daily driver and kept the Jeep for camping, towing, and winter driving. At this time my Jeep had tallied just over 180,000 miles. The transmission and axles were showing their age so I installed a remanufactured transmission and rebuilt the axles to stock specifications (which, in retrospect, would have been the perfect time to upgrade). I wanted to get back into some more hard core wheeling after being out of the game for over 10 years so after a little research my first mod was a RE Budget Boost and 31-10.50R15 BFG All-Terrains on the stock wheels. I liked the look and the Jeep could definitely go places that would be tough at the stock height but in my opinion the handling degraded much more than it should have given the relatively mild amount of lift. In an attempt to improve the handling, I widened the track with 1-1/4 Spidertrax wheel spacers. The spacers did help the handling a bit and also kept the tires from rubbing the suspension when the steering was fully locked. In fairly short order I decided that the BB was not cutting it and upgraded to the RE 3.5 Super-Flex suspension. At this time I also installed a RE adjustable front track bar, Rancho RS9000X shocks, and a Borla cat-back exhaust system. Heres a pic with the RE 3.5 kit and BFG tires:
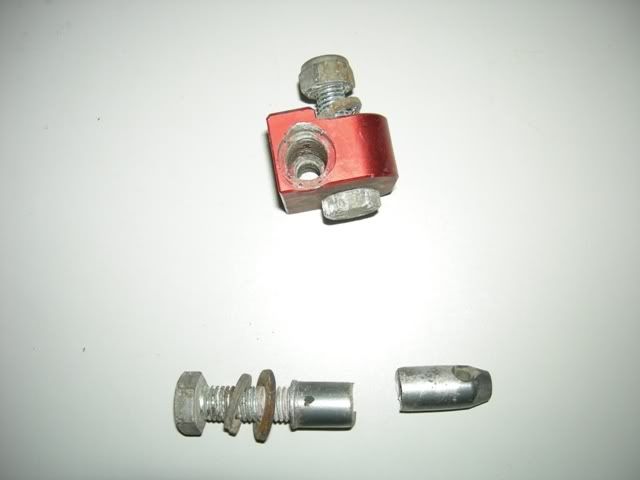
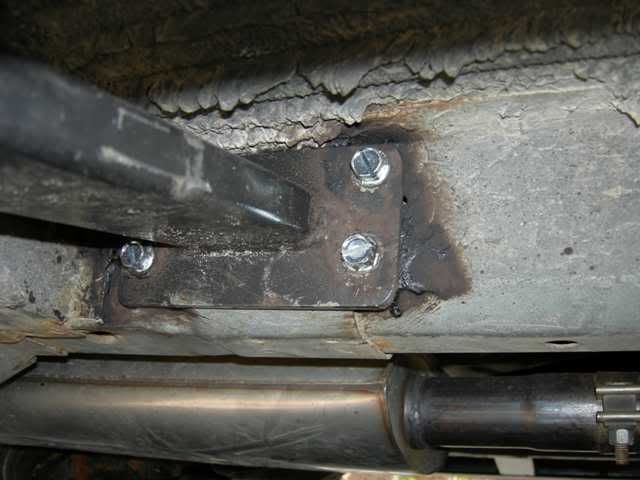
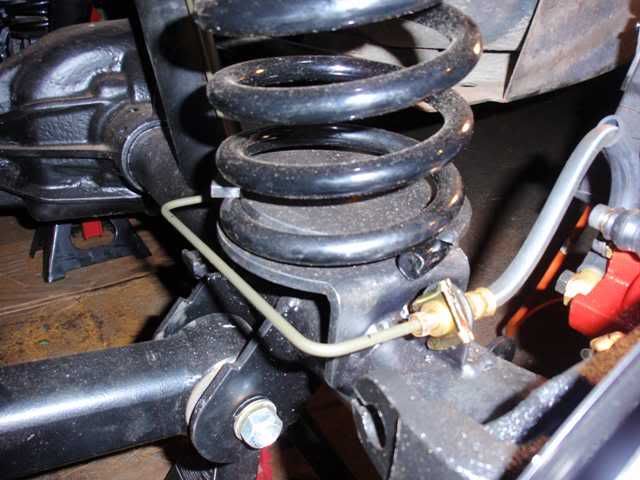
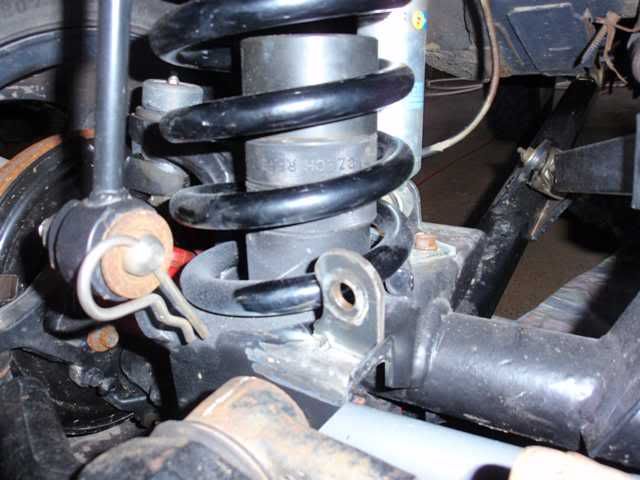
Overall, I have been satisfied with the RE kit. The on-road ride is acceptable, noticeably more stable than the BB, and the off-road capabilities are greatly enhanced over stock. The bolt-on rear track bar relocation bracket that comes with the kit is definitely a weak link. Within months of installing the kit I noticed that the bracket was cracking. Fortunately, I noticed this before it broke completely off on the trail. I welded the bracket on and had no problems since. If I had to do it over again, I would scrap the bracket and go with an adjustable rear track bar. Ive found the front sway bar disconnects to be the other weak link in the RE kit. The disconnects that came with the kit (Gen 1) were always sloppy and difficult to use. Eventually they corroded and became impossible to use so I upgraded to the RE Gen2 disconnects. The Gen2 disconnects look impressive but the design is weak; in less than a year they were trashed. After some research, I went with the Tereflex disconnects which look to be about as bulletproof as they come. Heres a pic showing where the RE Gen2 disconnects failed:
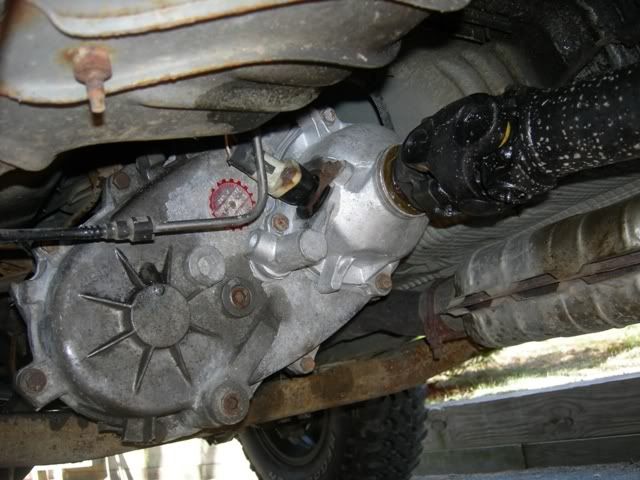
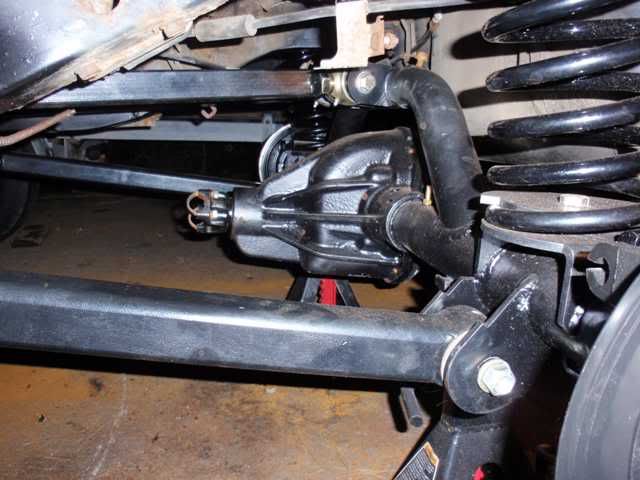
Several months ago the viscous coupling in my transfer case started going bad so I began researching my options. This is when I first stumbled across the Internet forums, NAGCA in particular. Over the years Ive grown attached to full-time 4WD. At the same time I was interested in having a 2WD option, primarily so that I could do donuts and smoke the tires. These requirements led me to go with the NP242 transfer case in place of the stock NP249. I scored a NP242 transfer case from a 99 Grand Cherokee from a local parts yard for $200 and rebuilt it using new bearings, chain, and a Tom Woods slip yoke eliminator kit. I cannot speak highly enough about the quality of Tom Woods products. Heres a couple pics of the transfer case in place:
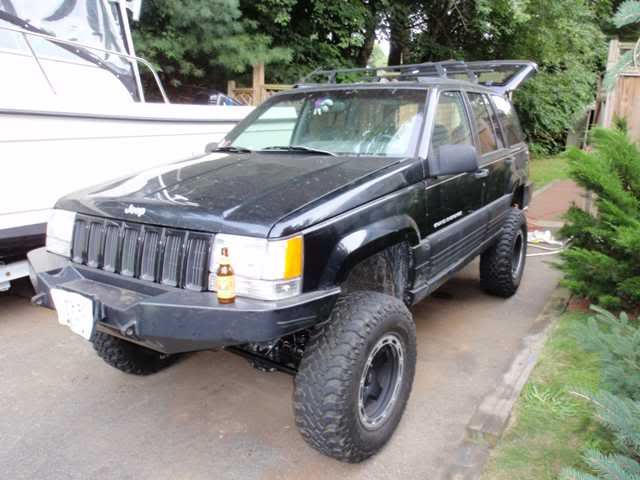
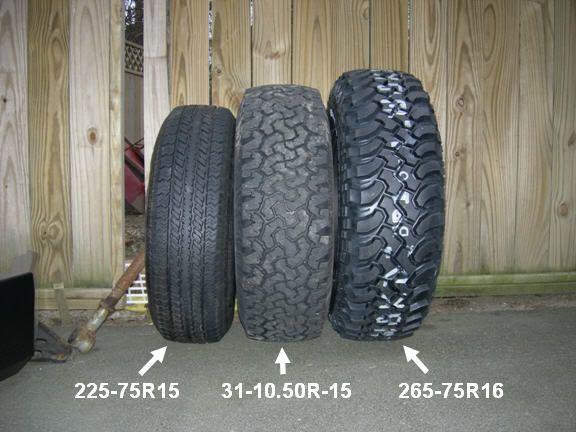
The project was supposed to end with the transfer case but after seeing all the rigs on NAGCA I could not stop. Before I knew what had come over me new bumpers and tires were on the way. I went with Hanson bumpers front and rear. These bumpers are not cheap but in my opinion they are the best looking ZJ bumpers out there. Actually, I guess I should say they were the best looking bumpers out there because the line has been discontinued! I was talking with a guy at the shop and he said they are too difficult to manufacture. For tires, I went with 265/75R16 BFG Mud-Terrains on 16x8 Pro-Comp 7023 cast-blast alloy wheels. The 265s on wheels with 4 backspacing are a perfect fit for the 3.5 lift. With stock 3.73 gears the V8 has plenty of power to get this thing moving, there is no rubbing, and no trimming was required (although maybe the stock bumpers would have needed some trimming). Heres a pic comparing the stock tires, 31s, and 265s:
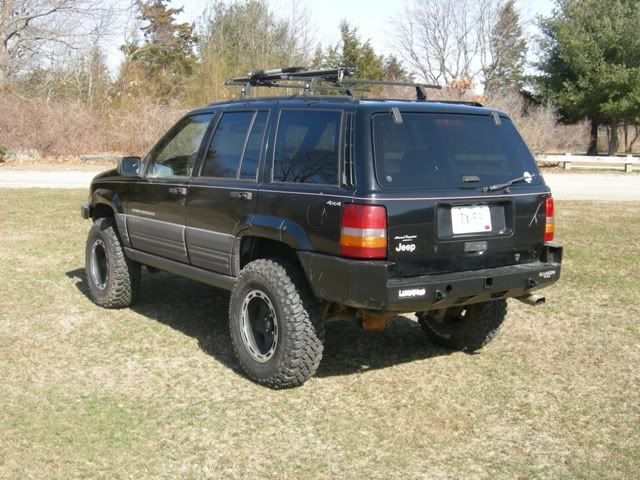
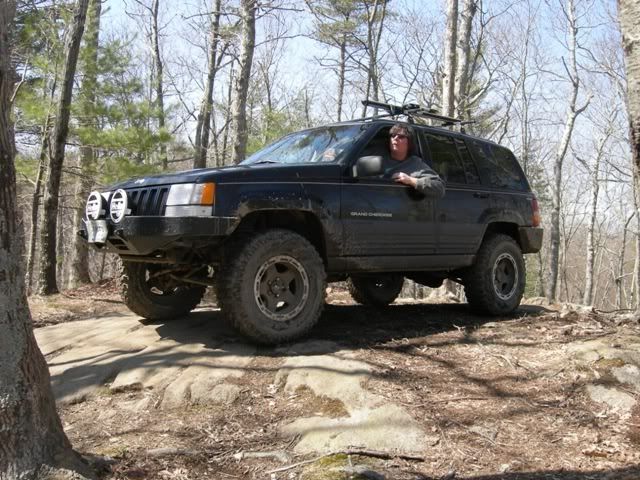
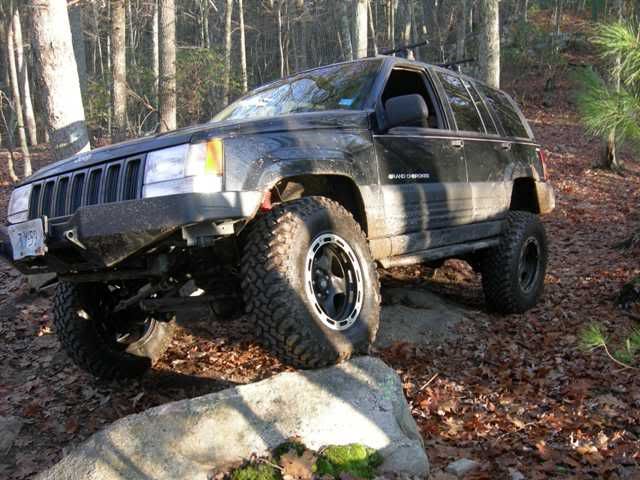
Heres some pics with everything bolted on:
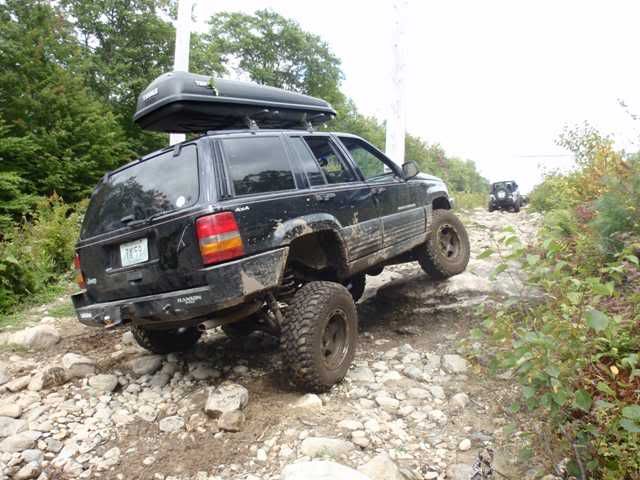
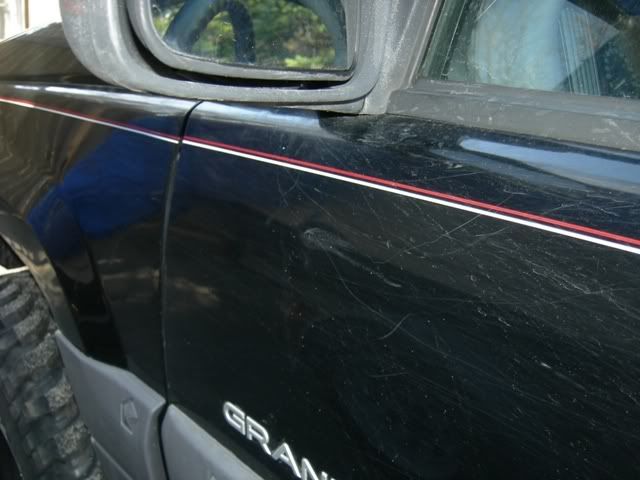
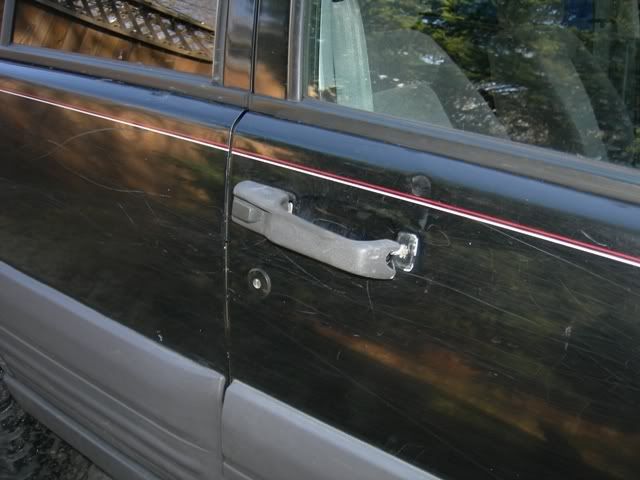
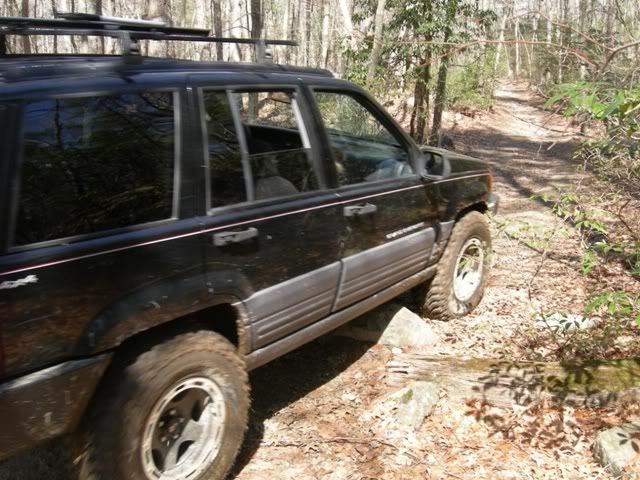
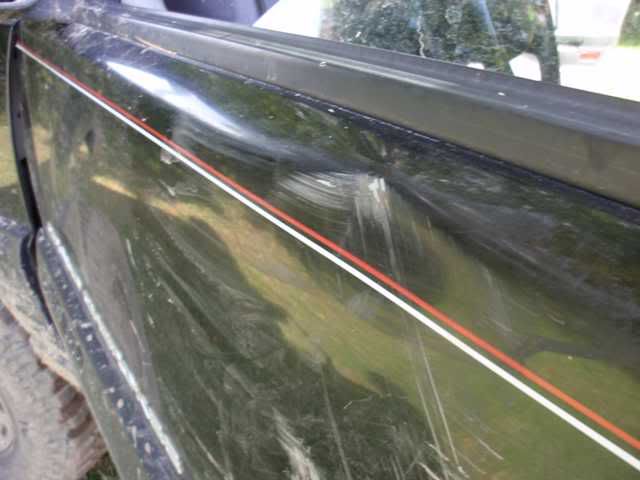
Heres some pics of a few trail scars that have been picked up along the way:
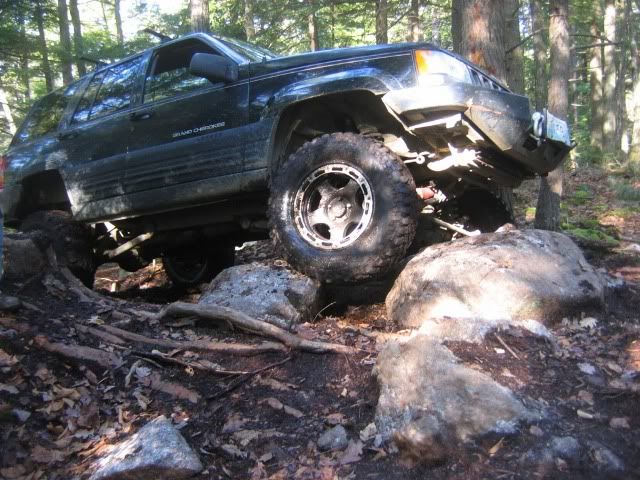
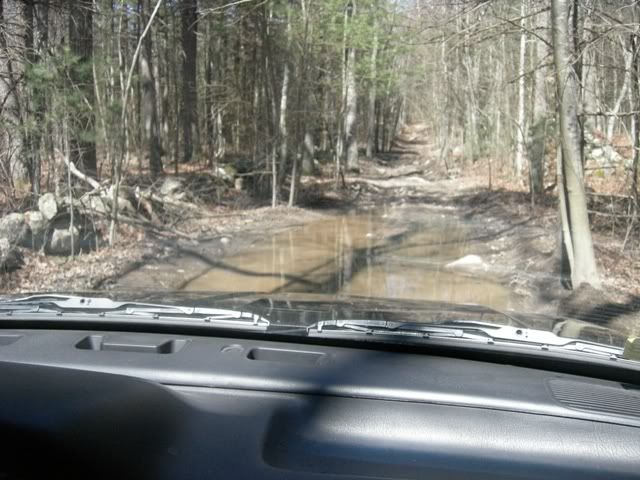
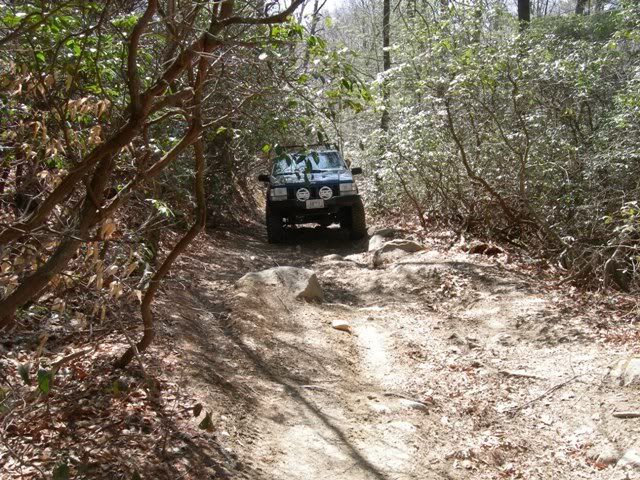
Heres some pics of the test drive with the NP242. Everything seemed to work fine in the driveway but when we got to the trail it would only shift into full-time. I opted to go for it anyways:
A couple short videos:
http://www.youtube.com/watch?v=ijI92ehiEeA
http://www.youtube.com/watch?v=MwUEv9Mg8Es
As for future mods, I have plenty of ideas. The most immediate (after fixing the transfer case shifter problem) are to paint the side cladding black and get some rock rails. Im leaning towards JCR Offroad for the rails. Ive decided to stick with the Dana 30 front axle but I want to upgrade the shafts to 30 spline with Spicer-style u-joints, add a limited slip (probably Detroit Tru-Trac), and beef the steering (bent the stock components twice already). Ive got less than 40,000 miles on the rebuilt rear axle but I want to scrap the aluminum housing and go with a real Dana 44 and Detroit Locker. Lastly, the original engine now has over 220,000 miles on it. Even though it still runs like a champ and does not use any oil I figure it cannot last forever so will be looking for a remanufactured engine, probably from Jasper.
Stay tuned!
April 30, 2008
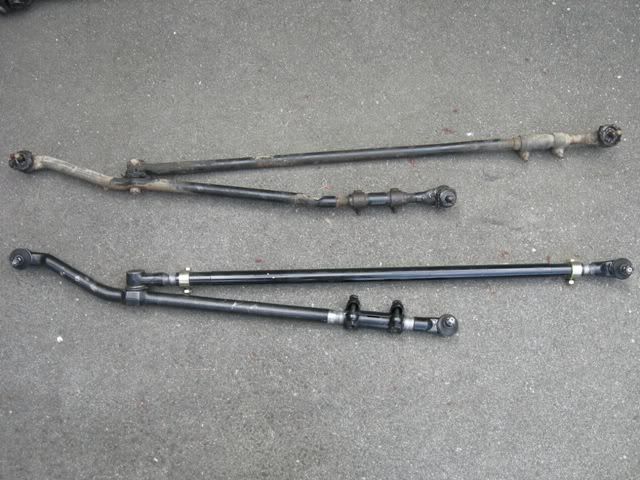
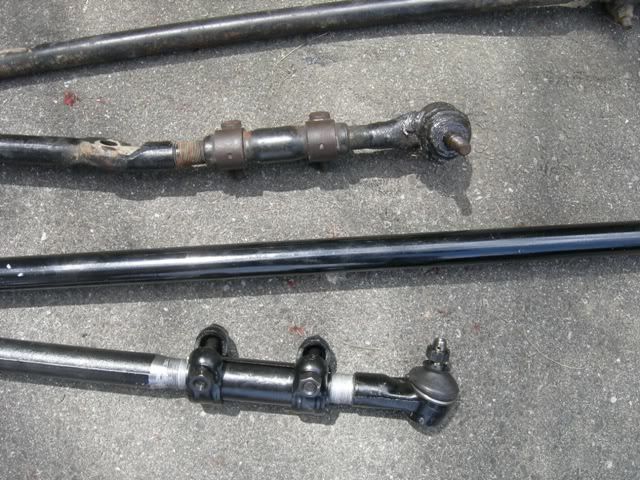
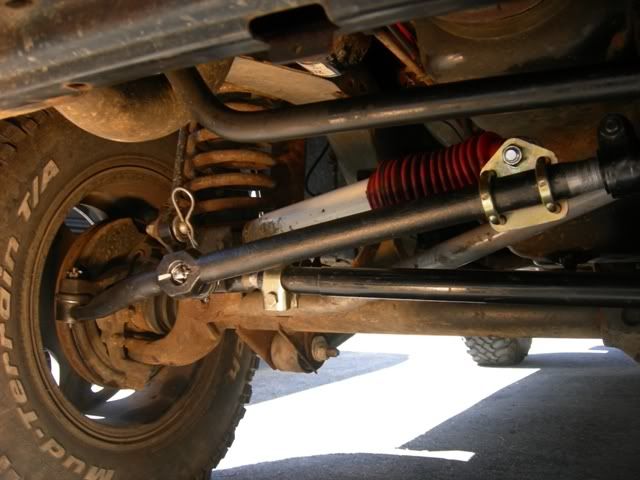
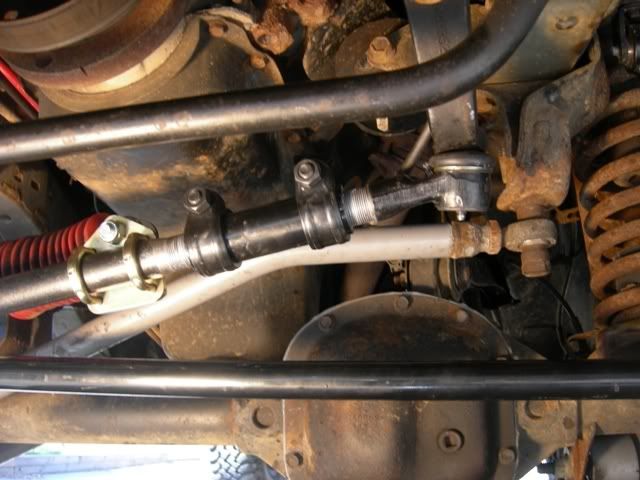
The last wheelin' trip resulted in bent steering components . . . again. Thats three strikes on the stock V8 linkage so I finally decided an upgrade was required. I opted to go with the Currie HD tie rod system (CE9701) which uses the stock inverted Y configuration but is considerably stronger. Initial impression on-road is that the Currie set-up is much more tight and responsive. Maybe thats not saying much given that the bent stock components reacted like a wet noodle. I need a new front driveshaft before giving it a test off-road. Hopefully this weekend. The Currie system is listed for TJ, XJ, LJ, and MJ on the Currie website but it fits just fine on the ZJ. Here's some pics:
May 23, 2008
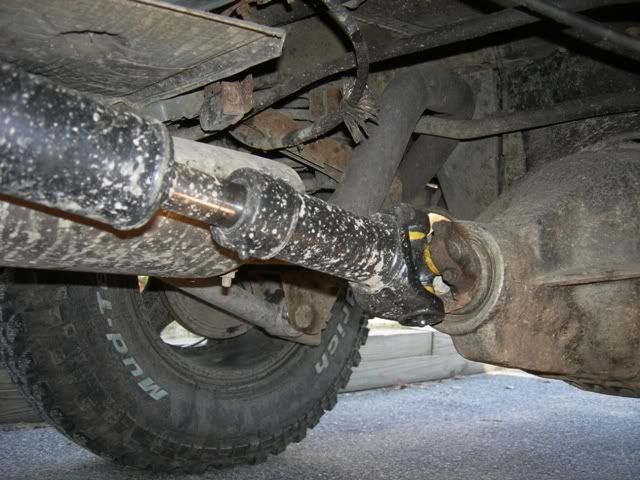
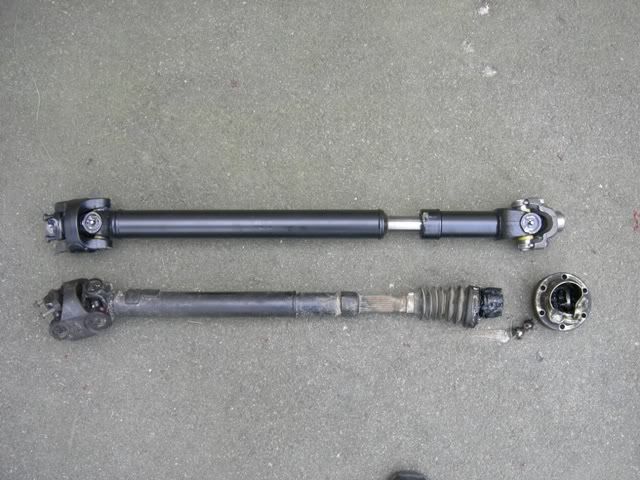
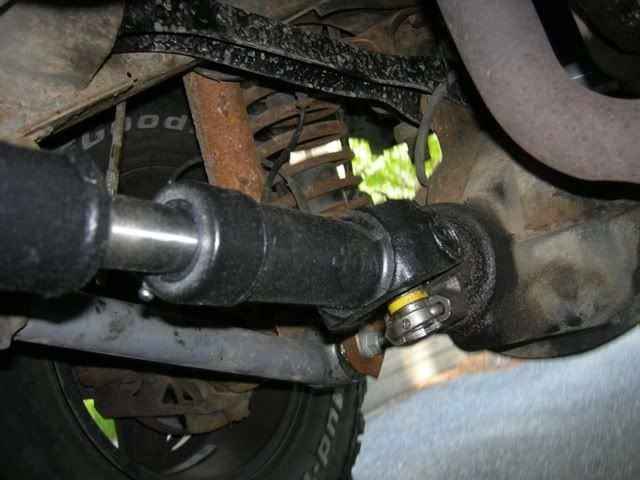
Finally got around to installing my new front driveshaft. I've had the shaft for a few weeks now but have been putting the job off because I figured dealing with the pinion yoke would be a bitch. I'm attending a trailride and campout hosted by the Rhode Island Off Highway Vehicle Association (RIOHVA) this weekend which forced the issue. Turned out the job went smoothly. Here's a pic of the new shaft next to the old CV shaft that blew its cookies:
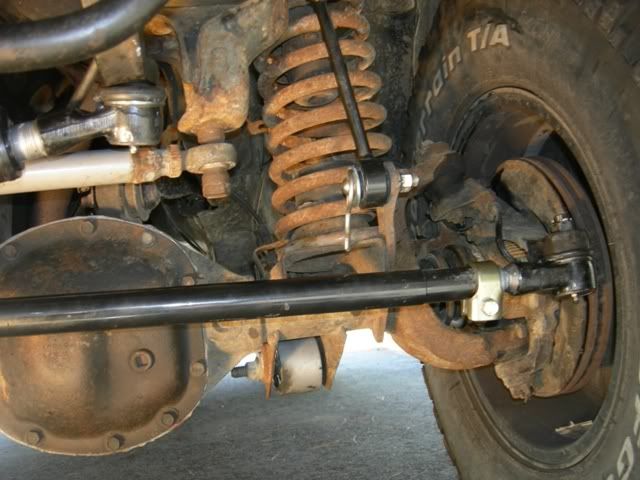
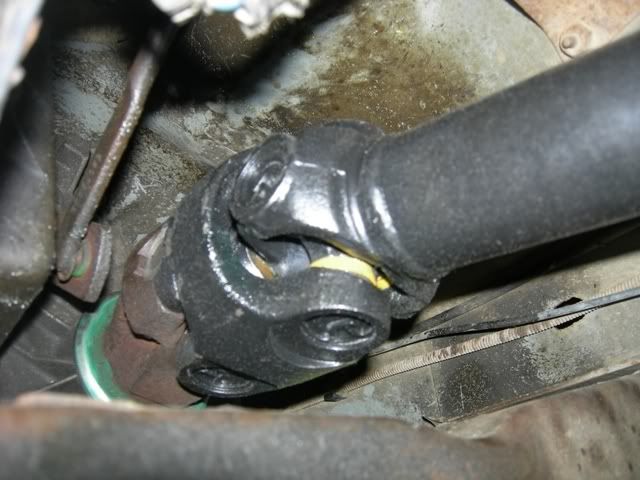
Pics of the installed shaft:
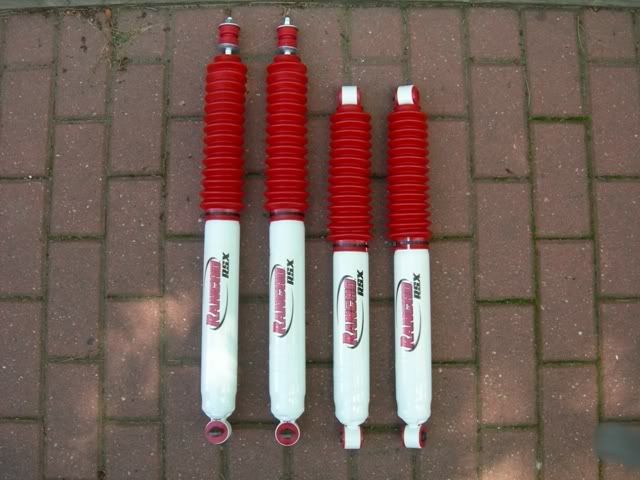
Also installed some new shocks. I went with the new Rancho RSX to replace the Rancho 9000XL's that have been on there for four years now. I ordered the shocks from 4 Wheel Parts. Unfortunately, when I went to bolt on the rears they were about 3" too short. Upon closer inspection it turns out they shipped the wrong part number. Kinda obvious from the pictures ain't it? Arrrrgh!
A couple months ago I noticed a small crack where the inlet pipe enters the muffler on my Borla cat-back system. Borla has a "million mile" warranty on these things but I needed the original sales receipt in order to cash in. After four years I had no clue where the receipt was located so I contacted the original vendor (4 Wheel Drive Hardware) and asked if they could get me a copy. They did. I faxed the receipt to Borla figuring I would get jerked around. Much to my surprise a brand new system was sitting on my doorstep two weeks later no questions asked! Having knocked off the driveshaft and shocks (at least the front ones) no problem I went ahead and installed the exhaust as well:

Last edited by Technohead; 06-27-2011 at 07:35 PM.
 11-14-2008, 12:23 AM
Turns out I could not copy my entire build thread over from NAGCA in a single post; too many characters. Here is the rest:
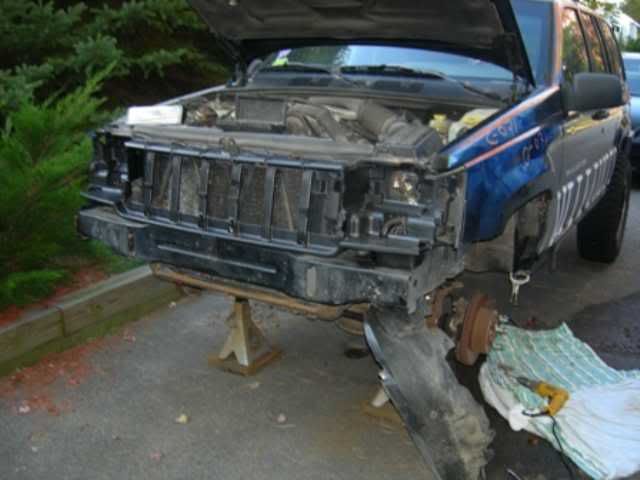
November 10, 2008
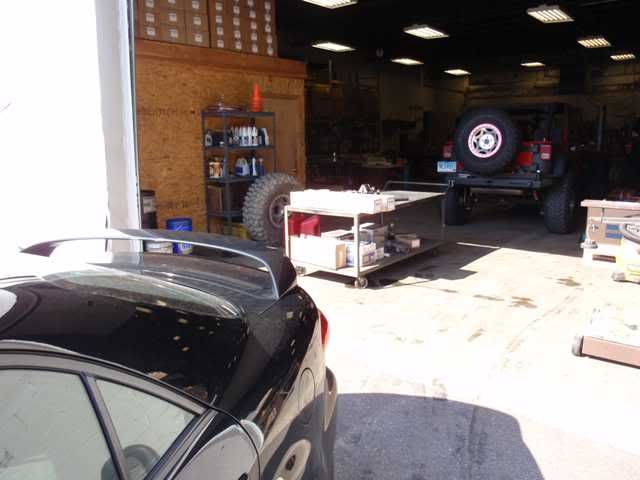
Its been a while since my last update; except for a handful of camping trips and brew festivals, saltwater fishing consumes my life between May and October. Fishing season is now over for me so I took a couple days last week and worked on my Jeep from sunrise to sundown. The modifications basically fall into three categories:Heres a pic of the final result:
- Cosmetic (paint the cladding, replace fenders and front lights)
- New steering box
- Rock sliders
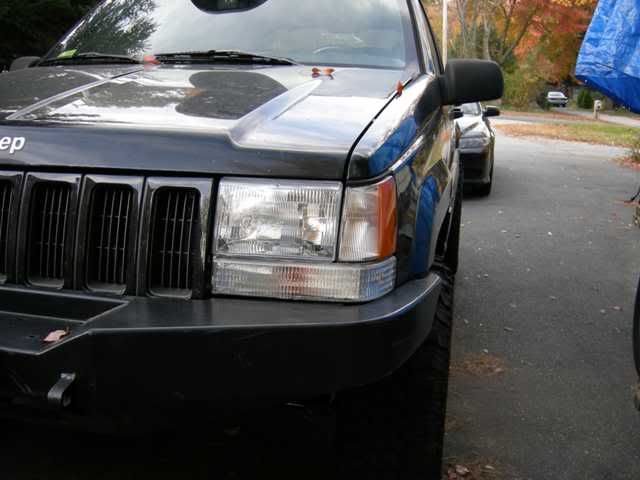
Ive wanted to paint the stupid looking gray cladding for months now and finally got the job done. After removing the cladding I washed it down with soap and water, wet-sanded it with 400 grit, washed it again with acetone, and then sprayed on 3 coats of flat black Rustoleum. It looks pretty good. Lets see how long it holds out. Both of my front fenders were pretty well banged up so I picked up a couple same color replacements in near perfect condition from a local parts yard; $75 for the pair. One of my front side marker lights got smashed out this summer, one of the turn signal lenses was cracked, and both of the headlamp lenses were faded so I picked up all new aftermarket replacements from 4Wheel Drive Hardware. The header panel (headlamp mounting panel) was held together with duct tape from carnage a couple years ago so I picked up a new aftermarket replacement ($90 compared to $190 at the dealership).
Fitting up the header panel and fenders:
Relocated charcoal canister:
It took quite of bit of tweaking (and something like six beers!) but everything finally fit together just about as good as the factory:
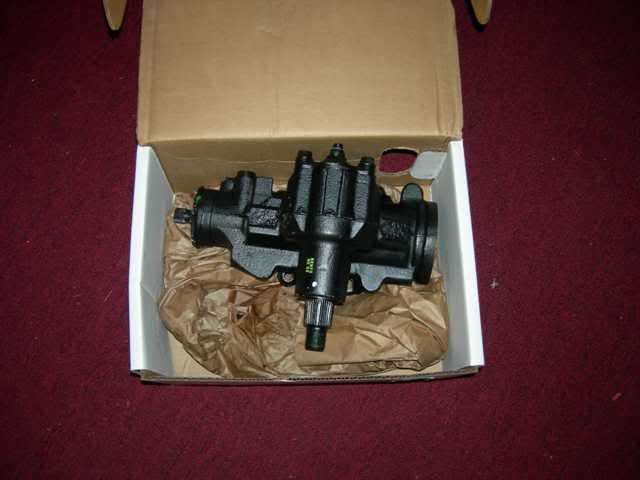
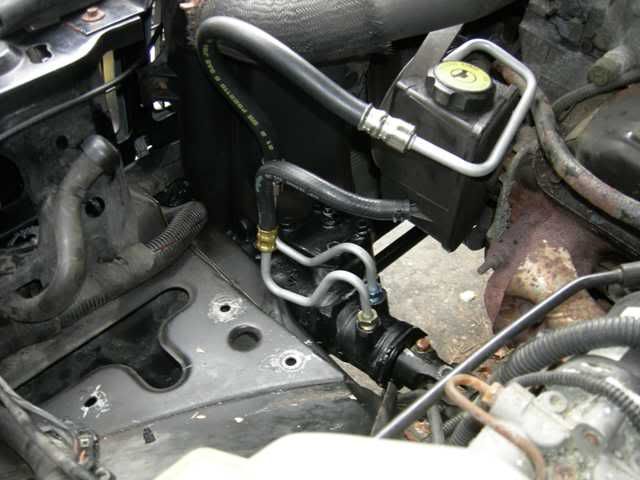
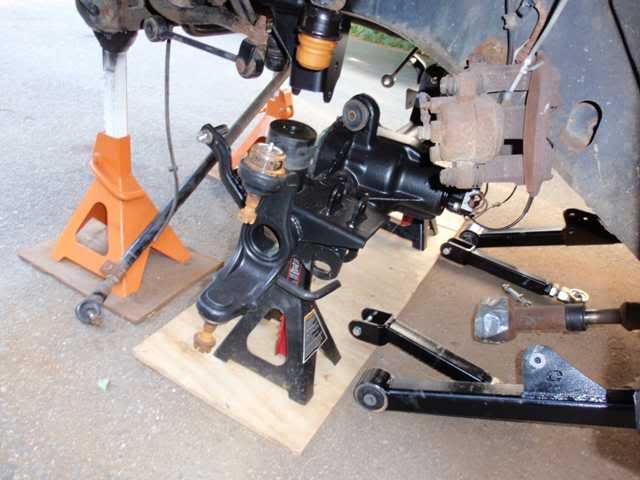
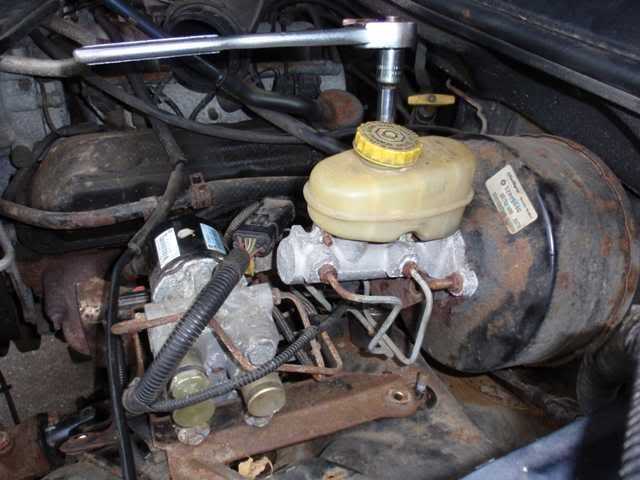
Next task was to replace the steering box. The stock box was rather sloppy after 220,000+ miles. I considered aftermarket boxes from AGR and PSC but in the end went with a remanufactured stock replacement from NAPA. I figure if the stock box can hang in there that long, and live through three bent tie rods, then it cant be that bad. Besides, the AGR and PSC boxes go for $500-$600 whereas the NAPA box went for $200 after the $200 core charge.
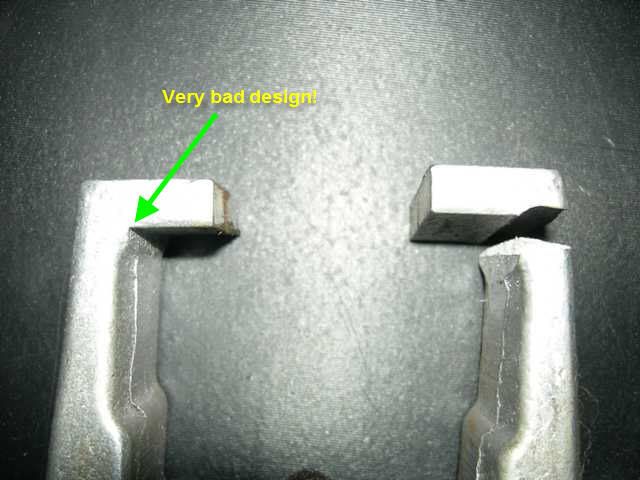
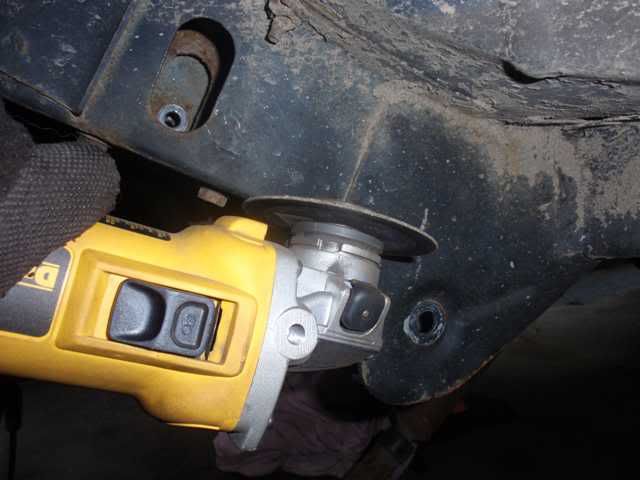
I ran into a little complication pulling the pitman arm off the old box. Normally if I get the pitman arm puller nice and tight, then give the pitman arm a couple good wacks with a B.F.H it falls right off. This time I got the puller tight and just as I was about to wack it, BANG!, the puller fractured. You can see in the pic below a sharp corner that causes a stress concentration and which is a very poor design. Even just a small radius there would probably double the strength. I went and bought a new puller from NAPA (which had a smooth radius instead of the sharp corner) and the pitman arm popped right off.
I coated the pitman arm splines with Never-Seez in case Im the one that has to take it off the next time:
Heres a pic of the installed box with new hoses:
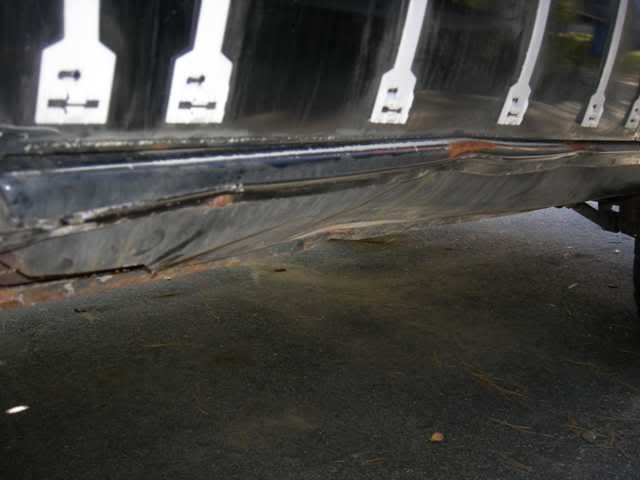
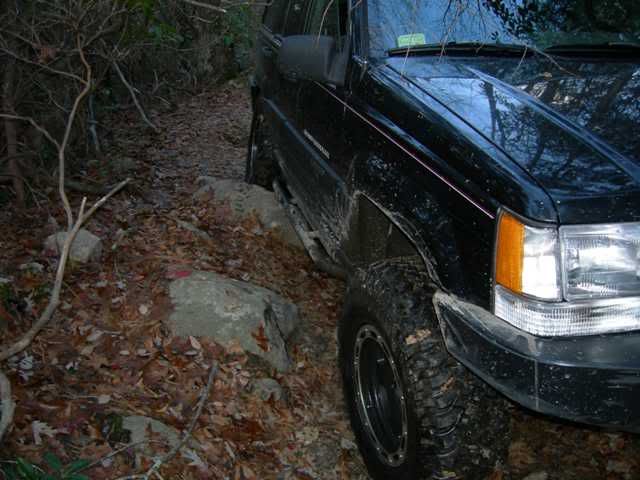
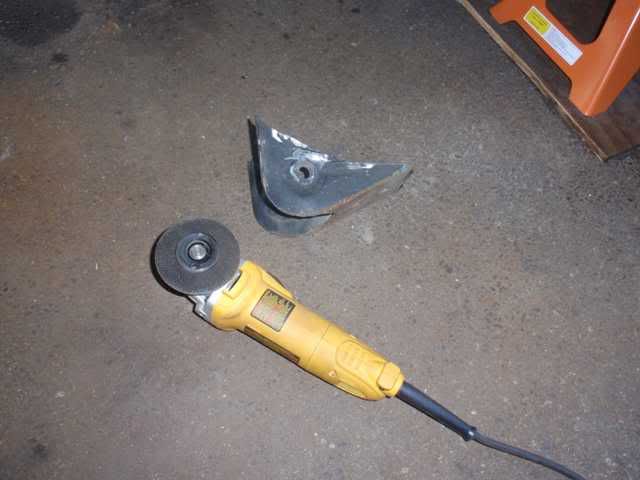
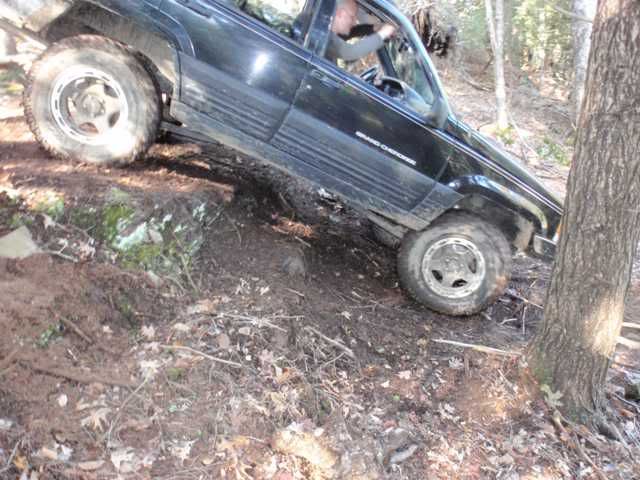
The last task was to bolt on the JCR Stage II sliders. Here is a good example why you want to have sliders:
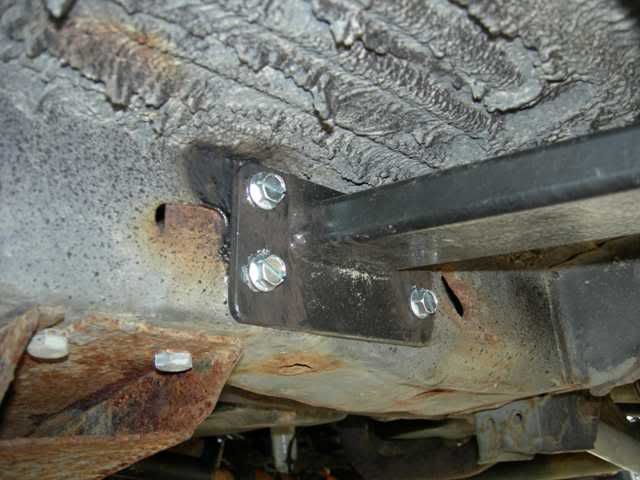
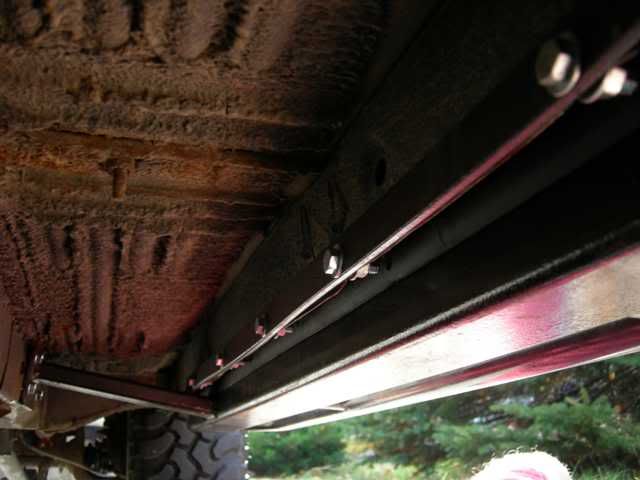
I guess its better to get sliders late than never. And good thing the cladding springs back into its original shape. The JCR sliders fit about as good as can be expected for this kind of part. Each slider mounts to the frame using two flanges and a total of eight bolts:
Then they mount to the rocker panel pinch seam using 1/4 thick bar stock and five bolts:
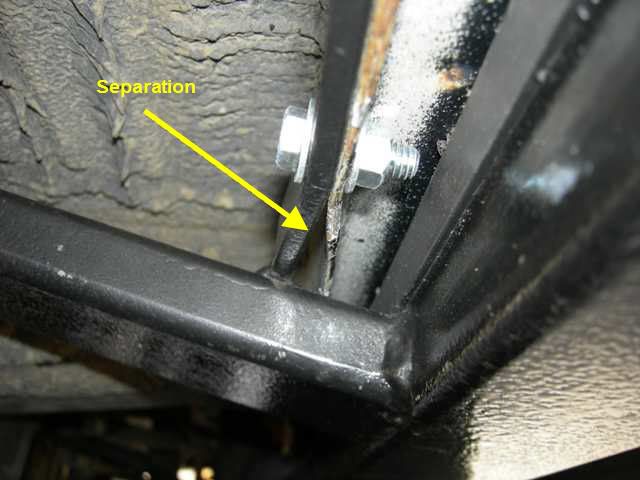
With the flanges snug against the frame about 3/8 clearance existed between the pinch seam and the bar stock. I probably should have cut the bar stock off and welded it back on in the correct position. Instead I just drilled and bolted which caused the ends of the bar stock to bend a bit and separate from the pinch seam. No big deal:
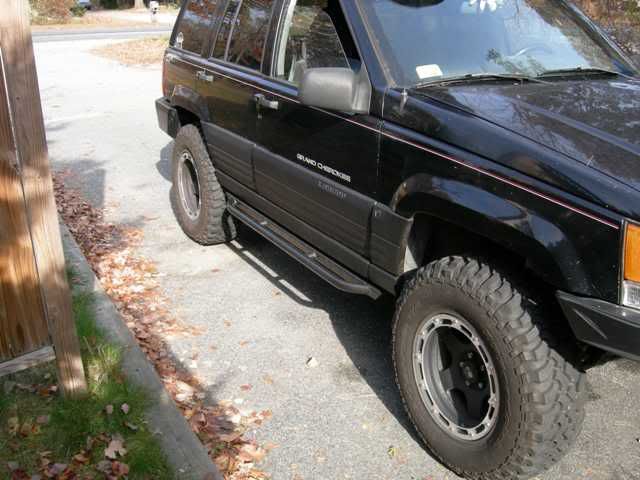
Heres a driveway pic of the installed sliders and painted cladding:
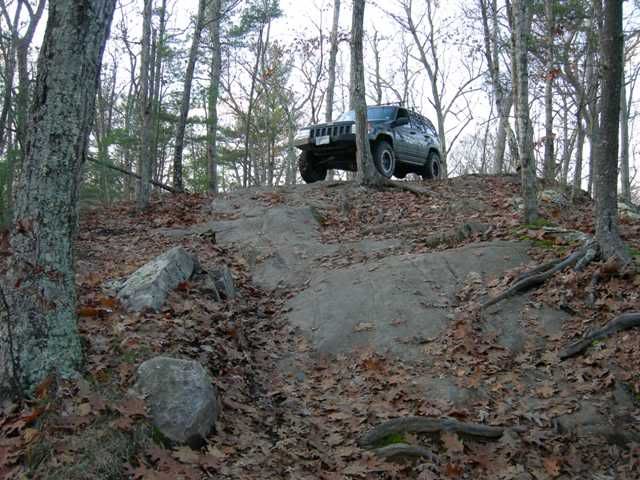
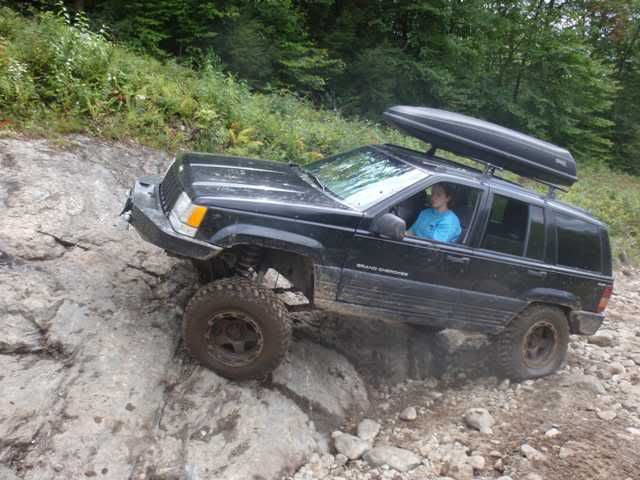
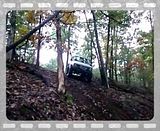
Now comes the fun part, banging the new sliders on the local trails. You need to make it past this rock if you want to climb the hill:
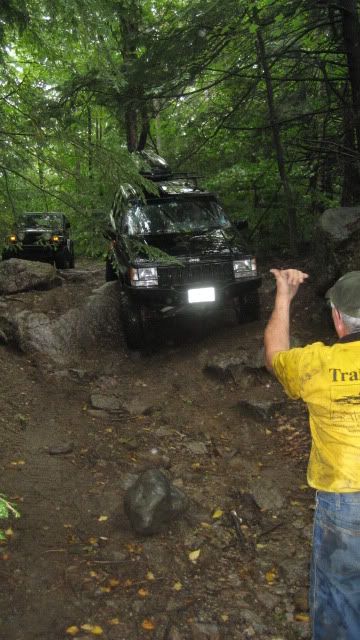
At the top ready to come back down:
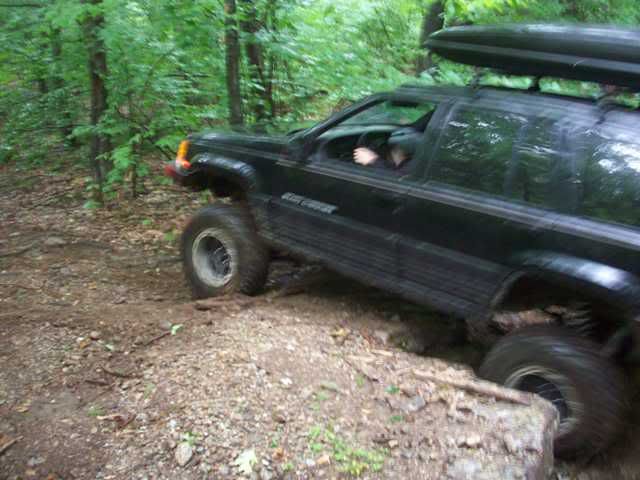
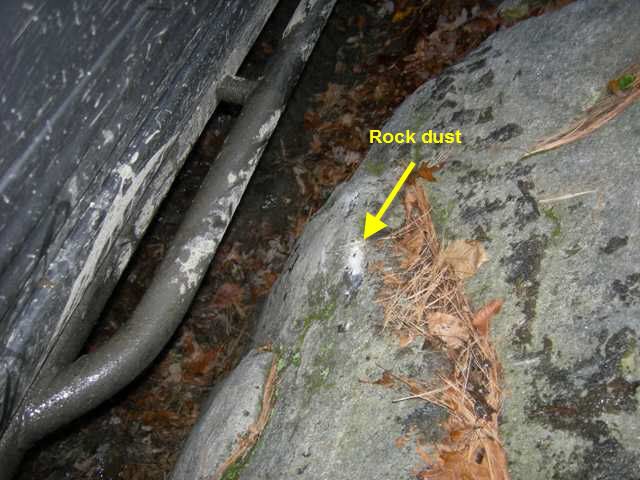
I landed on this rock hard enough to push the entire vehicle sideways. No damage to the sliders but some of the rock was turned into dust:
Another solid impact here, but no damage to the sliders:
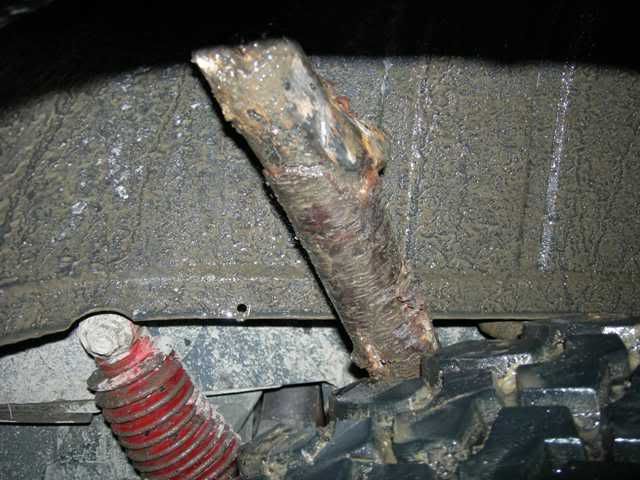
I picked up this log from the bottom of a mud hole and it came very close to ripping off a brake line. The tire had to be removed in order to get the log out:
The only downside to the sliders is I lost a bit of clearance . . . but I know how to fix that! For a while now Ive been toying with the idea of JK axles (which would require new wheels), a long-arm kit, and 5 1/2 coils. Unfortunately, I ended the fishing season with a blown powerhead on my boat motor and now Im looking at a $5,000 repair bill. Therefore plan B, a long-arm kit and HP D30 front axle, is probably more feasible given the financial realities.

 11-14-2008, 09:28 AM
vey nice
 11-14-2008, 10:59 AM
looks good sir
11-14-2008, 03:46 PM
sweet

 11-14-2008, 04:55 PM
LOL that is hilarious, wait till you really hit something, takes you a few seconds to recover haha.
11-14-2008, 05:01 PM
very nice
 12-05-2008, 01:47 PM
Love the post. I'm doing mine very similarly. Keep us updated.
12-07-2008, 12:33 PM
For a while now I've been going back-and-forth between getting some JK D44's or building up my own axles. According to the guys at IROR the JK axles are now being sold a la carte (i.e. rotors, calipers, etc. sold separately) and the price has gone up considerably. I have thus committed to building my own. For the front I got a high pinion D30 from a '94 XJ and for the rear I got a D44 from an '87 XJ. These D44's are rare since they were only available on '87-'89 XJ's with the tow package and I needed to travel to New Hampshire to get it.
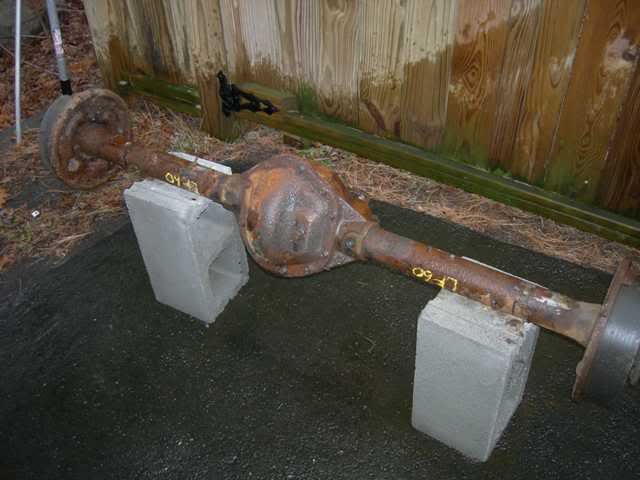
Front high pinion D30:
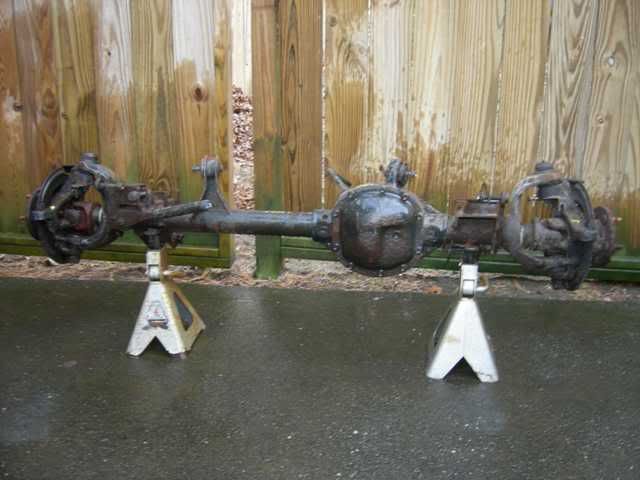
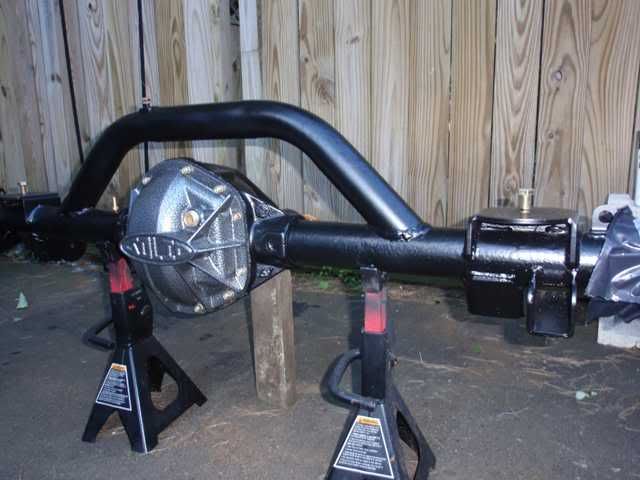
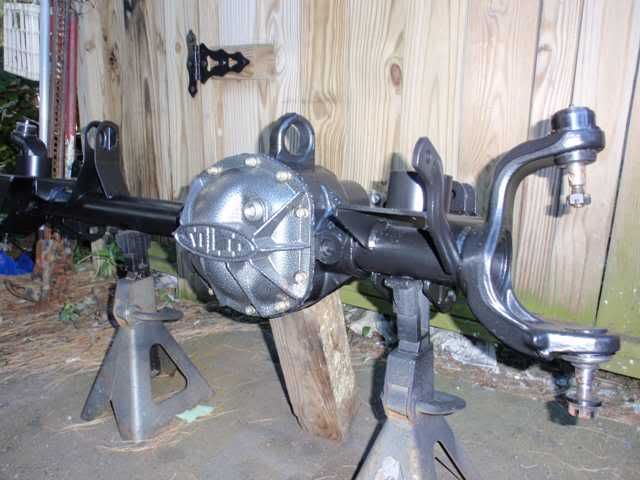
Rear D44:
I paid $150 for the front and $200 for the rear which is dirt cheap around here. Most yards are selling the D30's for $300-$550 and D44's from TJ's for (well) over $1000.
I'm going to strip them down and do a complete rebuild so by the time I'm done the only parts remaining will be the housings, knuckles, and bearing caps. Gearing will be 4.56's with a Detriot Locker in the rear. The rear will of course be adapted to disc brakes and I want to keep ABS working all around. I'm considering a Superior Super 30 kit w/ ARB in the front but its not clear if this kit works with ABS. I called Superior and was told the axles are machined to accept a tone ring but I got the impression that the guy I was talking to did not know the different between an axle and an anus. Its looking like I am on my own when it comes to ABS in the rear. The wildcard in all this is what to do with the suspension. I'm definitely stripping off all the mounting brackets and replacing them. The question is whether to stick with short-arms and 4 1/2" springs or go with long-arms and 4 1/2"-5 1/2" springs. If long-arms then triangulated 4-link, 5-link, or maybe something entirely different? Decisions, decisions. I'm even thinking about designing my own suspension.
While up in NH picking up the rear axle I had to wait a few hours while they pulled the axle so I asked them to direct me to some local trails. The sent me to some power lines a few miles away. Its was slippery out there! My daughter and I did not get a quarter mile down the trail before we ran into a kid who had his TJ (on street tires) mired. His mother and father were out there in a Land Rover trying to get him unstuck. They had already snapped a tow strap and tensions were running high. We spend the next hour or so shoveling and jacking and were finally able to pull him out with my tow strap. In the end we did not get much wheeling in and never took any action pictures because my daughter and I were to busy fighting about who got to drive.
12-07-2008, 02:06 PM
Jeep looks good. I like the wheels and bumpers a lot.
03-12-2009, 08:16 PM
Time for a quick update. Over the past couple months I've been accumulating all the parts needed for my axle build. I'm basically there now except for gear oil, some brake tubing, and outer rear wheel bearings. All I need now is time and a big dose of motivation; setting up gears sucks!
Brackets for the rear axle came from Mad 4WD. These brackets are for a 5-link set-up so this means I have committed to a 5-link set-up (almost certainly RE) when I install a long-arm kit:
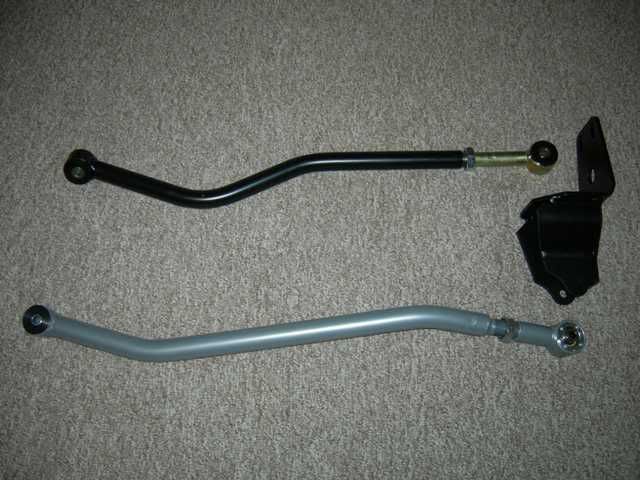
Rubicon Express extreme duty adjustable front track bar and JKS adjustable rear track bar. Although these are not strictly required for the axle swap my current front track bar is not cutting it and I figure might as well get these now so I'll be ready when the long-arms go on:
Yukon 4.56 gears with master install kit and Detroit Tru-Trac for the front:
Yukon 4.56 gears with master install kit and Detroit Locker for the rear:
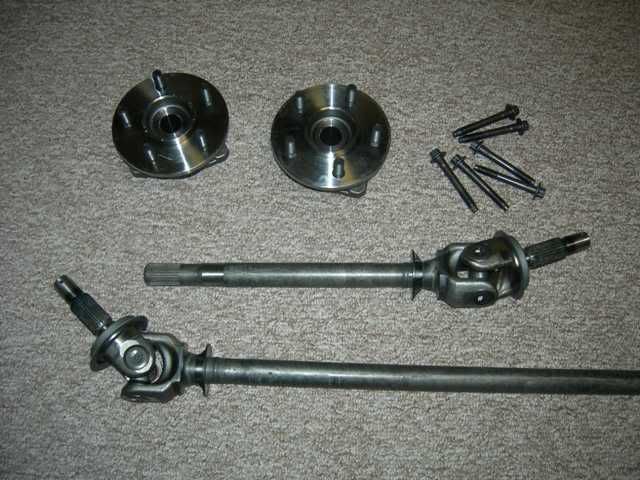
Heavy-duty front axle shafts with 297x u-joints and OEM replacement unit bearings:
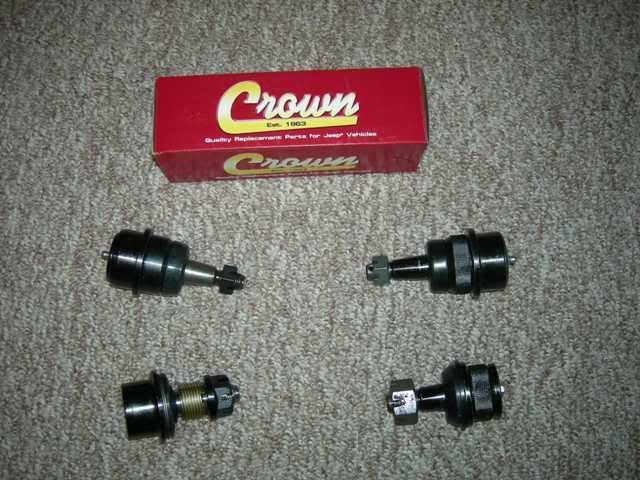
Crown ball joints. The part number on the boxes was the same but the joints have a slightly different look. Need to check this out:
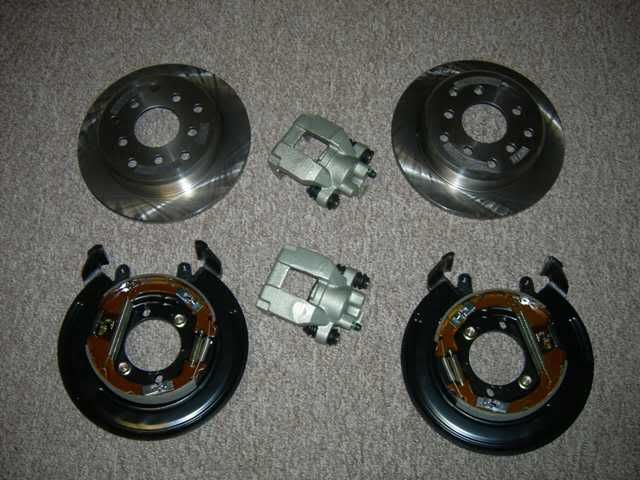
Rear disc brake kit from Teraflex:
I've got some runs with the Jeep club penciled in for April and May so now I just need to get it done!
Here's a video from a short run on the local trails a couple weeks ago. My 15 year old daughter is at the wheel. She started drivers ed this week. I'd say she's ready:
03-13-2009, 01:46 AM
Lookin good man...
05-13-2009, 10:48 PM
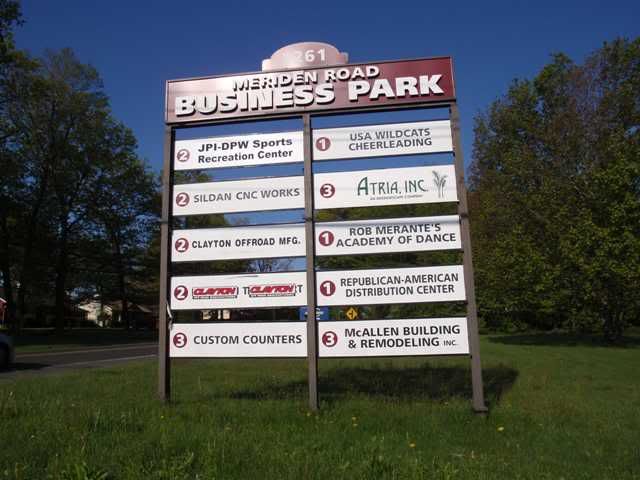
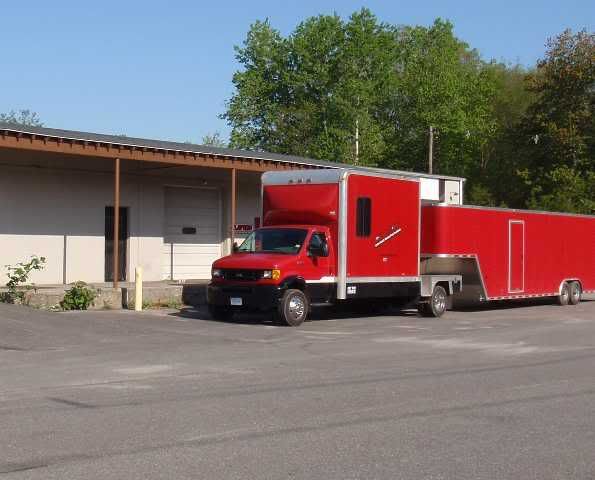
I blew off work this morning and made a pilgrimage to Waterbury, CT. Words are inferior so here's the pictures:
To be continued . . .
05-13-2009, 11:29 PM
Now that must of been a good dayOriginally Posted by Technohead

07-23-2009, 02:19 AM
I pulled the trigger on the axle swap and Claytons suspension. Just a few more days now. . .

 07-23-2009, 02:50 AM
I'm in the process of installing the same rear iron 44. What did you decide on for your pinion angle?
07-23-2009, 09:48 AM
I love this jeep. Looks awesome.
I remember my trip to Claytons. Met some interesting folk at the convenient store across the street.
Where did you buy those shafts and unit bearings? I think my unit bearings are starting to go (making noise at least) Are those aftermarket shafts or factory replacements?
07-23-2009, 10:10 AM
Well, its not so much that I decided on the pinion angle as I will adjust the pinion angle to whatever it needs to be once I have the thing sitting on the springs. I did rotate the spring perches something like 2-3 degrees from stock before welding them on.
The front shafts are Spicer stock replacements but with the larger 297x u-joints. Original plan was to get alloy shafts but this project was way over budget. I got the shafts from Iron Rock Offroad for like $250.
The unit bearings are from Crown and are the exact same bearings you would get from the dealership except they cost a whole lot less (but still like $100 each!). FYI, Crown has a retail store on Rt 138 in Canton, Ma; just a couple miles from where I 93 and I 95 meet South of Boston. Jeff, the guy that runs the place, is great to deal with.
07-23-2009, 10:21 AM
I never knew that. Do they stock alot of parts? Almost every part store I deal with I need to call a couple of days in advance to so the parts can get ordered and shipped.
07-23-2009, 11:34 AM
Yes. Its a rare day when Jeff does not walk out back and then emerge with what I need. And I've gone there for some odd-ball parts. I sometimes think you could build a Jeep from scratch with what they have there. The number is 877.298.5337.
08-04-2009, 11:30 AM
I have the rear axle bolted in. All thats left is to connect the brakes lines and driveshaft then fill the diff with gear lube. The D44 is considerably shorter than the D44a so the rear driveshaft is at a local shop getting 1 1/2" added.
Axle shafts and brakes installed:
Rear brake plumbing:
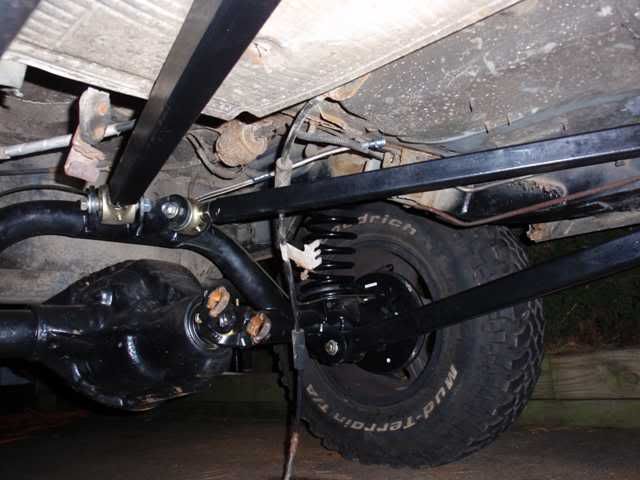
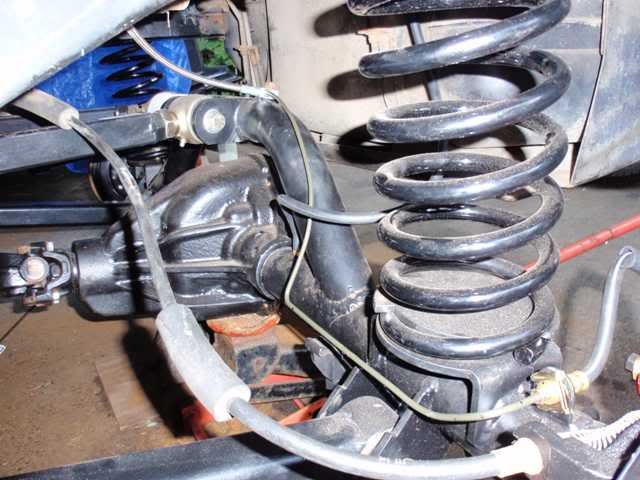
A few shots of the installed rear suspension:
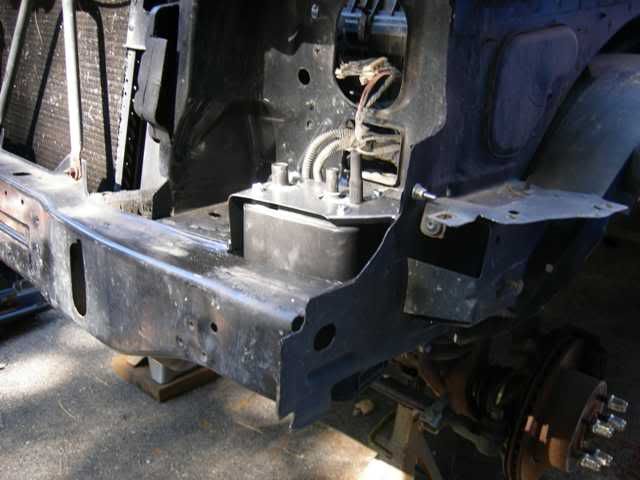
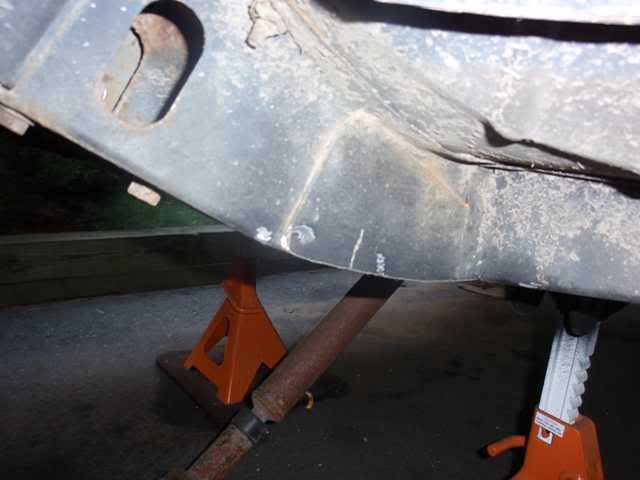
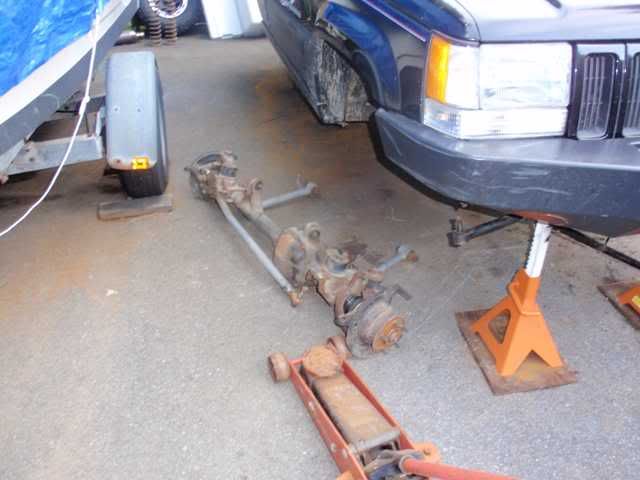
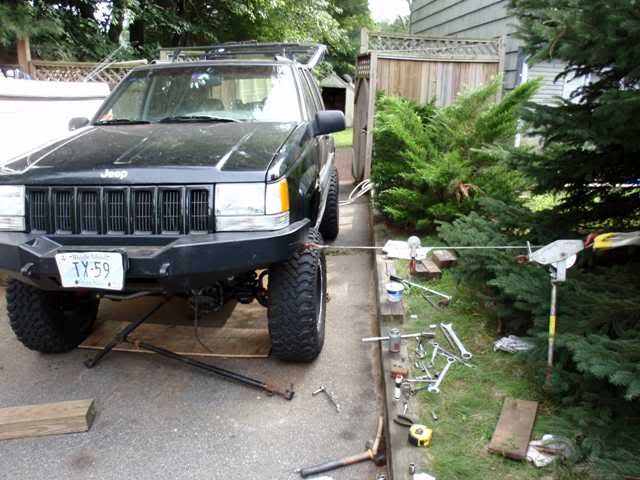
Ran into some complications with the front. Got the axle out no problem:
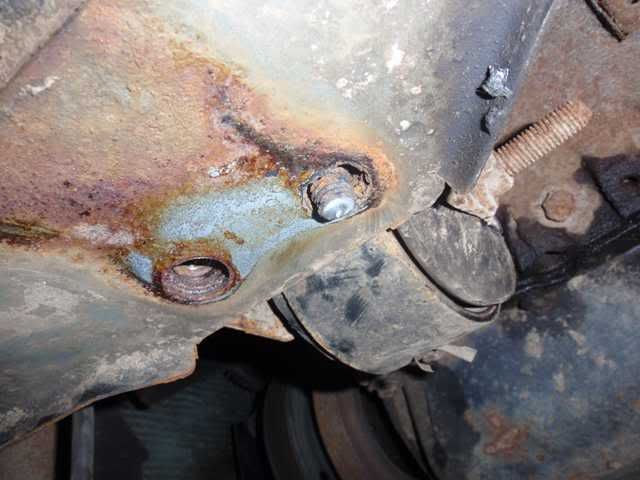
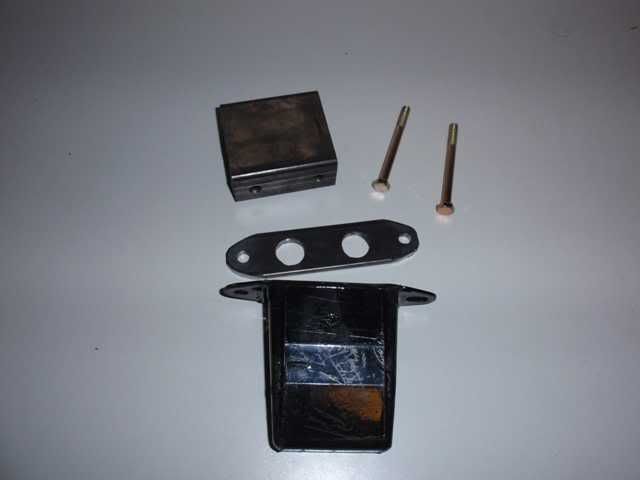
Went to remove the track bar bracket which is getting replaced with a double-shear unit and one of the bolts snapped off:
This bolt goes through to a nut that is welded to the engine mount bracket. Plan A was to remove the engine mount bracket and try to extract the broken bolt. I pulled the engine mount (what a PITA) and then proceeded to break off another one of the bolts holding on the engine mount bracket. Plan B is to just get that MF out of there and get a new bracket because I don't feel like screwing around extracting bolts. I just love it when what should be a 10 minute bolt-on job turns into a multi-hour ordeal.
09-18-2009, 02:02 PM
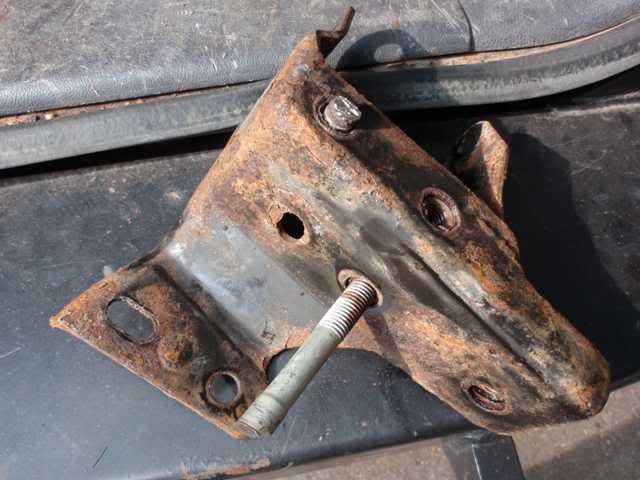
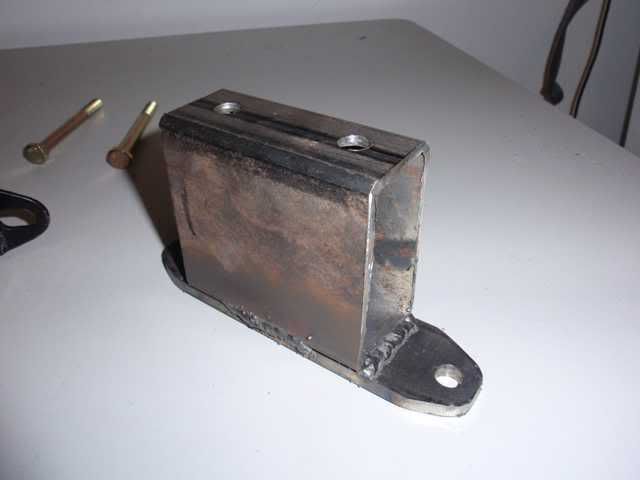
Here's that f***ing motor mount bracket that caused so much pain:
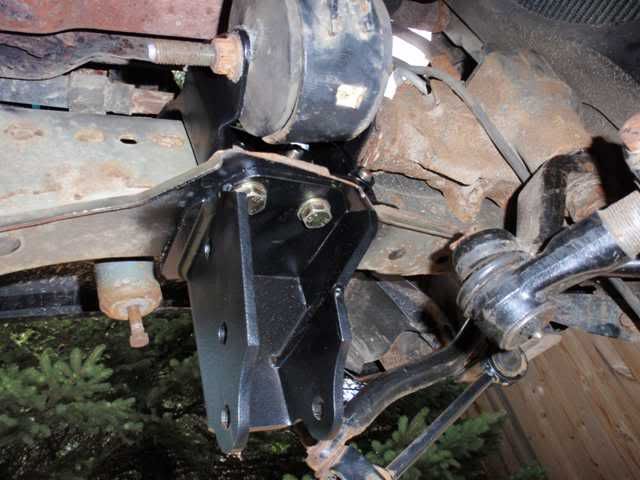
Motor mount bracket and track bar bracket bolted back on. Wasted alot of time tracking down the required metric 10.9 hardware:
Replacement front bump stops that the stealership gouged me $90 for:
Positioning the front axle:
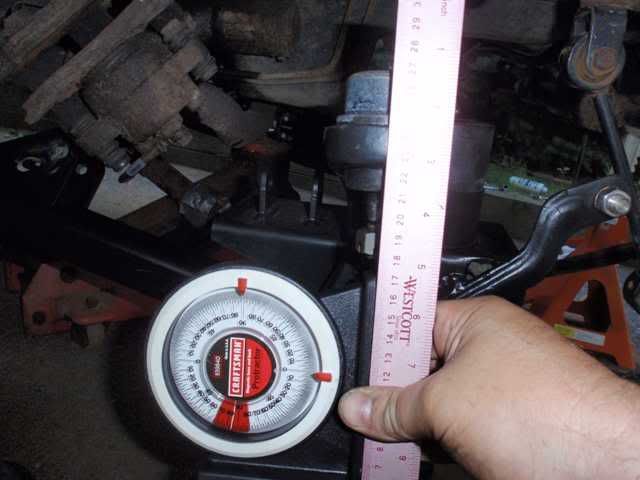
Dialing in the caster angle. Factory calls for 7 degrees positive. With the larger tires I figure anywhere from 3-7 should be OK. I can tweak it later if necessary but I really don't want to because adjusting those control arms is a PITA:
Sliding the springs into place. Dropped the axle down off the jack stands and never needed the spring compressor:
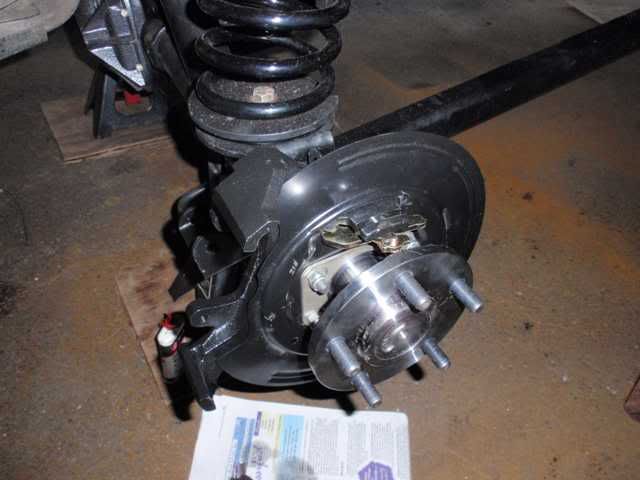
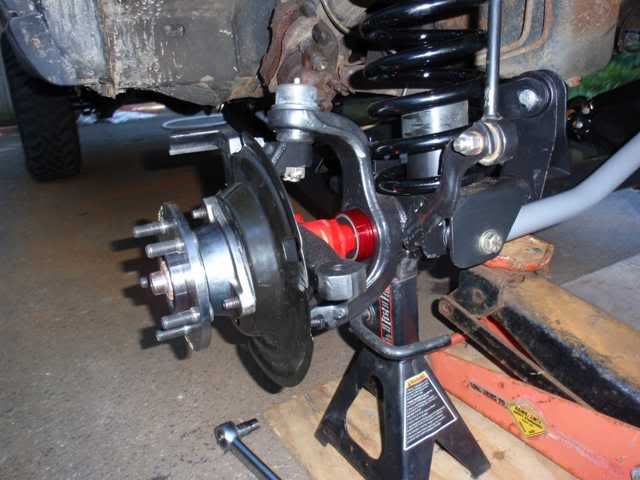
Install knuckles, outer axle seals, axle shafts, and unit bearings:
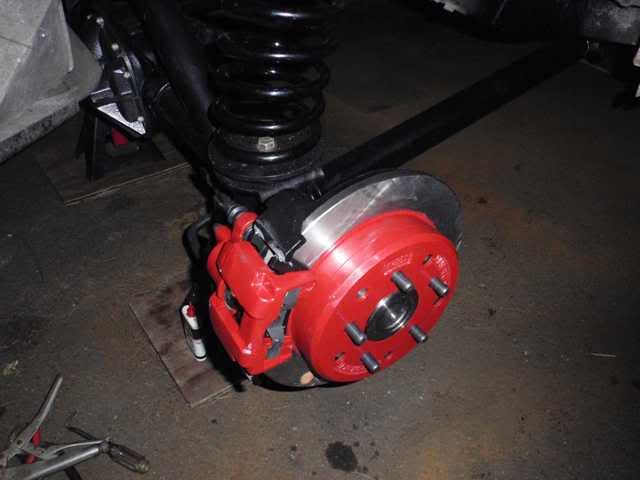
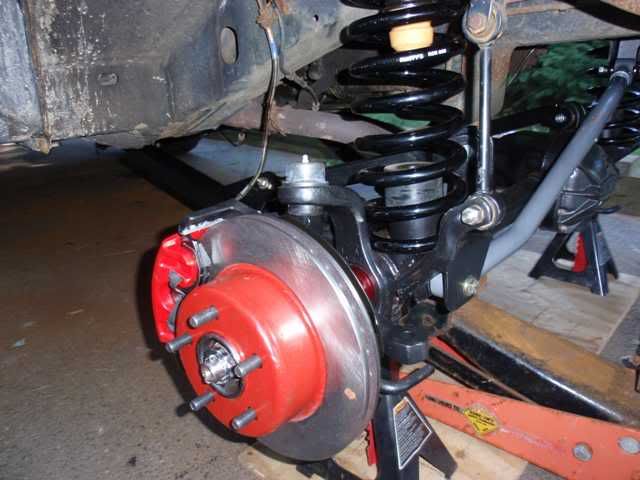
Install brakes:
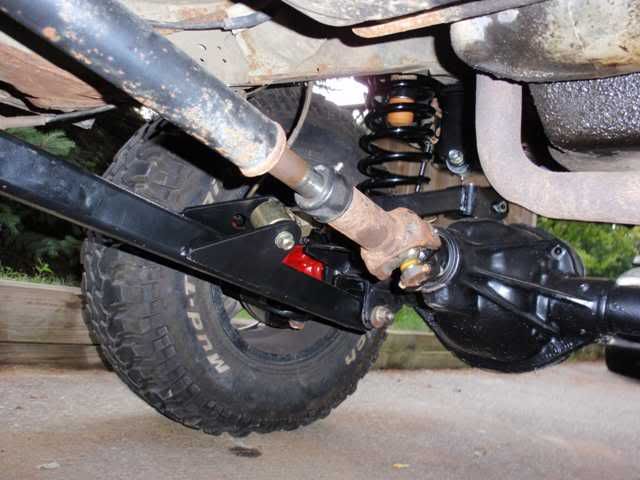
Bolted up the driveshaft. I was hoping the high pinion and lift would cancel out and leave the driveshaft length about the same. As you can see by the bare spot on the slip yoke they did not. Driveshaft is stretched about an inch with maybe a half inch of extension left. I think it should be OK:
Adjusting the trackbar:
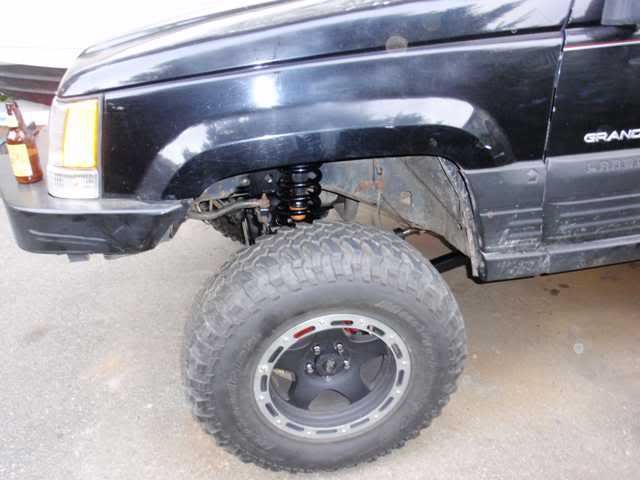
Here she is sitting on all fours again:
Plenty of room in the wheelwells now. Those 32's are looking small. I could fit 35's but plan to stick with 33's (305/70/R16) because I have zero interest in trimming:
Routing the rear brake lines:
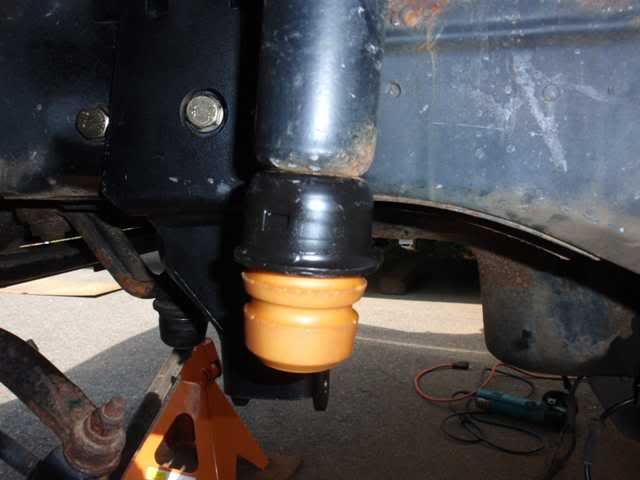
Built some custom rear bump stops from 3"x1.5"x0.120" rectangle tubing, bar stock, and 4" XJ "upcountry" rear bump stops:
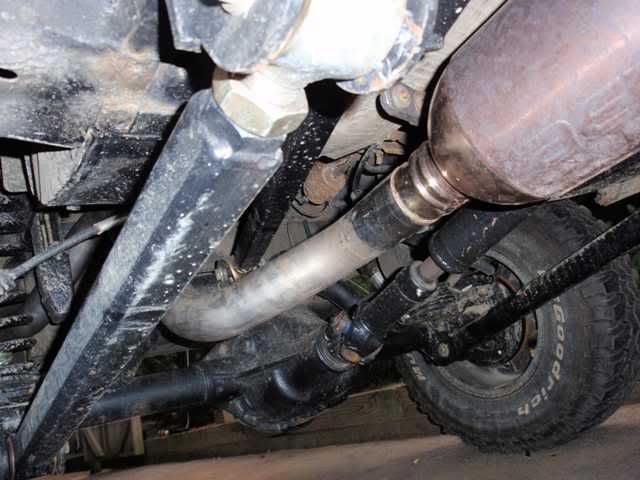
You can see the intalled bumpstop in this picture along with the custom stainless tailpipe and Aero muffler (won the muffler on NAGCA!):
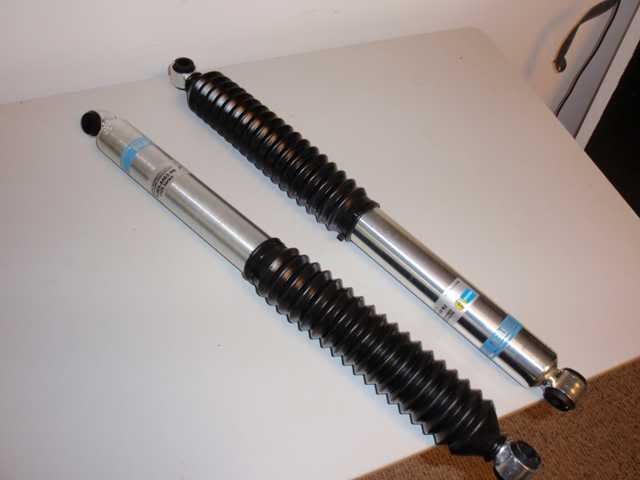
Bilstein stocks all around. The mounts were designed so the same part number fits all four corners. Had to pull the ABS pump to install the driver's side JKS stud eliminator. No more dealing with those PITA studs:
Custom made some tabs for the steering stabilizer:
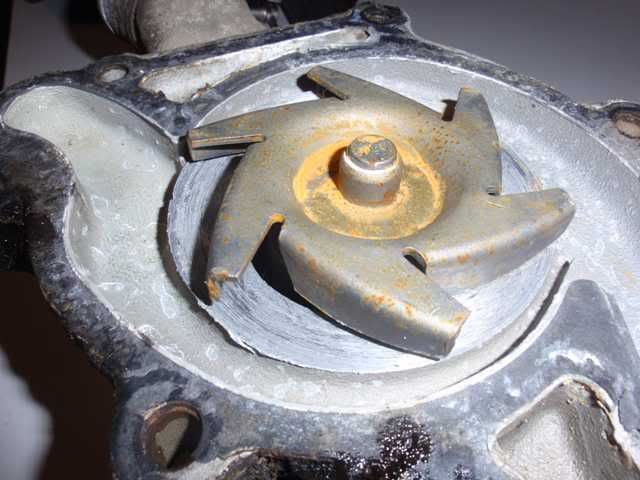
Went to the NEA4WD's Fall Crawl up in NH last weekend. First wheeling trip with the new axles and suspension. Everything worked flawlessly except on the way up Friday night I smoked the waterpump 16 miles from the registration desk. Luckily the parts store was still open and a local garage opened up to help me fix it:
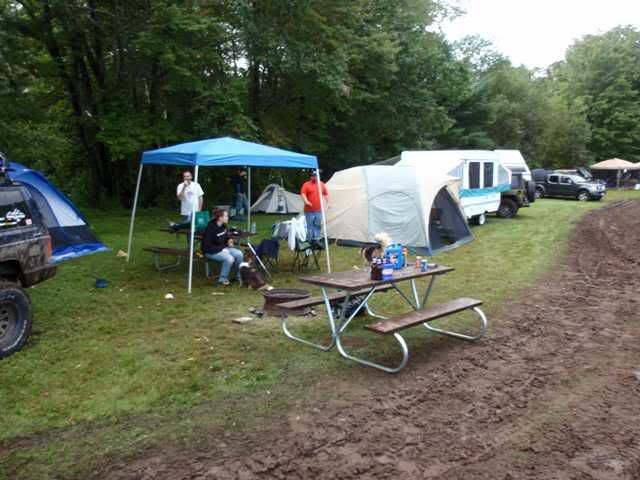
The Ocean State Jeepsters campsite:
Some pics from the trails:
Video of my buddies XJ on one of the slippery downhill sections. You want to squeeze your pucker hole on this one:
http://www.youtube.com/watch?v=h2M1-oKGeY8
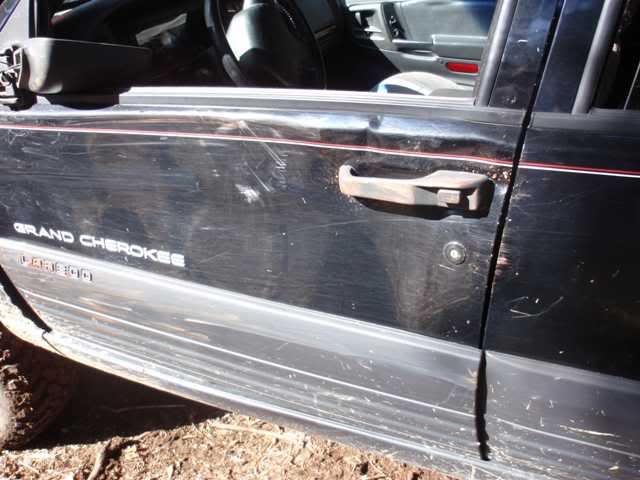
Got a customized tailpipe and small dent on the door from the Carnage Hill trail:
Last edited by Technohead; 09-18-2009 at 02:04 PM.
09-18-2009, 03:14 PM
Looks Great! Is OSJ still invitational only?
09-18-2009, 05:26 PM
At the moment yes, but we will likely be recruiting new members very soon (perhaps within a few weeks). Keep checking our website or PM me. If I can remember I will PM you. Where ya at?
10-07-2009, 10:20 AM
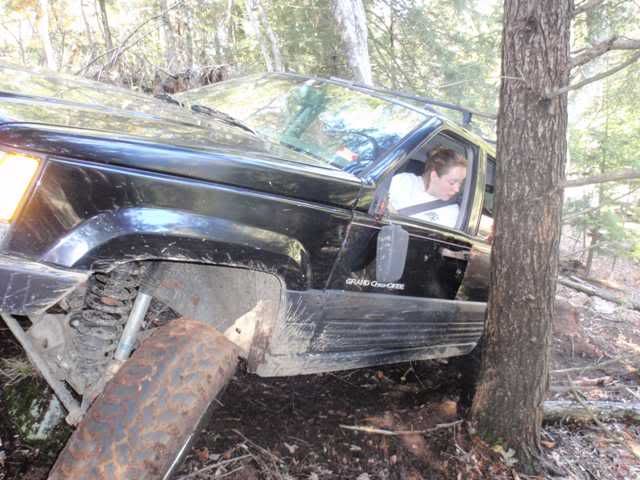
Ocean State Jeepsters did a trail ride last weekend on some new land we call G2. The trails are fairly mild now but there is potential to cut some new (more challenging) trails if the relationship with the land owner works out. Lots of stumps and I hate stumps! There were a couple fun hill climbs one of which cleaned out the drivers door when my daughter lost control:
Oops:
Made it up on the second attempt but I screwed up the video:
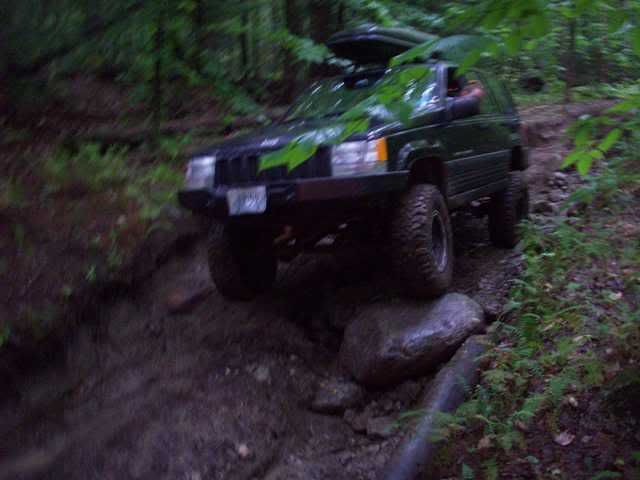
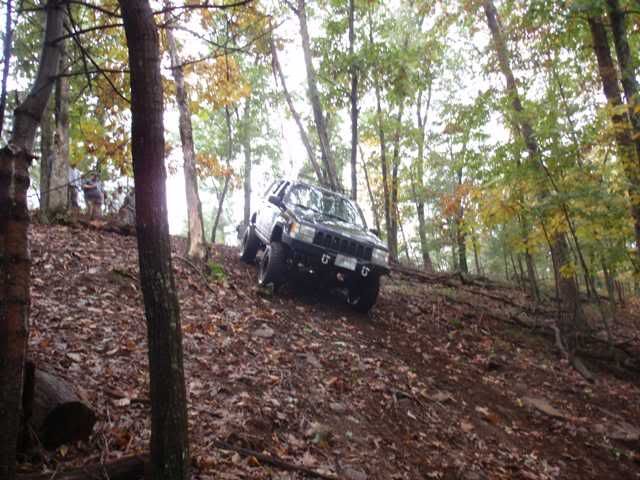
A steep downhill section made extremely slippery from about 2" of rain the day before. As always still photos do not convey the real scenario but the video gives a good feel for it:
| « Previous Thread | Next Thread » |
| Thread Information |
Users Browsing this ThreadThere are currently 1 users browsing this thread. (0 members and 1 guests) |