|
|


 06-03-2009, 10:26 AM
Actually they were already on the Jeep when I bought it. I'm guessing you could hit a stereo shop, or maybe even crutchfield for something like them, as the are from Rockford Fosgate.Originally Posted by downtowncb

I'm sure they cost more than they are really worth, but since they didn't cost me, I have been pretty happy to have them, as they have saved a lot of work with switching around connections.
There was also another bonus hidden away when I bought this, as there was a 2 gauge power cable running from the battery to back under the rear seats. I've added a distribution block and a disconnect switch back there and have used it to power my lockers and auxillary lighting and such. With the disconnect, I can simply flip the switch and ensure that no lights/lockers are ever accidently switched on driving down the road.
 06-12-2009, 11:01 PM
Just went through your build, very nice work!! The sliders are really sweet! D44 looks tough too!!
11-15-2009, 01:59 PM
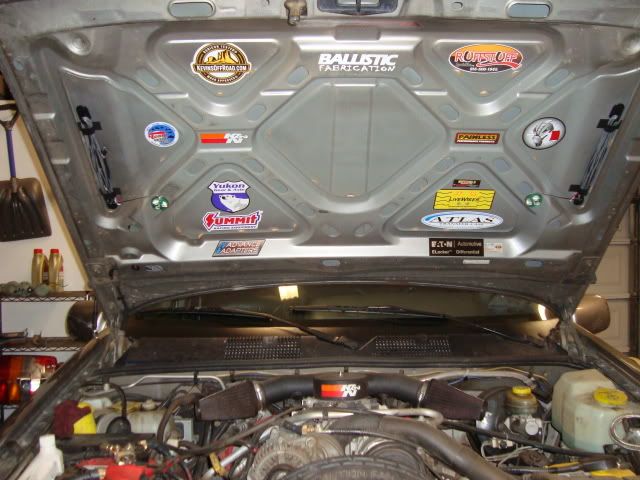
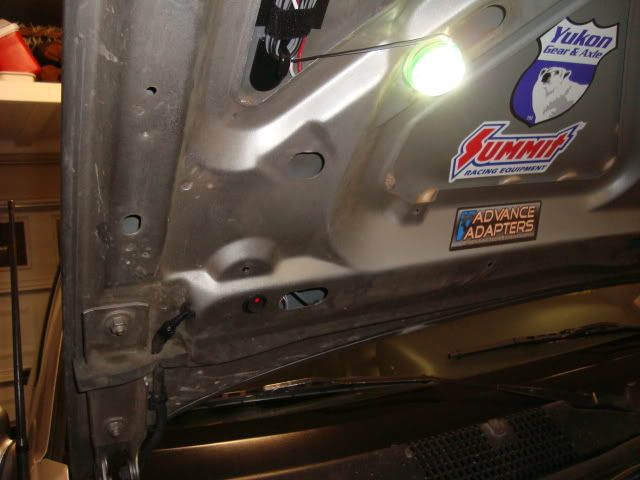
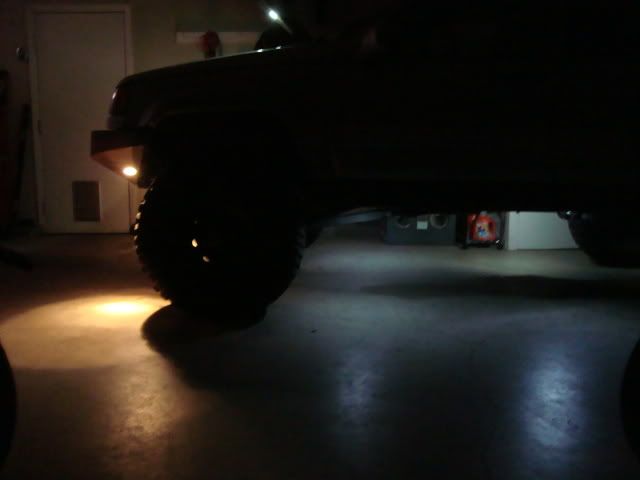
Since most of my trips this summer seemed to end up including some long night runs, I decided to add some more rock lighting, than just what I had in the front bumper. After looking around at the options, I ended up with the Off Road Only Litespots. These things are pretty impressive for their size.
Once I got them here and was playing around with them, I also came had another idea to put some under the hood. Since these also have a magnetic mount on the back side they are very handy to stick all over, so I installed 2 of them under the hood and left enough wire to reach the back of the rig, and have added an additional connector to one wire, so that both lights could be strung together. This leaves me with a quick and easy trouble light, or even some campsite lighting that could easily be easily strung out for use.
Here's some pics:
I took out the existing light/switch combo and added a small rocker switch to run the underhood lighting:
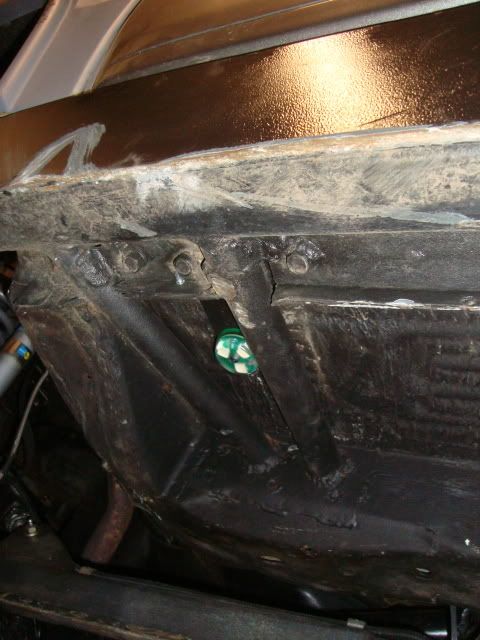
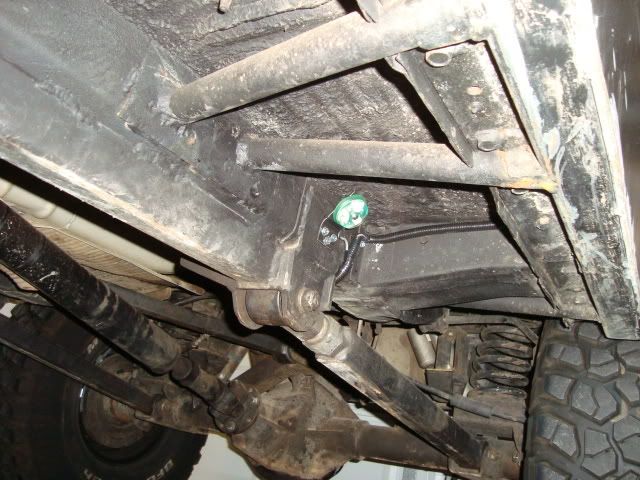
Behind the Front Tire:
In front of the Rear Tire:
Behind the Rear Tire:
Lights on. I was surprised by how much more dispersed the led light was than the 55W halogens that I've got in the front bumper. Now, I may have to switch those lights at some point, to get rid of the difference in lighting.
 11-15-2009, 11:42 PM
Hey Shawn - where did you place your switches? I've seen a lot of good placement ideas, just want to see what others are doing.
11-16-2009, 11:40 AM
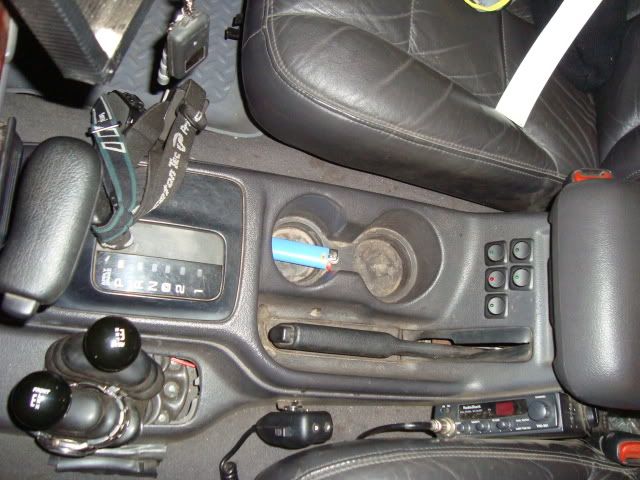
I mounted mine on flatspot on the front of the center console under the armrest/lid. I'll try and get you a pic in the next day or so.
12-28-2009, 01:01 AM
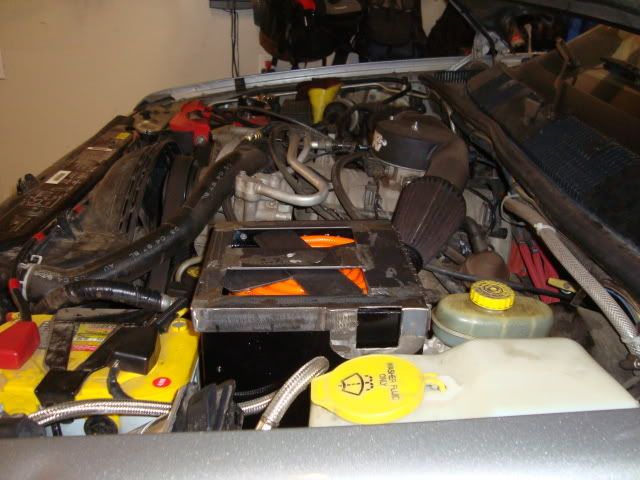
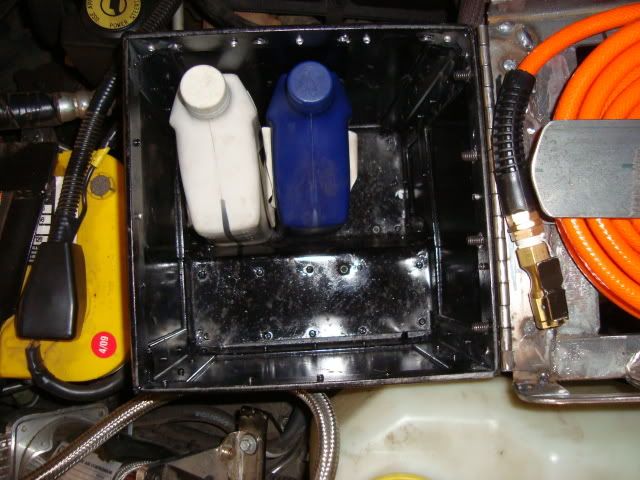
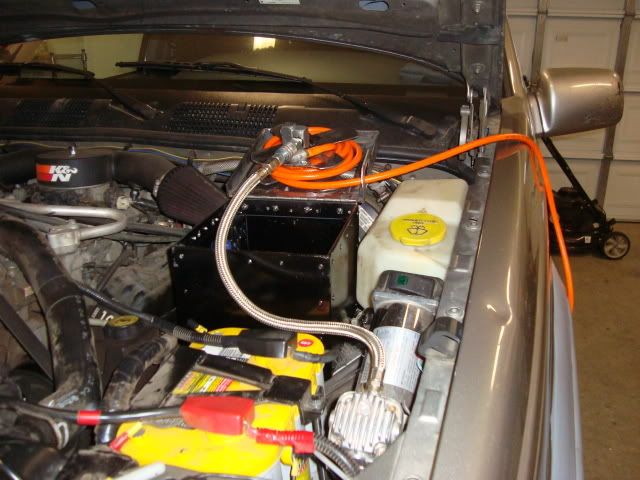
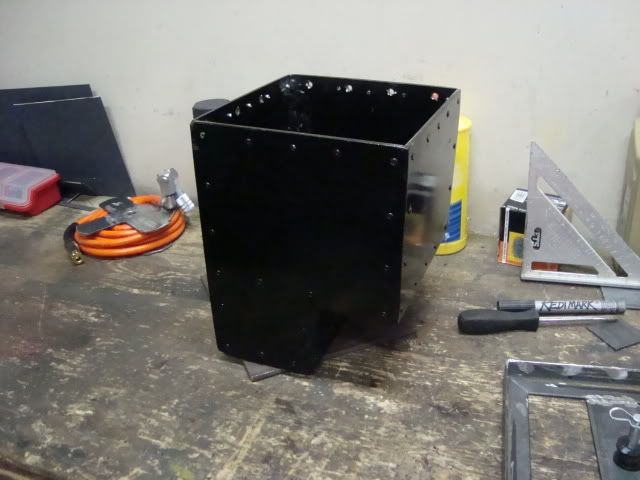
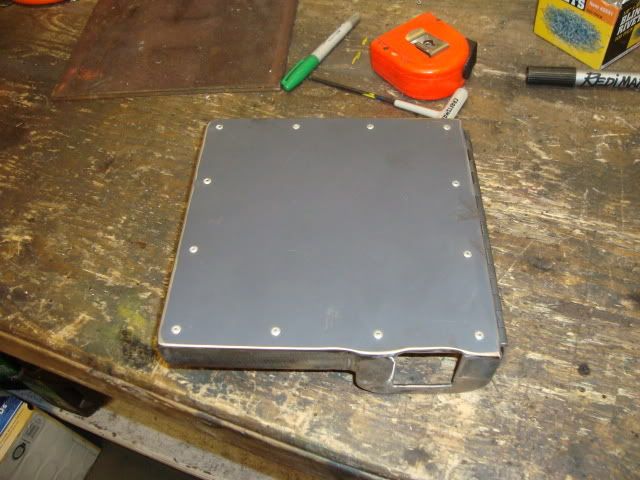
I've been thinking about this for a long time, but finally got around to it. I've been wanting to remove the ABS pump and build a storage box in its place. As I started to put it all together, I had the additional thought to add a air hose reel into the lid as well. I've still got to finish up the paint on the lid, but I'm pretty happy with how it came out. Here's a few pics:
And waiting in the background are the pieces for my next bit of welding:
12-28-2009, 01:09 AM
How do you like that intake? I've considered getting one but have heard both good and bad reviews.
12-28-2009, 01:09 AM
Sorry Jim, I totally forgot about this. Here's a pic of my setup:
12-28-2009, 01:12 AM
I like it because it freed up a lot of room for other stuff (batteries/compressor/etc.). As you can see, I didn't really like to looks of the filters that they offer, so I sourced my own K&N's to fit the way I wanted them too. Can't say that I can tell any difference in performance from the K&N setup I had before.
 12-28-2009, 01:13 AM
Cool idea!
And nice execution as always.
12-28-2009, 02:11 AM
Man, I can't believe you managed to fit all of that shit in there, good job. My only thought, is it worth it to have the holes in the top of the box? It seems like it will just provide a way for dirt and water to get in there and just sit in the bottom, just a thought...
Looks good though!
12-28-2009, 08:09 AM
What holes?
 12-28-2009, 09:21 AM
Awesome build, you gave me a bunch of ideas
12-28-2009, 08:39 PM
Oh, never mind, I was going off of the first photo. Carry on
 12-28-2009, 08:50 PM
how bad is your bump ster with the track bar being so short?
the underhood work is wicked! i live the storage box!!
12-28-2009, 09:09 PM
Thanks all!
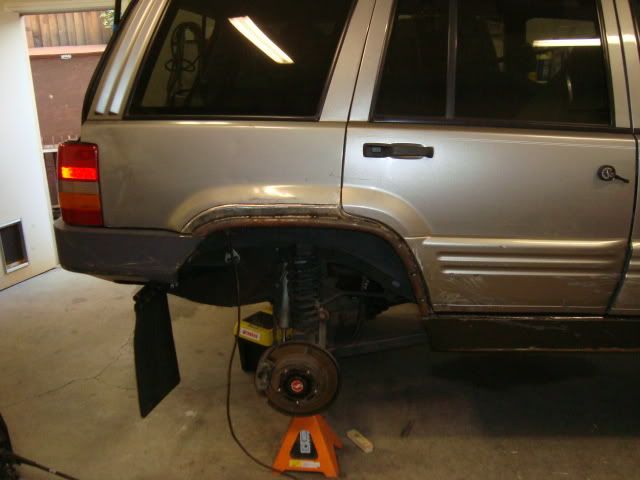
As for bumpsteer, I've never really noticed any on the highway. I can cruise 75 mph with 1 finger on the wheel, and not think twice. If I recall correctly, I think it was only a couple inches shorter than where I had it adjusted to previously.
12-28-2009, 09:40 PM
bump steer isn't during crusing.
if you hit a sudden bump or dip in the road ie speed bump. the steering wheel will jerk.
because the drag link and track bar are diferent lengths.
not THAT noticable if the link are flat or parralele with the ground but if they are on an angle you will notice it.
12-28-2009, 09:53 PM
That has to be the best switch spot I've seen yet. Easy access when you pull the console liner?
12-29-2009, 12:06 AM
Ahhh... you must not know the roads around here, they are pretty much a constant speed bump, ha ha. regardless I really don't have much of any bump steer in the setup, maybe it does happen to be flat enough to compensate for the different lengths.
12-29-2009, 12:09 AM
Thanks, and in case you'd be worried about accidentally hitting them, I happen to have all of those switches, plus my lockers on a single power source direct from the batteries, so I also hooked up a disconnect switch within reach of the driver's seat, so they aren't actually powered most of the time when I'm on the road.
12-31-2009, 05:54 PM
Shawn,
As usual great attention to detail with your projects. I have a quick question about the "west texas pump upgrade" you did on your Jeep a while back. I though I read somewhere that you posted that the additional pressure blew out your pump or box during a wheeling trip? How long did the pump last after you modified it and how much bigger did you drill out the main fitting? Did you modify the flow piston at all or did you leave it as it was? Is it a worth while upgrade or should I just pass? Thanks for the help.
Fred R.
01-01-2010, 05:07 PM
Thanks Fred.
Yes, I did do it, and yes my pump did blow up. I don't recall the details, but I think I only drilled out the how, and maybe put some washer in behind a spring. It lasted me most of one season, and then blew out the bearing/seal at the front of the pump on the way up to the last trip of season. Luckily, I was still within range of an autozone, and I'd already replaced it their, so I just exchanged in on warranty to finish the trip, and then bought an AGR pump. I'd say do it if you need a short term fix (I did notice the difference with it), but would suggest carrying a spare pump/pulley if you plan to keep it in there long term or on the trail.
01-04-2010, 10:06 PM
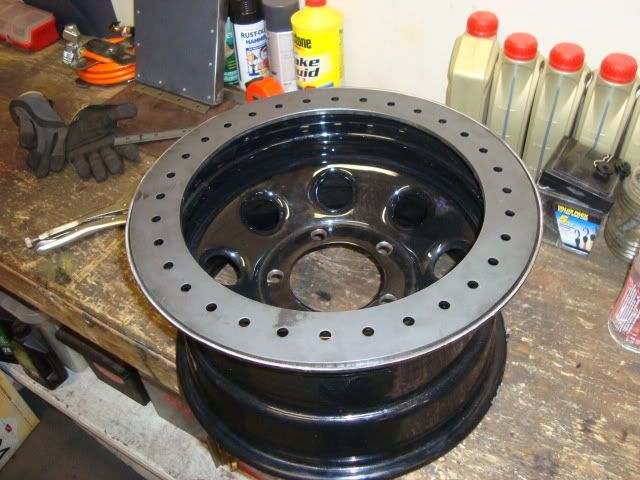
After getting some advice from you guys, I decided to use a standard beadlock kit to add some "rock rings" to my rims by just using the inner ring, so I waited for a free shipping code to come along and ordered up a set from A to Z Fabrication. Just got one welded up, painted and put on, and am pretty amazed at how small it they make the rims look, but I definitely think it will help keep my rims from getting quite so trashed.

04-15-2010, 12:16 AM
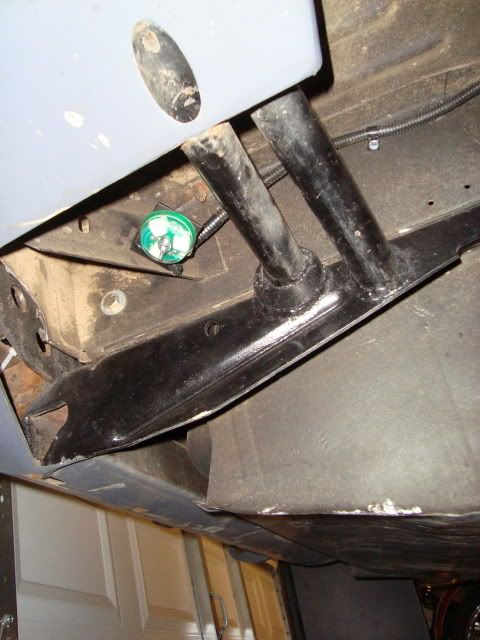
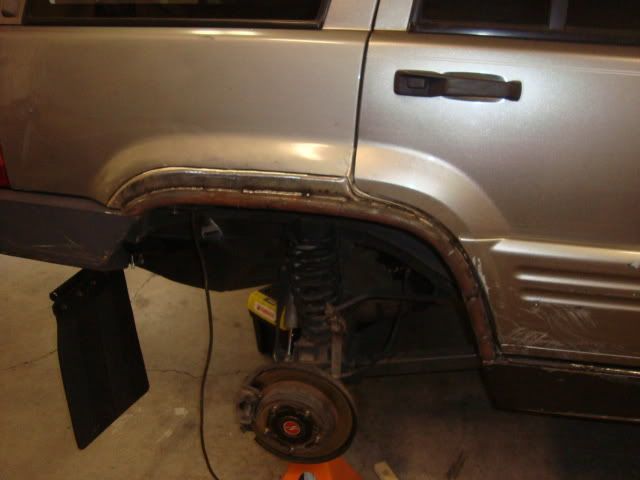
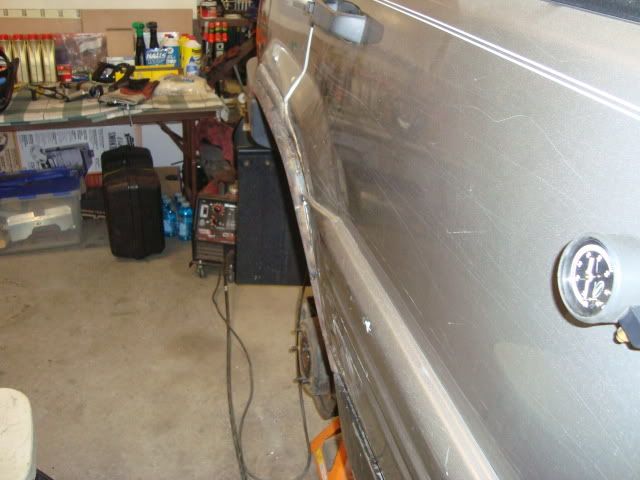
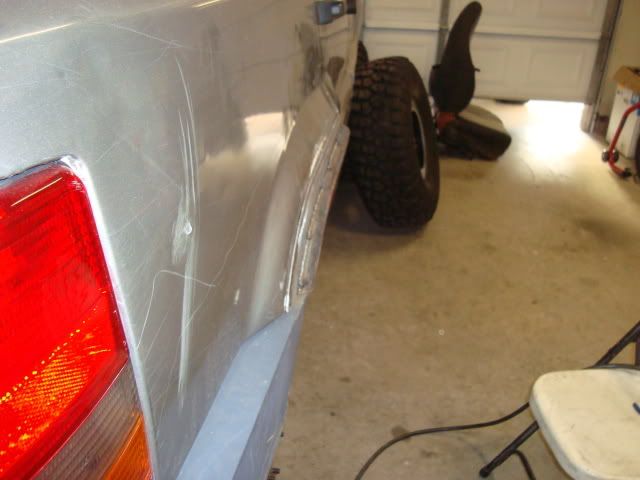
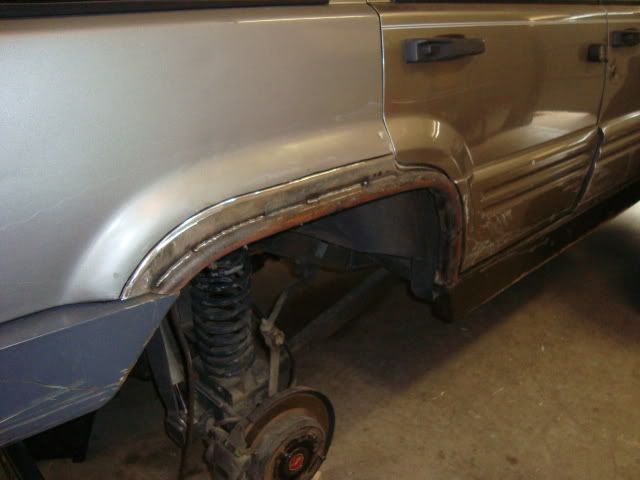
Where has the winter gone..... Now that spring is here, I'm finally getting a chance to tackle my winter project, and am trying to blast through it before the season hits. I've got the plates and tube all cut out and bent, and finished getting one side welded in tonight.
I'm hoping to these done and prepped and get the sides and bumpers all painted up before the snow melts.
Here's a couple pics I snapped tonight:
04-15-2010, 01:14 AM
Nice. did you cut the tube down the line and slide it over the fender, or just cut the fender and weld the tube to it?
Looks great, as always.
| « Previous Thread | Next Thread » |
| Thread Information |
Users Browsing this ThreadThere are currently 1 users browsing this thread. (0 members and 1 guests) |