|
|


 04-02-2008, 12:03 AM
Cool, thanks for the picks of the skid plates, our thoughts are pretty similar although I didn't think much about doing a front one as I have a cage on my 30. But now that I'm thinking...
I got excited for a minute thinking you had an RZ in the corner of your garage as the pipe looked like the end of an expansion chamber. Almost time to get my bike out of the garage (after I finish the in house construction projects).
 04-02-2008, 01:02 AM
Love it. It is the dual rate setup, so on the road I'd say it feels very comparable to stock, maybe even slightly more stable, and then with one little flick of a lever, you basicly have an anti-rock setup for the trail.Originally Posted by ILikeMud

I had the teraflex disconnects before, which work very well, but not this easy, and I really didn't like the roll that I had when the swaybar was disconnected. This is pretty close to the best of both worlds.
And yes, it is the TJ setup. I had to make the crosstube/mounts for it.
04-02-2008, 01:04 AM
The only thing I'd say the triangulation did was take away some of the dampening. It actually feels a little softer now. In fact eventually I'd like to put a slightly stiffer shock under it to add a bit more compression dampening.
 04-02-2008, 12:05 PM
Nice.
I was on their (ORO's) site the other day looking at it. Price is comparable to an Anti-Rock but the thought of more stability on the street makes me interested in it.
I've got to say that I really like the air actuated version, just flip a switch in the cab and it's disconnected plus it doesn't use air to hold the latch shut.

 04-27-2008, 02:21 AM
Can I please get some more pics of your rear shock brackets frameside and axle side?
Lookin good
 04-28-2008, 11:09 AM
I can try, but honestly I'm not sure I can get anything much better than the pics that are up here. A little more specificly which parts are you trying to get a clearer picture of.
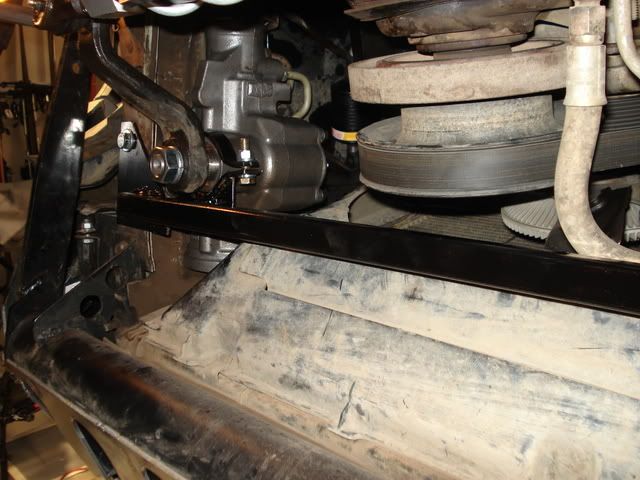
The setup is actually quite simple. I've just welded a piece of 1 1/2" or 1 3/4" pipe between I think it was 2" x 3" angle iron, and drilled it out to just stick 1/2" bolts thru it for the upper shock mounts. To mount it I drilled the angle iron, and bolted it to the stock bump stop locations to hold it in place and the welded the angle iron to the framerail.
For the bottom mount I just welded another 1/2" bolt thru a piece of plate and then welded up the plate inside the 3"x3" tube that I used for my control arm mounts. For that I cut it to fit snug up under the axle tube and ran it out the front far enough to be the control arm mounts and far enough out back to welded in the plate with the shock bolt in it.
After reading this take another look at the pics and let me know if that clears it up or you still need some more info/pics.
04-28-2008, 11:19 AM
cool i got it..
05-26-2008, 11:48 PM
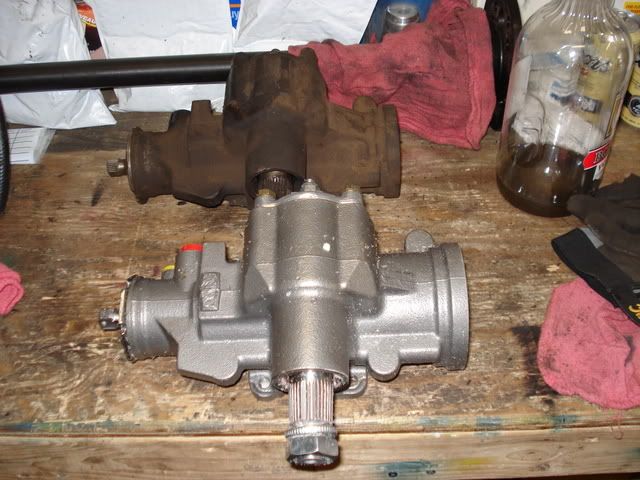
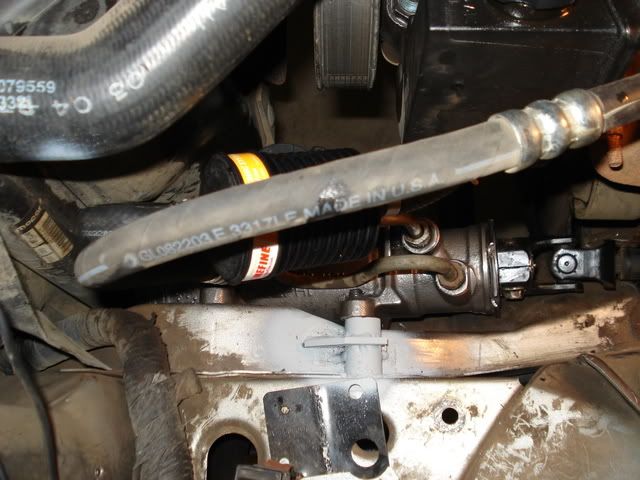
Unfortunately, I had to cancel my weekend to the mountains, as I found a busted ear on my steering gear while doing my pretrip check over last Thursday night. Fortunately, Summit Racing Rocks!!!!. I Decided to go with the AGR Superbox 2 and was able to get it at a good price from summit on Friday, and it showed up on Saturday. Since my weekend trip was already screwed, I dove in to the project, and finished out the whole deal. I swapped in the gear box, did the "West Texas Upgrade" on my pump, added the 4th bolt, and built a steering box support. AND MOST IMPORTANTLY... I am know ready to go again for next weekend!!!!!!
Here's a few pics of the work:
05-26-2008, 11:51 PM
Very nice.

 05-28-2008, 12:15 AM
what is the advantage with this gear box? also could you explain with the upgrade is? im a retard
05-28-2008, 10:01 AM
4th bolt on the box is a big improvement since ZJ boxes only have 3 bolts holding the box to the frame.
Plus most upgrade boxes offer a tighter turning radius and easier turning too (too an extent, depending on tire size the only way to get a stock feel back in the turning is with a hydro assist).
05-28-2008, 10:06 AM
The best I could figure it that the gearbox goes from the stock 12.7:1 to a variable 13-16:1 ratio, and uses a higher flow to create more power. Haven't been offroad yet to really be able to tell the difference, but on a quick little drive around, it does turn a bit easier than before.
The pump upgrade is here: http://westtexasoffroad.homestead.co...rsteering.html
It opens up the pump a bit and creates more flow and a higher blowoff pressure. I was telling my buddy about it over the weekend and he called the next morning to tell me he tried it on the scout he was building with hydroboost and power steering, and said he did it and it fixed his brake problems, so it does definitely provide some gains.
05-28-2008, 08:49 PM
hmm.....
05-28-2008, 09:01 PM
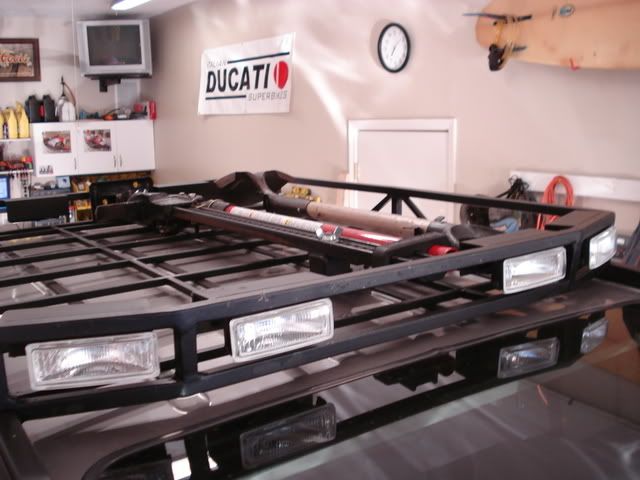
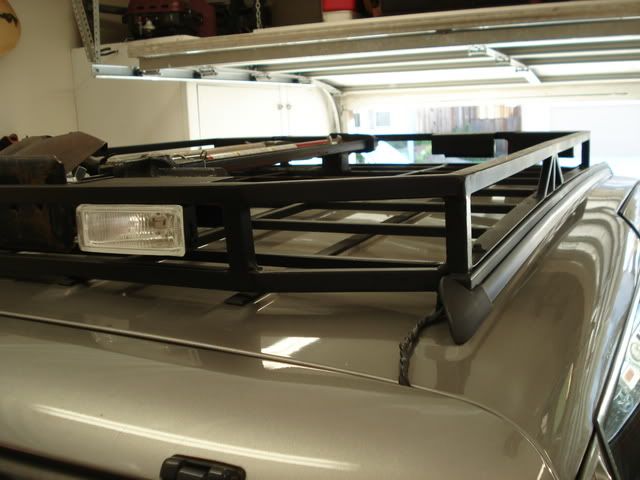
Again as it was said before i love that roof rack can i bug you from some day time photos and close up of the way you mounted it?
05-28-2008, 09:07 PM
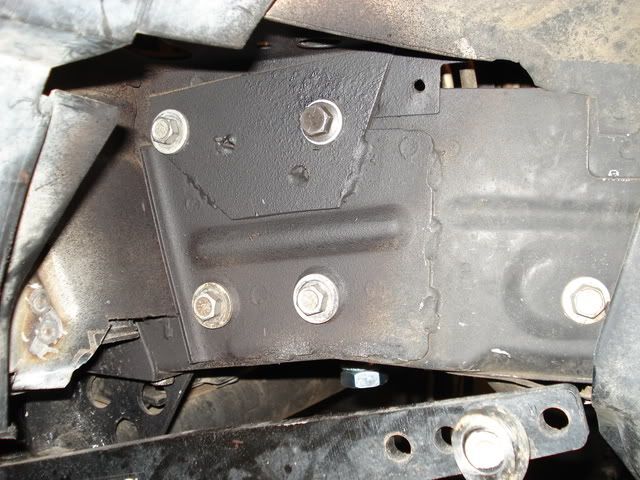
Where or what did the clamp come from for the box brace?? I really dig your design simple yet effective.
 05-28-2008, 09:22 PM
I'll try to get some pics this weekend.
05-28-2008, 09:25 PM
Just made it up with scraps I had laying around the garage. It's pretty easy to do, and after breaking an ear on the stock box, would highly suggest people move it up on their priority list. These could pretty easily be made up, painted and installed in just a couple hours... OR only a couple clicks away at Kevin's Offroad.
05-30-2008, 12:14 AM
Here you go, I was able to get some pics tonight as I was packing up for the weekend trip. Hope these help....


 05-30-2008, 12:24 PM
that is VERY nice.
but it is hard to tell how you bolted it to the existing roofrack.
05-30-2008, 02:01 PM
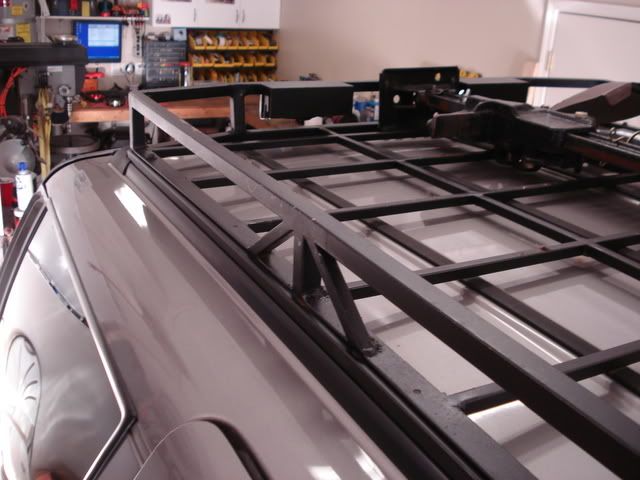
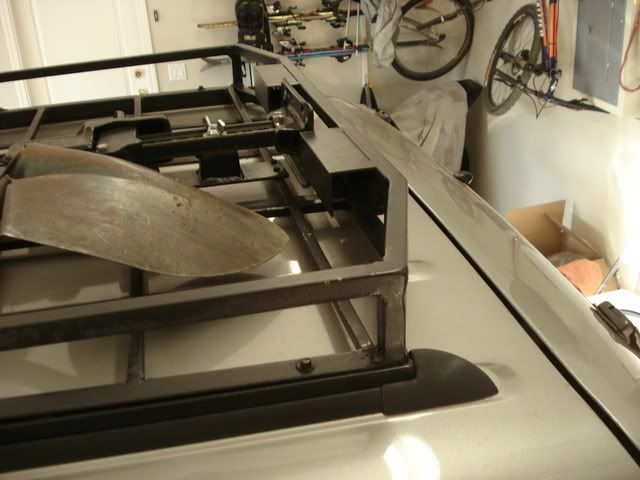
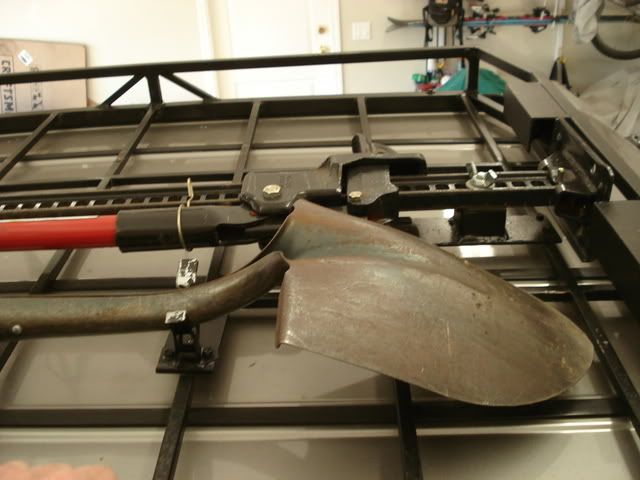
I eliminated the Stock triangle shaped bar running the length of the roof, and replaced it with a 1x1" piece of tube, and used the existing roof inserts to bolt it down. Then the rack itself was built around around that tube using some 3/4" angle iron set over the 1x1" tube with a bolt metal screws connecting the two.
Does that explain any better?
05-30-2008, 10:41 PM
Very slick roof rack... I like how it's mounted. Nice work!
 06-27-2008, 02:57 PM
how did you go about bending the 1x1 to follow the lines of the roof? did you use the stock triangular piece as a template for the amount of bend needed and just bend it by hand in a vice or something? thanks
06-27-2008, 11:47 PM
I did it two ways. On the first one, I eyed up where the bends needed to be and made some cuts to allow it to bend, and then welded up the cuts. THEN, I looked at it again on the second one, and just used the roof mount bolts to pull it down. You really only need to use the real thin wall tube, like you find at Lowe's or Home Depot, and if you start at one end and work your way across the roof with the mount bolts, it will bend and work without prebending anything. Not hard at all, just take your time to get the bolt holes correct and your there.
Good luck!
09-01-2008, 07:02 PM
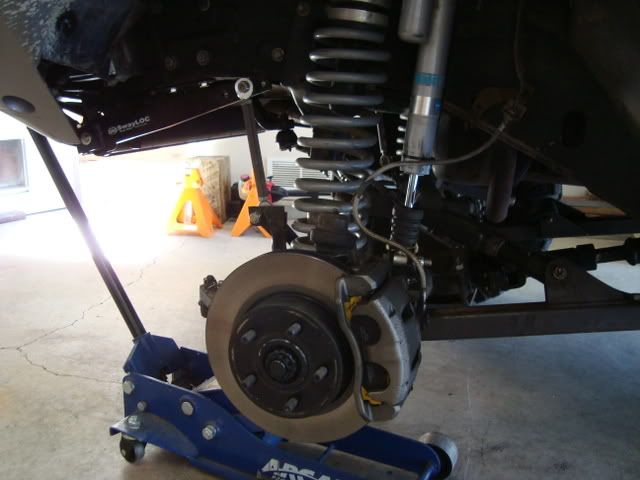
Added a little upgrade to the brakes this weekend. Installed the Vanco Big Brake kit upfront with the EBC yellow compound pads. With the break-in period stuff that is required with these pads I haven't really slammed them yet, but can already tell a huge improvement.
On a side note, while changing all this, I decided to move my steering stabilizer from the draglink down to the tie-rod. When driving around afterwards, I found that I had huge deathwobble issues that kicked in when between 30-40 mph, and scared the crap out of me. I've never had deathwobble issues before, so I was pretty concerned with the new knuckles and such of the brakes. I got home and checked all links and joints, and everything was tight. I didn't believe the stabilizer would be any different on the draglink than on the tie-rod, but I changed it back, and the wobbles went away.
Anyone ever played with this and know why it hooking the stabilizer to the tie-rod wouldn't work the same as the draglink?
 09-01-2008, 07:07 PM
I'm just amazed that your rig is so freakin clean!
| « Previous Thread | Next Thread » |
| Thread Information |
Users Browsing this ThreadThere are currently 1 users browsing this thread. (0 members and 1 guests) |