|
|


 03-29-2008, 06:54 PM
Nice build looks like we got another KOR in the making.Guess he'll be taken orders by mid summer.


 03-30-2008, 02:50 AM
do you think the bumper would work on a wj also with some minnor tweaking bending welding all the fun stuff
03-30-2008, 10:10 PM
If by "minor, tweaking, bending, and welding" you mean "designed and built for a WJ", then yes.Originally Posted by welder666420

I'm sure you could use the same principles and similar shapes to make one for a WJ.
 03-30-2008, 10:54 PM
Solid looking bumper.
 03-30-2008, 11:03 PM
I'm in awe, Shawn - you went from a solid mount to a fully customized bumper built around YOUR rig. Every bend and tweak is catered to the lines (accidental or intentional) of your Heep. The amount of time you spent on it definitely shows.
04-12-2008, 05:55 PM
Thanks, much appreciated
04-12-2008, 06:07 PM
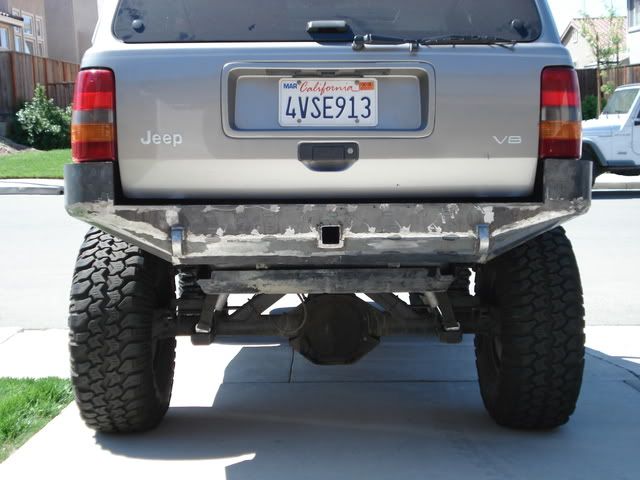
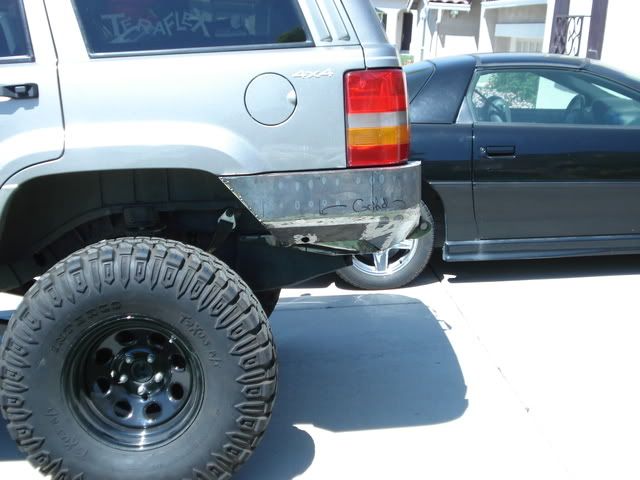
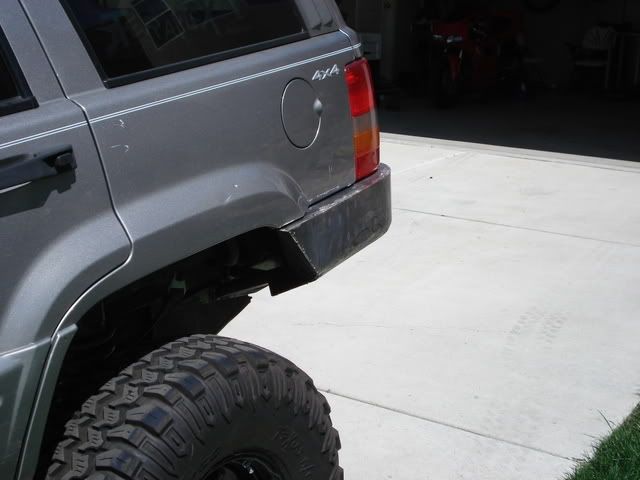
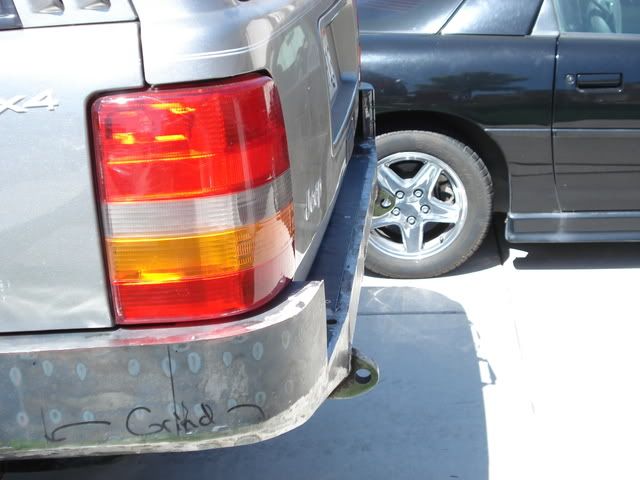
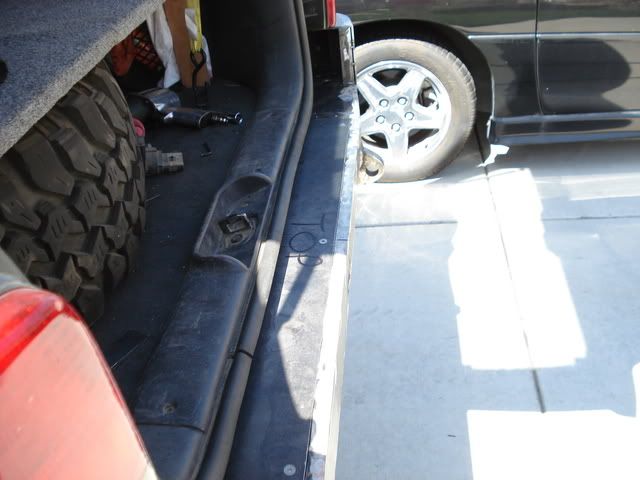
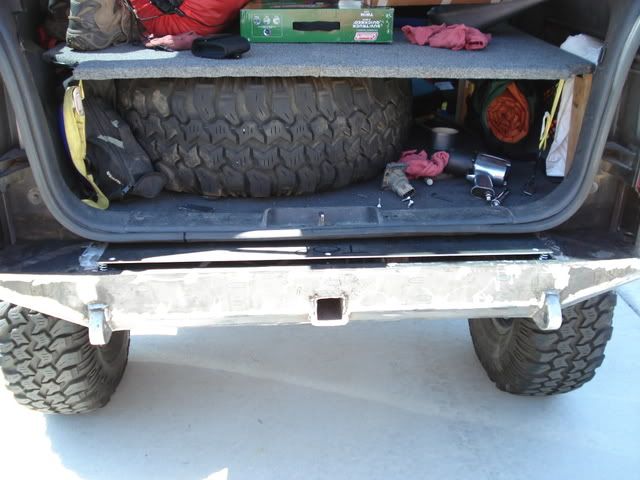
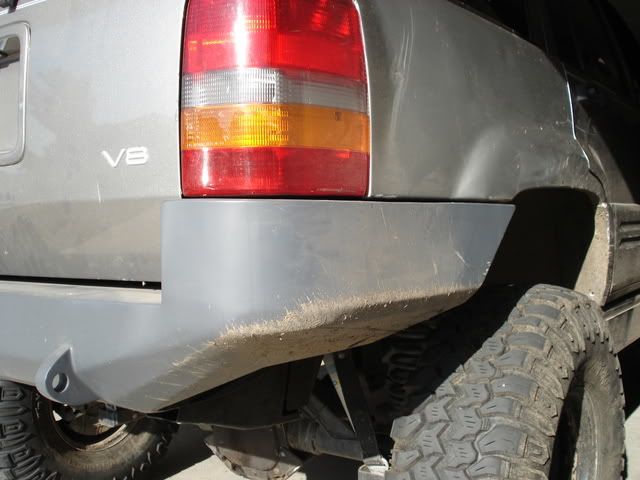
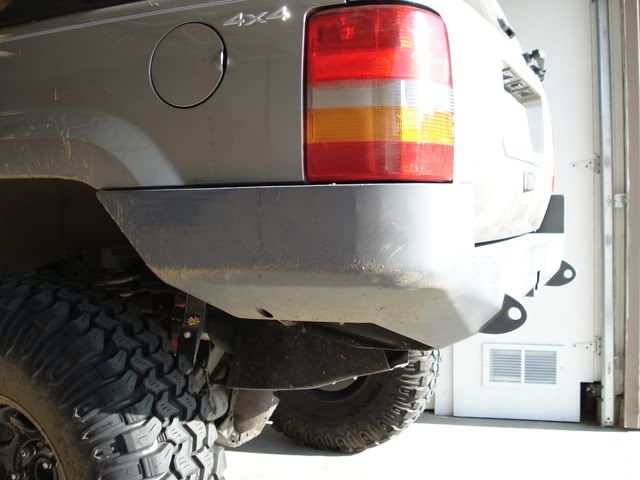
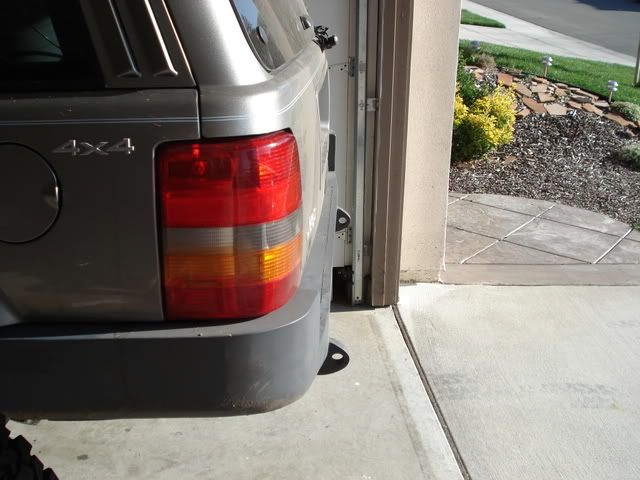
Well, my time spent finishing this thing up the last few weeks has been pretty sporatic, but I've got all but a few pieces finished and the first round of grinding complete. Now I've just got to finish up a little welding and add a couple last pieces, and then start smoothing it out and getting ready to paint. So far everything came together quite well, EXCEPT for the sides. As hard as I tried to keep it from happening somehow I still got movement when welding it up, and the sides flared out on me a bit. At the fenderwell they are out about 1/4 to 3/8" farther than I'd like. I guess that will motivate me to start working on my next thought of tubed flares around the fenders.
I pulled it out today to get a good look before pulling it off to finish up, so here are a few pics:
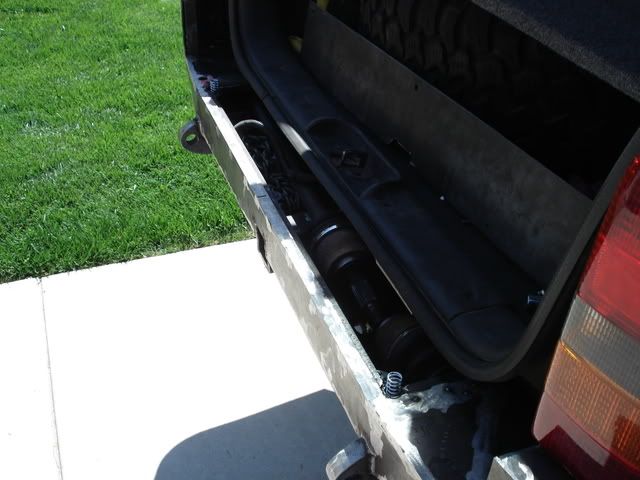
For the storage compartment cover I looked around for some of your guys ideas, but didn't come up with anything I really liked, so I stuck with the tapered bolts, which I happened across in stainless. It really only take a few seconds to pop them in and out so not a big deal, as long as keep an allen wrench around.
As for pulling the cover off, I was messing with several ideas, but one of my buddies mention springs, and what a great idea it was. I made some retainers and the lid is spring loaded so that I don't need any finger holes in the top of it:
The next pics should have it painted and ready for action!!!
 04-12-2008, 06:57 PM
Nice angles, very functional, very impressive!
 04-12-2008, 08:29 PM
Just an awesome job overall!
The little springs you put in to pop the cover up are an example of really thinking a design through, and yet another clever solution on your part.
Overall, your concept is excellent. I wonder if it will really hold up if slamed into the rocks multiple times. You used lighter gauge steel than I have been thinking about when I get around to building bumpers. Given your tools at hand (110 v weld etc.) I'm not sure you had any option. Clearly you made a choice to make something much stronger than stock, but not bullit proof either. I encourage you to wheel your rig hard and report back to us so we will all know if these 250 lb 3/8" steel bumpers that we see people making really are overkill.
Last edited by Skyline; 04-12-2008 at 08:34 PM.
04-12-2008, 09:35 PM
awesome job, best bumper i've seen built and definently is the coolest with the storage compartment. i like your front bumper as well, just for the note
 04-12-2008, 11:01 PM
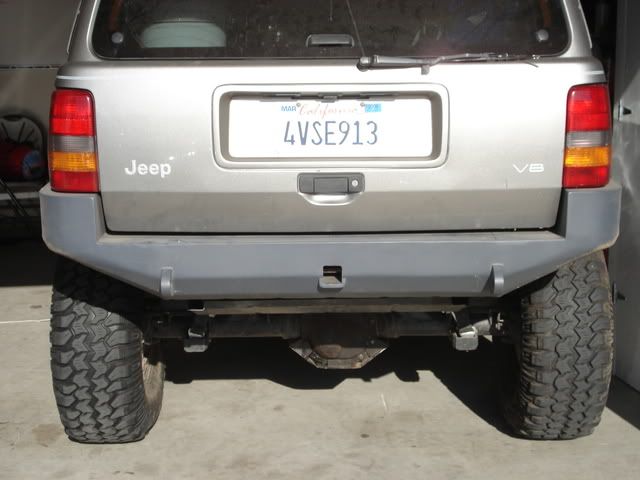
My 110v welder will do upto 5/16" steel and was used to build my bumper which just finished wheeling Golden Spike carrying a 33" spare and I hammer the bumper and rear end quite a few times. If you burn in good welds it isn't a problem. Looking at the quality of work and reading the steps I'm sure his welds are good. Third trip on Golden Spike, multiple other trips in Moab including Moab Rim, many trails in Colorado with the bumper carrying 31" spares over the last two and a half years without a problem.
04-13-2008, 12:04 PM
Thanks!!
First off: Nothing is built completely bulletproof
Secondly: if you are thinking you need to use 3/8" for a bumper, then yes that is completely overkill in my opinion.
As for my choices, I'd say my steel selection was made based on my experiences and what I was trying to accomplish, not my welder. With the correct procedures, I even trust my welds on the 1/2" I used to make the clevis tabs.
I've actually only used 1/8" steel on the upper parts of the bumper that usually won't take major hits. Anything on the bottom side is made out of 3/16". Also, if you notice on all of the heat marks on the side of the bumper that is the reinforcement behind the 1/8" areas. By leaving no more than 1-2 inches of gap between support, I believe the 1/8" will hold up. I used this same principle on the front, and I have slammed the front into some rocks pretty hard and had to slide across them and all I got were some scratches and a slight dimple.
I haven't seen too many of the aftermarket bumpers in person, but I can say that this is way stronger than the ones I have seen.
 04-13-2008, 12:12 PM
somethin that nice needs to be taken to a powdercoater...not just sprayed
 04-13-2008, 02:32 PM
yeah but then every time you scratch it, it needs to be redone, very pricy
04-13-2008, 03:08 PM
and you can just spray it and when it gets scratched you can touch it up

 04-13-2008, 03:17 PM
you have the nicest set of bumpers out there IMO. incredible
04-13-2008, 03:18 PM
Nice Duc!
04-13-2008, 06:14 PM
Nope, not true.
You can touch up powdercoating - they mix the pigment with adhesive (like clearcoat, varnish, something like that). Not an absolute match, but supposedly very close. Also not as durable, but you could at least reduce the number of times you have to have the bumper redone.
Also, a bumper that nice would look great painted bodycolor but that's pretty much impossible with powdercoat.
 04-13-2008, 07:09 PM
great build!!!!! you say that you think all finished its about a hundred pounds
 04-13-2008, 10:09 PM
Awesome man, I like it.
04-13-2008, 10:34 PM
thanks to everyone!!!!
No, all said and done I think it is about 100 lbs beyond the factory hitch assembly that I used as the mount. I'd guess the hitch mount itself weighs 80 lbs or so. I can still pick it up and move it around by myself, but it certainly has some weight to it, and I use my floor jack to install it.
04-13-2008, 10:39 PM
As much as a PIA as it is, I agree. I still have some matching paint left so, at least for now my plan is to paint it toomatch the body just as I did the front. The biggest problem with that is dealing with the touch ups, as I have found that the automotive paints aren't too friendly to small brush touchups.
04-13-2008, 10:41 PM
thanks, but not mine. I ride the R6 Raven that is covered up behind what you see.
04-30-2008, 11:30 AM
Well I would have gotten this thing finished and painted last weekend, but I suffered a major setback...... Spring Fever!!!!
I got invited to try Rubicon for some snow wheelin and to see how bad the snow still was up there. It was still too thick at the Rubicon so we just camped Friday night at Loon Lake and then headed over and ran a trail and stayed a night at Hell Hole Reservoir.
Here are a few pics of the bumper in primer. Got a couple new scratches to cover up now before final paint, but the new clearance on the rear corners is awesome. I was constantly hitting the stamped steel before when coming off of stuff, and don't think I hit this thing on the bottom once. Did however manage to break a shock off right where the shaft connects to the bottom eye. Still not sure how, since I have limit straps and bump stops on the thing.
 04-30-2008, 11:40 AM
That is AWESOME!!!!!!!!
| « Previous Thread | Next Thread » |
| Thread Information |
Users Browsing this ThreadThere are currently 1 users browsing this thread. (0 members and 1 guests) |