|
|


 02-23-2014, 11:24 PM
I dig the grab straps! You have a very nice rig bud!Originally Posted by WJJEEPIN


 02-24-2014, 02:24 AM
Thanks guys.
Yup, self tapping screws into the a pillars above and below the hole for the clips of the plastic covers. I cut out the center in the plastic where the tie down came into contact and cut this side out so I could slide the plastic cover back into place. Ill take some more close up shots tomorrow.
06-06-2015, 01:15 AM
Hey Guys,
Been a while. Been collecting parts for a front 609.
Spidertrax 9"
Clayton Axel bracekts
ford D60 Solid C and outter knucle
Currie High 9 with ARB 4.88
I have already had the hubs milled, just need them drilled and welded to 5 lug setup
Also got a Tail cone for the 242 from Tom Woods to get the speedo output.
Need to get working on getting it installed.
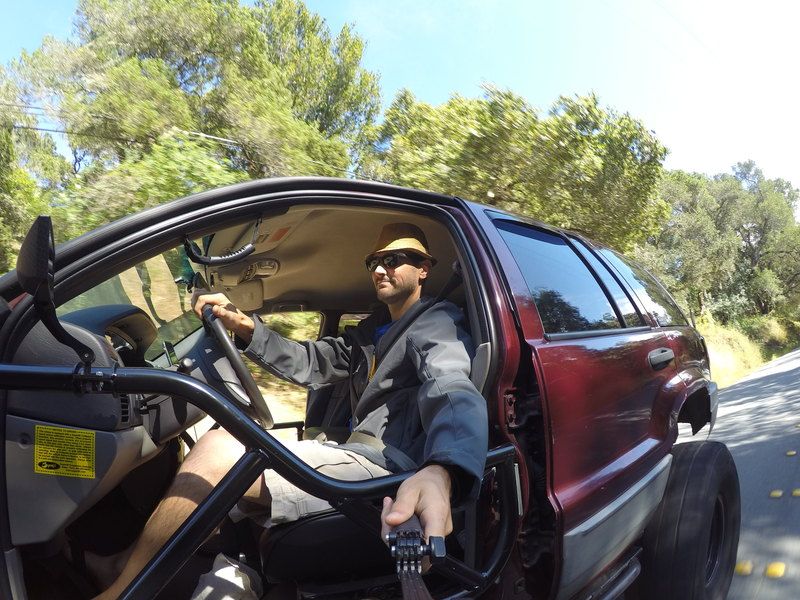
In the Meantime since the weather is warming up i finally got the tube doors installed and drove it to work.
Last edited by WJJEEPIN; 06-06-2015 at 10:51 AM.
06-06-2015, 04:24 PM
Hey Guys,
Went through the GoPro and found another cool angle

 06-12-2017, 05:04 PM
[QUOTE=WJJEEPIN;345123]So Here is the winch installed and bumper on.
I have been wondering the whether to go Hawse or Roller head. Why did you chose Hawse and hows it working for you?
06-12-2017, 05:18 PM
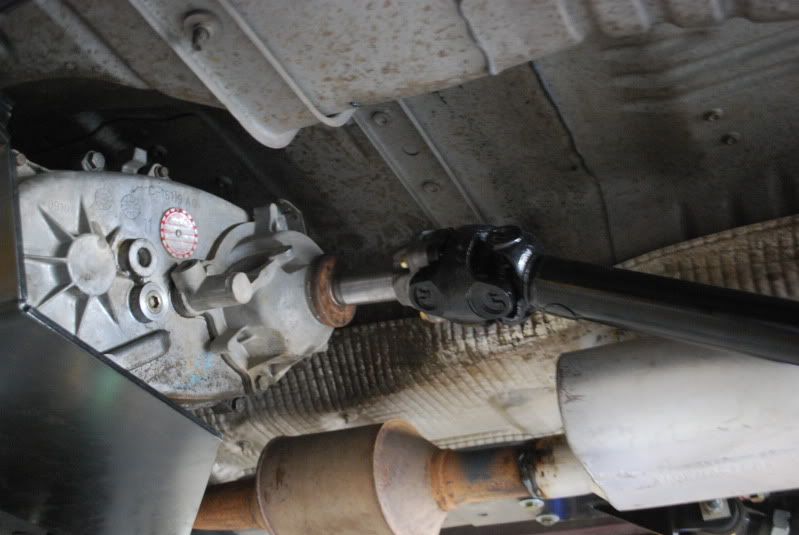
Does that shaft from the T-Case stick ou that far or is it a slip yoke out that far?
06-12-2017, 05:19 PM
Great WJ and Thread by the way!
02-13-2018, 08:43 AM
I've read through your build thread and wow! I'm impressed! Spans 11 years and you have a sweet WJ. I hope I can keep mine as long and it will get as much love. Have you thought of doing IRO's rock link front or do you have your front dialed in just the way you want it?
Sent from my SM-J320V using Tapatalk
02-14-2018, 07:47 AM
Photobucket sucks. I can't see the pics of the build anymore.
03-05-2018, 07:04 PM
This is my first post on this Forum, and I'm putting it on a pretty good build! I like what you've done with your rig!
Question, do you have power seats? The reason I ask is cause I'm thinking of putting in the Corbeau's in mine and I'm wondering how much fabbing I'll have to do to get it to work with my stock base so I can retain some of the power functions.
03-05-2018, 07:06 PM
If your using Chrome, just go to their site for extensions and add the one for PhotoBucket, it will allow you to see the pics again.
09-15-2020, 04:42 PM
Hey guys,
Its been a while since I posted anything new and since I have been locked in the house, not playing soccer or ice hockey, and am trying not to strangle my family I have been back under the jeep. I have upgraded the UCA joints on the axles to the IRO Press in sleeved ones as well as one on the axle side of the Trac-Bar. I also replaced the Heim Joints on the IRO TRE, with an alignment to top it off and she is much tamer driving around now. Nothing really photo worthy with those maintenance items so I will leave it to your imagination.
With all the chaos I have done a ton of research into solar backup generators for the house and in the end the cost to power ratio, plus I don't own the house meant it was easier to just go with a generator to power the fridge in case of emergency or power loss. I did get a small Goal Zero 400 for charging Phones/tablets/computers and a boulder 200 for recharging it. Its small but functional and even let us run a movie night outside with no need to run extension cords.
I did however get a great deal on a GoalZero extension battery so I pulled the trigger but in the end since I didn't move forward with that plan I needed something to do with a 100WH battery. So in the theme of giving the jeep attention I felt it was time to redo/upgrade the cargo area. I had a bunch of 3/4 MDF around and with all my newly acquired solar knowledge I set out to add a Second Battery to the jeep with a Renogy DC - DC charger that would not only charge the backup battery but would overflow back to the starting battery to keep it full during those longer durations when she is just waiting for me to drive her. It also takes charge from the Alternator during longer drives so when I go camping/overlanding (my new goal with the jeep with the kids) it will keep everything managed and charged for the DC - AC converter I installed.
Where did I put it all, great question. Here are some pics, happy to go into more detail if there is interest.
I started by removing the C02 Tank (still need to find its new home) and in its place I built out of the MDF I prev mentioned I created a spot to locate most of the electrical in the original CD changer location.
You will see the battery box chilling waiting its turn for placement. To this panel I mounted Volt meter/cig lighter/USB/switches panel for future lighting, the Renogy DC - DC controller and inline fuses for the power. Behind it I used HD magnets and a metal Bracket to hold it in place. I also put the main Neg bus bar and fuse panel for the forthcoming accessories I am going to add. For now its just running the Cig lighter on the R of the panel and the Vmeter/cig lighter/USB/switches.
Next I needed a place to mount the DC - AC converter and have been looking at adding a drawer system for a long time to the jeep so I built a 3 sided structure to be my base. I was originally going to have the tire live under it but it was too tight to have everything there so I added bracketry to put the tire on the top (to be shown later) in the case I am going wheeling and need it to keep the center of gravity lower. I plan to get a tire bumper but that will need to wait, my wife might just snap if I spent $1500 on a bumper....

09-15-2020, 04:54 PM
Here is the initial structure of the "box".
Here is the rough location for the DC - AC converter.
I decided on 5 tie down locations. The 4 back ones are spring loaded for cooler or misc tie down. The larger one in the center is for the tire.
You can see the old sub enclosure on the left, I made sure to give it enough breathing room so the box didn't interfere with the slump. Next step was to carpet the box. I used to work car stereo install back in college so put those skills to use.
I havent mounted the brackets in the above picture yet, I just got it all set for the run to Lowes to pick up the bolts. I decided to go with D rings and turnbuckle hooks similar to the ads I've seen for professional Yota ones. This way its easily removable.

09-15-2020, 05:03 PM
So no everything was bracketed and I added bracing to square it up I pulled out the sub box to see if I could gain access to the last bracket on the left side but it was built over it, killing that idea. While it was out I recarpeted it with to be matchy matchy. I then went back to Lowes to get a D bracket for that corner and mounted it up so all 4 corners were tied down. I used a thinner 1/2" MDF for the top sheet to save a little weight, which I wasn't originally concerned about but with all the holes I cut for the tie downs I added an eye bolt do the center tie down anchor which then is connected via a HD strap to the bracket I used originally for the tire so its not going anywhere.
Here is a pic of how its strapped down and the battery box strapped down and ready to go.
Here is the final product looking in through the back window.

09-15-2020, 05:11 PM
I ran the solar panel cables out through the brake light grommet and up the rear trunk lid channel up to the roof. I ordered a Goliath rack to replace the stock one but that won't be here for another week or so and I wanted to get it all tested out so I did a ghetto strap to the stock rack for test purposes. Here is the solar panel.
I also installed a Volt meter/USB charger with an on/off switch that runs direct to the starting battery to keep an eye on the voltage up front.
To top off the system Renogy offers a BT adapter to the DC - DC charger so I can monitor the amount of in/out charging and status of everything. Pretty cool.
Thanks for reading, once I get the rack I'll post more updates.
09-15-2020, 05:52 PM
Here is how it looks at night. I added two adhesive LED strips to the top of the windows to light it up at night. It made me realize I needed to update the inside ones to LED also.
Any other suggestions for switches would be appreciated. I will add more lights but any cool overlaning mods would be apprecaited.
| « Previous Thread | Next Thread » |
| Thread Information |
Users Browsing this ThreadThere are currently 3 users browsing this thread. (0 members and 3 guests) |